In this tutorial we shall cover in detail the procedure of installing and configuring Listmonk in a Docker Container. Listmonk is powerful, free to used and self-hosted mailing list and newsletter manager written in Go programming language with a Vue.js used for frontend.
Here are some good features of Listmonk:
- Management of Subscribers: You can create and manage mailing lists.
- Designing Newsletter templates: Easily build visually appealing email newsletters using online editor. You can also take advantage of pre-built templates.
- Delivery of Newsletters & Tracking: From Listmonk web interface you can send newsletters to your subscribers and track some key metrics such as open rates, click-through rates, and bounces.
- Security & Data Privacy: The data in Listmonk is stored securely on the server. You are the person with full control over your subscribers data.
- It is highly scalable: Listmonk is created to manage large mailing lists with efficiency.
Setup Requirements
- Linux System – This can be Debian based or RHEL based
- 2GB Ram and 1 vcpu should be adequate for small setups
Installing Docker Engine
We begin the setup by ensuring Docker container engine is installed. After provisioning your Linux server, you can verify your OS release version by running the commands below.
cat /etc/os-releaseNext we perform the installation of Docker.
- Install Docker and Compose on CentOS / Rocky / AlmaLinux:
sudo yum install -y yum-utils
sudo yum-config-manager --add-repo https://download.docker.com/linux/centos/docker-ce.repo
sudo yum -y install docker-ce docker-ce-cli containerd.io docker-buildx-plugin docker-compose-plugin
sudo systemctl enable --now docker- Install Docker and Compose on Debian:
# Add Docker's official GPG key:
sudo apt update
sudo apt install ca-certificates curl
sudo install -m 0755 -d /etc/apt/keyrings
sudo curl -fsSL https://download.docker.com/linux/debian/gpg -o /etc/apt/keyrings/docker.asc
sudo chmod a+r /etc/apt/keyrings/docker.asc

# Add the repository to Apt sources:
echo \
  "deb [arch=$(dpkg --print-architecture) signed-by=/etc/apt/keyrings/docker.asc] https://download.docker.com/linux/debian \
  $(. /etc/os-release && echo "$VERSION_CODENAME") stable" | \
  sudo tee /etc/apt/sources.list.d/docker.list > /dev/null
sudo apt update

# Install Docker Engine and Compose plugin
sudo apt install docker-ce docker-ce-cli containerd.io docker-buildx-plugin docker-compose-plugin
sudo systemctl enable --now docker- Install Docker and Compose on Ubuntu:
# Add Docker's official GPG key:
sudo apt-get update
sudo apt-get install ca-certificates curl
sudo install -m 0755 -d /etc/apt/keyrings
sudo curl -fsSL https://download.docker.com/linux/ubuntu/gpg -o /etc/apt/keyrings/docker.asc
sudo chmod a+r /etc/apt/keyrings/docker.asc

# Add the repository to Apt sources:
echo \
  "deb [arch=$(dpkg --print-architecture) signed-by=/etc/apt/keyrings/docker.asc] https://download.docker.com/linux/ubuntu \
  $(. /etc/os-release && echo "$VERSION_CODENAME") stable" | \
  sudo tee /etc/apt/sources.list.d/docker.list > /dev/null
sudo apt update

# Install Docker Engine and Compose plugin
sudo apt install docker-ce docker-ce-cli containerd.io docker-buildx-plugin docker-compose-plugin
sudo systemctl enable --now docker
For other Linux distributions check out our installation guide on all Linux systems.
Confirm Docker installation by checking the version.
$ docker --version
Docker version 26.1.3, build b72abbb

$ docker compose version
Docker Compose version v2.27.0
Add your normal user account to docker group.
sudo usermod -aG docker $USER
newgrp docker
Setup Listmonk on Docker Container
Create working directory for Listmonk deployment.
mkdir -p ~/listmonk && cd ~/listmonk Create Compose file for deploying listmonk.
$ vim docker-compose.yml
x-app-defaults: &app-defaults
  restart: unless-stopped
  image: listmonk/listmonk:latest
  ports:
    - "9000:9000"
  networks:
    - listmonk
  environment:
    - TZ=Etc/UTC

x-db-defaults: &db-defaults
  image: postgres:13-alpine
  ports:
    - "9432:5432"
  networks:
    - listmonk
  environment:
    - POSTGRES_PASSWORD=OIBvmZZgBULnk
    - POSTGRES_USER=listmonk
    - POSTGRES_DB=listmonk
  restart: unless-stopped
  healthcheck:
    test: ["CMD-SHELL", "pg_isready -U listmonk"]
    interval: 10s
    timeout: 5s
    retries: 6

services:
  db:
    <<: *db-defaults
    container_name: listmonk_db
    volumes:
      - type: volume
        source: listmonk-data
        target: /var/lib/postgresql/data

  app:
    <<: *app-defaults
    container_name: listmonk_app
    depends_on:
      - db
    volumes:
      - ./config.toml:/listmonk/config.toml

  demo-db:
    container_name: listmonk_demo_db
    <<: *db-defaults

  demo-app:
    <<: *app-defaults
    container_name: listmonk_demo_app
    command: [sh, -c, "yes | ./listmonk --install --config config-demo.toml && ./listmonk --config config-demo.toml"]
    depends_on:
      - demo-db

networks:
  listmonk:

volumes:
  listmonk-data:
Create configuration file for Listmonk.
$ vim config.toml
[app]
# Interface and port where the app will run its webserver.  The default value
# of localhost will only listen to connections from the current machine. To
# listen on all interfaces use '0.0.0.0'. To listen on the default web address
# port, use port 80 (this will require running with elevated permissions).
address = "localhost:9000" #0.0.0.0:9000

# BasicAuth authentication for the admin dashboard. This will eventually
# be replaced with a better multi-user, role-based authentication system.
# IMPORTANT: Leave both values empty to disable authentication on admin
# only where an external authentication is already setup.
admin_username = "admin"
admin_password = "OIBvmZZgBULnk"

# Database.
[db]
host = "listmonk_db"
port = 5432
user = "listmonk"
password = "OIBvmZZgBULnk"

# Ensure that this database has been created in Postgres.
database = "listmonk"

ssl_mode = "disable"
max_open = 25
max_idle = 25
max_lifetime = "300s"

# Optional space separated Postgres DSN params. eg: "application_name=listmonk gssencmode=disable"
params = ""
Create a script that we will use to run Listmonk newsletter.
vim run.shPaste the commands below into the file created.
#!/usr/bin/env bash
set -eu

printf '\n'

RED="$(tput setaf 1 2>/dev/null || printf '')"
BLUE="$(tput setaf 4 2>/dev/null || printf '')"
GREEN="$(tput setaf 2 2>/dev/null || printf '')"
NO_COLOR="$(tput sgr0 2>/dev/null || printf '')"

info() {
  printf '%s\n' "${BLUE}> ${NO_COLOR} $*"
}

error() {
  printf '%s\n' "${RED}x $*${NO_COLOR}" >&2
}

completed() {
  printf '%s\n' "${GREEN}✓ ${NO_COLOR} $*"
}

exists() {
  command -v "$1" >/dev/null 2>&1
}


is_healthy() {
	info "waiting for db container to be up. retrying in 3s"
	health_status="$(docker inspect -f "{{.State.Health.Status}}" "$1")"
	if [ "$health_status" = "healthy" ]; then
		return 0
	else
		return 1
	fi
}

is_running() {
	info "checking if $1 is running"
	status="$(docker inspect -f "{{.State.Status}}" "$1")"
	if [ "$status" = "running" ]; then
		return 0
	else
		return 1
	fi
}

run_migrations(){
	info "running migrations"
	docker compose up -d db
	while ! is_healthy listmonk_db; do sleep 3; done
	docker compose run --rm app ./listmonk --install
}

start_services(){
	info "starting app"
	docker compose up -d app db
}

show_output(){
	info "finishing setup"
	sleep 3

	if is_running listmonk_db && is_running listmonk_app
	then completed "Listmonk is now up and running. Visit http://localhost:9000 in your browser."
	else
		error "error running containers. something went wrong."
	fi
}

run_migrations
start_services
show_output
Make the script executable.
chmod +x run.shRun the script to setup Listmonk.
./run.shSee screenshot below on deployment.
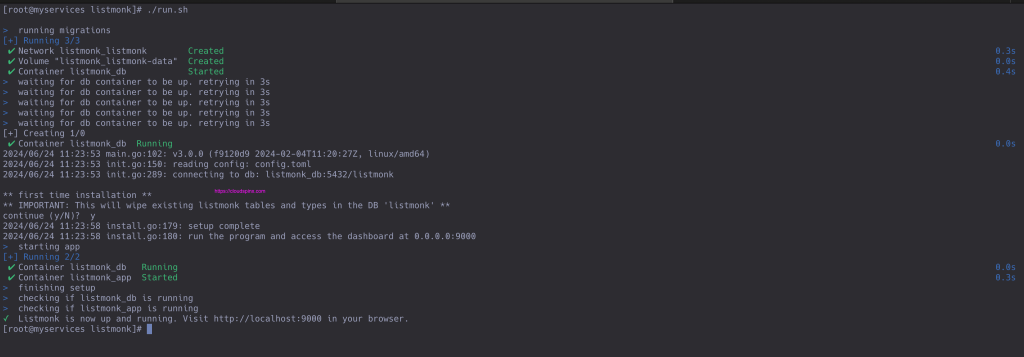
Check status of the deployment.
$ sudo ss -tunelp|grep 9000
tcp   LISTEN 0      2048         0.0.0.0:9000      0.0.0.0:*    users:(("docker-proxy",pid=2646765,fd=4)) ino:105922270 sk:7 <->
tcp   LISTEN 0      2048            [::]:9000         [::]:*    users:(("docker-proxy",pid=2646773,fd=4)) ino:105919256 sk:e v6only:1 <->
Access Listmonk Web Interface
To login use http://ServerIP:9000.
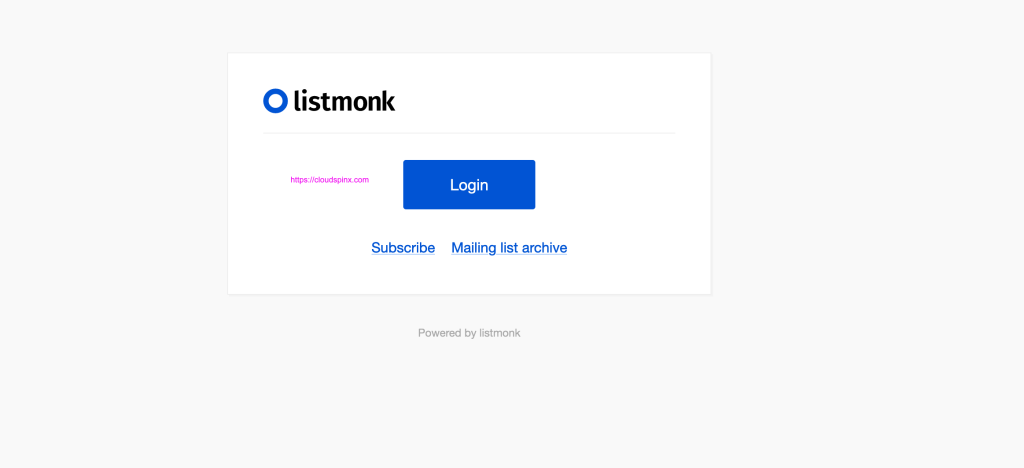
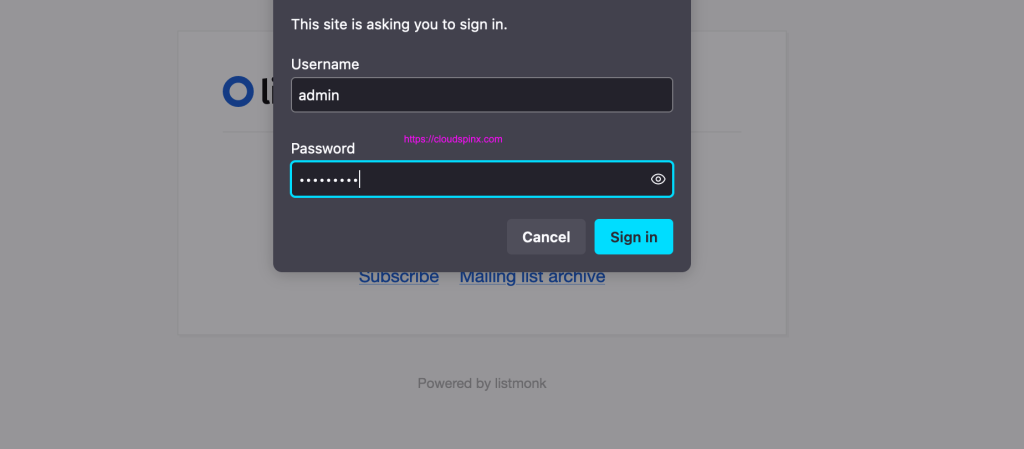
Use access details set in configuration file – username and password.
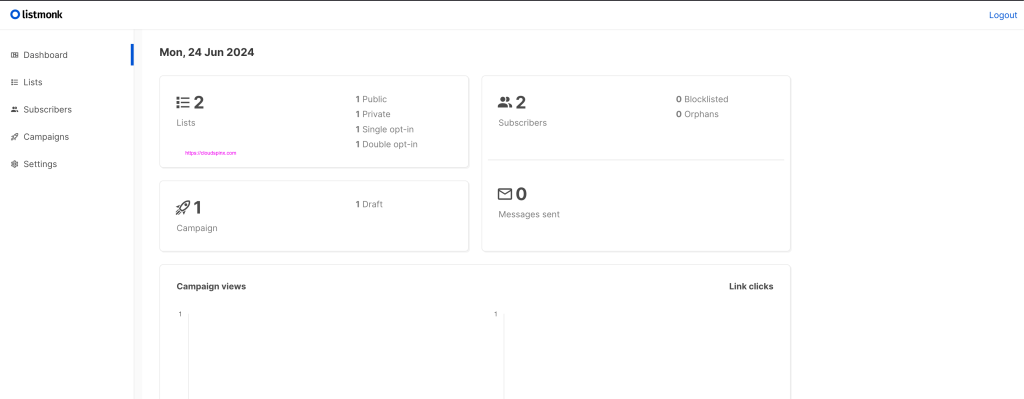
A dashboard will look like below.
Configure Nginx Proxy
Install Nginx with Let’s Encrypt certbot tool.
### CentOS / RHEL / AlmaLinux / Rocky Linux ###
sudo dnf -y install epel-release
sudo dnf -y install nginx certbot python3-certbot-nginx

### Ubuntu / Debian ###
sudo apt update
sudo apt install nginx certbot python3-certbot-nginx
Start and enable nginx service.
sudo systemctl enable --now nginxCreate Nginx configuration file – VirtualHost.
sudo vim /etc/nginx/conf.d/listmonk.confHere is the used sample configs. You can customize accordingly.
server {
    listen 80;
    server_name newsletter.example.com;
    location / {
        proxy_pass http://localhost:9000;
	proxy_set_header    Host                $http_host;
	proxy_set_header    X-Real-IP           $remote_addr;
	proxy_set_header    X-Forwarded-For     $proxy_add_x_forwarded_for;
	access_log /var/log/nginx/listmonk_access.log;
	error_log /var/log/nginx/listmonk_error.log;

    }
}
Check Nginx syntax if everything works as expected.
$ sudo nginx -t
nginx: the configuration file /etc/nginx/nginx.conf syntax is ok
nginx: configuration file /etc/nginx/nginx.conf test is successful
If this is configured on a Linux running in Cloud Environment, then request for Let’s Encrypt SSL certificate.
sudo certbot --nginx -d newsletter.example.comExample execution when requesting for a free SSL certificate.
Saving debug log to /var/log/letsencrypt/letsencrypt.log
Enter email address (used for urgent renewal and security notices)
 (Enter 'c' to cancel): [email protected]

- - - - - - - - - - - - - - - - - - - - - - - - - - - - - - - - - - - - - - - -
Please read the Terms of Service at
https://letsencrypt.org/documents/LE-SA-v1.4-April-3-2024.pdf. You must agree in
order to register with the ACME server. Do you agree?
- - - - - - - - - - - - - - - - - - - - - - - - - - - - - - - - - - - - - - - -
(Y)es/(N)o: Y

- - - - - - - - - - - - - - - - - - - - - - - - - - - - - - - - - - - - - - - -
Would you be willing, once your first certificate is successfully issued, to
share your email address with the Electronic Frontier Foundation, a founding
partner of the Let's Encrypt project and the non-profit organization that
develops Certbot? We'd like to send you email about our work encrypting the web,
EFF news, campaigns, and ways to support digital freedom.
- - - - - - - - - - - - - - - - - - - - - - - - - - - - - - - - - - - - - - - -
(Y)es/(N)o: Y
Account registered.
Requesting a certificate for newsletter.example.com

Successfully received certificate.
Certificate is saved at: /etc/letsencrypt/live/newsletter.example.com/fullchain.pem
Key is saved at:         /etc/letsencrypt/live/newsletter.example.com/privkey.pem
This certificate expires on 2024-09-22.
These files will be updated when the certificate renews.
Certbot has set up a scheduled task to automatically renew this certificate in the background.

Deploying certificate
Successfully deployed certificate for newsletter.example.com to /etc/nginx/conf.d/listmonk.conf
Congratulations! You have successfully enabled HTTPS on https://newsletter.example.com

- - - - - - - - - - - - - - - - - - - - - - - - - - - - - - - - - - - - - - - -
If you like Certbot, please consider supporting our work by:
 * Donating to ISRG / Let's Encrypt:   https://letsencrypt.org/donate
 * Donating to EFF:                    https://eff.org/donate-le
- - - - - - - - - - - - - - - - - - - - - - - - - - - - - - - - - - - - - - - -
You can now access your Newsletter application over https – https://newsletter.example.com.
CloudSpinx Engineers are available to help with the installation, configurations and monitoring of applications running in Linux or Windows Environment. Chat with us to get a customized quote.

