
Chatwoot is a self-hosted and open-source customer engagement system created to enable your business have good customer service by improving interactions with your clients across various channels. In this article we look at how you can run Chatwoot in a Docker Container.
Chatwoot enables you to handle all your customer conversations coming from different channels such as social media (X, Facebook, Instagram, e.t.c.), live chat, email and much more. All this management is done from a single dashboard hence giving a streamlined communication and single pane of glass.
To streamline the workflows further, Chatwoot offers automation features. It’s easy to set automatic responses, create message routing rules that saves you time and improve your efficiency when communicating with customers. if you have multiple people handling customers, you can assign conversations to an individual and facilitate collaboration among your support agents.
Setup Requirements
- A Linux Server. You can order a Linux VM from our platform.
- Internet access
- User with Sudo permissions
In the other article we discussed how Chatwoot can be installed directly on Ubuntu Linux.
Install Docker / Compose
Login to your Linux machine and install both Docker Engine and the Compose plugin. Refer to the following article for a complete how-to process.
Confirm they are installed and working.
docker --version
docker compose version
Once Docker Engine is working, proceed to the next step.
Download required files
Create a directory that will host all the files.
mkdir ~/chatwoot && cd ~/chatwootDownload environment file template – this will contain all the configurations required to run Chatwoot in Docker Container.
wget -O .env https://raw.githubusercontent.com/chatwoot/chatwoot/develop/.env.exampleOpen the file for editing.
vim .envCustomize the .env to your preferences. Refer to the available environment variables.
SECRET_KEY_BASE=3fe397575565365108556c3e5549f139e8078a8ec
FRONTEND_URL=http://0.0.0.0:3000
REDIS_PASSWORD=StrongDBPassw0rd
POSTGRES_PASSWORD=StrongDBPassw0rd
Download Docker compose template for Chatwoot.
wget -O docker-compose.yaml https://raw.githubusercontent.com/chatwoot/chatwoot/develop/docker-compose.production.yamlOpen Compose file and customize it to suit your setup. For example volumes paths can be changed.
vim docker-compose.yaml Remember to set PostgreSQL and Redis password.
$ vim docker-compose.yaml ||nano docker-compose.yaml
POSTGRES_PASSWORD=StrongDBPassw0rd
Prepare the database by running the migrations using the following commands.
docker compose run --rm rails bundle exec rails db:chatwoot_prepareExpected output after running the commands.
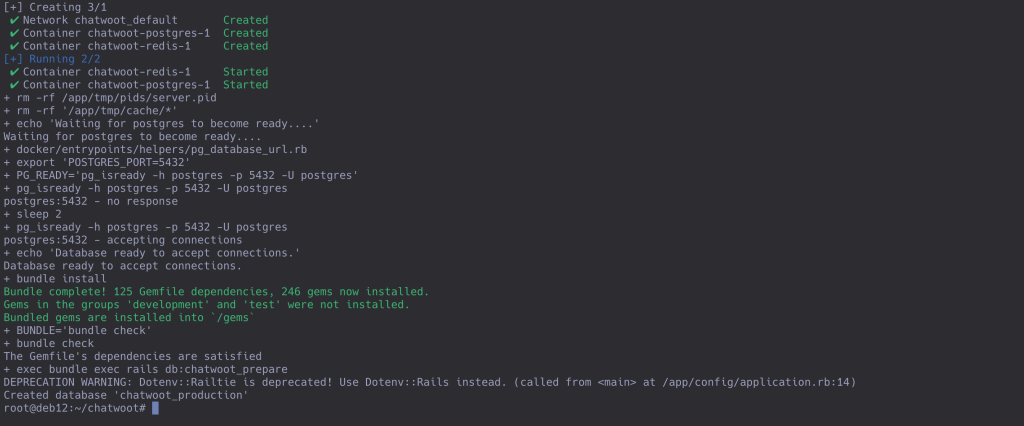
Once database migrations are performed, start all chatwoot services.
$ docker compose up -d
[+] Running 5/5
 ✔ Container chatwoot-postgres-1  Running                                                                                                                                                        0.0s
 ✔ Container chatwoot-redis-1     Running                                                                                                                                                        0.0s
 ✔ Container chatwoot-base-1      Started                                                                                                                                                        0.4s
 ✔ Container chatwoot-sidekiq-1   Running                                                                                                                                                        0.0s
 ✔ Container chatwoot-rails-1     Running
To this point you should have a complete installation of Chatwoot in a Docker Container.
$ sudo ss -tunelp|grep 3000
tcp   LISTEN 0      4096       127.0.0.1:3000      0.0.0.0:*    users:(("docker-proxy",pid=47756,fd=4)) ino:698533 sk:1003 cgroup:/system.slice/docker.service <->
Next we will expose the service to the internet securely using Nginx that proxy the requests to the container.
Configure Nginx Proxy
Install Nginx web server package alongside certbot tool.
### CentOS / RHEL / AlmaLinux / Rocky Linux ###
sudo dnf -y install epel-release
sudo dnf -y install nginx certbot python3-certbot-nginx

### Ubuntu / Debian ###
sudo apt update
sudo apt install nginx certbot python3-certbot-nginx
Start and enable nginx web service.
sudo systemctl enable --now nginxCreate Nginx configuration file – VirtualHost.
sudo vim /etc/nginx/conf.d/chatwoot.confWe have provided sample Nginx configuration for Chatwoot. You can customize and input your domain name.
server {
    listen 80;
    server_name livechat.example.com;
    location / {
        proxy_pass http://localhost:3000;
	proxy_set_header    Host                $http_host;
	proxy_set_header    X-Real-IP           $remote_addr;
	proxy_set_header    X-Forwarded-For     $proxy_add_x_forwarded_for;
	access_log /var/log/nginx/chatwoot.log;
	error_log /var/log/nginx/chatwoot_error.log;

    }
}
Confirm the syntax is ok.
$ sudo nginx -t
nginx: the configuration file /etc/nginx/nginx.conf syntax is ok
nginx: configuration file /etc/nginx/nginx.conf test is successful
If Chatwoot is installed on a Public Linux VM, then request for Let’s Encrypt SSL certificate.
DOMAIN=livechat.example.com
sudo certbot --nginx -d $DOMAIN
Example execution when requesting for a free SSL certificate.
.....
Saving debug log to /var/log/letsencrypt/letsencrypt.log
Requesting a certificate for livechat.example.com

Successfully received certificate.
Certificate is saved at: /etc/letsencrypt/live/livechat.example.com/fullchain.pem
Key is saved at:         /etc/letsencrypt/live/livechat.example.com/privkey.pem
This certificate expires on 2024-09-29.
These files will be updated when the certificate renews.
Certbot has set up a scheduled task to automatically renew this certificate in the background.

Deploying certificate
Successfully deployed certificate for livechat.example.com to /etc/nginx/sites-enabled/default
Congratulations! You have successfully enabled HTTPS on https://livechat.example.com

- - - - - - - - - - - - - - - - - - - - - - - - - - - - - - - - - - - - - - - -
If you like Certbot, please consider supporting our work by:
 * Donating to ISRG / Let's Encrypt:   https://letsencrypt.org/donate
 * Donating to EFF:                    https://eff.org/donate-le
- - - - - - - - - - - - - - - - - - - - - - - - - - - - - - - - - - - - - - - -
New updated configurations.
server {
    server_name livechat.example.com;
    location / {
        proxy_pass http://localhost:3000;
  proxy_set_header    Host                $http_host;
  proxy_set_header    X-Real-IP           $remote_addr;
  proxy_set_header    X-Forwarded-For     $proxy_add_x_forwarded_for;
  access_log /var/log/nginx/chatwoot.log;
  error_log /var/log/nginx/chatwoot_error.log;

    }

    listen 443 ssl; # managed by Certbot
    ssl_certificate /etc/letsencrypt/live/livechat.example.com/fullchain.pem; # managed by Certbot
    ssl_certificate_key /etc/letsencrypt/live/livechat.example.com/privkey.pem; # managed by Certbot
    include /etc/letsencrypt/options-ssl-nginx.conf; # managed by Certbot
    ssl_dhparam /etc/letsencrypt/ssl-dhparams.pem; # managed by Certbot

}
server {
    if ($host = livechat.example.com) {
        return 301 https://$host$request_uri;
    } # managed by Certbot


    listen 80;
    server_name livechat.example.com;
    return 404; # managed by Certbot


}
You can now access your Chatwoot web application over https – https://livechat.example.com.
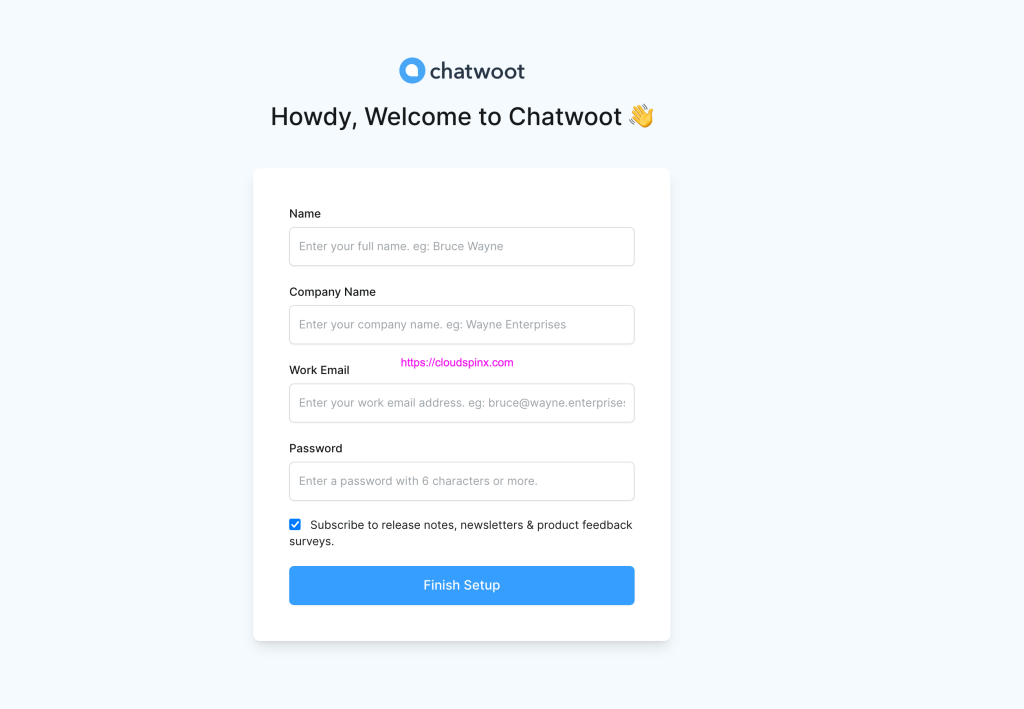
Create first admin user.
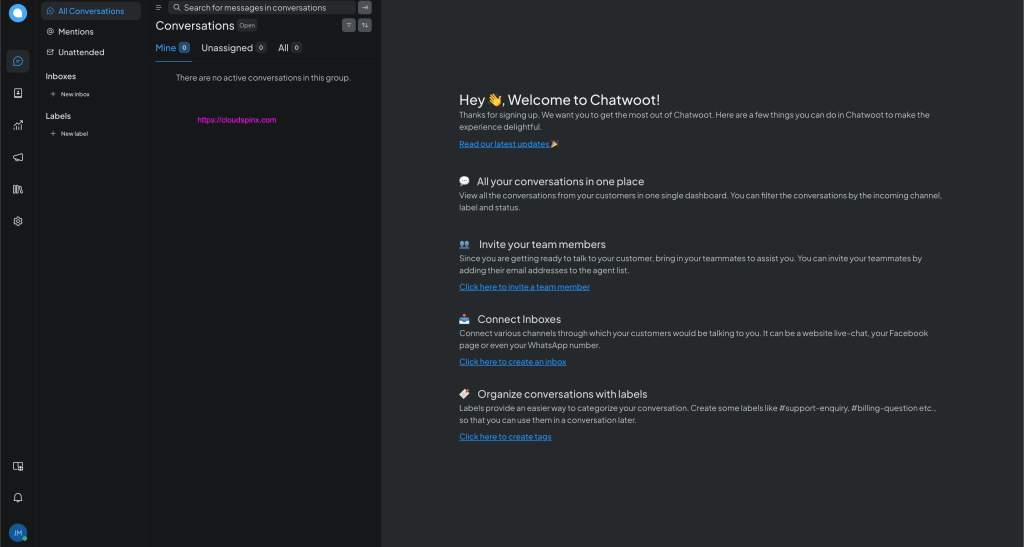
Thereafter, login with the email and password of the user you just created.
Remember CloudSpinx Engineers can help you with the installation, configurations, and customization of Chatwoot on your system. Chat us now to get our premium support.


