
Welcome to today’s guide on how to run Postgresql in Podman Container with pgAdmin UI management tool. Podman is a tool developed for running images and containers. It is designed by Red Hat with an intention of being a drop-in replacement of docker. Podman is similar to Docker only that docker requires the Docker Engine daemon to run containers, unlike Podman.
In this guide, I will run both the Postgres and pgAdmin together to avoid restarting the containers separately. PostgreSQL is an object-oriented relational database management system. It helps ease developments in implementing data-driven applications with the following features:
- High levels of security
- Ensures data integrity – foreign key referential intergrity
- Nested transactions
- Table inheritance
- Support for different data types as well as user-defined types
- Sophisticated locking mechanism
- Extensibility
- Reliability and disaster recovery – supports asynchronous replication and point-in-time recovery
Let’s dive in!
Step 1 – Install Podman container runtime
First and foremost, we need to install Podman on our system to be able to manage the PostgreSQL database in container.
Podman can be installed using the commands below:
#On CentOS/Rocky Linux
sudo yum install podman

#On Debian/Ubuntu
sudo apt-get install podman

#On Fedora
sudo dnf install podman

#On RHEL 8
sudo yum module enable -y container-tools:rhel8
sudo yum module install -y container-tools:rhel8

#On RHEL 7
sudo subscription-manager repos --enable=rhel-7-server-extras-rpms
sudo yum -y install podman
Now edit the file below to work with OCI registries(on Ubuntu ad Debian)
$ sudo vim /etc/containers/registries.conf
unqualified-search-registries = ["registry.fedoraproject.org", "registry.access.redhat.com", "registry.centos.org", "docker.io"]
Step 2 – Create PostgreSQL DB Pod
We will begin by creating a pod with the name postgre-sql as below
podman pod create --name postgre-sql -p 9876:80See the pod created by running the following command:
thor@debian:~$ podman pod ps
POD ID        NAME         STATUS   CREATED         INFRA ID      # OF CONTAINERS
fcdb89605d79  postgre-sql  Created  59 seconds ago  fa01541fa613  1
From the output, we can see in pod postgre-sql port 9876 is mapped to port 80 which will be used to access the pgAdmin web UI.
Create pgAdmin container as below
podman run --pod postgre-sql \
-e 'PGADMIN_DEFAULT_EMAIL=[email protected]' \
-e 'PGADMIN_DEFAULT_PASSWORD=StrongPassw0rd'  \
--name pgadmin \
 -d docker.io/dpage/pgadmin4:latest
In the above code, dpage/pgadmin4 is the image of pgAdmin we are pulling, “name pgadmin” is the name of the container. Create the pgAdmin user with the credentials of your own as above.
Now pull the PostgreSQL image.
##For PostgreSQL 16
podman pull docker.io/library/postgres:16

##For PostgreSQL 15
podman pull docker.io/library/postgres:15

##For PostgreSQL 14
podman pull docker.io/library/postgres:14

##For PostgreSQL 13
podman pull docker.io/library/postgres:13

##For PostgreSQL 12
podman pull docker.io/library/postgres:12
Tag the image to your local container registry.
$ podman images
REPOSITORY                            TAG                    IMAGE ID      CREATED        SIZE
docker.io/library/postgres            16                     07a4ee949b9e  2 months ago   439 MB
docker.io/library/postgres            15                     9f31f7bb3ca1  2 months ago   433 MB
docker.io/library/postgres            14                     dbceeef68585  2 months ago   429 MB
docker.io/library/postgres            13                     483aeb0a0bb9  2 months ago   427 MB
docker.io/library/postgres            12                     842534c87032  2 months ago   426 MB
Run the PostgreSQL container, examples
### PostgreSQL 16 ###
podman run --name db --pod=postgre-sql -d \
  -e POSTGRES_USER=admin \
  -e POSTGRES_PASSWORD=StrongPassw0rd \
  docker.io/library/postgres:16

### PostgreSQL 15 ###
podman run --name db --pod=postgre-sql -d \
  -e POSTGRES_USER=admin \
  -e POSTGRES_PASSWORD=StrongPassw0rd \
  docker.io/library/postgres:15

### PostgreSQL 14 ###
podman run --name db --pod=postgre-sql -d \
  -e POSTGRES_USER=admin \
  -e POSTGRES_PASSWORD=StrongPassw0rd \
  docker.io/library/postgres:14
Set credentials for your PostgreSQL user and password and the latest version of PostgreSQL will be pulled from the local registry.
In the code, you can add
-v /your/data/volume:/var/lib/postgresql/data: Z-v /your/data/volume:/var/lib/postgresql/data: with your persistent volume, Z is used to modify SELinux in CentOS, Fedora, RHEL, and Rocky Linux to avoid permission errors.
View the status of the containers running as below.
$ podman pod ps
POD ID        NAME         STATUS      CREATED             INFRA ID      # OF CONTAINERS
c6e64f2228c3  postgre-sql  Running     About a minute ago  55fa51edc60f  3

$ podman pod stats postgre-sql
POD           CID           NAME                CPU %  MEM USAGE/ LIMIT   MEM %  NET IO   BLOCK IO  PIDS
2d9a3445b89f  223ea8d45da8  db                  5.23%  121.5MB / 4.122GB  2.95%  -- / --  -- / --   7
2d9a3445b89f  c726f41820cf  pgadmin           1.41%  180.2MB / 4.122GB  4.37%  -- / --  -- / --   7
2d9a3445b89f  da727b5e7383  2d9a3445b89f-infra  1.11%  761.9kB / 4.122GB  0.02%  -- / --  -- / --   1
Step 3: Access the pgadmin Web UI
Now we want to access the pgAdmin web UI and configure it to use PostgreSQL. Access the pgAdmin web UI with the URL http://IP_Address:9876

Log in using the credentials created while making the pgAdmin container above. In our case this will be:
-e 'PGADMIN_DEFAULT_EMAIL=[email protected]' \
-e 'PGADMIN_DEFAULT_PASSWORD=StrongPassw0rd'  \
You will then add your PostgreSQL server by clicking add server as shown.
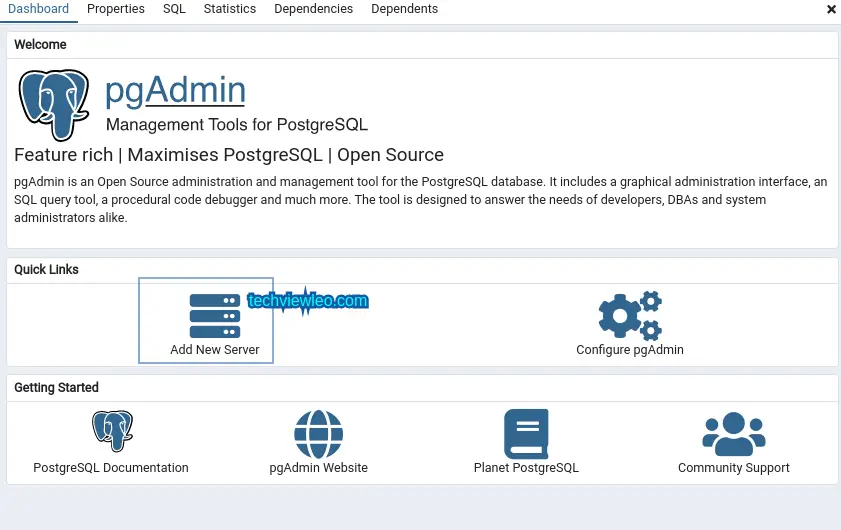
You will be granted the below window, enter the name for the server
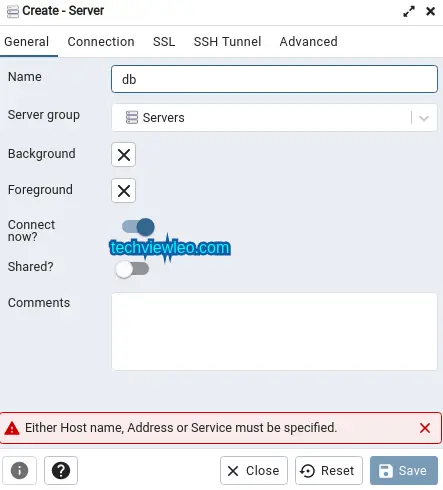
Proceed to the next tab connection as shown, enter the created credentials for PostgreSQL, hostname/address, and port as below.
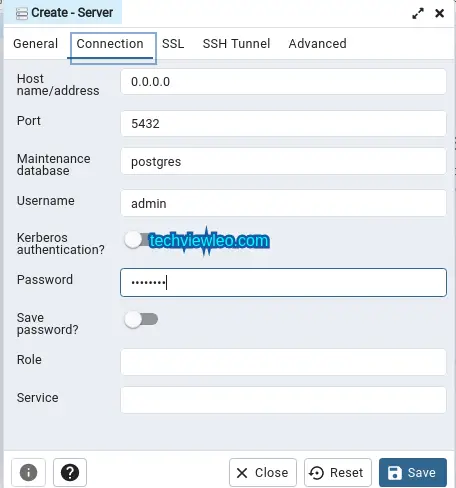
Now connect to your running PostgreSQL container by clicking save. Check your PostgreSQL and pgAdmin instance.
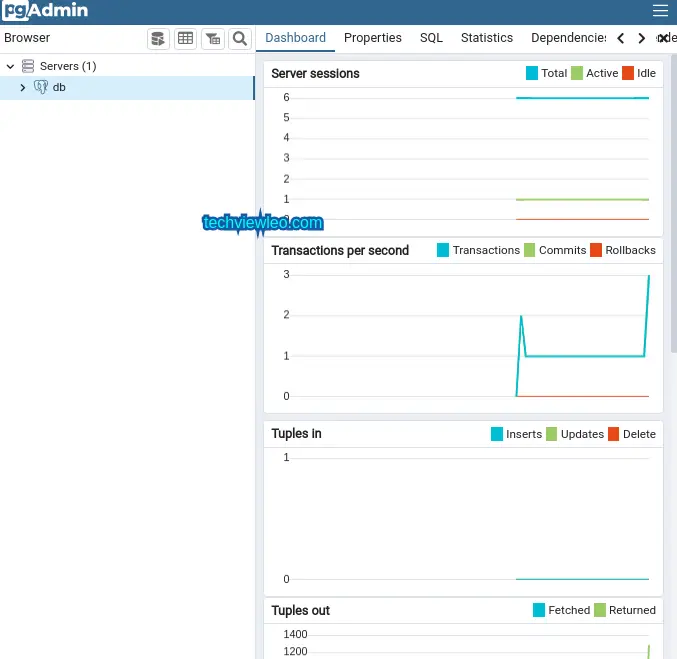
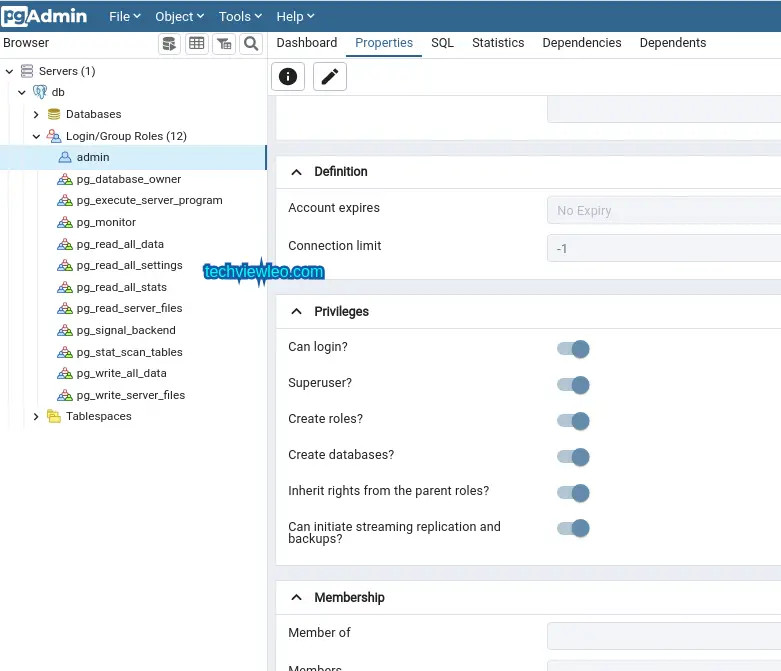
Verify the installed PostgreSQL version under properties as below.

You can also view the privileges associated with the created user “admin“.
That is it! You have PostgreSQL server running and can be managed through the pgAdmin web interface.
Step 4 – Manage the PostgreSQL Service
You can manage both the PostgreSQL and pgAdmin service with a single command since both containers are running in the same pod with the pod name postgre-sql.
To pause and unpause the pod use:
podman pod pause postgre-sql
podman pod unpause postgre-sql
Start and stop the pod with the command.
podman pod stop postgre-sql
podman pod start postgre-sql
In case you want to remove the container, use the command:
podman pod rm postgre-sqlConclusion.
Congratulations! You have successfully run PostgreSQL in Podman Container. I hope this was enjoyable and welcome again and again to our website.


