
Minikube is a tool or a utility that can be used to run, deploy and manage Kubernetes (k8s) nodes on the local machine. Minikube is a virtual machine-based tool intended for implementing the k8s cluster in macOS, Linux and Windows. With minikube, you perform demo operations without having full k8s installed which s time and resource-consuming. It is one of the best platforms to help you practice and gain familiarity with Kubernetes basic concepts.
Features of Minikube
- LoadBalancer – Scaling up applications to improve performance.
- Dashboard – Web interface for management and monitoring.
- Ingress – API with rules that dictates access to services in a cluster.
- Container runtime such as Docker.
- Supports persistent volumes.
In this guide, we are going to discuss how to install Minikube in Rocky Linux and AlmaLinux 8 and be able to run Kubernetes node locally without having Kubernetes installed. This is normally done via hypervisors such as KVM or VirtualBox. For our walkthrough, we are going to install Minikube Virtual machine in KVM as our hypervisor. There, you will need to have the hypervisor installed and running before continuing with the installation.
Install Hypervisor (KVM, VirtualBox, e.t.c)
For this demo, we are going to use KVM as our Hypervisor to install Mininkube. Use the command below to install KVM.
sudo dnf -y install qemu-kvm libvirt virt-installConfirm that the required modules are loaded.
$ lsmod | grep kvm

kvm_intel         	315392  0
kvm               	847872  1 kvm_intel
irqbypass          	16384  1 kvm
Enable libvirtd services to auto-start on reboot.
sudo systemctl enable --now libvirtdConfirm that KVM services are running.
$ systemctl status libvirtd
● libvirtd.service - Virtualization daemon
   Loaded: loaded (/usr/lib/systemd/system/libvirtd.service; enabled; vendor preset: enabled)
   Active: active (running) since Fri 2024-08-09 19:09:33 UTC; 5s ago
     Docs: man:libvirtd(8)
           https://libvirt.org
 Main PID: 43862 (libvirtd)
    Tasks: 21 (limit: 32768)
   Memory: 19.2M
   CGroup: /system.slice/libvirtd.service
           ├─43862 /usr/sbin/libvirtd --timeout 120
           ├─43977 /usr/sbin/dnsmasq --conf-file=/var/lib/libvirt/dnsmasq/default.conf --leasefile-ro --dhcp-script=/usr/libexec/libvirt_leaseshelper
           └─43978 /usr/sbin/dnsmasq --conf-file=/var/lib/libvirt/dnsmasq/default.conf --leasefile-ro --dhcp-script=/usr/libexec/libvirt_leaseshelper

Aug 09 19:09:34 rocky8.cloudspinx.com dnsmasq[43977]: started, version 2.79 cachesize 150
Aug 09 19:09:34 rocky8.cloudspinx.com dnsmasq[43977]: compile time options: IPv6 GNU-getopt DBus no-i18n IDN2 DHCP DHCPv6 no-Lua TFTP no-conntrack ipset auth DNSSEC loop-detect inotify
Aug 09 19:09:34 rocky8.cloudspinx.com dnsmasq-dhcp[43977]: DHCP, IP range 192.168.122.2 -- 192.168.122.254, lease time 1h
Aug 09 19:09:34 rocky8.cloudspinx.com dnsmasq-dhcp[43977]: DHCP, sockets bound exclusively to interface virbr0
Aug 09 19:09:34 rocky8.cloudspinx.com dnsmasq[43977]: reading /etc/resolv.conf
Aug 09 19:09:34 rocky8.cloudspinx.com dnsmasq[43977]: using nameserver 185.12.64.2#53
Aug 09 19:09:34 rocky8.cloudspinx.com dnsmasq[43977]: using nameserver 185.12.64.1#53
Aug 09 19:09:34 rocky8.cloudspinx.com dnsmasq[43977]: read /etc/hosts - 6 addresses
Aug 09 19:09:34 rocky8.cloudspinx.com dnsmasq[43977]: read /var/lib/libvirt/dnsmasq/default.addnhosts - 0 addresses
Aug 09 19:09:34 rocky8.cloudspinx.com dnsmasq-dhcp[43977]: read /var/lib/libvirt/dnsmasq/default.hostsfile
.....
Install Snapd for snap packages
During the installation of Minikube, we will need a snap command. Snappy is a software deployment and package management system.
Install epel-release repository first
sudo dnf install epel-releaseNow install snapd with epel-release repository.
sudo dnf --enablerepo=epel -y install snapdCreate a symlink between “/var/lib/snapd/snap” and “/snap” to enable classic snap support by running the command below.
sudo ln -s /var/lib/snapd/snap /snap
echo 'export PATH=$PATH:/var/lib/snapd/snap/bin' | sudo tee -a /etc/profile.d/snap.sh
Enable snapd and snapd communication socket.
sudo systemctl enable --now snapd.service snapd.socketInstall kubectl
Kubectl is a Kubernetes tool used to execute and manage k8s pods. Is used as a client-side tool (binary executable) that can connect to a Kubernetes cluster to read, create, modify well known Kubernetes resources like pods, deployment and services.
$ sudo snap install kubectl --classic
2024-08-09T19:11:12Z INFO Waiting for automatic snapd restart...
kubectl 1.30.3 from Canonical✓ installed
Download and install Mikube
Use the command below to download minikube.
wget https://storage.googleapis.com/minikube/releases/latest/minikube-linux-amd64 -O minikubeIt is also important to install docker drivers which are used by minikube as a runtime environment.
wget https://storage.googleapis.com/minikube/releases/latest/docker-machine-driver-kvm2Run command bellow change permissions for both minikube and docker-machine-driver-kvm2
sudo chmod 755 minikube docker-machine-driver-kvm2Copy the two files in the binary files directory.
sudo cp minikube docker-machine-driver-kvm2 /usr/local/bin/With the above command, we have successfully installed minikube in Rocky Linux 8|AlmaLinux 8. To confirm this, check the version of the installed minikube with help of the below command.
$ sudo minikube version
minikube version: v1.33.1
commit: 5883c09216182566a63dff4c326a6fc9ed2982ff
It is always good to run Minikube command without being prompted to enter the root password to verify the action you want to perform. To avoid this run Minikube as a non-root user, use the command below to add a user in libvirt group.
sudo usermod -aG libvirt $USERNow start minikube as an ordinary user to install the Kubernetes cluster.
$ minikube start --vm-driver=kvm2
* minikube v1.33.1 on Rocky 8.10 (kvm/amd64)
✨  Using the kvm2 driver based on user configuration
💿  Downloading VM boot image ...
	> minikube-v1.33.1-amd64.iso.....iso.sha256: 65 B / 65 B [-------------] 100.00% ? p/s 0s
	> minikube-v1.33.1-amd64.iso: 314.16 MiB / 314.16 MiB  100.00% 37.59 MiB p
👍  Starting control plane node minikube in cluster minikube
💾  Downloading Kubernetes v1.30.0 preload ...
	> preloaded-images-k8s-v18-v1...: 502.14 MiB / 502.14 MiB  100.00% 10.56 Mi
🔥  Creating kvm2 VM (CPUs=2, Memory=2200MB, Disk=20000MB) ...
🐳  Preparing Kubernetes v1.30.0 on Docker 26.0.2 ...
	▪ Generating certificates and keys ...
	▪ Booting up control plane ...
	▪ Configuring RBAC rules ...
🔎  Verifying Kubernetes components...
	▪ Using image gcr.io/k8s-minikube/storage-provisioner:v5
🌟  Enabled addons: storage-provisioner, default-storageclass
💡  kubectl not found. If you need it, try: 'minikube kubectl -- get pods -A'
🏄  Done! kubectl is now configured to use "minikube" cluster and "default" namespace by default
Check status
$ minikube status
minikube
type: Control Plane
host: Running
kubelet: Running
apiserver: Running
kubeconfig: Configured
To see the docker environment in the cluster use this command.
$ minikube docker-env
export DOCKER_TLS_VERIFY="1"
export DOCKER_HOST="tcp://192.168.39.2:2376"
export DOCKER_CERT_PATH="/home/angani/.minikube/certs"
export MINIKUBE_ACTIVE_DOCKERD="minikube"
# To point your shell to minikube's docker-daemon, run:
# eval $(minikube -p minikube docker-env)
Cluster information.
$ kubectl cluster-info
Kubernetes control plane is running at https://192.168.39.2:8443
CoreDNS is running at https://192.168.39.2:8443/api/v1/namespaces/kube-system/services/kube-dns:dns/proxy
To further debug and diagnose cluster problems, use 'kubectl cluster-info dump'.
To access minikube VM via ssh run this command.
$ minikube ssh
                        _             _
            _         _ ( )           ( )
  ___ ___  (_)  ___  (_)| |/')  _   _ | |_      __
/' _ ` _ `\| |/' _ `\| || , <  ( ) ( )| '_`\  /'__`\
| ( ) ( ) || || ( ) || || |\`\ | (_) || |_) )(  ___/
(_) (_) (_)(_)(_) (_)(_)(_) (_)`\___/'(_,__/'`\____)
Creating Pods in Minikube
Where are going to use kubectl command to create and run pods in minikube Kubernetes cluster. To create your first pod, run the command below in your terminal.
$ kubectl create deployment webserver --image=nginx
deployment.apps/webserver created
The deployment process will be initiated in the background and you should be up and running in about 30 sec.
To see you see your running pod use this command.
$ kubectl get pods
NAME                         READY   STATUS    RESTARTS   AGE
webserver-559b886555-w8cxb   1/1     Running   0          21s
Deploy services
We will need to expose our service for the application to be accessed from outside Use command to run your deployed application as a service.
$ kubectl expose deployment webserver --type="NodePort" --port 80
service/webserver exposed
To see the IP and port which the service is running use this command.
$ kubectl get service webserver
NAME        TYPE       CLUSTER-IP       EXTERNAL-IP   PORT(S)        AGE
webserver   NodePort   10.103.184.174   <none>        80:32433/TCP   99s
Below is a command that displays the environment of a running application.
$ kubectl exec webserver-559b886555-w8cxb -- env
PATH=/usr/local/sbin:/usr/local/bin:/usr/sbin:/usr/bin:/sbin:/bin
HOSTNAME=webserver-559b886555-w8cxb
KUBERNETES_PORT=tcp://10.96.0.1:443
KUBERNETES_PORT_443_TCP_PROTO=tcp
KUBERNETES_PORT_443_TCP_ADDR=10.96.0.1
KUBERNETES_SERVICE_PORT=443
KUBERNETES_PORT_443_TCP_PORT=443
KUBERNETES_SERVICE_PORT_HTTPS=443
KUBERNETES_PORT_443_TCP=tcp://10.96.0.1:443
KUBERNETES_SERVICE_HOST=10.96.0.1
NGINX_VERSION=1.21.1
NJS_VERSION=0.6.1
PKG_RELEASE=1~buster
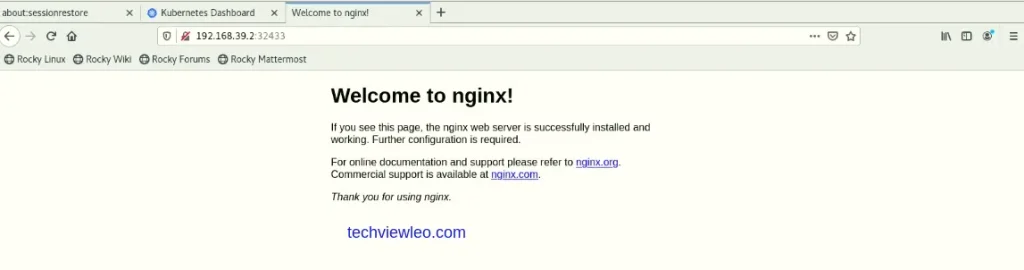
HOME=/rootGenerate a URL that you can run in the browser to access the Nginx service.
$ minikube service webserver --url
http://192.168.39.2:32433
When you enter the URL above in your browser you will see a screen showing Nginx is installed.
Scaling the application
This is the act of creating multiple replicates of the application when large traffics are generated to accommodate the users. Kubernetes use this as load balancing requests. Command below guides how to scale applications.
$ kubectl scale deployment webserver --replicas=4
deployment.apps/webserver scaled
To see all replicated applications execute this line.
$ kubectl get pods
NAME                         READY   STATUS    RESTARTS   AGE
webserver-559b886555-57swh   1/1     Running   0          20s
webserver-559b886555-shwsl   1/1     Running   0          20s
webserver-559b886555-w8cxb   1/1     Running   0          48m
webserver-559b886555-xlxld   1/1     Running   0          20s
Access pod shell
You may need to login to your pod for further configurations like adding config files. This command is used to access the pod shell in minikube.
$ kubectl exec -it webserver-559b886555-w8cxb -- bash
root@webserver-559b886555-w8cxb:/# ls
bin  boot  dev	docker-entrypoint.d  docker-entrypoint.sh  etc	home  lib  lib64  media  mnt  opt  proc  root  run  sbin  srv  sys  tmp  usr  var
root@webserver-559b886555-w8cxb:/#
Minikube dashboard
From the dashboard, you can be able to manage your pods and other Kubernetes services in minikube. Provides an overview visualization of the node. To start the dashboard service, run this command.
$ minikube dashboard
🤔  Verifying dashboard health ...
🚀  Launching proxy ...
🤔  Verifying proxy health ...
🎉  Opening http://127.0.0.1:36611/api/v1/namespaces/kubernetes-dashboard/services/http:kubernetes-dashboard:/proxy/ in your default browser...
Your dashboard will be opened automatically in your default browser.

Delete Services and Pods
You can terminate your service by running this command.
$ kubectl delete services <service-name>
Service “<service-name>” deleted
To delete a pod, use this command.
$ kubectl delete deployment <pod-name>
Deployment.extensions “<pod-name>” deleted
Conclusion
Kubernetes is one of the best orchestration tools. Is an open-source application thus freely available at no cost. We hope you enjoyed our walkthrough on how to run and deploy Kubernetes locally with minikube on Rocky Linux 8 and AlmaLinux 8. Take a step to promote this article by sharing it with friends.


