Emacs stands as one of the most long-standing and adaptable text editors available. The inception of GNU Emacs dates back to 1984, renowned for its robust and extensive editing capabilities. It is highly customizable and can be extended with different modes, making it useful as an Integrated Development Environment (IDE) for programming languages such as Java, C, and Python.
Emacs is primarily designed for text manipulation, although it possesses the ability to format and produce documents similar to a word processor. It achieves this by collaborating with external tools like LaTeX, Ghostscript, and web browsers. In addition, Emacs furnishes commands for altering and exhibiting semantic text components like words, sentences, paragraphs, and even source code elements such as functions. This text editor is categorized as a real-time display editor, wherein modifications are promptly shown on the screen as they happen. Renowned for its significant extensibility, adaptability, and personalization options, Emacs boasts a substantial and dedicated user base.
Here are some features of Emacs that make it unique:
- Editing Modes: Emacs editing mode are content-aware, the have been integrated with various mode including syntax coloring for different file types.
- Built-in documentation: Emacs offers a complete documentation which comes in-built. It also includes a tutorial for new users, which guides them during their first time with Emacs.
- Packaging system: With Emacs, you can download and install extensions since you it is equipped with a packaging system at your disposal.
- Enhanced functionality: Emacs is equipped with more than just text editing capabilities. It also has a project planner, mail service, a news reader, calendar, an IRC client and much more.
- Highly customizable: Emacs is a highly customizable text editor. This can be achieved by using the Emacs Lips code, or a graphical interface. Emacs also offers full Unicode support.
Installing Emacs on Linux and macOS
In this article, am going to show you how to install Emacs on Linux and macOS and how to use it. For Linux, I’ll touch on the popular Linux distributions such as Debian based, RHEL, Arch and Alpine. Let’s dive into it.
Install emacs on Debian-based distributions
Open a terminal and run the following command to install Emacs:
sudo apt update && sudo apt install emacsInstall emacs on RHEL-based distributions
For RHEL-based distributions, run the following commands:
# Fedora / RHEL 8+
sudo dnf install emacs

#CentOS / RHEL 7
sudo yum install emacs
Install emacs on Arch-based distributions
Open the terminal and run the following command:
sudo pacman -S emacsInstall emacs on Alpine Linux
Open your terminal and run the following command:
sudo apk add emacsInstall on macOS using Homebrew
Open your terminal and the command below to install Homebrew, if you haven’t already:
/bin/bash -c "$(curl -fsSL https://raw.githubusercontent.com/Homebrew/install/HEAD/install.sh)"After installing Homebrew successfully, run the following command to install Emacs:
brew install emacsUsing Emacs on Linux
1. Starting Emacs
To start using Emacs, execute the command emacs in your terminal:
$ emacsThe text-based version of Emacs starts with an empty buffer waiting, waiting for input from the user. The program displays a welcome message when Emacs is started without specifying a file to open.
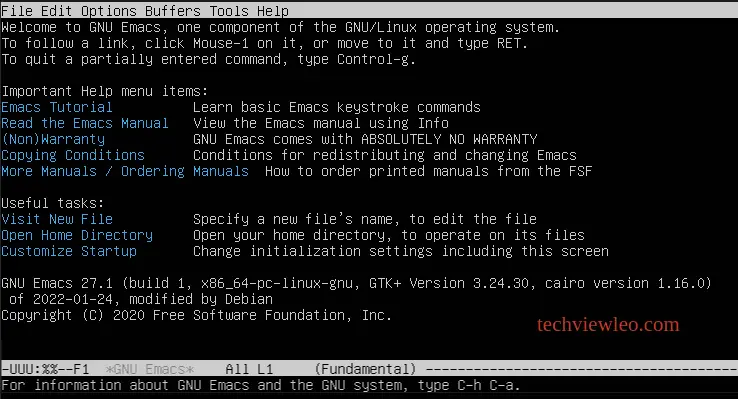
To create a new file, you have to move your cursor all the way to the link labeled “Visit New File” and the press enter. Use the arrow keys to move the cursor. When you press enter, a prompt appears at the end of the terminal, where you can input the name of the file you’d like to create:
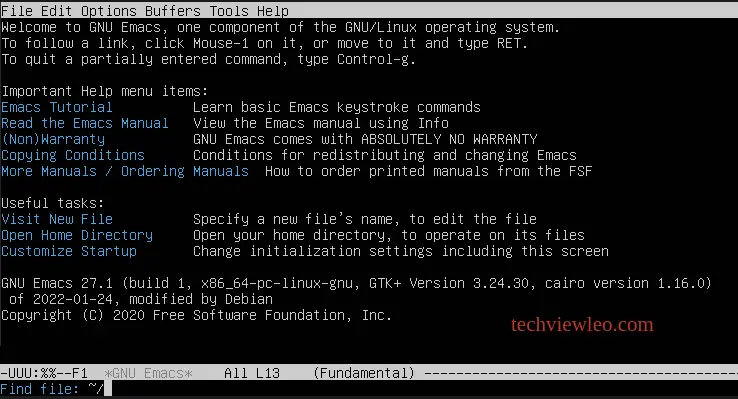
Enter a file name, for example newfile.txt and press enter. Emacs will create an empty file named newfile.txt and displays an editing window where you can type or view the content of your file.
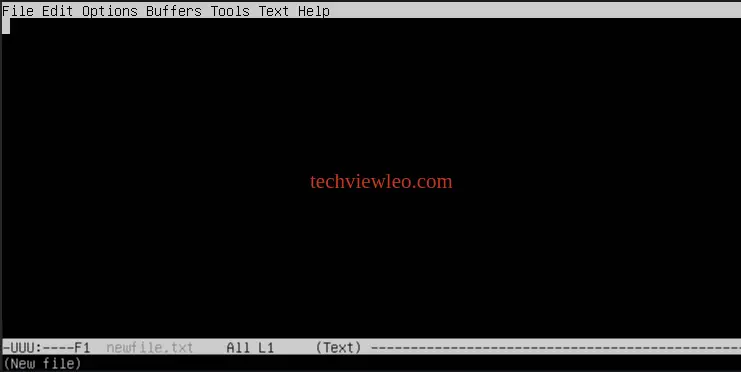
When using Emacs to edit an existing file, a copy of that file is loaded into memory and displayed in the buffer area. The buffer is the working space where all the changes made in the editing area are applied, while the original file on disk remains unchanged. Emacs may auto-save in the background, but the changes are only written to the disk when the document is manually saved.
The same applies to new files, where all changes are made in the buffer until it is saved. The main editing space in Emacs provides a view of the buffer. The status bar or mode line, displayed near the bottom of the screen, provides additional information about the editing session.
The status bar shows the name of the current file, position of the cursor, current editing mode, and the status of the file.
2. Emacs Menus
When dealing with text-based programs, the functionality of a mouse click goes out the window. What I mean is, you cannot access a menu by dropping it down as you would in a GUI-based program. Text-based programs usually have some designated keys for accessing such menus.
For Emacs, you can access the menus by pressing the F10 key, which opens another window above the main buffer. The window displays a list of options starting with the File Menu options. Scroll through the options using the UP and DOWN arrow keys.
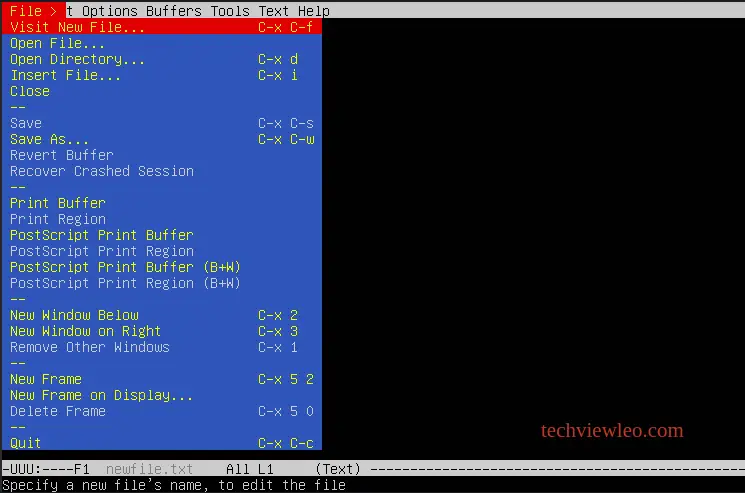
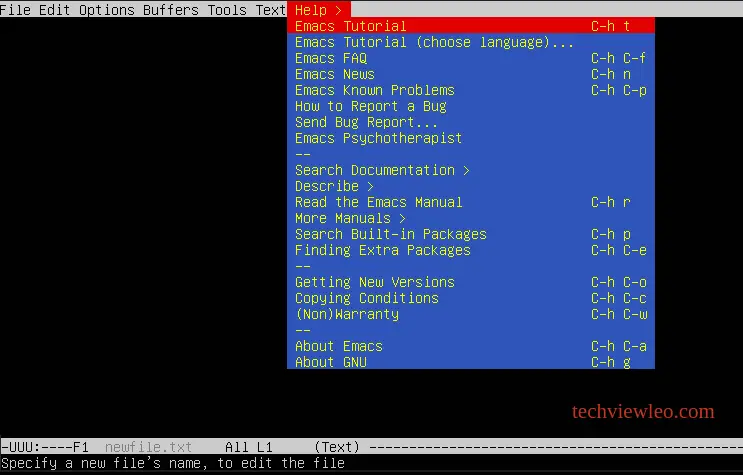
You can move between the different menu options using the RIGHT and LEFT arrow keys. You can access the HELP menu by scrolling to the Menu labeled ‘Help’. From the HELP menu, you can access all the relevant options such as the Emacs Tutorial:
3. Emacs Command Keys
In Emacs, command functions usually involve a combination of two or three keys. The most common key is the CTRL key, which is usually specified as ‘C’, for instance, when a command is specified as C-x and C-c, it means that you press CTRL+x followed by CTRL+c . Similarly, a command such as C-h t means that you press CTRL+H then followed by t.
The ALT and ESC keys are referred to as meta keys, which are also used in combination with other keys to issue commands in Emacs. In macOS, the OPTION key is used in place of ALT. The ENTER key is shown as RET, short for RETURN, and the ESC key is shown as E.
4. Basic Commands
Now that you are familiar with the key functions of Emacs, here is a cheat sheet for the basic commands:
| Key-Stroke | Function | Command-Line |
| C-x C-f | Open a file | M-x find-file |
| C-x i | Insert another file at the current cursor position | M-x insert-file |
| C-x C-s | Save current file | M-x save-buffer |
| C-x C-w | Save current file with another name | M-x write-file |
| C-x C-f | Open an additional file | M-x find file |
We had already opened a new file called newfile.txt, now lets insert another file called myfile.py to this file using the command C-x i. When you execute C-x i, you will be prompted to enter the name of the file you would like to insert.
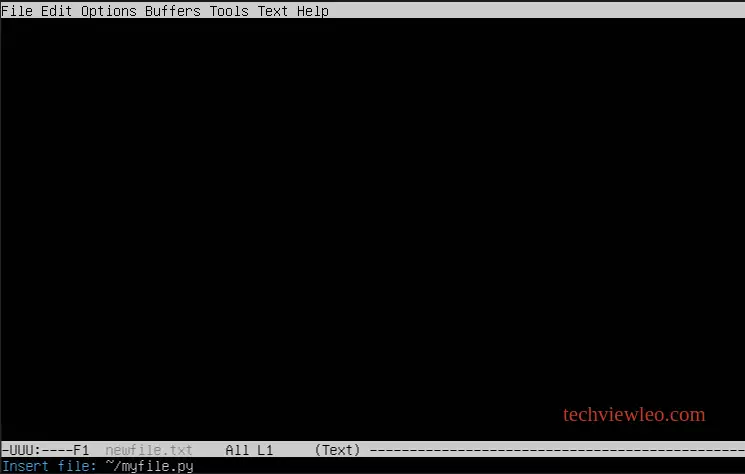
After typing in the name of the file and pressing enter, the contents of that file will be inserted into the current buffer at the current position of the cursor:
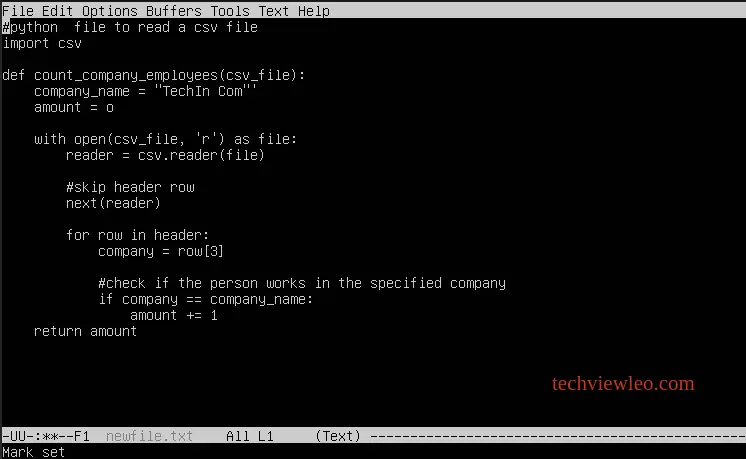
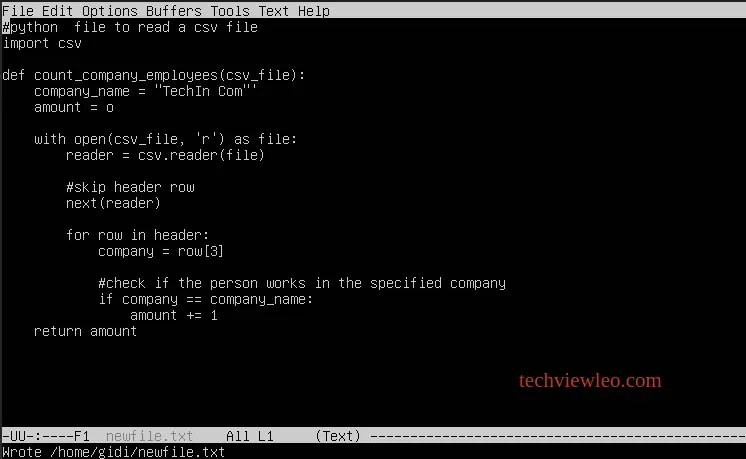
To save the changes we just made to the current file, we use the C-x C-s command and we can see the output at the bottom the window, showing that changes have been written to the file:
5. Moving among buffers
As we defined earlier, a buffer is the workspace/editor where we can view and edit the contents of a file. In Emacs, we can move between the open buffers, delete a buffer and list available buffers.
Here is the cheat sheet:
| Key-Strokes | Function | Command-Line |
| C-x b | Move to the previous buffer | M-x switch-to-buffer |
| C-x C-b | Display buffer list | M-x list-buffers |
| C-x k | Delete current buffer | M-x kill-buffer |
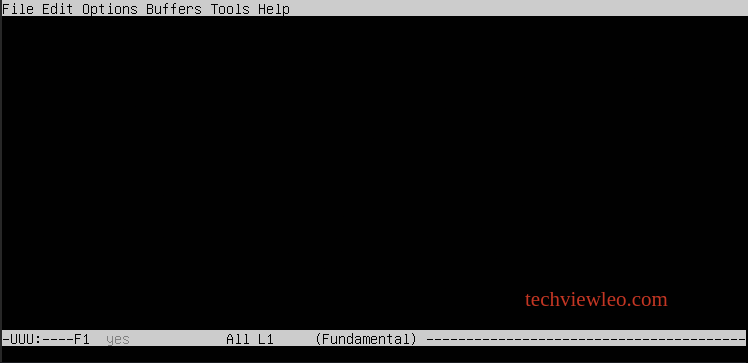
From the current buffer that we were operating in, we can switch to previous buffer, which is the empty buffer before we inserted myfile.py to the current buffer:
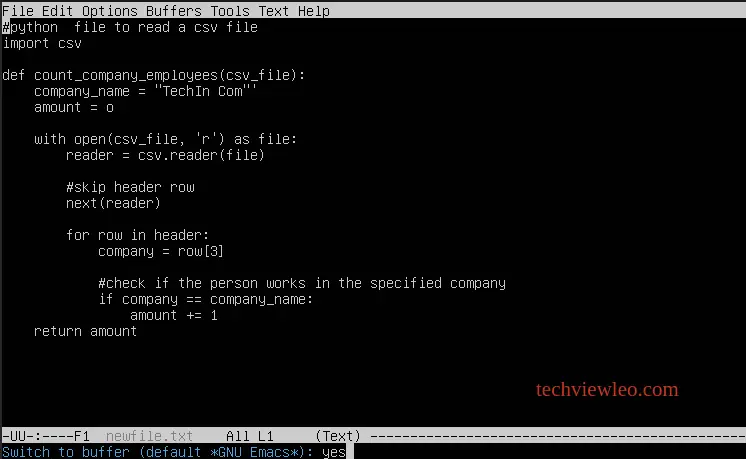
When you execute C-x b command, you are prompted whether you’d like to proceed and move to the previous buffer. You can type either ‘Yes‘ or ‘No‘:
When you type ‘Yes’ and press enter:
6. Using Emacs Windows
In Emacs, windows are the areas where buffers are displayed. Each window can show a different buffer, allowing you to work on multiple files simultaneously. Windows can be split horizontally or vertically, creating multiple side-by-side or stacked windows.
Here is a cheat sheet to guide you through navigating the windows:
| Key-Strokes | Function | Command-Line |
| C-x 2 | Create two windows | M-x split-window-vertically |
| C-x o | Move to the other window | M-x other-window |
| C-x 0 | Delete the current window | M-x delete-window |
| C-x 1 | Delete all the other windows except the current one | M-x delete-other-windows |
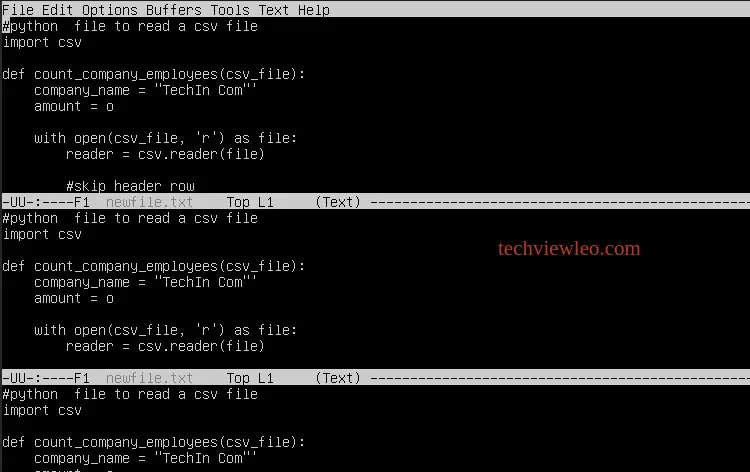
To split the current window, use the C-x 2 command. You can execute it multiple times if you want to create more than two windows:
To switch to the other window from the current one, use C-x o command. The switch is shown by the change in position of the cursor from the first window, to the second:
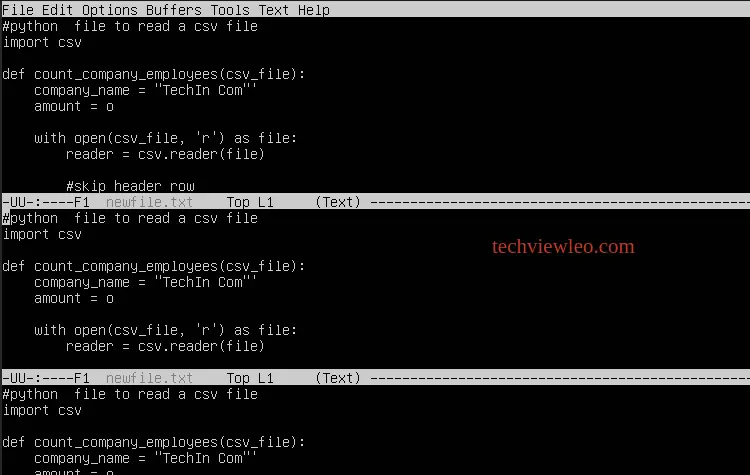
You can ahead and try out the rest of the window commands and see the outcome. So an going to delete all other windows except for the first one, since am still using it:
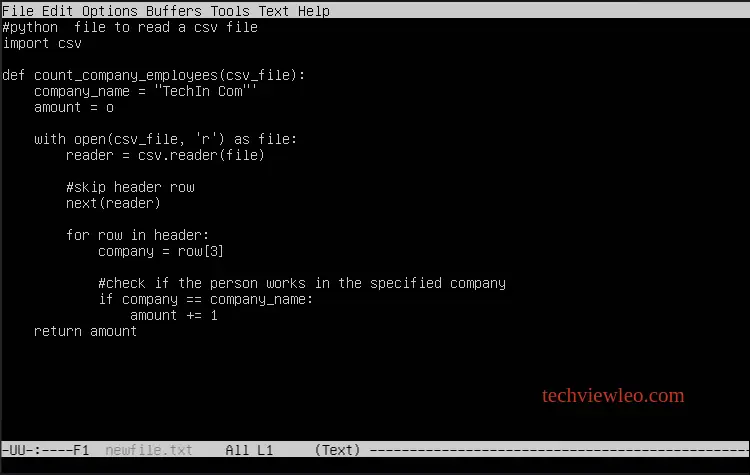
7. Moving around the buffer
In Emacs, moving around the buffer is achieved using the following commands:
| Key-Strokes | Function | Command-Line |
| M-< | Move to the beginning of the buffer | M-x beginning-of-buffer |
| M-> | Move to the end of the buffer | M-x end-of-buffer |
| C-f | Move forward one character | M-x forward-char |
| C-b | Move backward one character | M-x backward-char |
| C-n | Move down one line | M-x next-line |
| C-p | Move up one line | M-x previous-line |
| M-f | Move forward one word | M-x forward-word |
| M-b | Move backward one word | M-x backward-word |
| C-e | Move to the end of a line | M-x end-of-line |
| C-a | Move to the beginning of a line | M-x beginning-of-line |
To be able to work fast and efficiently using Emacs, you need to have these commands on your fingertips. Let’s start with moving to the beginning and end of the buffer. We use M-< to move to the beginning and M-> to move to the end:
Keep in mind that ‘M‘ is short for the ALT key:
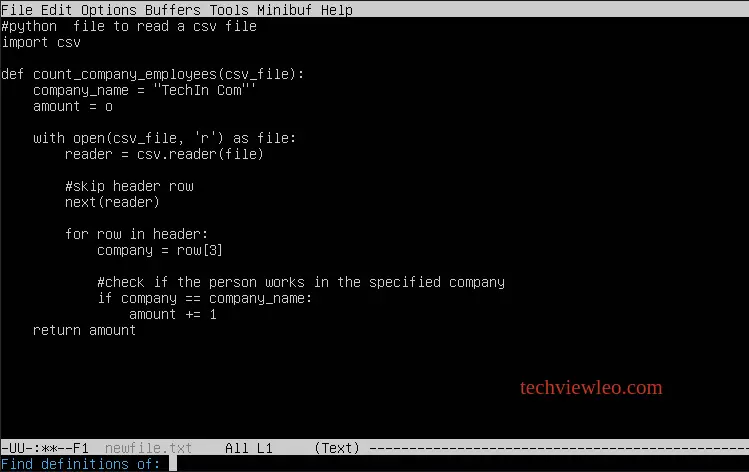
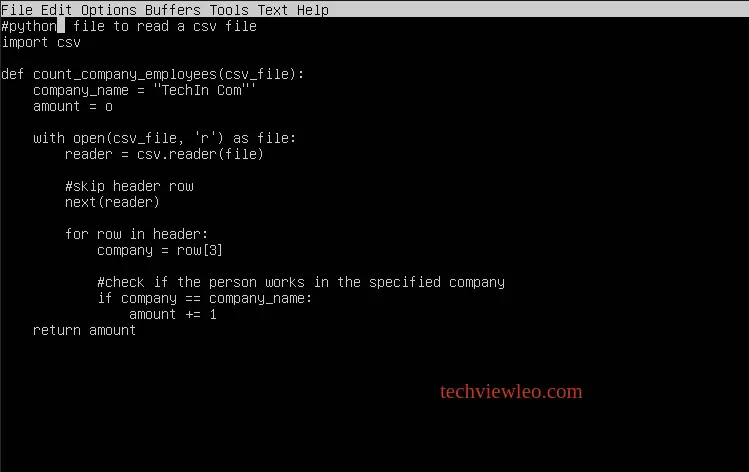
Instead of moving by characters, you can also move word by word, either forward or backward. The command M-f is used to move forward by one word and M-b is used for moving backward by one line:
All of the buffer operations can be performed using the arrow keys. It’s only a matter of preference.
8. Editing commands
Emacs provides a wide range of functions and features for text editing, allowing users to navigate and edit text efficiently and effectively.
Cutting(deleting) Text
Here is the cheat sheet for Cutting and deleting texts:
| Key-Strokes | Function | Command-Line |
| C-d | Delete character | M-x delete-char |
| DEL/BACKSPACE | Delete previous character | M-x delete-backward-char |
| M-d | Delete word | M-x kill-word |
| M-DEL/M-BACKSPACE | Delete previous word | M-x backward-kill-word |
| C-k | Delete the entire line | M-x kill-line |
Most of these operations are very straightforward and don’t need any demonstrations, so lets move on to marking the text you’ll be deleting, moving or copying.
Marking/Highlighting Text
Highlighting is a common operation which is useful in specifying the part of the text you’ll be performing changes to. When you want to delete, move, or copy a large chunk of the text, you will highlight it first. So here is the cheat sheet for marking text in Emacs:
| Key-Strokes | Function | Command-Line |
| C-@ or C-SPACEBAR | Mark the beginning of selection | M-x set-mark-command |
| C-w | Delete the marked region | M-x kill-region |
| M-w or C-INSERT | Copy a marked region | M-x kill-ring-save |
| C-y | Paste a copied region | M-x yank |
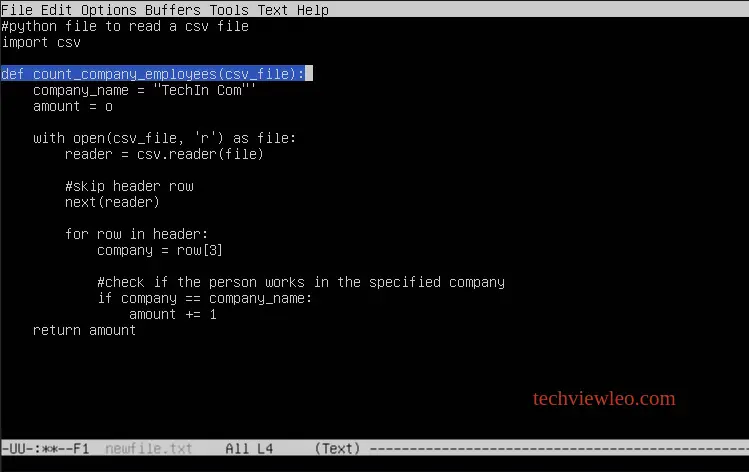
- 1. To mark the beginning of a selection, use CTRL+@ or CTRL+SPACEBAR then start selecting using the RIGHT and LEFT arrow keys:
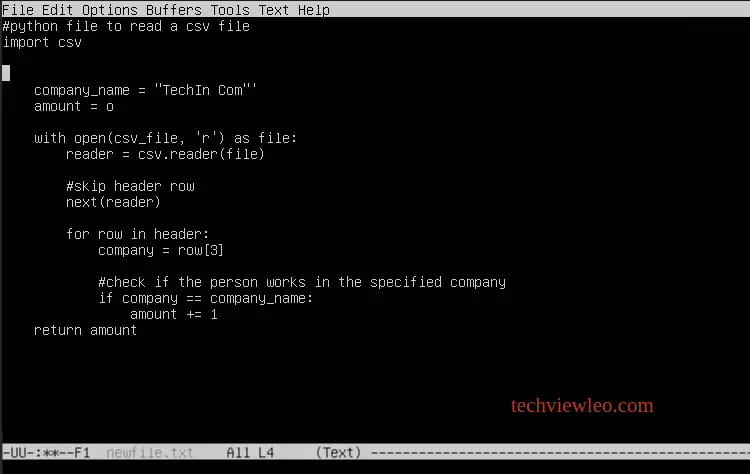
- 2. Once you have selected a region, you can delete it using the BACKSPACE key or the CTRL+w command.
- 3. You can also copy the selection using ALT+w and paste it using CTRL+y.
Searching Text
When searching for text in Emacs, there are several commands and techniques you can use. Here is a summary of the search operations and the commands involved:
| Key-Strokes | Function | Command-Line |
| C-s | Incremental Search forward | M-x isearch-forward |
| C-r | Incremental search backward | M-x isearch-backward |
| C-s ENTER | Non-incremental search | *None |
| C-g | Cancel incremental search | M-x keyboard-quit |
| M-s w | Word search | *None |
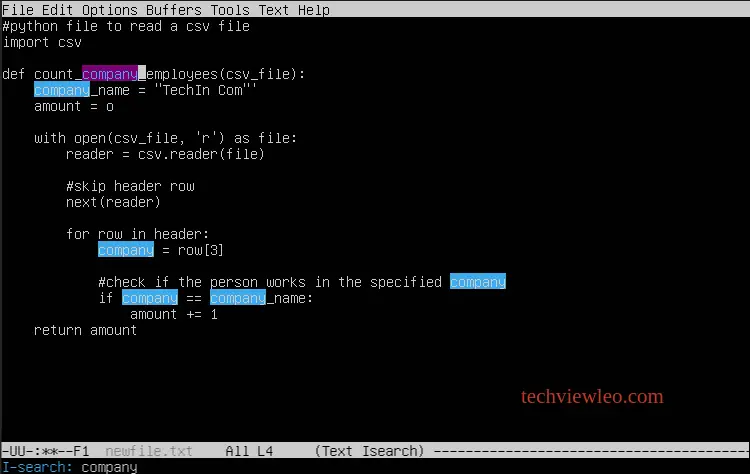
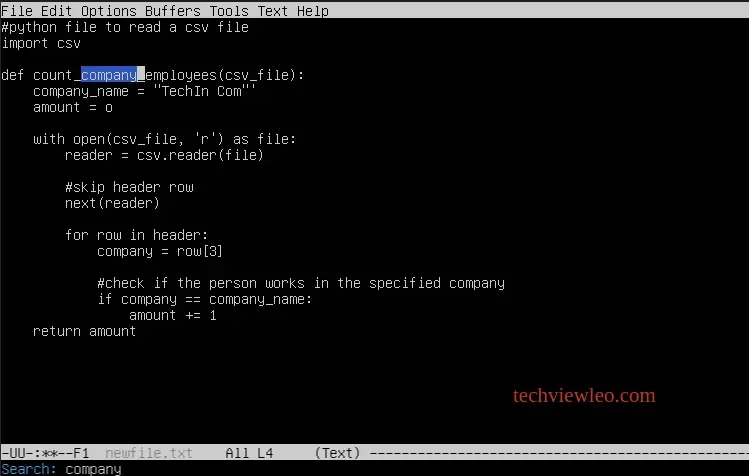
To initiate an incremental search in Emacs, press CTRL+s and input the text to search in the prompt at the bottom of the buffer. The text to search is highlighted starting from the current cursor position going forward:
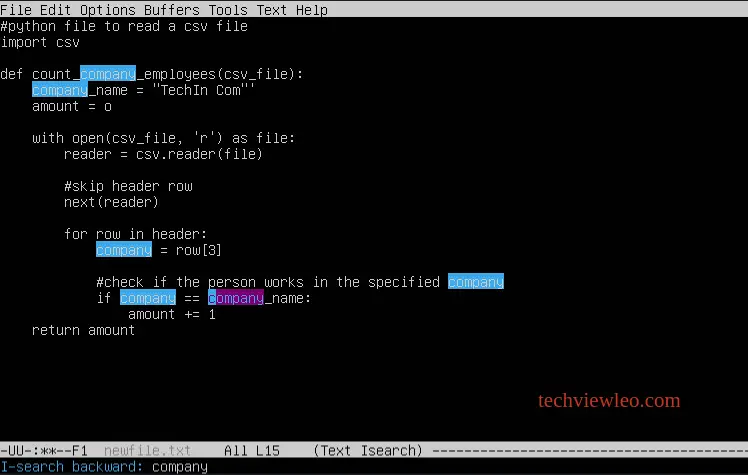
You can also perform an incremental search backward. A backward incremental searches the whole buffer backwards starting from the cursor position going backwards. Here the cursor was positioned at the end of the buffer:
For a non-incremental search, use CTRL+s followed by ENTER. A non-incremental search performs the search and stops after the first occurrence of the text. Also, the search only occurs after you press the ENTER key.
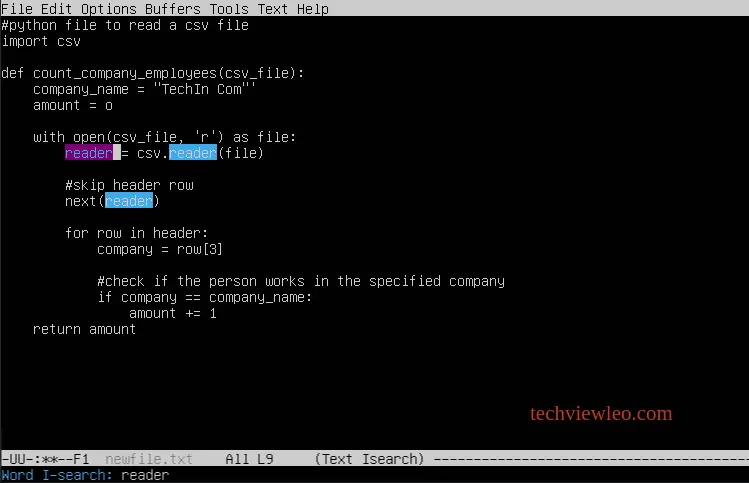
To perform a word search, press ALT+s followed by w :
9. Entering Modes
In Emacs, modes are sets of definitions that customize Emacs behavior in useful ways. There are two types of modes: major modes and minor modes. Major modes are used for editing or interacting with a particular kind of text, while minor modes provide features that users can turn on and off while editing. Each buffer has exactly one major mode at a time. Major modes are language or task-specific, while minor modes are smaller and less specific utilities that cut across many tasks.
Entering Major Mode
Major modes provide specialized facilities for working on a particular file type, such as a C source file, or a particular type of non-file buffer, such as a shell buffer. Emacs has specialized major modes for many programming languages, and these modes typically specify the syntax of the language.
Here is a list of all the available Major modes in Emacs:
- python-mode
- c-mode
- text-mode
- java-mode
- shell-script-mode
- html-mode
- perl-mode
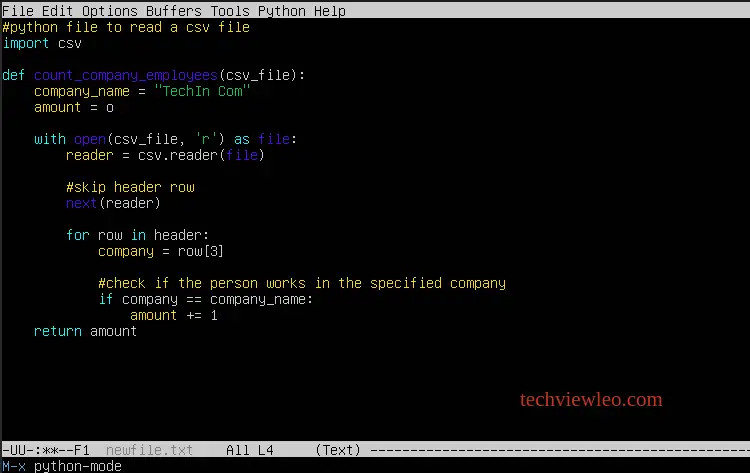
To enter any of the major modes, execute ALT+x and then input the mode for example , python-mode to enter and press ENTER. To demonstrate, we will use the file we already have and since it is a python file, let’s try to enter python mode. Once we enter the mode, the syntax highlighting for python will be applied when the buffer recognizes the text.
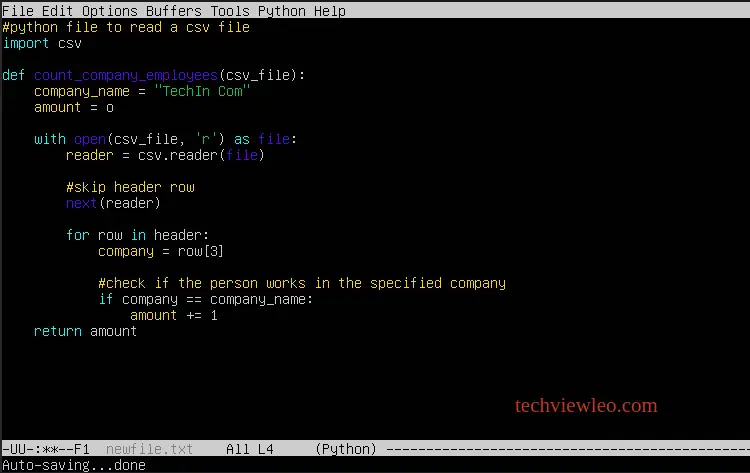
You can see that from the status bar, the buffer mode changes from text-mode to python-mode.
Entering Minor Mode
Minor modes in Emacs offer more specific features than major modes. Unlike major modes, there can be multiple minor modes in effect at any one time. Some minor modes are enabled by default, while others are not. If a minor mode is already on, calling it will switch it off, and if it is off, it will be switched back on.
Minor modes are like switches that can be turned on or off independently of the major mode. Most minor modes are disabled by default, but some are enabled by default. Most buffer-local minor modes indicate in the mode line when they are enabled, while global minor modes affect everything you do in the Emacs session, in all buffers.
These are some examples of the minor modes in Emacs:
- auto-save-mode: This turns on the feature that periodically auto-saves content to the main buffer.
- column-number-mode: Shows the current position if the cursor in the status bar.
- line-number-mode: Turns on the display of the current line number in the status bar.
- overwrite-mode: Turns on the feature that overwrites text on the right side of the cursor as you type.
- menu-bar-mode: Switches the main menu on and off.
- linum-mode: Turns on the display of line numbers along the left edge of the window.
Recommended Linux Books to read:
- Best Linux Books for Beginners & Experts
- Best Linux Bash Scripting Books
- Top RHCSA / RHCE Certification Study Books
- Best Top Rated CompTIA A+ Certification Books
- Best LPIC-1 and LPIC-2 certification study books
Conclusion
Emacs is a versatile and powerful text editor that has been in development for over 40 years. It is cross-platform, open-source, and can be used for a wide range of tasks, from editing configuration files to programming and document processing. Understanding how to use this powerful editor can greatly improve your productivity on Linux.
More guides to check out:

