
Fedora is a community-built operating system that runs on desktop computers, laptops, servers, cloud computing, edge devices, and pretty much everything else you can imagine. The most recent version of Fedora is Fedora Linux 39, equipped with multiple novel functionalities and enhancements and it runs on the Linux kernel 6.5.
Fedora Linux 39 is available in several flavors, including;
- Fedora Workstation 39: Fedora Workstation is a well-designed, user-friendly desktop and laptop operating system that comes with a full suite of tools for developers and manufacturers of all stripes. The leading Linux Desktop.
- Fedora Server 39: This is a community server OS, a powerful and very flexible operating system that comes equipped with the most advanced and effective data center technologies. It is perfectly capable of running server applications.
- Fedora Cloud: Fedora Cloud Edition is a powerful and basic operating system image that may be customized for a variety of private and public cloud applications. It is meant for lightweight VM environments.
- Fedora CoreOS: This is the container optimized OS. It is an automatically updating minimal, container-focused operating system.
- Fedora Onyx: Version 39 brings a new edition, Fedora Onyx, an immutable variant built around the Budgie desktop, which expands Fedora’s immutable options and pairs well with Fedora Budgie Spin and features a Budgie Desktop environment.
New Features
- GNOME 45: Fedora’s Workstation 39 features GNOME 45 as the main theme, which brings new Adwaita styles with split headerbars and enhanced system settings dialogs, giving your desktop a refined makeover.
- Linux Kernel 6.5: Fedora 39 ships with Linux Kernel 6.5, bringing many performance improvements, security enhancements, and hardware support. This means better compatibility with the latest hardware and a smoother and more secure computing experience.
- No custom Qt theming: Fedora workstation uses QGnomePlatform and Adwaita-qt packages to make the Qt applications look like GNOME apps. Thus, while the Qt apps could have a slightly different appearance, they should be reliable and free of bugs.
- Fedora on Azure Cloud: Fedora 39 now offers an official Fedora Cloud image on Azure, opening up a world of possibilities for Fedora users in the cloud.
- Auto Updates: Plasma Discover now supports automatic updates through rpm-ostree staged updates. This guarantees that your system remains safe and current and allows you to easily obtain bug patches and upgrades as they become available in this unchangeable Fedora-spin with KDE Plasma.
- Fedora Onyx: Fedora Onyx is an immutable variant built around the Budgie desktop, which expands Fedora’s immutable options and pairs well with Fedora Budgie Spin and features a Budgie Desktop environment.
- Colorful Bash: A colored shell prompt. Say goodbye to monochromatic instructions and welcome to a more aesthetically pleasing and intuitive interface. You can even alter it to suit your preferences!
Installing Fedora Linux 39 – Complete Steps With Screenshots
Follow the steps provided in the subsequent sections to have a working installation of Fedora 39 Linux distribution in your hardware.
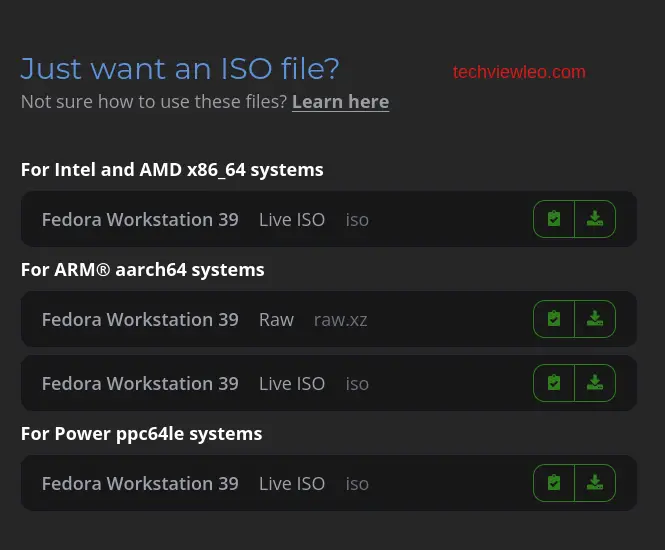
Step 1: Download Fedora 39 ISO image
You can pull Fedora 39 ISO from Downloads page. Choose the ISO image that fits the CPU architecture of your system.
Step 2: Create a Installation media
Write the ISO image to a USB stick to create an installation media. For this tutorial, we’ll use balenaEtcher, as it runs on Linux, Windows and Mac OS. Choose the version that corresponds to your current operating system, download and install the tool.
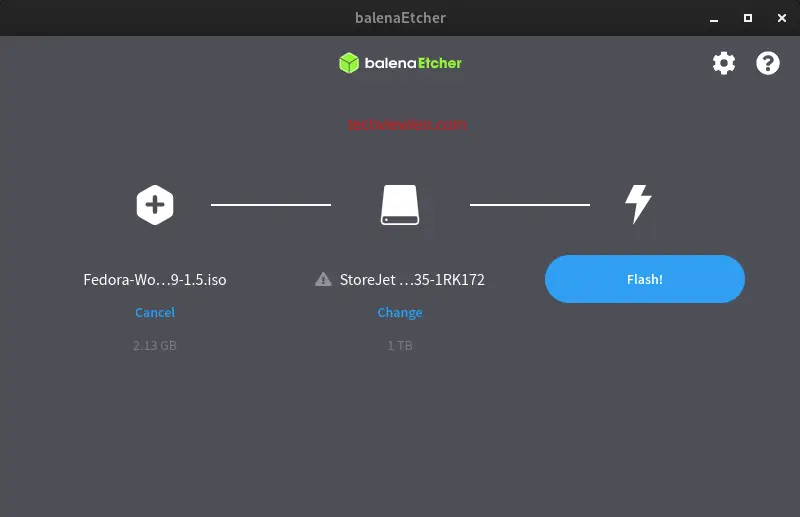
After successful installing the tool, select you ISO image and click the flash button to flash the image.
For installation in a Virtualization environment, create VM template and attach ISO image to begin OS install.
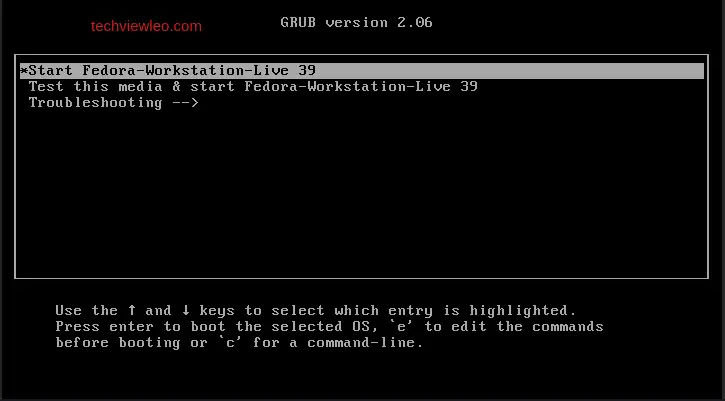
Step 3: Boot from the USB disk
Insert the USB flash drive into the laptop or PC you want to use to install Fedora 39 and boot or restart the device. It should recognize the installation media automatically. If not, try holding F2 or F10 during startup and selecting the USB device from the system-specific boot menu. Press the enter key to proceed to the next step:
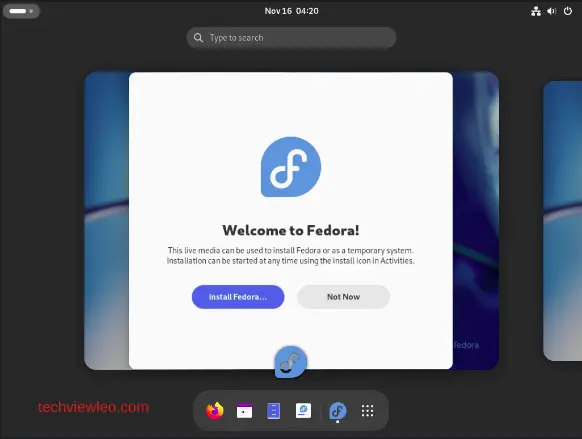
You will be greeted with a Welcome window by Fedora immediately you boot into Fedora Workstation. Click on [Install Fedora] button on your left to begin the installation.
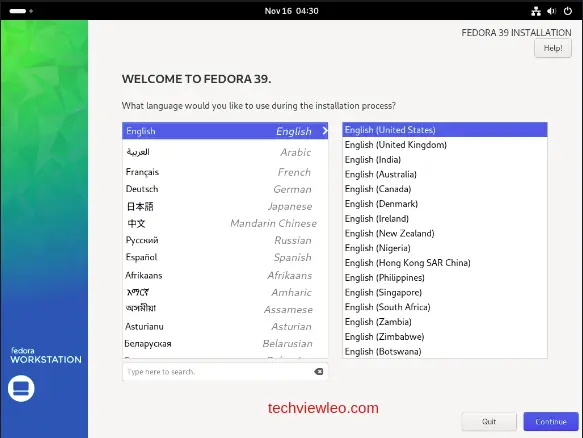
Select the language you’d like toy use during the installation. This language will also be set as the default language for your system if you don’t change it.
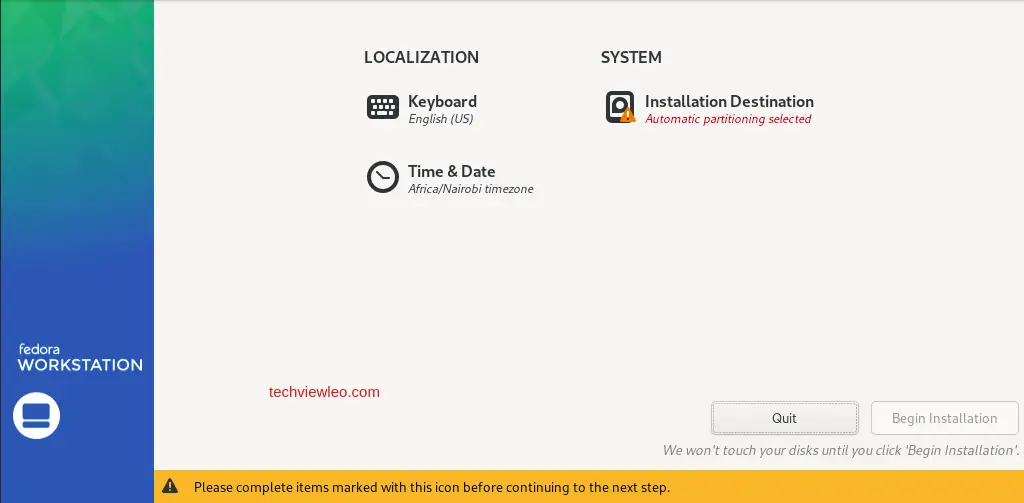
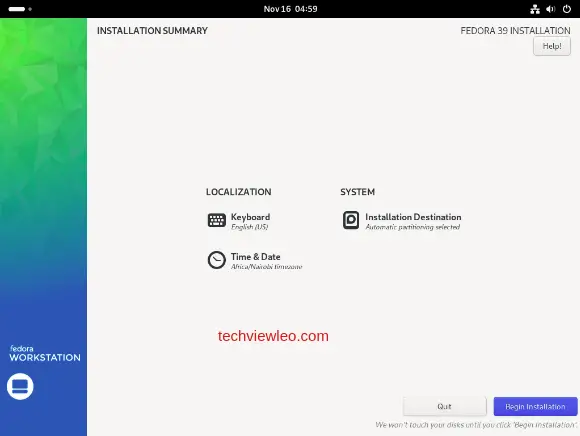
This next page, is the default Installation Summary section for some basic configurations. On this example, Configure Keyboard Map on [LOCALIZATION] category, Click [Keyboard] icon.
Click [+] button on under-left.
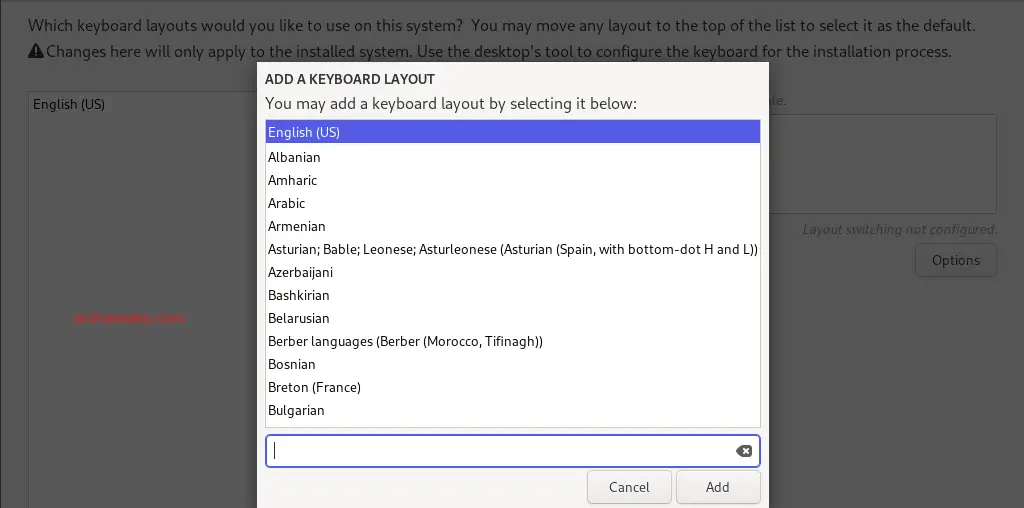
Select your usage keyboard type on the list and click [Add] button. After adding keyboard layout, Click [Done] button which is upper left to finish. Back to the default Installation Summary section, set your timezone, Click [Time & Date] icon. Click a point on the map you’d like to set your timezone and push [Done] button which is on the upper left.

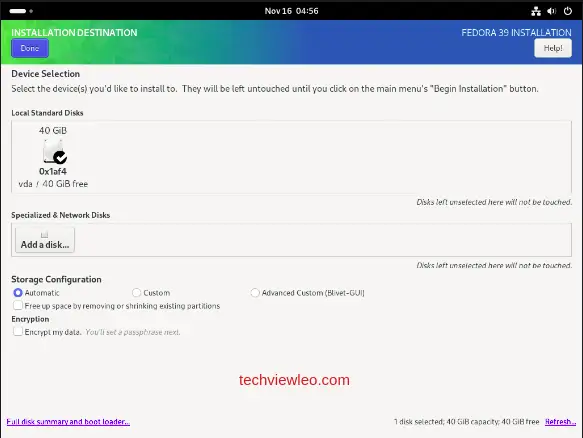
Go back to the default Installation Summary section, and click [Installation Destination] icon to select a disk you install Fedora. If you’d like to edit the partition layouts manually, select [Custom] on the [Storage Configuration] section, but if you select [Automatic] on it, partitioning are automatically done. Then partitioning is configured as [/boot], [/], [/home], [swap]. If That’s OK all, Click [Done] button that is upper-left to finish disk configuration.
Confirm Selections and If that’s OK all, Click [Begin Installation] to install Fedora.
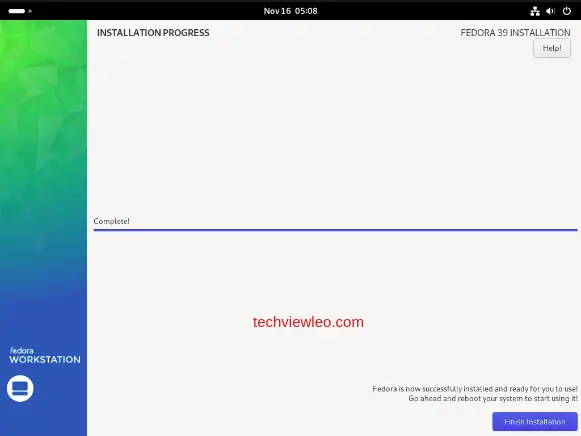
After finishing Installation, Click [Finish Installation] button on the lower right and reboot your system from the terminal.
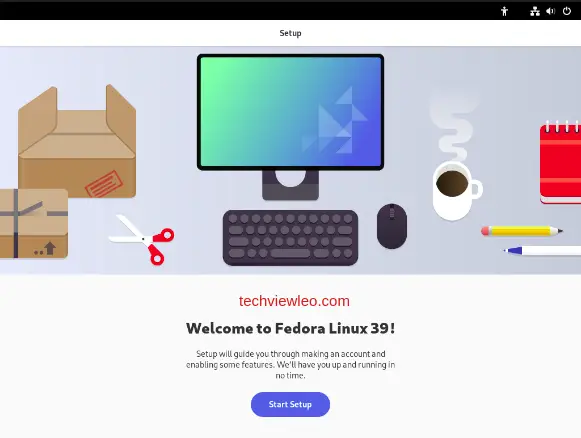
Step 4: Setup Fedora Linux 39
When you reboot your new Fedora 39 system, the first thing you’ll see is the setup prompt. Click on [Start Setup] to proceed.
We’ll start with the privacy settings. You can allow apps to determine your geographical location or not. You can change these privacy settings from the settings app at any time, so don’t worry too much.

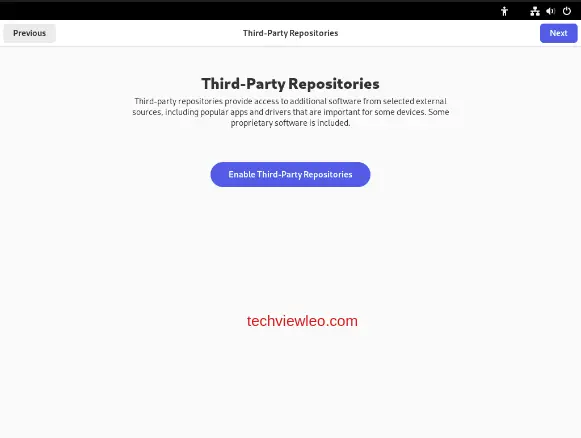
Next, you are prompted whether you want to enable third party repositories. Third-party repositories provide access to additional software from selected external sources which include popular apps and drivers crucial to some devices.
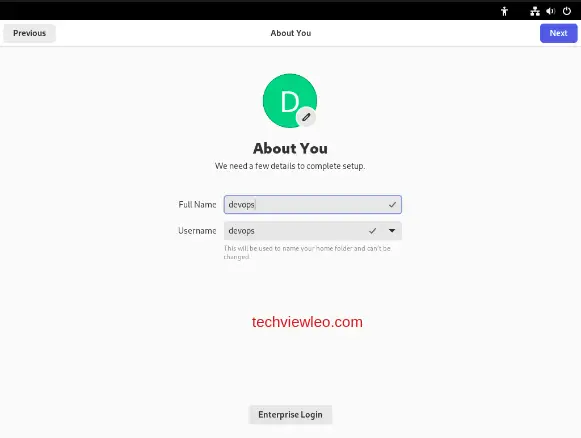
Provide your name and username in the next [About You] page.
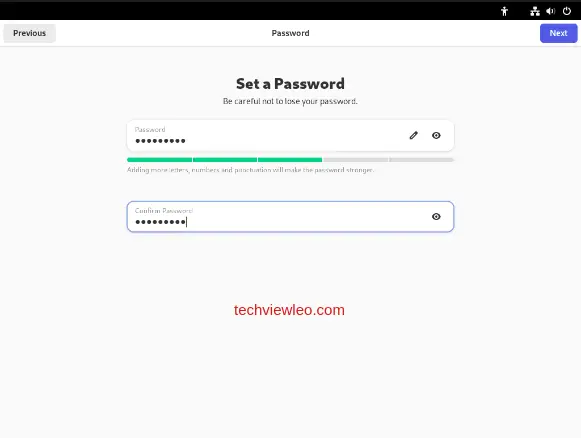
Input the password you’d like to use for your account and confirm it just below. Be careful not to lose your password, remember it, you can even write it down somewhere.
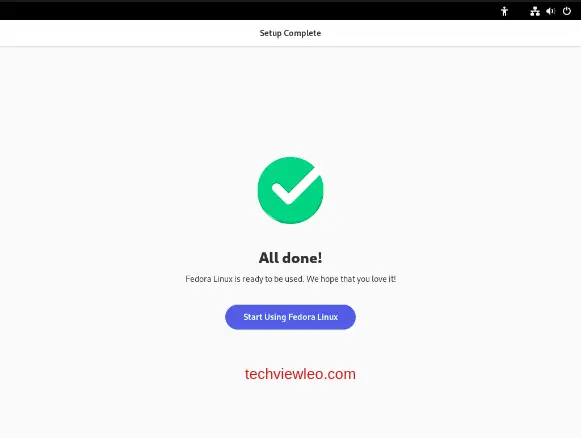
You are all done and ready to start using Fedora Linux 39. Click on [Start Using Fedora Linux] and proceed to explore your new Fedora 39 system.
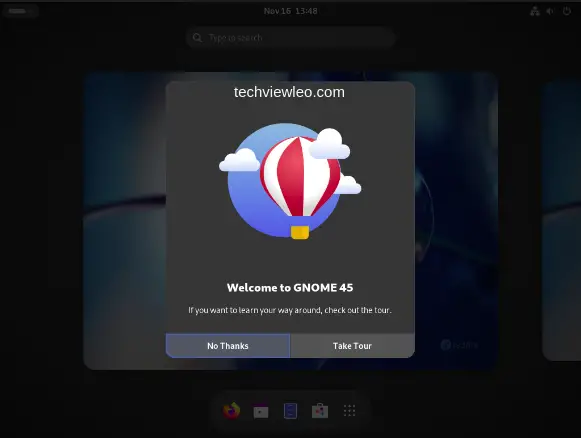
You’ll be prompted whether you’d like to take a tour of the new GNOME 45, and it’s up to you, good luck.
You have successfully installed Fedora 39. Go ahead and start your journey.
Conclusion
When installing Fedora Linux on a Virtual Machine or Physical server hardware, you have the option of choosing the Fedora server edition if you are not interested in Desktop Environment and other GUI tools. Once Fedora server edition is installed, a Desktop Environment of your choice is installable at any time. For users new to Linux, we recommend you start with the desktop version for ease of use and general system administration. We hope this article was helpful.


