Docker is a tool that allows one to build, debug and deploy applications easily by using containers. It provides a lightweight environment to deploy and run an application. Docker swarm is a group of physical or virtual machines running the docker application and have been joined in a cluster. When joined one can issue a command to be executed by machines in the cluster. All these activities are controlled by a swarm manger and the joined machines are nodes.The key benefits of Docker swarm mode are; container self-healing, container scale up and scale down, load balancing service discovery and rolling updates
Both Docker and Kubernetes are container Orchestration tools. They share the following similarities:
- They both get daily contributions from the Global community
- They both receive regular updates by CNCF.
Docker and Kubernetes being similar in some way, they have the following differences.
| Docker | Kubernetes |
| 1.Does not have a web UI. Uses third party tools i.e portainer | 1. Has an easy web interface |
| 2. Easy installation, install Docker Engine and assign IPs and opening ports | 2. Involves installing Kubectl first |
| 3. Deploy and define applications using predefined swarm files | 3. Deployment involves describing declarative updates while updating Pods and ReplicaSets |
| 4. Deploys containers quickly making orchestration faster | 4. Scaling involves creating new pods and it to nodes with available resources |
| 5. Does not offer a monitoring solution out-of-the-box | 5. Offers multiple native logging and monitoring solutions |
From the above comparison there are differences between the two tools. But in the end, they both solve challenges to digital transfomation.
This article demonstrates how to Setup Docker Swarm Cluster on Rocky Linux 8.
Step 1: Set up Pre-requisites
In this guide, we will need 3 servers, one as a Docker manage. Go to /etc/hosts file on all the servers and add the line below replacing the IP_Addresses and Hostnames with your own.
$ sudo vi /etc/hosts
192.168.1.27    dockermanager.example.com   dockermanager
192.168.1.26    node1.example.com         workernode1
192.168.1.30    node2.example.com         worke
Uninstall older version
If we have older versions of docker, we need to uninstall them before we install a new version with their associated dependencies on all servers.
sudo dnf remove -y docker-common docker container-selinux docker-selinux docker-engineInstall Dependencies
Then install docker dependencies on all servers as shown below:
sudo dnf install -y lvm2 device-mapper device-mapper-persistent-data device-mapper-event device-mapper-libs device-mapper-event-libsStep 2: Install Docker Engine
Now we proceed and install Docker Engine on the 3 Rocky / AlmaLinux servers through the following steps:
Add Docker Repository
Here, we need to add the required Docker repositories to our systems before we can install docker engine:
sudo dnf install -y dnf-utils
sudo dnf config-manager --add-repo https://download.docker.com/linux/centos/docker-ce.repo
Install Docker Engine
With repositories added, we are set to install Docker Engine.
sudo dnf install -y docker-ce docker-ce-cli containerd.ioOn all the nodes, start and enable the service to run on boot as below.
sudo systemctl start docker
sudo systemctl enable docker
Step 3: Open firewall ports
After installing Docker Engine on the servers, we need to make some changes to the firewall to allow traffic to specific ports.
On Docker Manager
On the docker manager server, run the command below to allow the specified ports.
sudo firewall-cmd --permanent --add-port={2376,2377,7946,4789,80}/tcp
sudo firewall-cmd --reload
Now restart Docker service to apply the changes.
sudo systemctl restart dockerOn Worker Nodes
We have to run the same firewall-cmd command on both nodes, but without the cluster management port since these are the worker nodes.
sudo firewall-cmd --permanent --add-port={2376,7946,4789,80}/tcp
sudo firewall-cmd --reload
Now restart Docker service on the nodes.
sudo systemctl restart dockerStep 4: Start Docker Swarm
To initialize docker swarm Init, execute the following command on the Docker Manager server. Don’t forget to replacing the ip_address with the address of your Docker manager.
sudo docker swarm init --advertise-addr 192.168.1.27Sample output:
$ sudo docker swarm init --advertise-addr 192.168.1.27
Swarm initialized: current node (mbiap5ii2psyzozoun3553d8c) is now a manager.

To add a worker to this swarm, run the following command:

    docker swarm join --token SWMTKN-1-64b7zlw8w0vas81kyzsw5vzccw220rg5ggv6gc9wlj07jib27z-cwajjmlcadxbrf8e4e4fn8h7u 192.168.1.27:2377

To add a manager to this swarm, run 'docker swarm join-token manager' and follow the instructions.
Run the command below to list all the nodes in your cluster, as well as check the status of your docker manager.
$ sudo docker node ls
ID                            HOSTNAME        STATUS    AVAILABILITY   MANAGER STATUS   ENGINE VERSION
mbiap5ii2psyzozoun3553d8c *   dockermanager   Ready     Active         Leader           27.0.3
Alternatively, you can use docker info to view the status of docker swarm.
$ sudo docker info
Client: Docker Engine - Community
 Version:    27.0.3
 Context:    default
 Debug Mode: false
 Plugins:
  buildx: Docker Buildx (Docker Inc.)
    Version:  v0.15.1
    Path:     /usr/libexec/docker/cli-plugins/docker-buildx
  compose: Docker Compose (Docker Inc.)
    Version:  v2.28.1
    Path:     /usr/libexec/docker/cli-plugins/docker-compose

Server:
 Containers: 0
  Running: 0
  Paused: 0
  Stopped: 0
 Images: 7
 Server Version: 27.0.3
 Storage Driver: overlay2
  Backing Filesystem: extfs
  Supports d_type: true
  Using metacopy: false
  Native Overlay Diff: true
  userxattr: false
 Logging Driver: json-file
 Cgroup Driver: systemd
 Cgroup Version: 2
....
Step 5: Add Nodes to the swarm cluster
With the Docker manager configured, we now need to add nodes to our created swarm. We join the cluster using the token issued earlier after running sudo docker swarm init --advertise-addr 192.168.1.27
Run this command on each node.
$ sudo docker swarm join --token SWMTKN-1-64b7zlw8w0vas81kyzsw5vzccw220rg5ggv6gc9wlj07jib27z-cwajjmlcadxbrf8e4e4fn8h7u 192.168.1.27:2377
This node joined a swarm as a worker.
Now with nodes added sucessfully, verify the status by running this command on Docker manger.
$ sudo docker node ls
ID                            HOSTNAME        STATUS    AVAILABILITY   MANAGER STATUS   ENGINE VERSION
mbiap5ii2psyzozoun3553d8c *   dockermanager   Ready     Active         Leader           27.0.3
ssg784ymr9kj1l6ibmaj1p2ed     node1           Ready     Active                          27.0.3
gremhhuyltdv7qdcmxuwsxb9n     node2           Ready     Active                          27.0.3
Step 6: Launch service in Docker Swarm
In Docker swarm, containers are replaced with tasks and launched as a service. For example in this instance, I want to create a service called webserver with 5 containers and state of containers inside the service to be 5.
$ sudo docker service create -p 80:80 --name webserver --replicas 5 httpd
tp0vqj86vdmu3s1cugz9kx8d7
overall progress: 0 out of 5 tasks
1/5: preparing [=================================>                 ]
2/5: preparing [=================================>                 ]
3/5: preparing [=================================>                 ]
4/5: preparing [=================================>                 ]
5/5: preparing [=================================>                 ]
overall progress: 5 out of 5 tasks
1/5: running
2/5: running
3/5: running
4/5: running
5/5: running
verify: Service converged
In this case, a service “webserver” has been created with a desired stateof tasks is 5 and will be launched from docker image “httpd”. We can list the service by running this on Docker manager.
$ sudo docker service ls
ID             NAME        MODE         REPLICAS   IMAGE          PORTS
tp0vqj86vdmu   webserver   replicated   5/5        httpd:latest   *:80->80/tcp
To view the status of the service, issue this:
$ sudo docker service ps webserver
ID             NAME          IMAGE          NODE            DESIRED STATE   CURRENT STATE            ERROR     PORTS
8bxuwkz6szmt   webserver.1   httpd:latest   node2           Running         Running 16 minutes ago
q4vq8ngc7r31   webserver.2   httpd:latest   node1           Running         Running 16 minutes ago
d0wteptnluql   webserver.3   httpd:latest   node2           Running         Running 16 minutes ago
om3ddjgo35ht   webserver.4   httpd:latest   dockermanager   Running         Running 16 minutes ago
y45isuxb6bgl   webserver.5   httpd:latest   node1           Running         Running 16 minutes ago
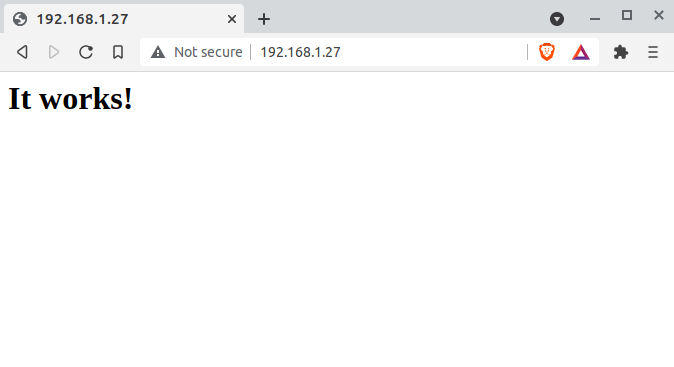
Now we know that the service is running across all nodes including the docker manager. Lets see if we can access it using a web browser from http:// 192.168.1.27 or http:// 192.168.1.26 or http:// 192.168.1.30 . Replace these IPs with your own.
The web should look like this:

Step 7: Scaling your microservices
One of the features of Docker swarm is scaling up and down of services. This can be done easily uisng the docker service scale command.
Scale down a service in Docker swarm
Using the previous created task webserver, lets scale it down to 3 containers, by running the following command:
sudo docker service scale webserver=3Sample output:
[rockylinux@dockermanager ~]$ sudo docker service scale webserver=3
webserver scaled to 3
overall progress: 3 out of 3 tasks
1/3: running
2/3: running
3/3: running
verify: Service converged
Scale up a service in Docker swarm
Now, let’s try scaling up the service to 6 containers by running the comand below:
sudo docker service scale webserver=6Sample output:
[rockylinux@dockermanager ~]$ sudo docker service scale webserver=6
webserver scaled to 6
overall progress: 6 out of 6 tasks
1/6: running
2/6: running
3/6: running
4/6: running
5/6: running
6/6: running
verify: Service converged
From this guide, we have learned how to install and configure docker swarm. We have also demonstrated the amazing features of docker swarm. I hope this article was of importance. CloudSpinx Engineers are available to help out with any container related work, don’t hesitate to reach out to us.


