“Infrastructure as Code” is a best practice tool used in DevOps and cloud computing these days. Rather than setting up cloud infrastructure by hand, “Infrastructure as Code” tools let you create infrastructure such as servers, networks, storage, Kubernetes environments, and services in a configuration file. Two of the most popular tools used for “Infrastructure as Code” are Terraform and OpenTofu.
Terraform, developed by HashiCorp, is one of the most commonly used infrastructure automation tools in the industry. It offers a unified workflow for managing infrastructure on a wide range of cloud platforms including AWS, Azure, Google Cloud, OpenStack, VMware, and many others. Terraform is a robust tool with an efficient state management system, making it a perfect solution for scaling and repeating infrastructure deployment setups.
OpenTofu is an open-source fork of Terraform created within a community of users who were unhappy with the change in licensing by HashiCorp over to BUSL licensing. It is fully compatible with Terraform’s existing configuration and workflow tools and is open source with an MPL license, ensuring openness within the ecosystem.
Regardless of whether you’re implementing cloud automation, infrastructure deployment, CI/CD pipelines, and infrastructure automation with DevOps, both tools can be considered strong alternatives. This tutorial will guide you step by step on how to install either Terraform or OpenTofu on Amazon Linux 2023 so you can decide which one is most suitable for your setup and organization.
Install Terraform/OpenTofu on Amazon Linux 2023
Terraform binary is provided by Hashicorp for all Linux distributions for easy installation. You can either install terraform from official repos using your package manager or install it manually using terraform binary.
Using package manager
Both Terraform and Opentofu can be installed using the yum or dnf package manager as follows:
Terraform
To isntall Terraform using your package manager, run the following commands:
#Install yum-config-manager to manage your repositories.
sudo yum install -y yum-utils

#Use yum-config-manager to add the official HashiCorp Linux repository.
sudo yum-config-manager --add-repo https://rpm.releases.hashicorp.com/AmazonLinux/hashicorp.repo

#Install Terraform from the new repository.
sudo yum -y install terraform

#Confirm installation
$ terraform --version
Terraform v1.14.0
on linux_amd64
OpenTofu
To install OpenTofu using your package manager, you need to first add the OpenTofu yum repository as follows:
sudo tee /etc/yum.repos.d/opentofu.repo > /dev/null <<'EOF'
[opentofu]
name=opentofu
baseurl=https://packages.opentofu.org/opentofu/tofu/rpm_any/rpm_any/\$basearch
repo_gpgcheck=0
gpgcheck=1
enabled=1
gpgkey=https://get.opentofu.org/opentofu.gpg
       https://packages.opentofu.org/opentofu/tofu/gpgkey
sslverify=1
sslcacert=/etc/pki/tls/certs/ca-bundle.crt
metadata_expire=300

[opentofu-source]
name=opentofu-source
baseurl=https://packages.opentofu.org/opentofu/tofu/rpm_any/rpm_any/SRPMS
repo_gpgcheck=0
gpgcheck=1
enabled=1
gpgkey=https://get.opentofu.org/opentofu.gpg
       https://packages.opentofu.org/opentofu/tofu/gpgkey
sslverify=1
sslcacert=/etc/pki/tls/certs/ca-bundle.crt
metadata_expire=300
EOF
Then update your system packages and install OpenTofu:
sudo yum update
sudo yum install -y tofu
Check the installed version:
$ tofu --version
OpenTofu v1.10.7
on linux_amd64
Manual Installation using binary
If you prefer to install Terraform/OpenTofu manually you can do so as follows:
Terraform
All you have to do is download the latest binary archive, extract and place it in a directory within your PATH.
Get the latest release version.
TERRAFORM_VER=`curl -s https://api.github.com/repos/hashicorp/terraform/releases/latest | grep tag_name | cut -d: -f2 | tr -d \"\,\v | awk '{$1=$1};1'`To download the latest release of Terraform on Amazon Linux 2023, run the command:
wget https://releases.hashicorp.com/terraform/${TERRAFORM_VER}/terraform_${TERRAFORM_VER}_linux_amd64.zipExtract the file.
sudo yum -y install unzip
unzip terraform_${TERRAFORM_VER}_linux_amd64.zip
Move binary file to the /usr/local/bin directory:
sudo mv terraform /usr/local/bin/Confirm installation by checking the version of Terraform.
$ terraform --version
Terraform v1.14.0
on linux_amd64
Enable tab completion:
terraform -install-autocomplete
source ~/.bashrc
OpenTofu
For OpenTofu, I am not sure if this is a manual process but I’ll go with it. It involves the use of a script, which doesn’t sound manual at all. You can use the OpenTofu installer script as follows:
# Download the installer script:
curl --proto '=https' --tlsv1.2 -fsSL https://get.opentofu.org/install-opentofu.sh -o install-opentofu.sh
# Alternatively: wget --secure-protocol=TLSv1_2 --https-only https://get.opentofu.org/install-opentofu.sh -O install-opentofu.sh

# Give it execution permissions:
chmod +x install-opentofu.sh

# Run the installer:
./install-opentofu.sh --install-method rpm

# Remove the installer:
rm -f install-opentofu.sh
Check the installed version as follows:
$ tofu --version
OpenTofu v1.10.7
on linux_amd64
Using Terraform/OpenTofu on Amazon Linux
Terraform documentation have lots of resources on how you can use Terraform to manage your complete Infrastructure lifecycle.
We can show you a simple terraform usage with Docker. You can install Docker CE on Amazon Linux 2023 following our guide below:
Create temporary project directory:
mkdir terraform-docker-lab && cd terraform-docker-lab
vim main.tf
Create main.tf Terraform configuration file.
terraform {
  required_providers {
    docker = {
      source = "kreuzwerker/docker"
    }
  }
}

provider "docker" {}

resource "docker_image" "nginx" {
  name         = "nginx:latest"
  keep_locally = false
}

resource "docker_container" "nginx" {
  image = docker_image.nginx.name
  name  = "tutorial"
  ports {
    internal = 80
    external = 8000
  }
}
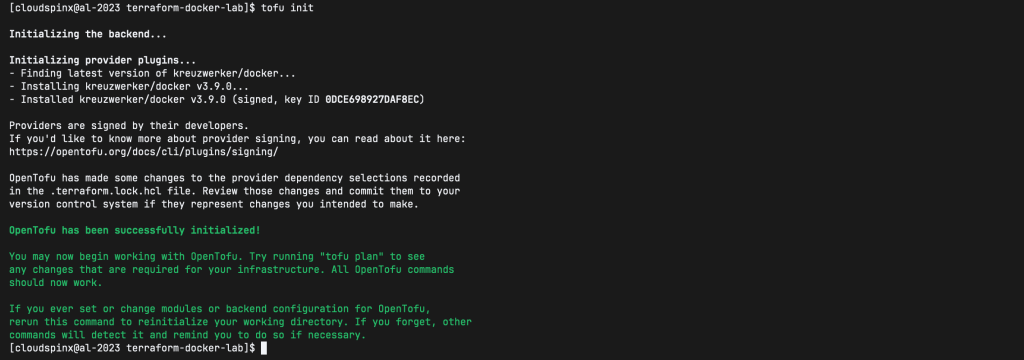
Now, download the plugin that allows Terraform/OpenTofu to interact with Docker.
## Terraform
terraform init
## Opentofu
tofu init
Create Nginx docker container with the terraform apply command.
## Terraform
terraform apply --auto-approve
## OpenTofu
tofu apply --auto-approve
A docker container should be created in few seconds.

You can use docker ps to confirm it is running:
$ docker ps
CONTAINER ID   IMAGE          COMMAND                  CREATED         STATUS              PORTS                  NAMES
8694bf5ed96f   nginx:latest   "/docker-entrypoint.…"   2 minutes ago   Up About a minute   0.0.0.0:8000->80/tcp   tutorial
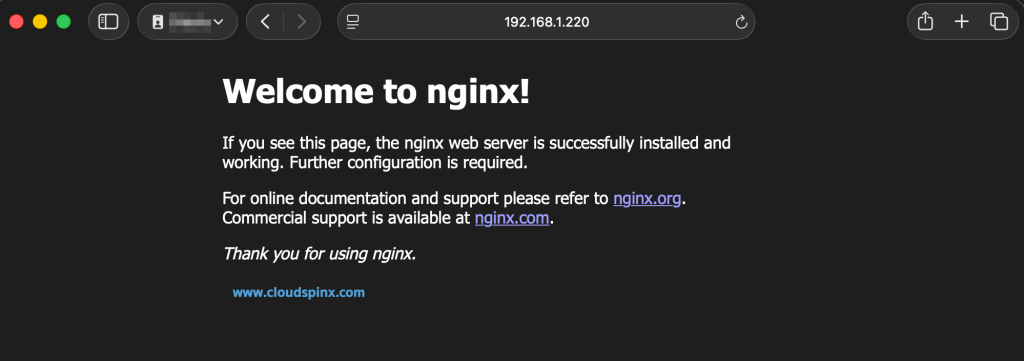
If you try accessing http://server_ip:8000 on your browser, you should get Welcome to nginx page.

To destroy the Infrastructure run the command:
## Terraform
terraform destroy --auto-approve
## OpenTofu
tofu destroy --auto-approve
The created resources should be destroyed in seconds:

Check out our other articles about Terraform:


