Back in the day, a developer would create an application, test and run it on one operating system. The application if transferred to be used on another user’s system, it might not fully work as it might require different libraries not provided by the host of the system. It can also result in bugs and errors. This is tedious, especially if the application is to be used by a number of users who can have a different experience with the application due to a difference in the computing environment. It used to be a struggle and mainly composed of one mainframe computer that had the software and would be used at different intervals by different users. However, Containerization came to solve this issue.
Containerization is a form of virtualization that involves the packaging of an application code with its own binaries, libraries, configuration files, and dependencies required for it to run in any infrastructure. These executable packages are called containers which are meant to be lightweight and run independently of the host operating system. They can be run on any infrastructure including bare metal, cloud, or within VMs without the need to change anything. Containerization enables developers to develop and deploy applications faster and securely on different infrastructures and still provide high efficiency while doing so.
What is Docker & Docker Desktop?
Docker is a platform that allows one to build, test, and run containers. With Docker, you can deploy and scale applications quickly into any environment that you want and the code will run smoothly. Using Docker allows you to ship your code 7x faster compared to non-docker users, standardized application operation, and seamlessly move your code from a local development environment to a cloud environment. Docker is an open-source platform but uses engineering resources to install, configure, patch, and maintain container services.
Docker Desktop
Docker Desktop is an easy-to-use containerization platform that developers use to eliminate the struggle of setting up complex environments for building modern applications. Docker Desktop is easy to set up and maintain because it has a single installer that allows you to set up docker in your systems in seconds and proceed to develop on your local machine. Docker desktop stores containers and images in an isolated storage location within a VM offering control and restriction to its resources.
Docker Desktop offers a mechanism to enable file sharing between the host and Docker Desktop VM. Docker Desktop is free for small businesses with 250 employees and below, for personal and non-commercial use, and for large businesses, it offers premium features with a minimum monthly cost of $5. It is a reliable, multi-platform and available on Windows, macOS, and Linux to build, ship, and run modern cloud-native applications in production, at scale.
Some of its features include;
- Docker has a simple user interface to manage all configurations,
- Includes Docker extensions that transform and optimize workflows like debugging, testing, networking, and security.
- Volume management enables administrators to identify space usage and remove unneeded files.
- Docker Desktop includes a vulnerability scanning powered by Snyk, that scans your containers and provides actionable insights.
- Integrated with Azure Container Instances that simplifies code to cloud application development.
- Securely access only the official Docker images and Docker Verified Publishers. This is a feature on Docker Business.
Docker Desktop and Docker Engine have vast differences when you compare them. First of all, Docker Desktop contains a single installer that setup everything you need to use Docker quickly and in seconds while Docker Engine requires other resources to configure install and patch its components. Other features offered by Docker Desktop and not found in Docker Engine are as shown below;
| Feature | Docker Engine | Docker Desktop |
| Integrated with the new Apple hypervisor, Docker Compose 2.0, and Microsoft WSL2 Linux distro | No | Yes |
| Automated Security patches | No | Yes |
| Command line interface (CLI) for managing container lifecycle | Yes | Yes |
| Bind mount files into the host VM | No | Yes |
| Built-in control of local host system resources | No | Yes |
Install and Use Docker Desktop on Arch Linux
To install Docker Desktop successfully, your Linux host must meet the following requirements:
- 64-bit kernel and CPU support for virtualization.
- KVM virtualization support.
- QEMU must be version 5.2 or newer.
- systemd init system.
- Gnome or KDE Desktop environment.
- At least 4 GB of RAM.
We will install Docker Desktop on Arch Linux.
Step 1. KVM Virtualization Support
Docker Desktop runs a VM that requires KVM. We should check that our system supports KVM. Load the KVM module with the following command
sudo modprobe kvmDepending on the processor of the host machine, the corresponding module must be loaded:
sudo modprobe kvm_intel  # Intel processors
sudo modprobe kvm_amd    # AMD processors
To check if the KVM modules are enabled, run
$ lsmod | grep kvm
kvm_intel             360448  0
kvm                  1085440  1 kvm_intel
irqbypass              16384  1 kvm
Set up KVM user permission by adding your user to the KVM group in order to access the KVM device:
sudo usermod -aG kvm $USERUse kvm user group on the system.
newgrp kvmInstall gnome-terminal if your desktop environment is not Gnome with the following command.
sudo pacman -S gnome-terminalStep 2. Install Docker Engine
Update your system packages with the newest available versions
sudo pacman -SyDocker does not have an Arch package repository hence users must install the Docker client binary manually on their systems.
sudo pacman -S dockerStart and enable docker to start on boot.
sudo systemctl start docker
sudo systemctl enable docker
Check for the status of the service.
$ systemctl status docker
● docker.service - Docker Application Container Engine
     Loaded: loaded (/usr/lib/systemd/system/docker.service; enabled; preset: disabled)
     Active: active (running) since Sat 2024-11-02 14:34:13 EAT; 8h ago
 Invocation: 93b1efb199124a84ad686c61ad5657c0
TriggeredBy: ● docker.socket
       Docs: https://docs.docker.com
   Main PID: 825 (dockerd)
      Tasks: 14
     Memory: 96.6M (peak: 97.1M)
        CPU: 2.612s
     CGroup: /system.slice/docker.service
             └─825 /usr/bin/dockerd -H fd:// --containerd=/run/containerd/containerd.sock
To run docker CLI commands for a non-root user, add the user to the docker group.
sudo usermod -aG docker $USER
newgrp docker
Verify you can run containers by running the following command. The command downloads the latest Arch Linux image and uses it to run a Hello World program within a container:
$ docker run -it --rm archlinux bash -c "echo hello world"
Unable to find image 'archlinux:latest' locally
latest: Pulling from library/archlinux
eebb07dfd16c: Pull complete
ec2ee4e22db4: Pull complete
Digest: sha256:71df376dbf28d6eaecbe9de04e394566afeba74e8cac2b2fdf36e05c5ae0b1e7
Status: Downloaded newer image for archlinux:latest
hello world
Step 3. Install Docker Desktop on Arch Linux
Download the latest Package for Arch Linux distribution from the release page or use the wget utility to do so.
wget https://desktop.docker.com/linux/main/amd64/docker-desktop-4.15.0-x86_64.pkg.tar.zstThen install the package with the following command.
sudo pacman -U ./docker-desktop-*.pkg.tar.zstAfter you’ve successfully installed Docker Desktop, you can check the versions of these binaries by running the following commands:
$ docker compose version
Docker Compose version v2.13.0

$ docker --version
Docker version 27.3.1, build ce1223035a

$ docker version
Client:
 Version:           27.3.1
 API version:       1.47
 Go version:        go1.23.1
 Git commit:        ce1223035a
 Built:             Wed Sep 25 14:43:43 2024
 OS/Arch:           linux/amd64
 Context:           default

Server:
 Engine:
  Version:          27.3.1
  API version:      1.47 (minimum version 1.24)
  Go version:       go1.23.1
  Git commit:       41ca978a0a
  Built:            Wed Sep 25 14:43:43 2024
  OS/Arch:          linux/amd64
  Experimental:     false
 containerd:
  Version:          v1.7.23
  GitCommit:        57f17b0a6295a39009d861b89e3b3b87b005ca27.m
 runc:
  Version:          1.2.0
  GitCommit:
 docker-init:
  Version:          0.19.0
  GitCommit:        de40ad0
Set Docker Desktop to start on login.
sudo systemctl --user enable docker-desktopLaunch Docker Desktop with the following command.
sudo systemctl --user start docker-desktopAlternatively, you can start it from the Applications menu. The application opens with a License agreement window. Accept the License Agreement by checking the box and clicking Accept.

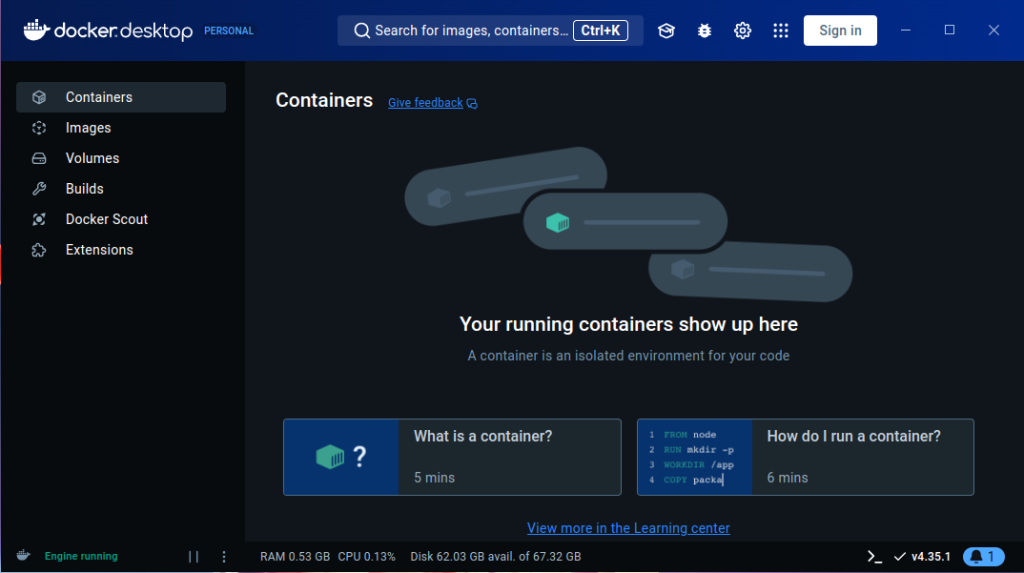
The Dashboard opens as shown below.
Step 4. Run a Container
Try running a sample container. Copy the following command and run it on your terminal.
$ docker run -d -p 80:80 docker/getting-started
Unable to find image 'docker/getting-started:latest' locally
latest: Pulling from docker/getting-started
c158987b0551: Pull complete
1e35f6679fab: Pull complete
cb9626c74200: Pull complete
b6334b6ace34: Pull complete
f1d1c9928c82: Pull complete
9b6f639ec6ea: Pull complete
ee68d3549ec8: Pull complete
33e0cbbb4673: Pull complete
4f7e34c2de10: Pull complete
Digest: sha256:d79336f4812b6547a53e735480dde67f8f8f7071b414fbd9297609ffb989abc1
Status: Downloaded newer image for docker/getting-started:latest
519824f51304e8fe798a1d66a6898970a1b205861df58b3d196be3937f02886a
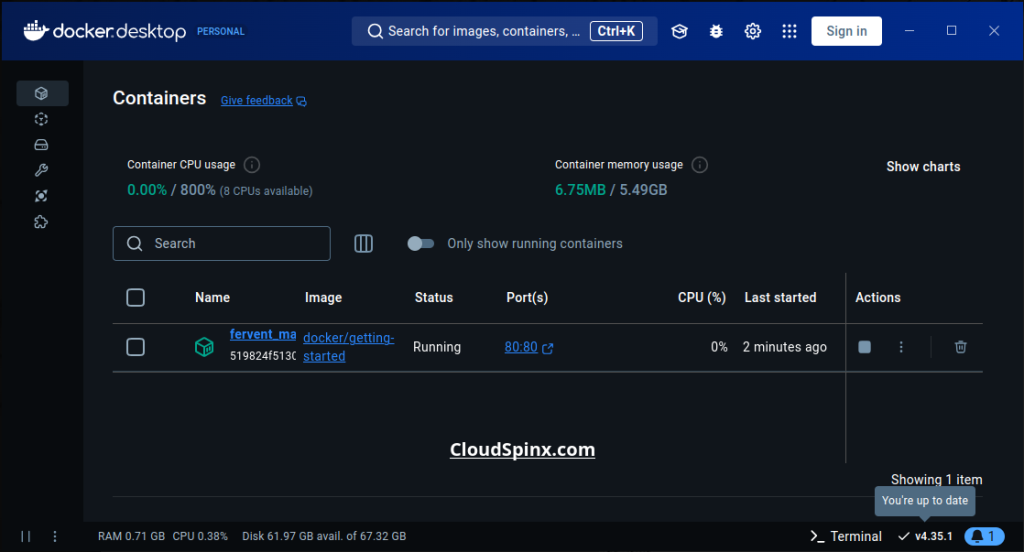
Then head back to the Docker Desktop interface to find the container running. The name might be different as it is random.
Step 5. Configure Docker Desktop
You can further tweak the Docker Desktop interface from the settings.
Under the General settings, you can enable Docker Desktop to start at login and change the theme of the interface.
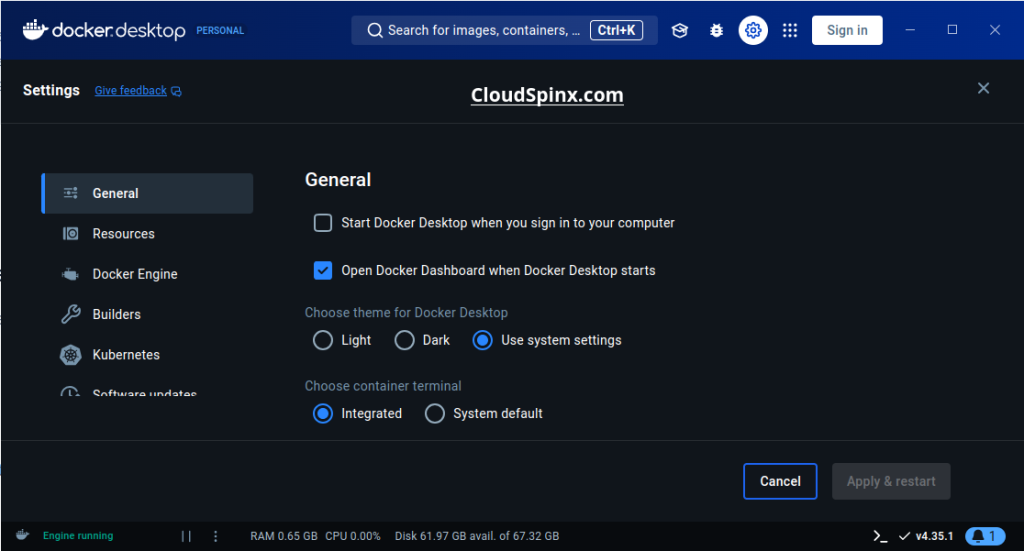
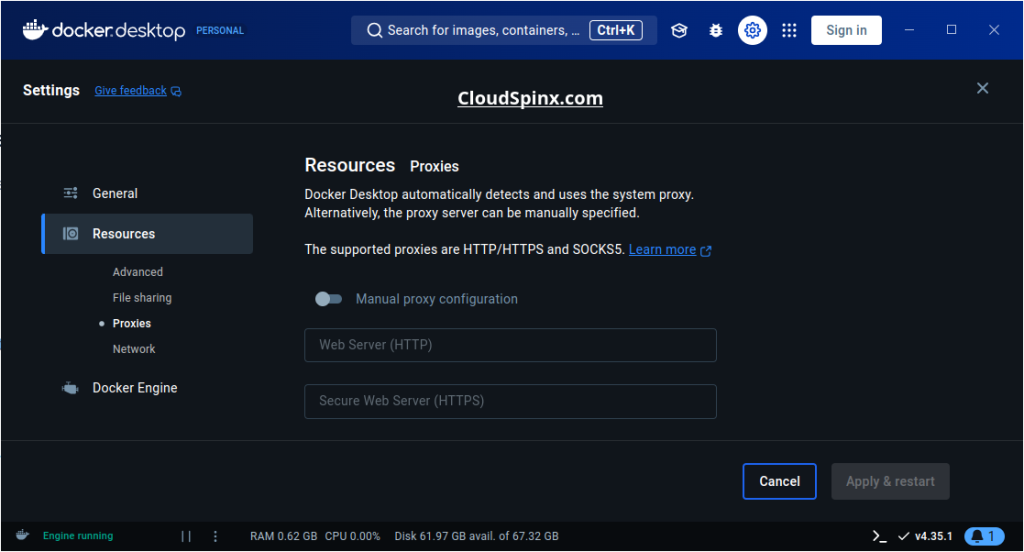
The Resources tab enables you to change different settings including the resources used, set up proxies, and directories for file sharing.
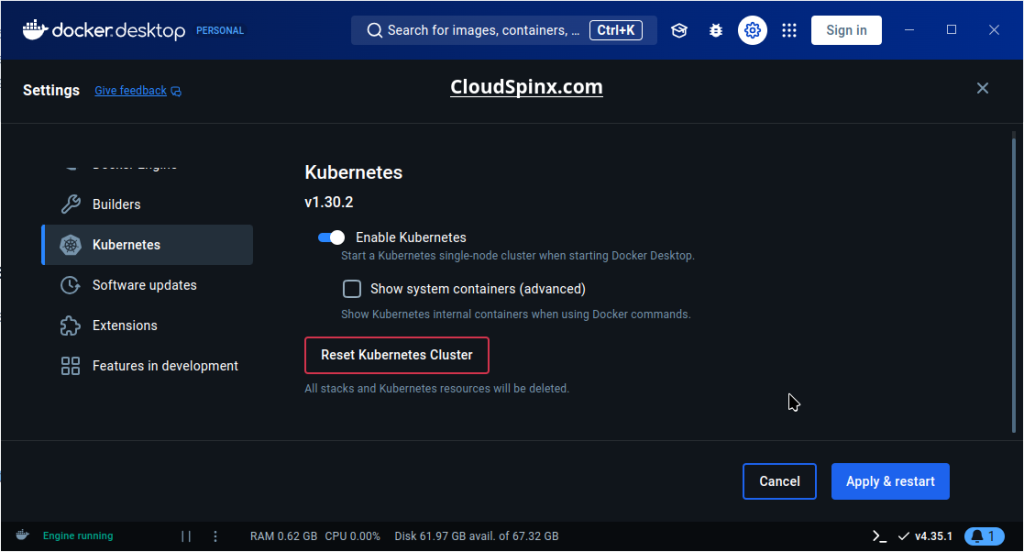
You can also enable Kubernetes.
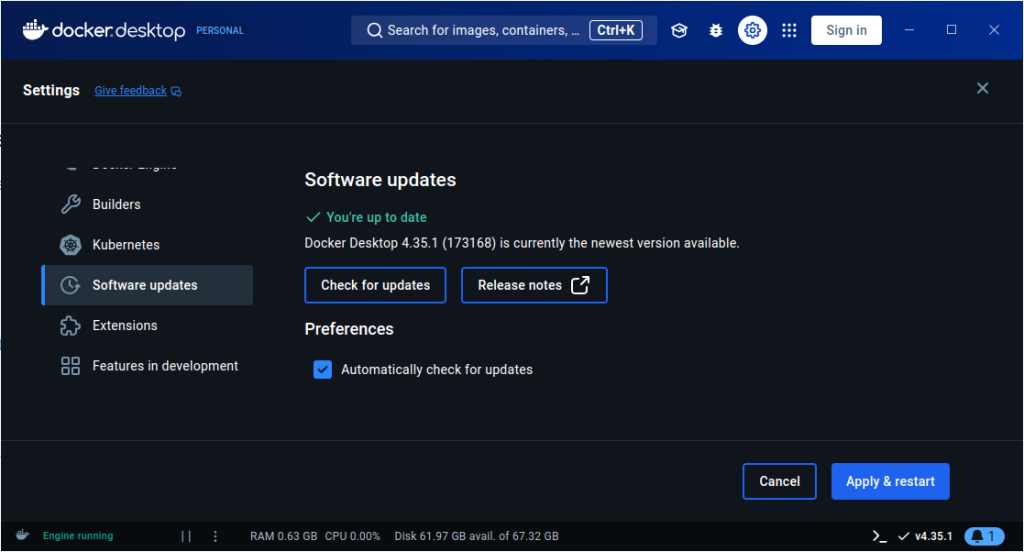
You can also check for update from the interface.
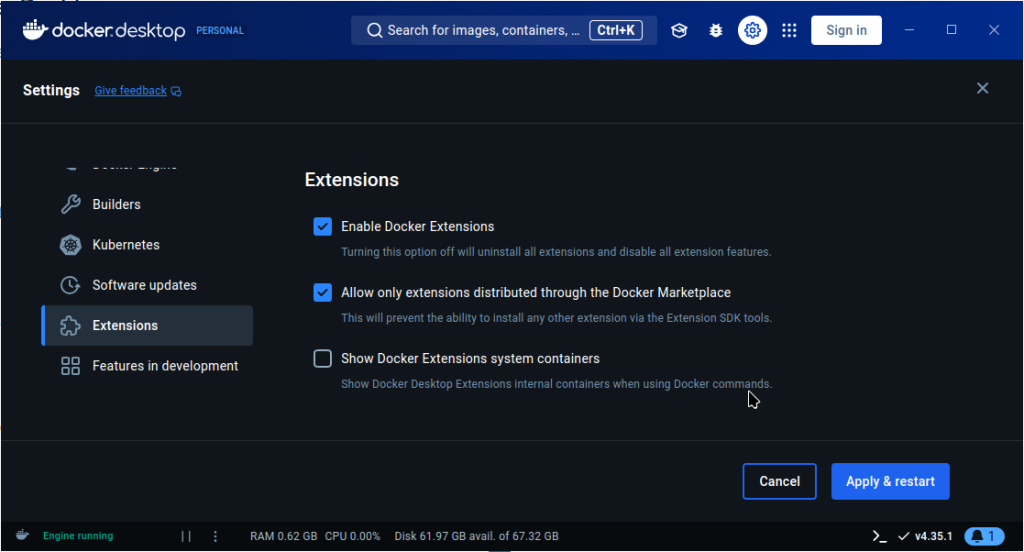
And configure extensions:
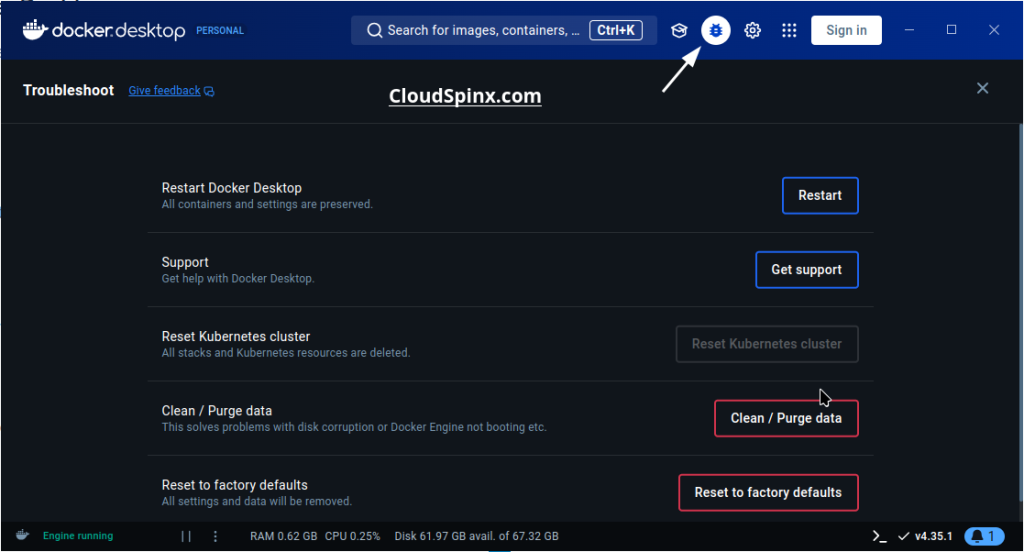
The troubleshoot icon will open the following screen that allows you to restart, purge data, or reset Docker Desktop.
Switching Between Docker Desktop and Docker Engine
Docker Desktop and Docker Engine can be installed on the same machine as Docker desktop runs on an isolated VM which offers control and restricts the use of the system resources. It is however recommended to stop the Docker engine while you’re using Docker Desktop to prevent the Docker Engine from consuming resources and to prevent conflicts.
To stop the Docker Engine service, use the following command.
sudo systemctl stop docker docker.socket containerdTo disable it from starting automatically, use the following command.
sudo systemctl disable docker docker.socket containerdWhen Docker Desktop is installed it sets its own context desktop-linux as the current context and subsequent Docker CLI commands target Docker Desktop.
Use the following command to view what contexts are available and which is being used currently(the one with asterisk *)
docker context lsUse the docker context use command to switch between the Docker Desktop and Docker Engine contexts.
Use default context to interact with Docker Engine:
docker context use defaultUse the desktop-linux context to interact with Docker Desktop:
docker context use desktop-linuxDocker Desktop is highly reliable and easy to use. It offers features all in one single installer and is easy to set up in seconds and use Docker on your local machine. It has a simple user interface that is not available on the other DIY Docker Engine alternatives. The Total Cost of Ownership would be a consideration when using Docker Desktop.
Explore More with CloudSpinx
Looking to streamline your Linux infrastructure? Please visit our official linux consulting page.

