NextCloud is a free and open-source software to enable collaboration and sharing. It allows one access and save files across multiple devices such as PCs and phones. NextCloud works similarly to DropBox because it allows seamless collaboration of various projects, manage your calendar, send and receive emails and also make video calls. In this article we will be walking you through the steps to install and Configure Nextcloud on Rocky Linux 8 / AlmaLinux 8.
The biggest improvements Nextcloud Hub II (Nextcloud 24) introduces are:
- Nextcloud Files: 10x syncing performance improvements, delegate limited administration from admins to users; automatic user status setting
- Nextcloud Groupware: external appointment booking, advanced room and resource search in Calendar and Mail improvements
- Nextcloud Talk: background blur, device check screen and advanced permission management
- Nextcloud Office: developed in collaboration with Collabora Productivity
- Docker-All-In-One: easy installation and update
- Nextcloud Backup: a peer-to-peer backup solution designed for private users
- Nextcloud Clients: updates available for Desktop, Android and iOS clients
Since we will be accessing NextCloud using a web interface, there are a few dependencies we need to install and configure.
Step 1: Install LAMP Stack
You need to have LAMP stack installed. LAMP stands for Linux, Apache,MySQL/MariaDB and PHP. Follow the article in the link below:
Step 2: Create a Nextcloud Database
With LAMP stack installed successfully, we will create a Nextcloud’s data by logging in to the MariaDB database as below.
mysql -u root -pLog in with MariaDB credentials created above in LAMP stack. Then create a database as below
CREATE DATABASE nextcloud_db;
CREATE USER 'nextcloud'@'%' IDENTIFIED BY 'P@ssw0rd';
GRANT ALL PRIVILEGES ON nextcloud.* TO 'nextcloud'@'%';
FLUSH PRIVILEGES;
EXIT;
Step 3: Install NextCloud
We are required to download NextCloud file from the official release site. In this article, we will download NextCloud probably not the latest version available. By visiting the official page, you will choose the latest version.
sudo yum install wget
wget https://download.nextcloud.com/server/releases/latest.zip
Extract the file in the directory /var/www/html/ with the command
sudo yum -y install unzip
sudo unzip latest.zip -d /var/www/html/
Create a directory to store the nextcloud user data
sudo mkdir -p /var/www/html/nextcloud/dataTo the created directory, assign permissions to apache web server
sudo chown -R apache:apache /var/www/html/nextcloud/Step 4: Configure Apache, SELinux and Firewall
Allow SELinux to handle Nextcloud as below
sudo chcon -t httpd_sys_rw_content_t /var/www/html/nextcloud/ -ROpen port 80 on the web server
sudo firewall-cmd --add-port=80/tcp --zone=public --permanent
sudo firewall-cmd --reload
Edit the Apache httpd configuration file:
sudo vim /etc/httpd/conf.d/yourdomain.com.confEdit the file to look like below snippet:
<VirtualHost *:80>
    ServerName yourdomain.com
    ServerAlias www.yourdomain.com
    DocumentRoot /var/www/html/nextcloud
    ErrorLog /var/www/html/nextcloud/error.log
    CustomLog /var/www/html/nextcloud/requests.log combined
</VirtualHost>
Give permissions of the file /var/www/yourdomain.com/ to apache and restart the service
sudo chown -R apache:apache /var/www/html/nextcloud/
sudo chmod -R 755 /var/www
sudo systemctl restart httpd
Step 5: Finish Nextcloud Installation on Web
Finalize NextCloud installation over the web by opening the following address on the browser http://server-IP. You will see this landing page.
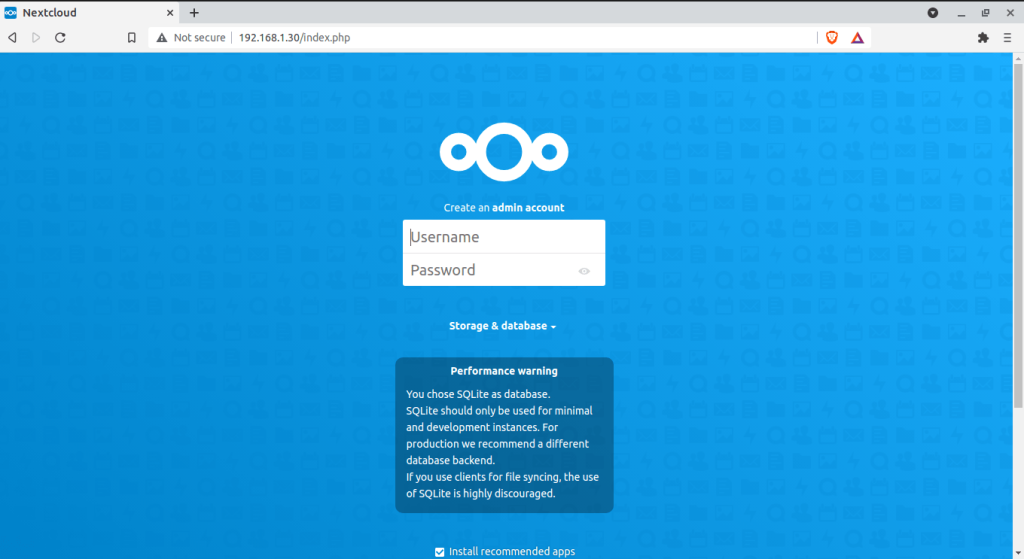
Input the credentials created in MariaDB and login and select your database as MariaDB under storage and database above.
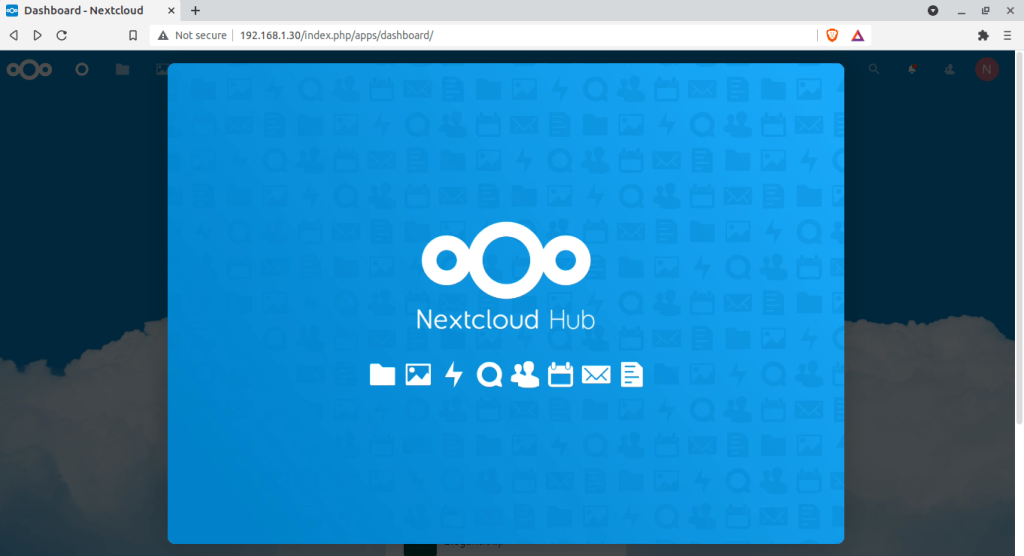
While here, scroll till the end going through the tips. On the below page, you can customize your background and what you want to appear on the start up page.
Now while here, you can now make settings and configurations to nextcloud. To back up, sync and share files on Nextcloud navigate to the Files tab as below:
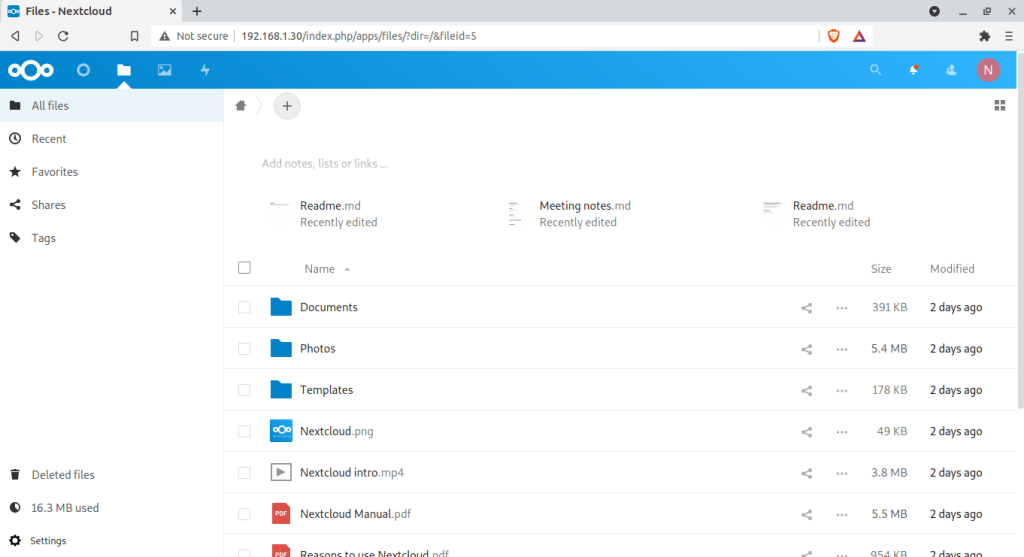
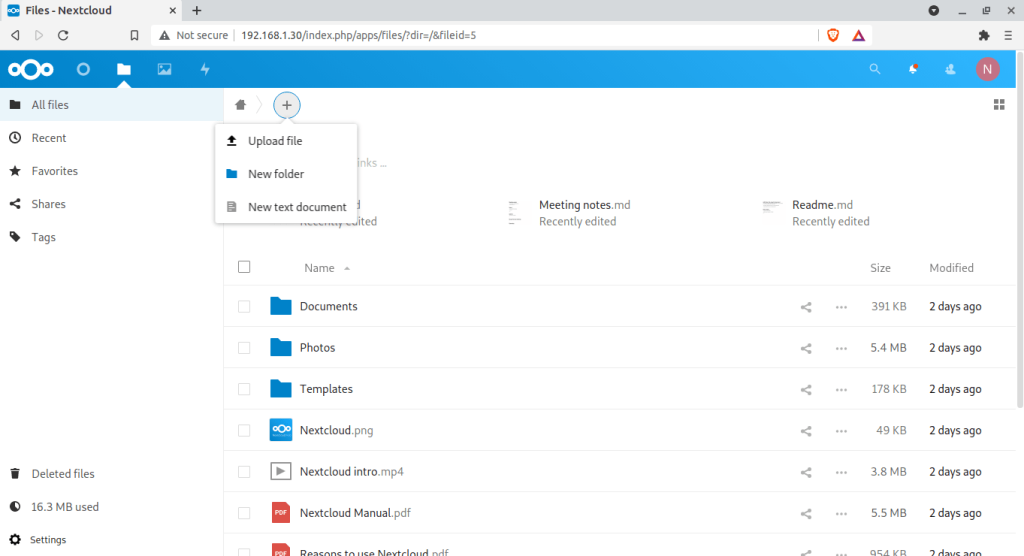
To share files, click on the + and you will see a whiteboard entry as below:
Set Email notification on Nextcloud
If NextCloud is to be used by more than one peron, it is important to set transactional mails. Go to settings> basic settings
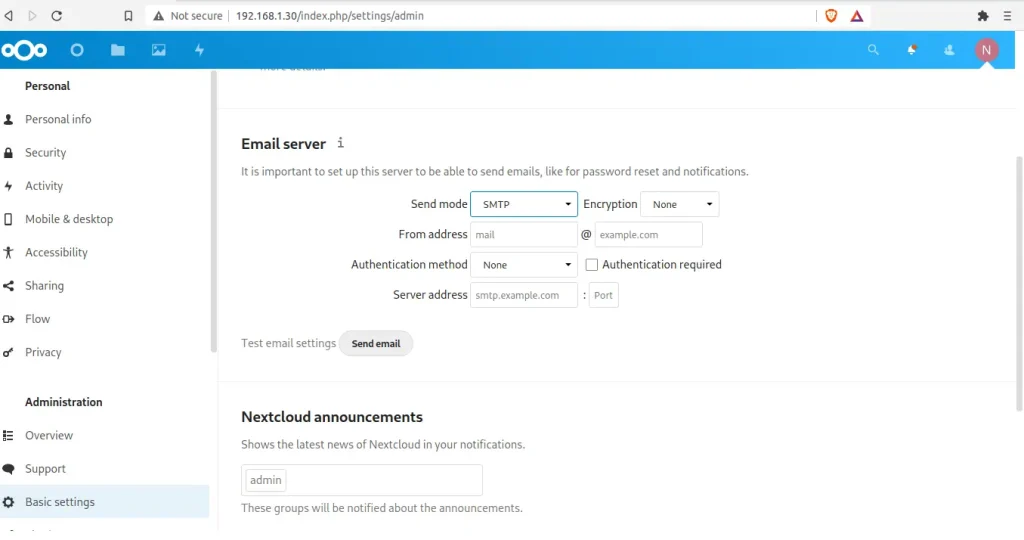
As shown above, we have two modes: sendmail and SMTP. Add the required information either using send mail mode or SMTP
You wil be required to allow this on SELinux as below
setsebool -P httpd_can_sendmail onUser creation in Nextcloud
Adding users is quite easy. It is achieved by navigating to settings >>users. While on this page you will see the available users and their permissions. To add a user click on the +New user.
Apps management in Nextcloud
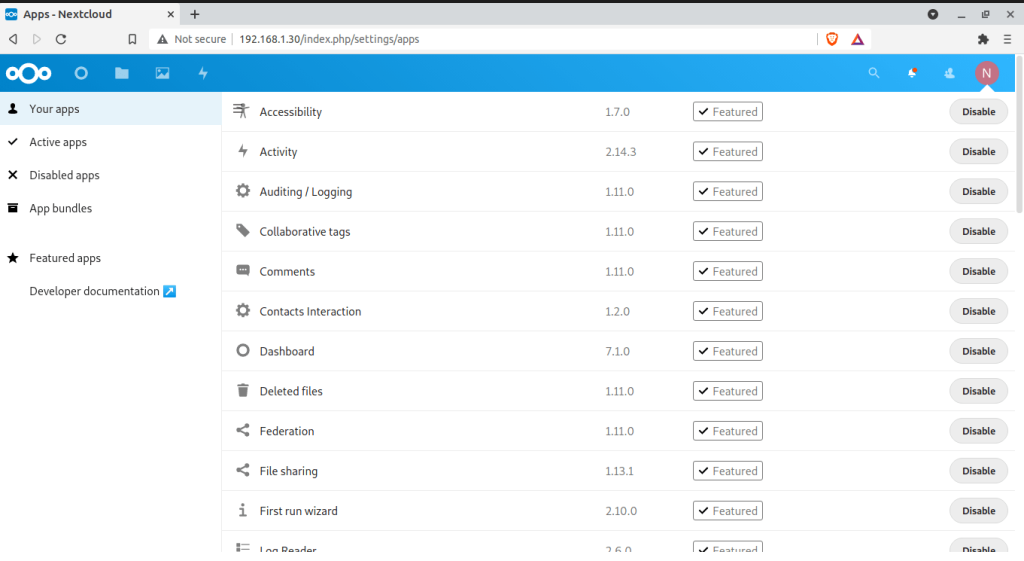
With NextCloud, you can enhance, customize and restrict features. After installing Nextcloud, you might want to enable and disable a few features and apps depending on your needs. To see default apps, naavigate to the Apps page.
This brings us to the conclusion of this guide. There are a variety of activities you can perform on NextCloud. Thanks for viewing this article. I hope this article was useful.
Explore More with CloudSpinx
Looking to streamline your tech stack? At CloudSpinx, we deliver robust solutions tailored to your needs:
- Hosting Services: Web Hosting, VPS, and Email Hosting
- Development Services: Custom Web & Mobile Apps, UI/UX Design
- Consultancy Services: Cloud, DevOps, Cybersecurity, and Kubernetes Experts
- Managed Services: End-to-end infrastructure support
- Dedicated Servers: Power and control, fully managed
Learn more about how we can support your journey with CloudSpinx.

