In this guide we shall cover how to setup Cacti monitoring tool on Rocky Linux 8 / AlmaLinux 8. Cacti is an open-source monitoring tool that works as a front end for the enterprise class logging tool, RRDtool.
Cacti can make use of RRDtool’s data storage and graphing functionality with some more functionalities such as:
- Support for advanced templating.
- User management with Access Control List (ACL).
- Fast polling of metrics.
- Support for multiple data acquisition methods.
Cacti runs with a web front end for managing and monitoring configurations. There are some dependencies that needs to be installed alongside Cacti for a successful setup. These are:
- Apache server.
- MySQL/MariaDB server.
- PHP and PHP extensions.
- SNMP tools.
This article will cover how to setup all of them.
Step 1 – Install System Dependencies
Before we can start installation of these tools, we first need to install Development Tools set:
sudo dnf -y groupinstall "Development Tools"After a successful installation of Development Tools, proceed to installation of SNMP packages:
sudo dnf install -y net-snmp net-snmp-utils rrdtoolStep 2 – Install Apache Web server
Install Apache web server with the command below:
sudo dnf -y install @httpdStart and enable httpd service to start at boot
sudo systemctl enable --now httpdCheck and confirm that the service is up and running.
systemctl status httpdAllow http and https service through the firewall.
sudo firewall-cmd --add-service={http,https} --permanent
sudo firewall-cmd --reload
Step 3 – Install PHP and PHP Extensions
Before we install Cacti we need to get PHP and PHP extensions required by Cacti system.
Add Remi repository for PHP:
sudo dnf install -y dnf-utils http://rpms.remirepo.net/enterprise/remi-release-8.rpmEnable the DNF module for PHP installation.
sudo dnf module reset php -y
sudo dnf module enable php:remi-8.0 -y
Install PHP and PHP extensions.
sudo dnf -y install @php
sudo dnf install -y php php-{mysqlnd,curl,gd,intl,pear,recode,ldap,xmlrpc,snmp,mbstring,gettext,gmp,json,xml,common}
Verify the installed PHP version.
$ php -v
PHP 8.1.30 (cli) (built: Jun  4 2024 15:15:06) ( NTS gcc x86_64 )
Copyright (c) The PHP Group
Zend Engine v4.1.30, Copyright (c) Zend Technologies
    with Zend OPcache v8.1.30, Copyright (c), by Zend Technologies
Set PHP timezone and memory_limit in /etc/php.ini
$ sudo vi /etc/php.ini
; http://php.net/date.timezone
date.timezone = Africa/Nairobi
memory_limit = 512M
max_execution_time = 300
Start and enable PHP-FPM
sudo systemctl enable --now php-fpmStep 4 – Configure Database server
Follow the guide below on how to setup a secure MariaDB od MySQL 8 instance.
After a successful installation, create a database, and a user for Cacti tool.
$ mysql -u root -p
CREATE DATABASE cacti;
GRANT ALL ON cacti.* TO 'cacti'@'localhost' IDENTIFIED BY 'Str0ngP@ssw0rd';
FLUSH PRIVILEGES;
quit
Add the following settings under [mysqld] section of the file /etc/my.cnf.d/mariadb-server.cnf
$ sudo vim /etc/my.cnf.d/mariadb-server.cnf
[mysqld]
character-set-server=utf8mb4
collation-server=utf8mb4_unicode_ci
max_heap_table_size=128M
tmp_table_size=128M
join_buffer_size=128M
innodb_buffer_pool_size=1024M
innodb_doublewrite=ON
innodb_flush_log_at_timeout=3
innodb_read_io_threads=32
innodb_write_io_threads=16
innodb_buffer_pool_instances=10
innodb_file_format=Barracuda
innodb_large_prefix=1
innodb_io_capacity=5000
innodb_io_capacity_max=10000
Restart mariadb service.
sudo systemctl restart mariadbStep 5 – Download and Configure Cacti
Download and extract the latest version of Cacti:
mkdir cacti && cd cacti
curl -SL https://www.cacti.net/downloads/cacti-latest.tar.gz | tar --strip 1 -xzf -
Move the cacti directory to /var/www/html/ directory.
cd ..
sudo mv cacti/ /var/www/html/
Import Cacti database data.
mysql -u root -p cacti < /var/www/html/cacti/cacti.sqlSetup mysl timezone for the cacti user created on the database.
mysql_tzinfo_to_sql /usr/share/zoneinfo | mysql -u root -p mysqlGrant the cacti user access to the timezone database:
$ mysql -u root -p
GRANT SELECT ON mysql.time_zone_name TO cacti@localhost;
ALTER DATABASE cacti CHARACTER SET utf8mb4 COLLATE utf8mb4_unicode_ci;
FLUSH PRIVILEGES;
EXIT;
Configure SELinux to allow connections to the cacti directory.
sudo semanage fcontext -a -t httpd_sys_rw_content_t "/var/www/html/cacti(/.*)?"
sudo restorecon -Rv /var/www/html/cacti
Restart httpd service.
sudo systemctl restart httpd php-fpmCacti Configuration
We need to do some initial configurations for cacti e.g database connection and permissions.
Edit the /var/www/html/cacti/include/config.php file to setup the database credentials we created in step 4 above.
$ sudo vim /var/www/html/cacti/include/config.php
$database_type     = 'mysql';
$database_default  = 'cacti';
$database_hostname = 'localhost';
$database_username = 'cacti';
$database_password = 'Str0ngP@ssw0rd';
$database_port     = '3306';
Create Cacti System log file.
touch /var/www/html/cacti/log/cacti.logSet directory permissions on the cacti folder.
sudo chown -R apache:apache /var/www/html/cactiSetup Cacti cron job
sudo crontab -u apache -eAdd the content below:
*/5 * * * * php /var/www/html/cacti/poller.php > /dev/null 2>&1Step 6 – Access Cacti Web Interface
We can now access our cacti web interface for the installation wizard via http://[ServerIP/Hostname]/cacti
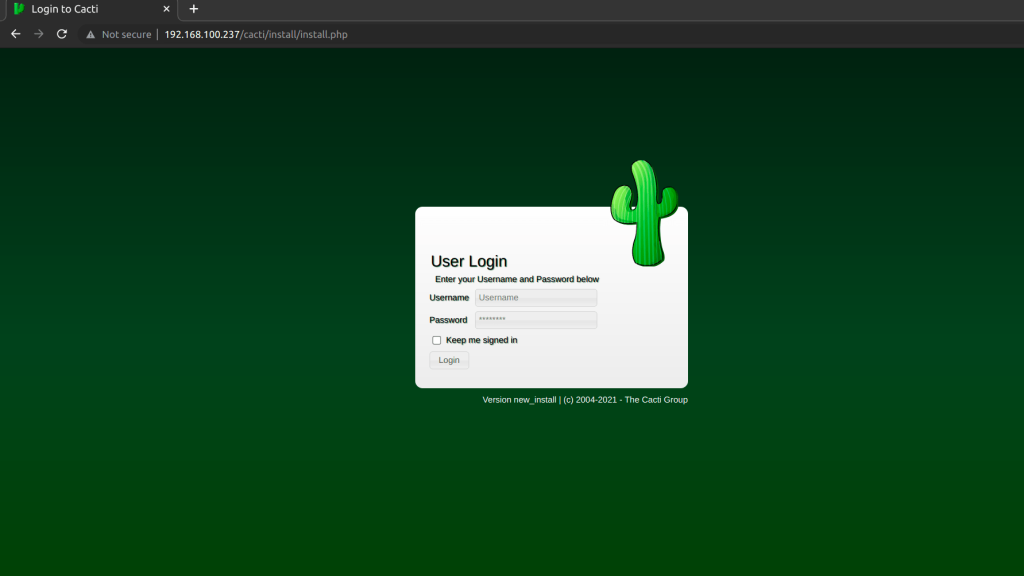
The default logins for cacti are:
Username: admin
Password: admin
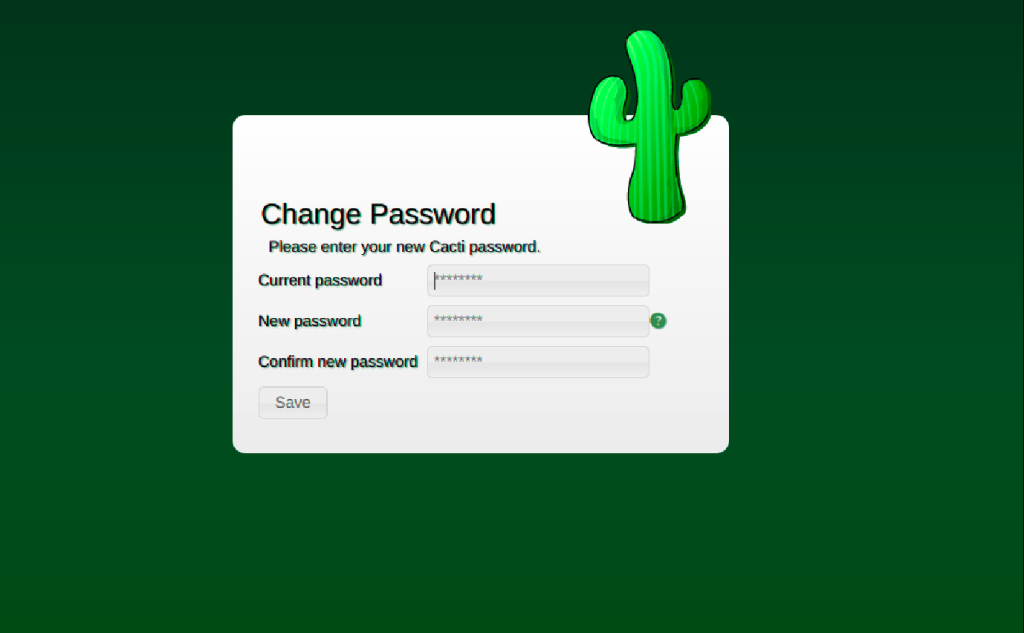
You will be required to change the password upon first-time login.
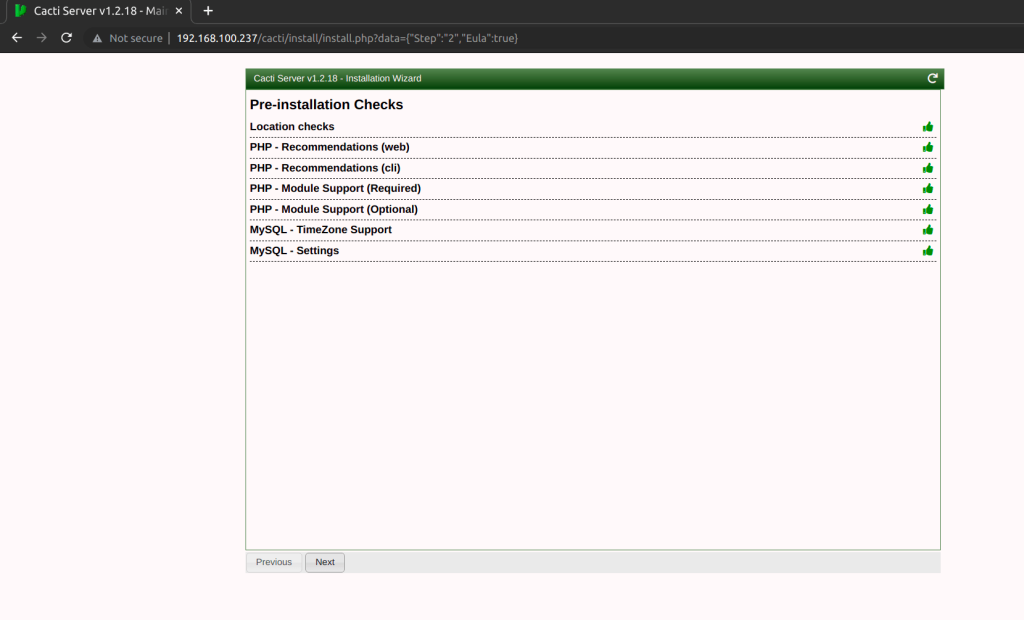
Accept License Agreement for GPL the click “Begin“. Make sure that all the pre-installation checks have passed with a green thumbs-up.
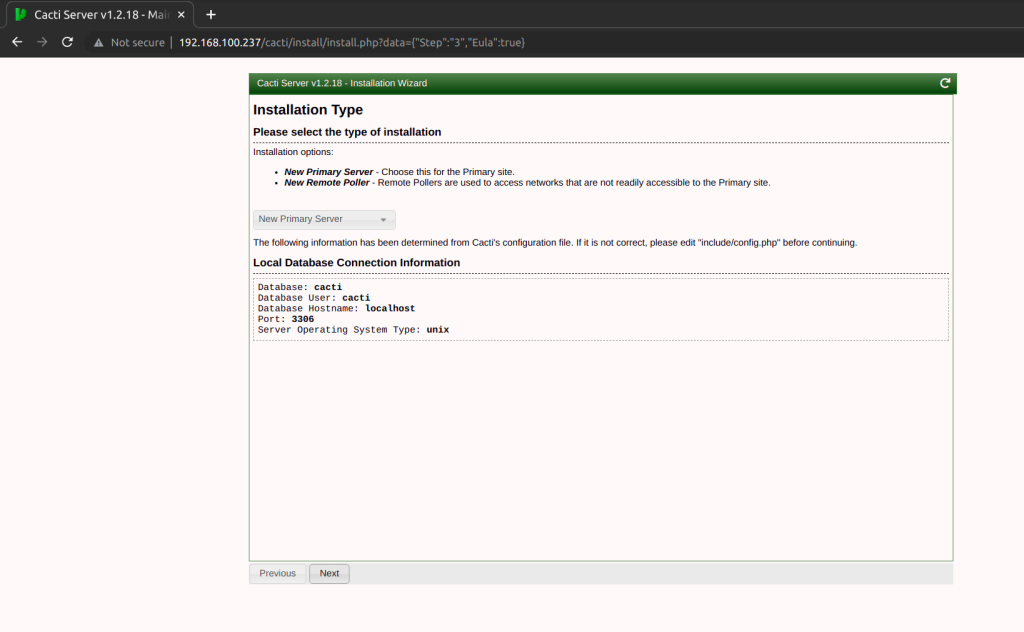
Select “New Primary server” option in the installation type window to do a local installation of cacti.
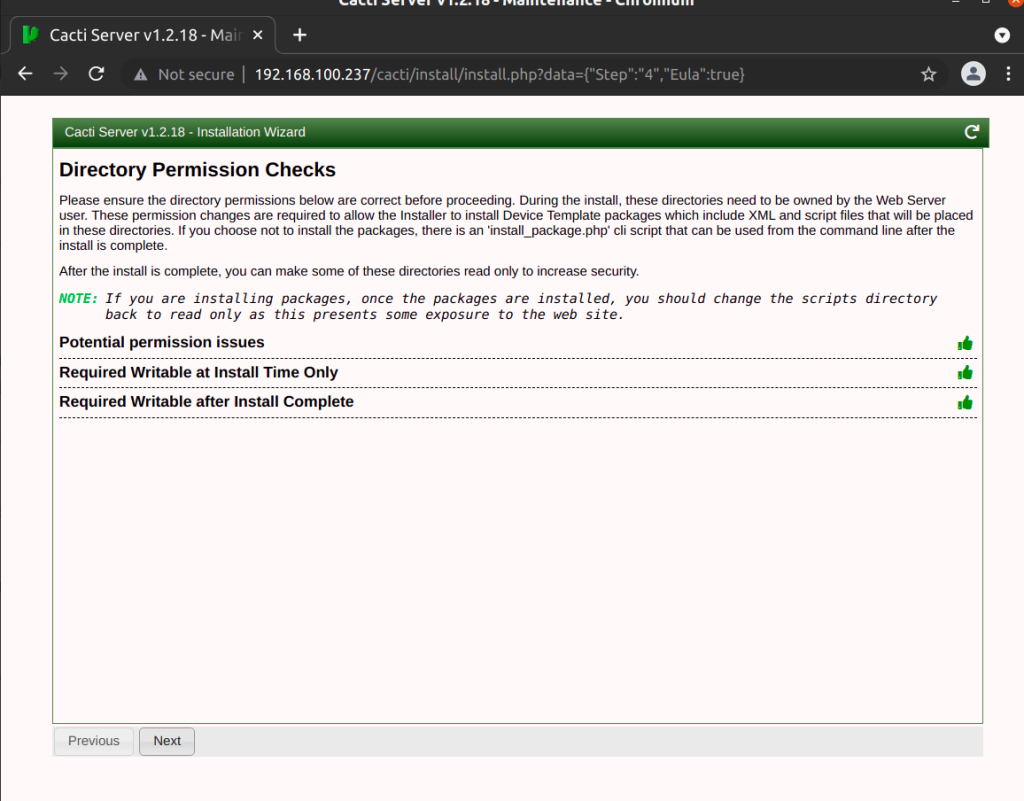
Confirm that directory permission checks are okay
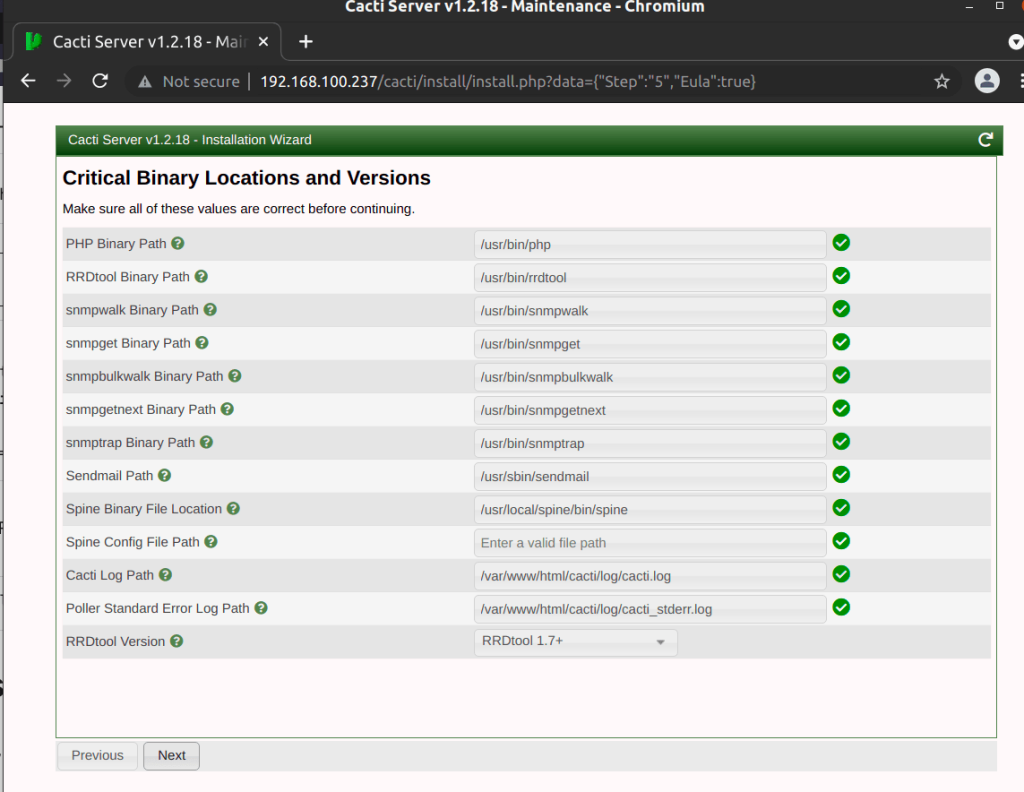
In the next window confirm that binary paths are located in the correct paths.
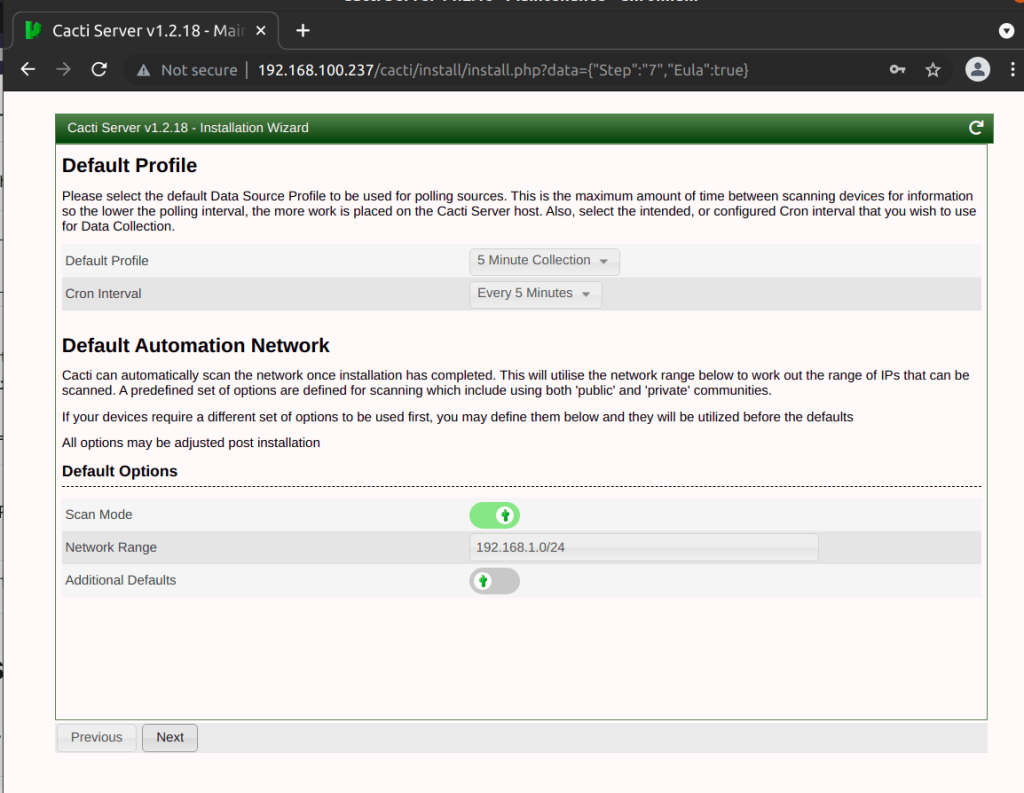
Select the default profile for data polling.
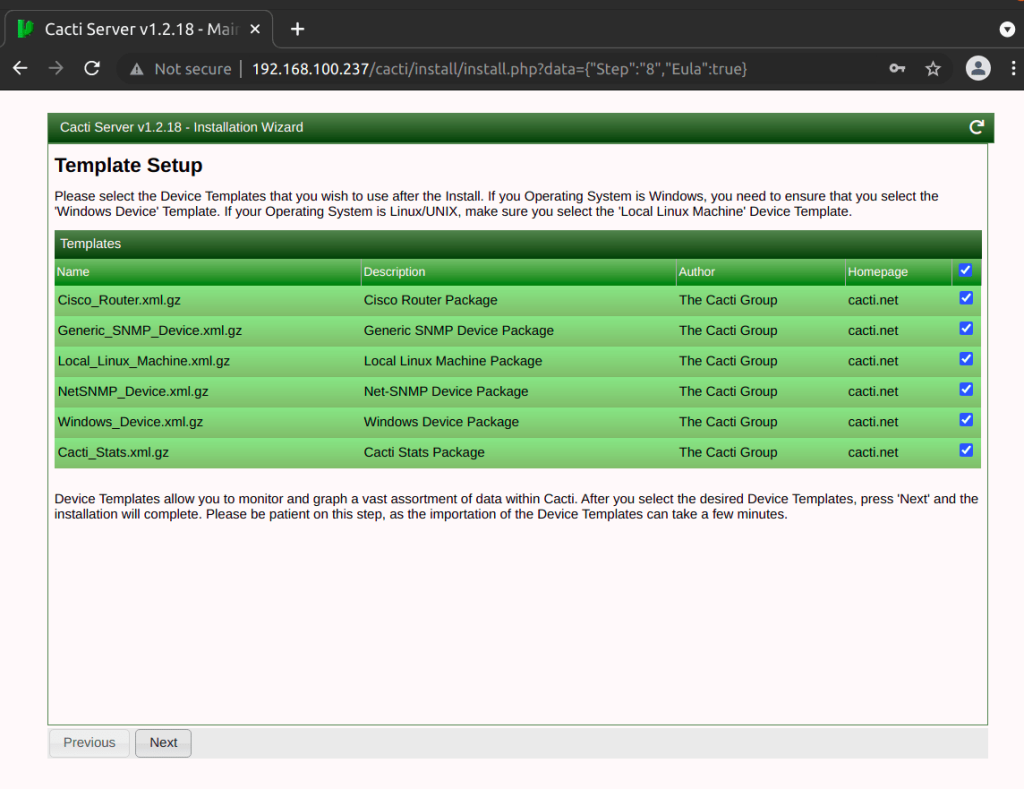
Choose the device templates of your choice which will be used to add devices. You can also add other templates later after the installation.
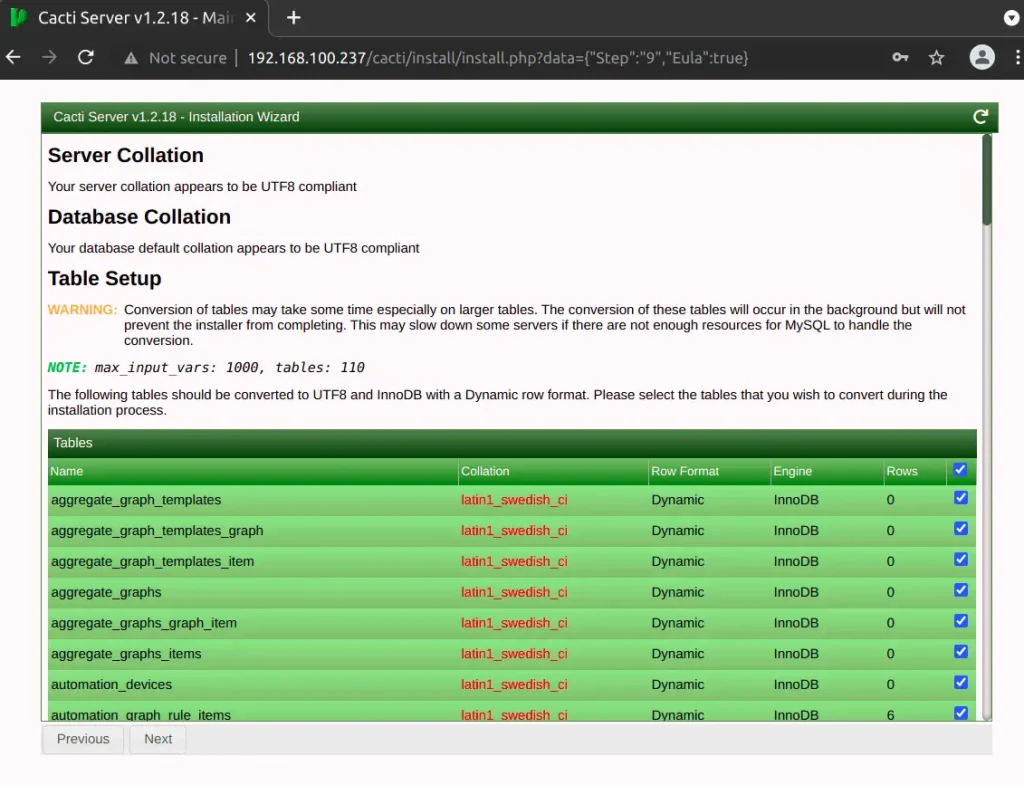
Confirm that the database settings are in order.
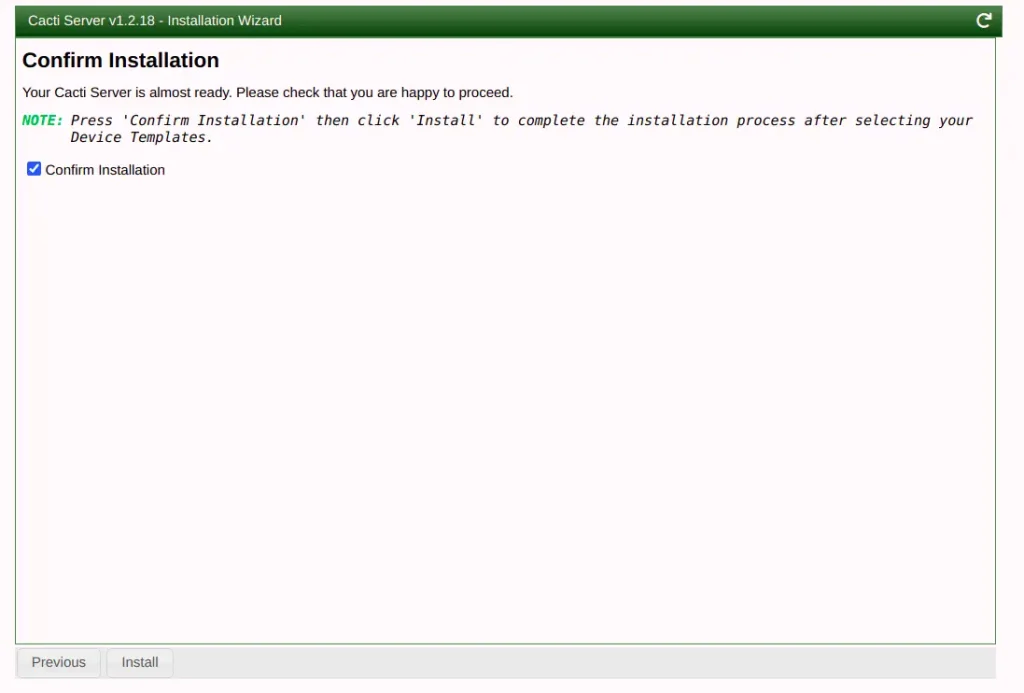
Confirm installation.
Click install to start the installation process.
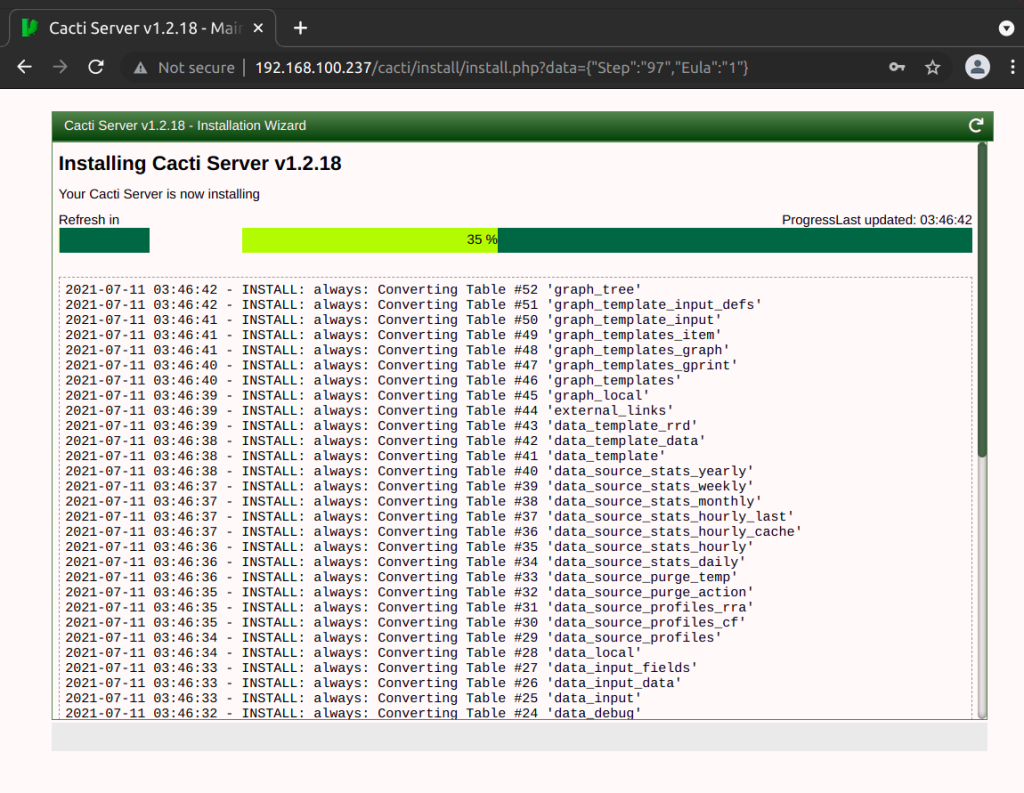
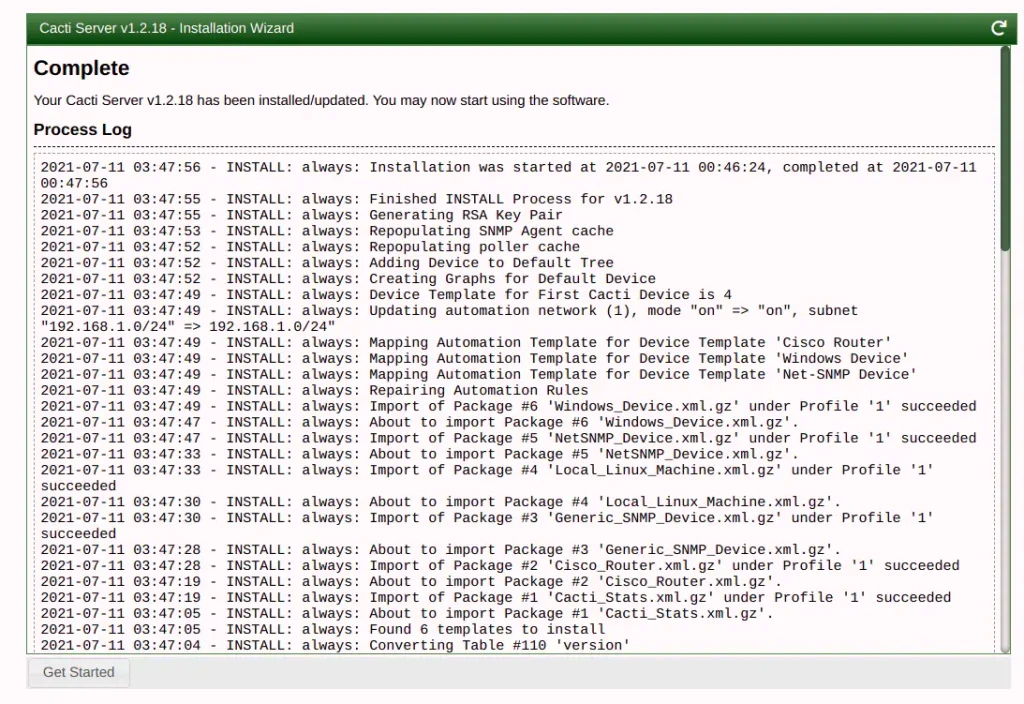
The installation process takes a few moments to complete. Upon completion, click on “Get Started” to navigate to the Cacti dashboard.
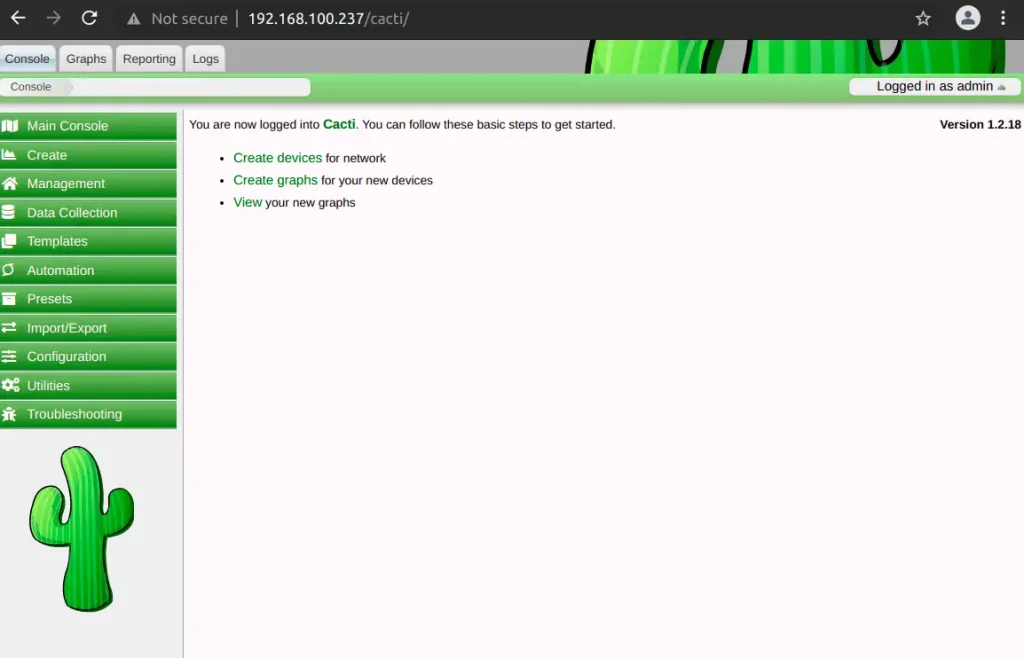
You will be redirected to the login dashboard where you can now add devices for monitoring.
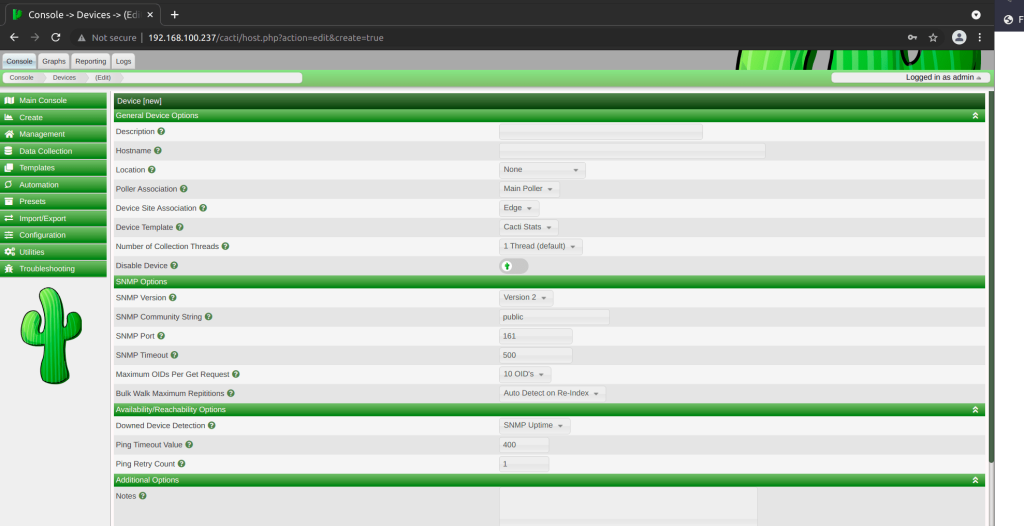
To add a device go to Console>Create>New Device then add a new device for monitoring.
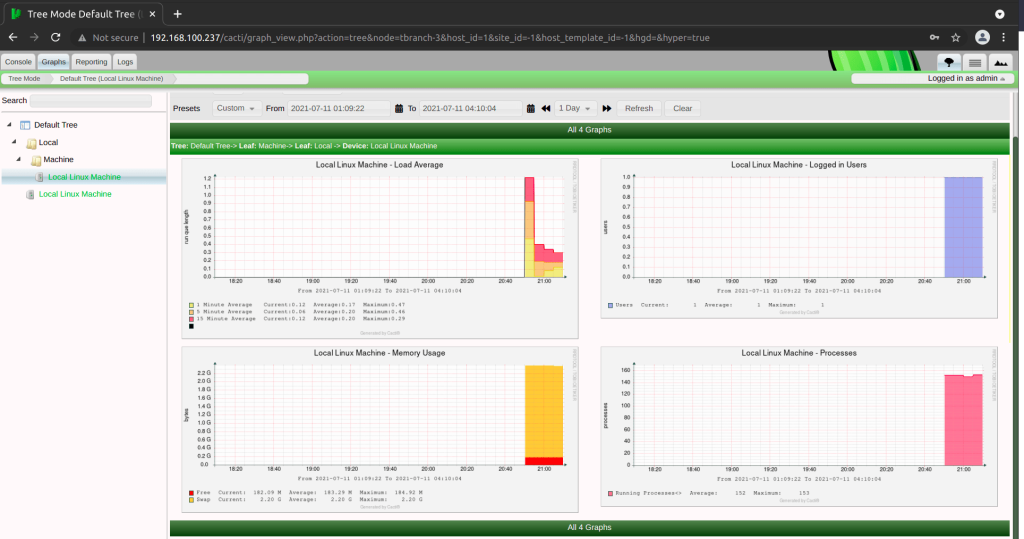
Cacti polling runs as a cron job which is set to run after every 5 minutes. This means that for you to see the metrics being populated you have to wait for at least 5 minutes.
You can then navigate to Graphs and choose the device that you added to see the metrics.
Conclusion
I hope this article was informative enough as we have been able to successfully deploy Cacti monitoring tool on Rocky and AlmaLinux 8. Cheers and please have a look at some of the articles about monitoring on this article.
Explore More with CloudSpinx
Looking to streamline your tech stack? At CloudSpinx, we deliver robust solutions tailored to your needs.
Check out more articles:

