Syncthing is a free and open source peer to peer (P2P) file synchronization app. It allows two devices to be synchronized over the LAN or remotely over the internet. It allows one to make changes on one device such as file creation, modification and deletion which is replicated automatically on other devices. The devices could be PCs, server or mobile phones. This guide, demonstrates how to install and Use Syncthing file synchronization on Rocky Linux or AlmaLinux 8.
Syncthing has the following features;
- Safety from data loss
- Easy to use
- Helps provide security against attackers
- It is automatic and user interaction required only when neccesary
- Universally available
Install Syncthing on Rocky Linux 8 / AlmaLinux 8
Since there is no officially supported repository for rpm installation packages in the repositories, we will choose to download and install Syncthing from the official release page.
Check for the latest version of Syncthing from the release page. Download the latest version of Syncthing on using:
curl -s https://api.github.com/repos/syncthing/syncthing/releases/latest | grep browser_download_url | grep linux-amd64 | cut -d '"' -f 4 | wget -qi -Now let’s extract the .tar file using:
tar xvf syncthing-linux-amd64*.tar.gzThis command unpacks in a file called synthing-linux-amd64* into the folder exists a file named synthing. We will copy it to /usr/local/bin directory.
sudo cp syncthing-linux-amd64-*/syncthing /usr/local/bin/Confirm your installation by checking your installed version
$ syncthing --version
syncthing v1.28.1 "Gold Grasshopper" (go1.23.3 linux-amd64) [email protected] 2024-11-24 21:55:12 UTC
Configure Syncthing Service
Create a user account syncthing
sudo useradd -m syncthingWe need to start and enable Syncthing to run on boot. This is done by first creating a file at /etc/systemd/system/ for the service as below.
sudo vi /etc/systemd/system/syncthing.serviceIn the created file, paste the following:
[Unit]
Description=Syncthing - Open Source Continuous File Synchronization for %I
Documentation=man:syncthing(1)
After=network.target

[Service]
User=syncthing
Group=syncthing
ExecStart=/usr/local/bin/syncthing --no-browser --gui-address="0.0.0.0:8384" --no-restart --logflags=0
Restart=on-failure
SuccessExitStatus=3 4
RestartForceExitStatus=3 4

# Hardening
ProtectSystem=full
PrivateTmp=true
SystemCallArchitectures=native
MemoryDenyWriteExecute=true
NoNewPrivileges=true

[Install]
WantedBy=multi-user.target
Update the list added on Systemd as blow:
sudo systemctl daemon-reloadThen start and enable syncthing service.
sudo systemctl start syncthing
sudo systemctl enable syncthing
Confirm the status of the service.
systemctl status syncthingAllow the port through the firewall
sudo firewall-cmd --add-port=8384/tcp --zone=public --permanent
sudo firewall-cmd --reload
Open Syncthing UI
Syncthing admin GUI is started automatically on port 8384. The service runs on https://localhost:8384/
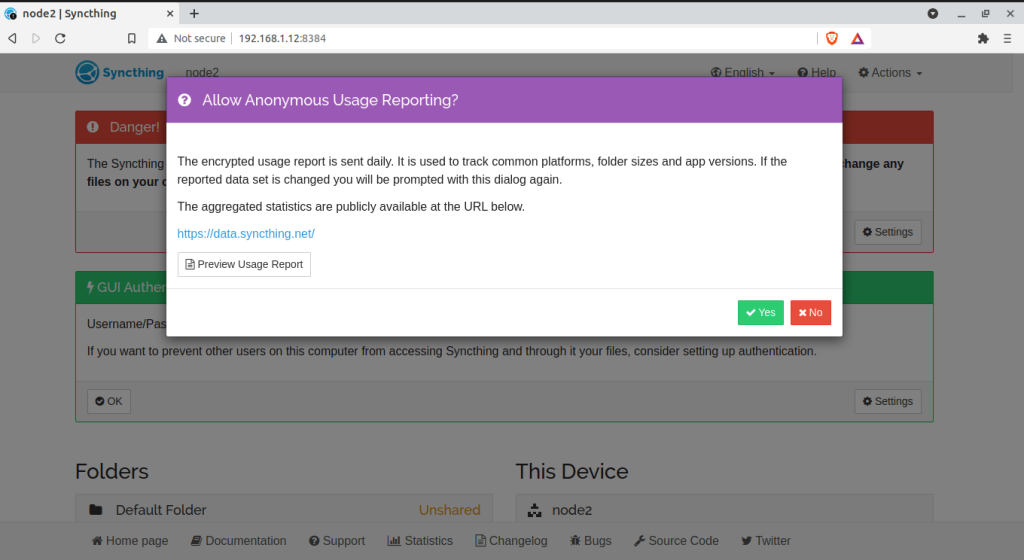
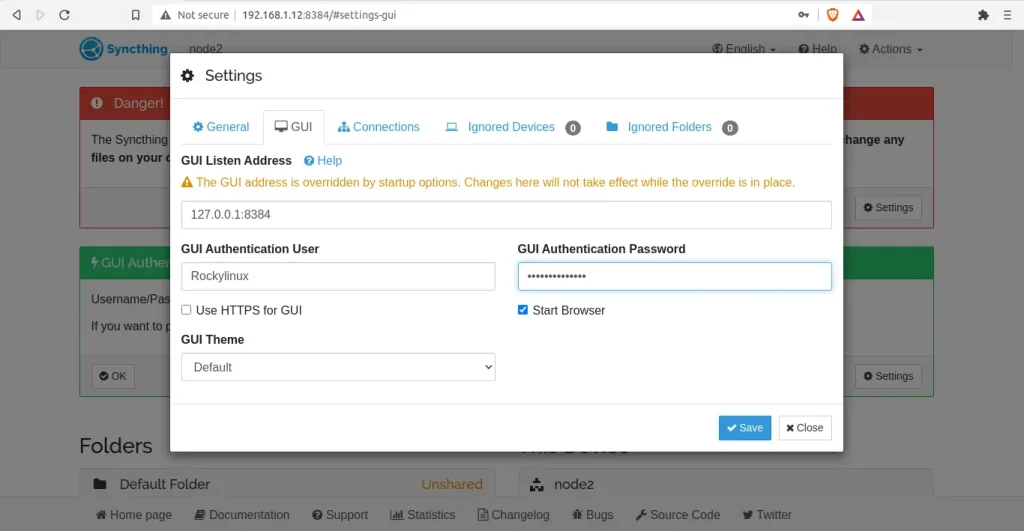
When you open syncthing for the first time, it does not ask for login credentials. You are required to set on login. Navigate to settings->GUI to set the username and password.
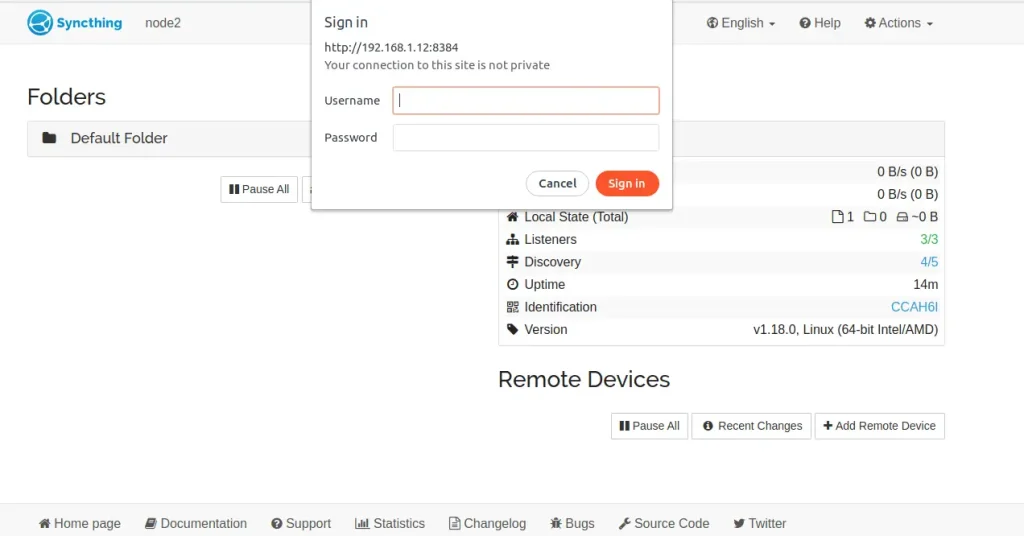
After saving the changes, you will required to authenticate as below:
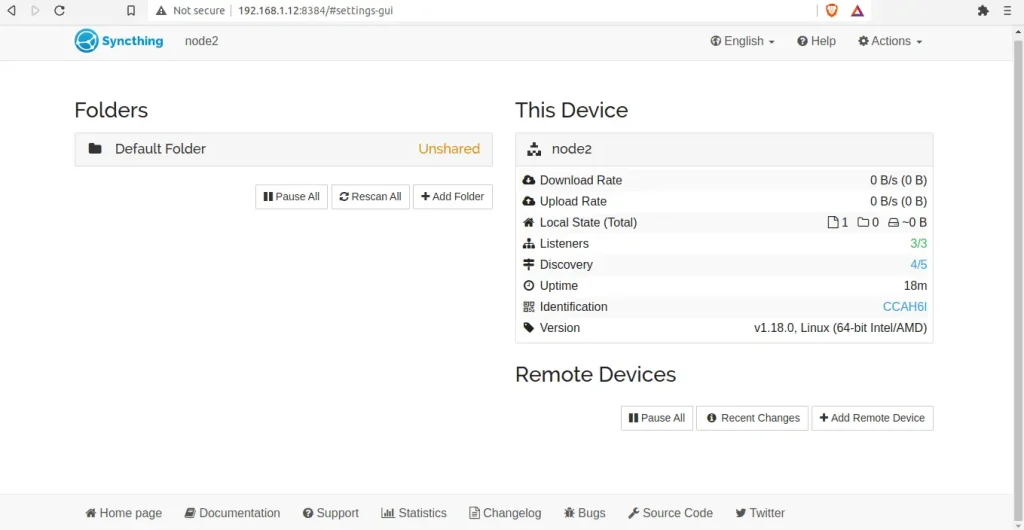
Once logged in, you should see an interface similar to this.
Sync data between devices using Syncthing
Syncing data with syncthing between devices requires one to have syncthing installed on all the devices to sync data with.
Syncthing Device ID
Incase you want to sync devices for the first time. You will require Device IDs. The ID is unique and generated as part of the key generation security measure the first time you start syncthing. Devices only communicate when they are configured with each others ID which is obtained from the Actions-> Show ID tab.
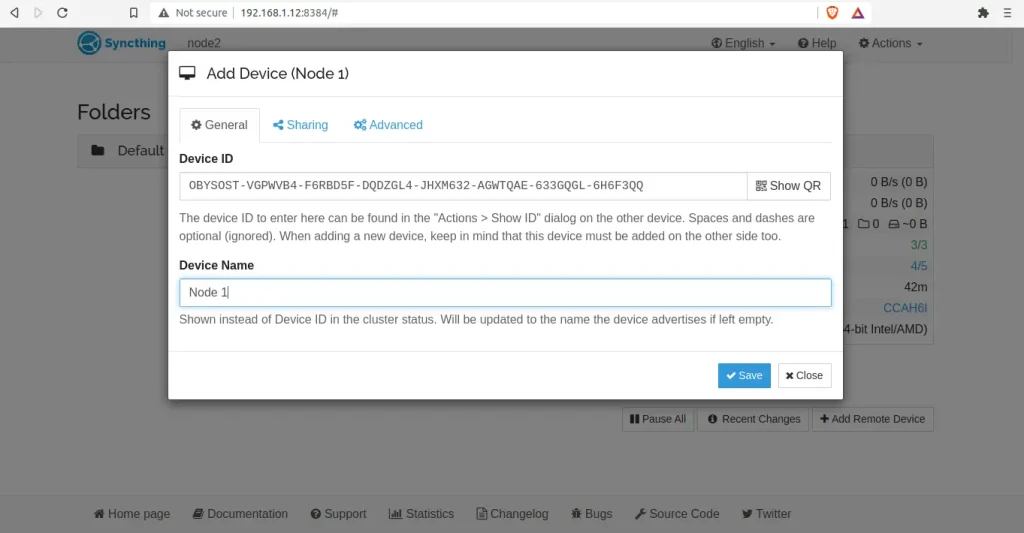
Add Device ID in Syncthing
To add a device for communication, click Add Remote Device. This action is done on both devices by exchanging the keys of either sides. The folder to share is also selected on the sharing tab. You the set the device name at this point or later. Then save the changes.
The added device appears on the bottom right showing Disconnected status as below
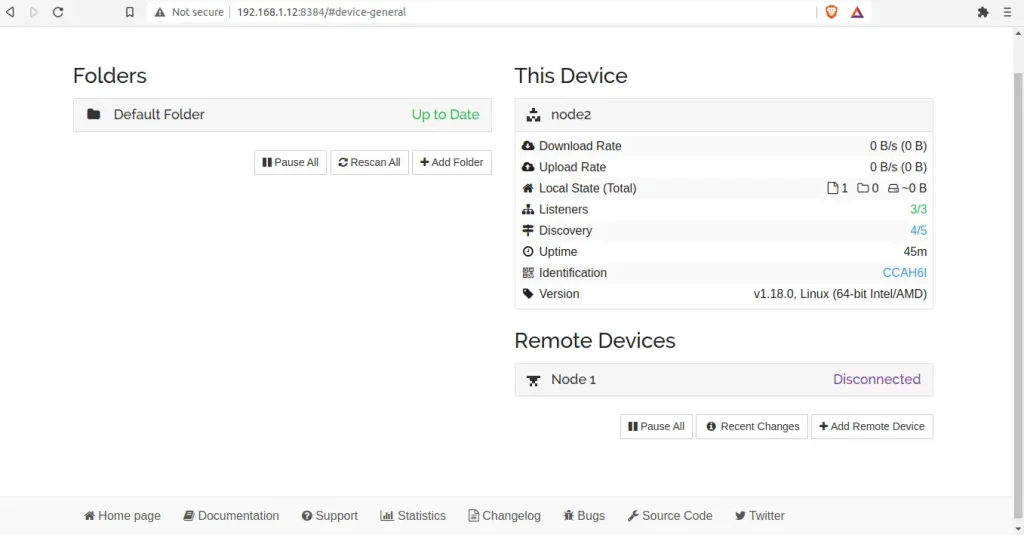
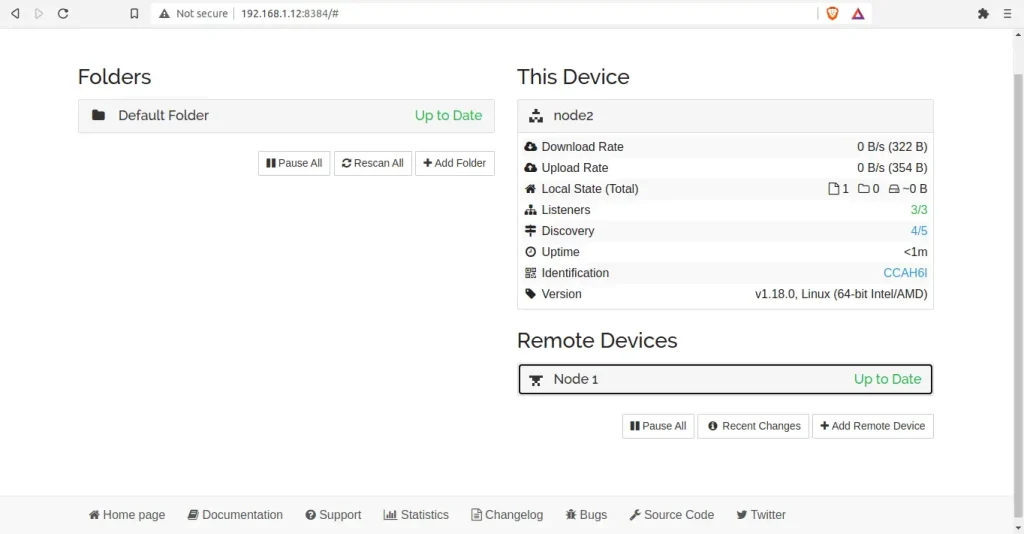
The same is done on the other device and then save and restart syncthing by navigating to “Actions” > “Restart” tab
When both devices are restarted,the status Disconnected changes to Up to Date.
Sync data using Syncthing.
With the devices linked you can view the shared file by clicking on the “Default Folder”
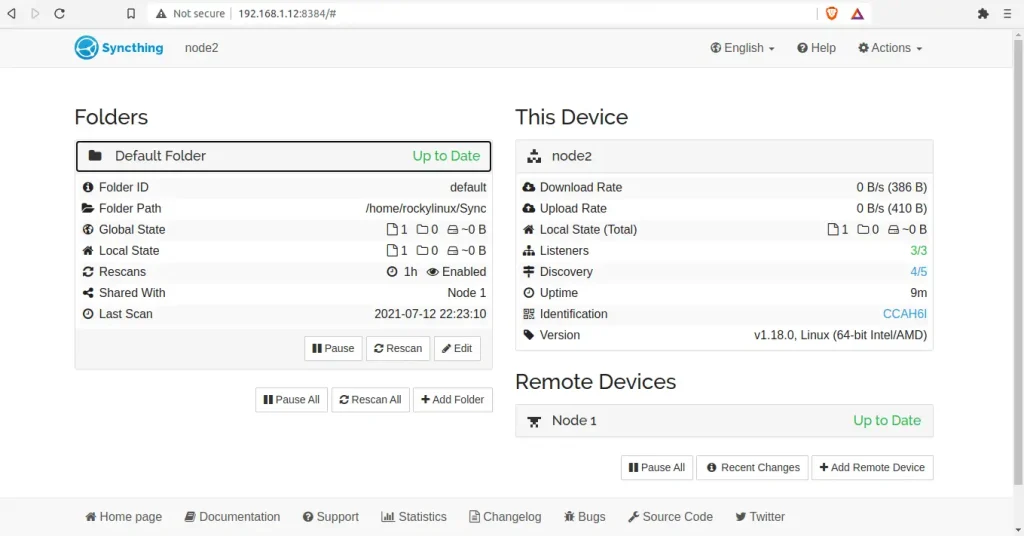
When you click on the Default folder, you can see details of the shared folder such as the folder ID, Path, the device sharing and time of last scan. With this synchronization whatever you put in the ~/Sync folder on one system will be shown on the other system and can edit the file as well.
Create a New Shared Folder in Syncthing
You can possibly create multiple shared folders between the paired devices aside from the default /sync folder.
To create folders, click “Add Folder” then enter the name of the folder, the Id and path of the folder to share with the other on the General tab.
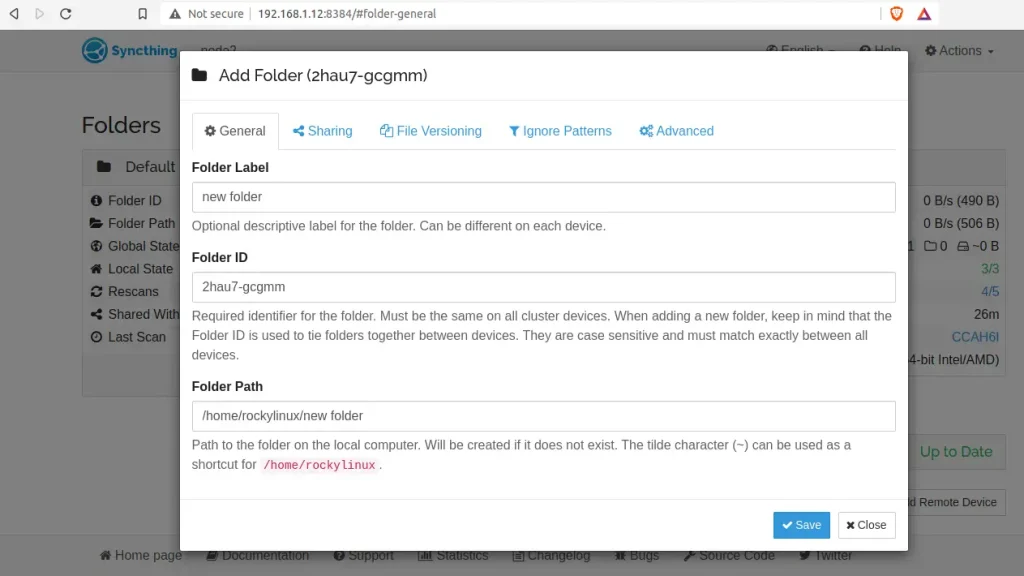
Then proceed to the sharing tab and select the device to share with; then to the advanced tab and set the folder type, either as Send-only or Receive-only or both Send & Receive and save.
On the other device, you will be required to add the folder as below.
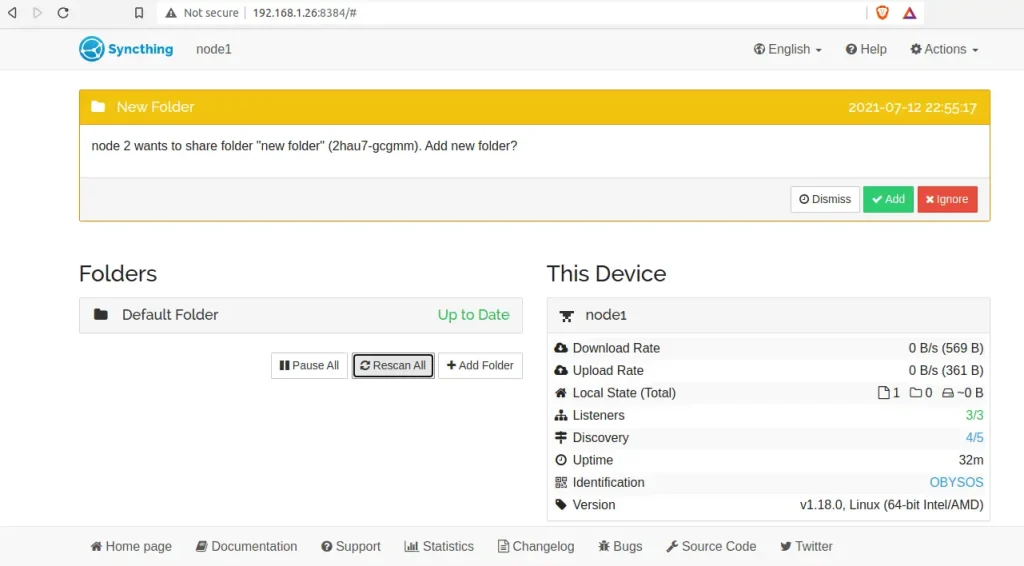
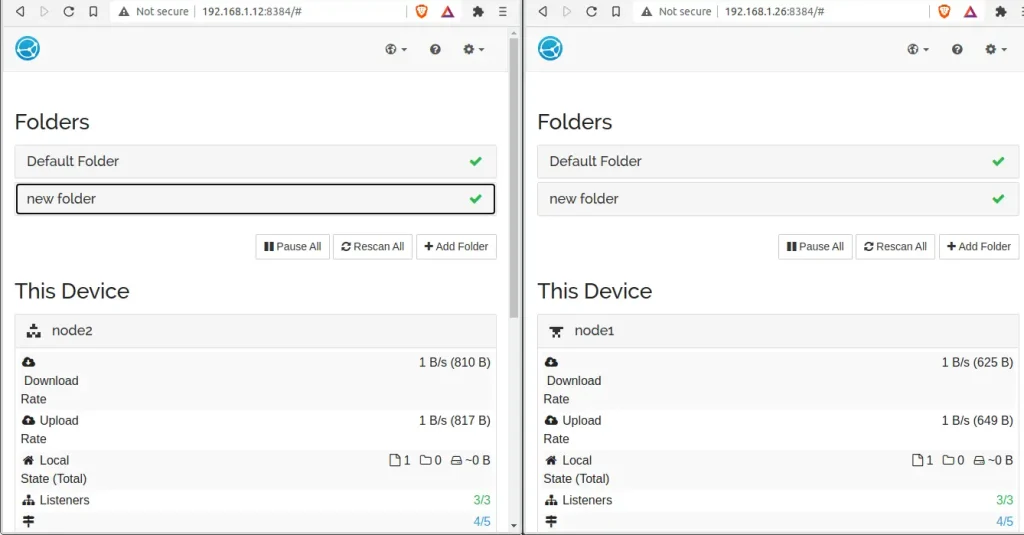
You are required to add and save it. Once saved, it appears on both systems as below.
Troubleshooting Syncthing
In cases where you have troubles syncing files between devices with syncthing, you might want to re-scan and re-sync devices database as below.
syncthing -reset-databaseConclusion
In the above guide, we have walked through the installation and use of Syncthing file synchronization on Rocky / AlmaLinux. We have also configured syncthing on. I hope this article was helpful.
Explore More with CloudSpinx
Looking to streamline your tech stack? CloudSpinx, your cloud consultant of choice.
More articles:

