Virtualbox is an open source type 2 hypervisor software used to create and run virtual machines on various operating systems i.e Linux, Windows, OS/2, Solaris, MacOS e.t.c .VirtualBox was first released in 2007. It was released as a free software licensed under GPL v2 with extension pack that contains driver released under PUEL which restricts commercial use.
It has many amazing features, among them are:
- Ability to import and export a VM from OCI
- Has an updated extensible Firmware Interfaces and use
- Supports nested virtualization on Intel CPUs
- Has imported VM groups and storage settings
- Offers the ability to create multiple VM instances
Getting Started
In this article we will be performing an install of VirtualBox 7.1 on Rocky / AlmaLinux 8. To run Virtualbox on your system make sure Virtualization is enabled on your processor. Check if Virtualization is enabled in BIOS/EFI.
egrep -c '(vmx|svm)' /proc/cpuinfoSample output: (must be non zero) if 0, virtualization is not enabled
$ egrep -c '(vmx|svm)' /proc/cpuinfo
4
Also ensure your host Operating System is 64-bit by executing:
$ lscpu
Architecture:        x86_64
CPU op-mode(s):      32-bit, 64-bit
Byte Order:          Little Endian
CPU(s):              1
On-line CPU(s) list: 0
Thread(s) per core:  1
Core(s) per socket:  1
Socket(s):           1
NUMA node(s):        1
Vendor ID:           GenuineIntel
CPU family:          6
Model:               69
Downloading and installing Virtualbox is easy. We will take the following steps:
Step 1. Add VirtualBox Repositories
Install EPEL repository on your System:
sudo dnf install epel-release -yConfirm the installed version
rpm -q epel-releaseThen proceed and install kernel headers.
sudo dnf install gcc make perl kernel-devel kernel-headers bzip2 dkms -yUpdate the kernel as well.
sudo dnf update -yAdd Virtualbox repositories to our to be able to install Virtualbox.
sudo dnf config-manager --add-repo=https://download.virtualbox.org/virtualbox/rpm/el/virtualbox.repoAfter the repository is added, run a system update for the changes to take effect.
sudo dnf update -y && sudo rebootStep 2. Install Virtualbox
In the added repository, there are a multiple versions of Virtualbox. First we search for the versions available.
dnf search virtualbox -ySample output
================================================================================= Name & Summary Matched: virtualbox =================================================================================
VirtualBox-6.0.x86_64 : Oracle VM VirtualBox
VirtualBox-6.1.x86_64 : Oracle VM VirtualBox
VirtualBox-7.0.x86_64 : Oracle VM VirtualBox
VirtualBox-7.1.x86_64 : Oracle VirtualBox
When I was writing this article, there were 3 versions of Virtualbox available. Install Virtualbox using this command:
sudo dnf install VirtualBox-7.1Dependency tree:
....
Transaction Summary
================================================================================
Install  10 Packages

Total download size: 154 M
Installed size: 430 M
Is this ok [y/N]: y
Accept the key importation as below:
Importing GPG key 0x98AB5139:
 Userid     : "Oracle Corporation (VirtualBox archive signing key) <[email protected]>"
 Fingerprint: 7B0F AB3A 13B9 0743 5925 D9C9 5442 2A4B 98AB 5139
 From       : https://www.virtualbox.org/download/oracle_vbox.asc
Is this ok [y/N]: y
Installing Virtualbox Extension Pack
Now we need to download extensions to support a variety of features such as Using USB 2.0, USB 3.0 devices , virtualbox RDP, disk encryption, NVMe and PXE boot for intel cards. This extension pack is downloaded from the official website
On the site, navigate to VirtualBox Extension pack all supported platforms. We can also download from CLI.
VER=$(curl -s https://download.virtualbox.org/virtualbox/LATEST.TXT)
wget https://download.virtualbox.org/virtualbox/$VER/Oracle_VM_VirtualBox_Extension_Pack-$VER.vbox-extpack
After downloading install it:
sudo VBoxManage extpack install Oracle_VM_VirtualBox_Extension_Pack-$VER.vbox-extpackAgree to the Licence terms and proceed with the installation.
Then build kernel modules:
$ sudo /sbin/vboxconfig
vboxdrv.sh: Stopping VirtualBox services.
vboxdrv.sh: Starting VirtualBox services.
vboxdrv.sh: Building VirtualBox kernel modules.
Use VirtualBox to create VMs
With virtualbox installed, we now want to put it in use. We will try and install Ubuntu server 20.04 LTS from an ISO file. Launch Virtualbox from the Activities/App Menu.
Creating a Virtual Machine on VirtualBox
When virtualbox launches, click New to create a new Virtual Machine. While here, you can create a virtual machine (Ubuntu 20.04LTS) with the following steps.
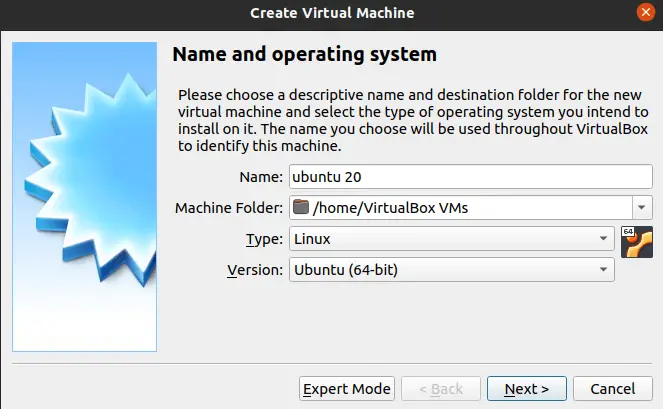
step 1. Set the machine Name and Type
Set the name,the path to store files and the type of operating system.
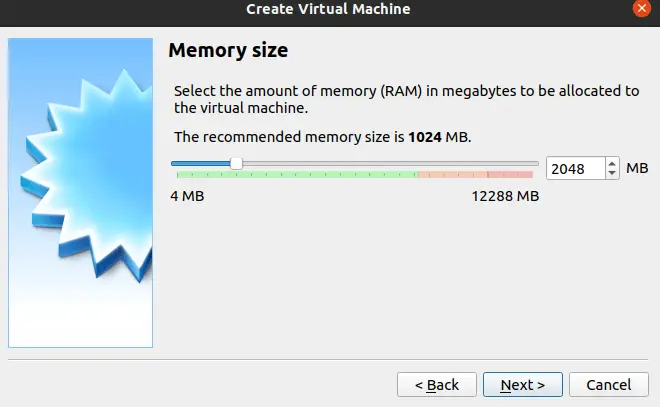
Step 2. Set Memory and Storage
Then we set the memory for your virtual machine.
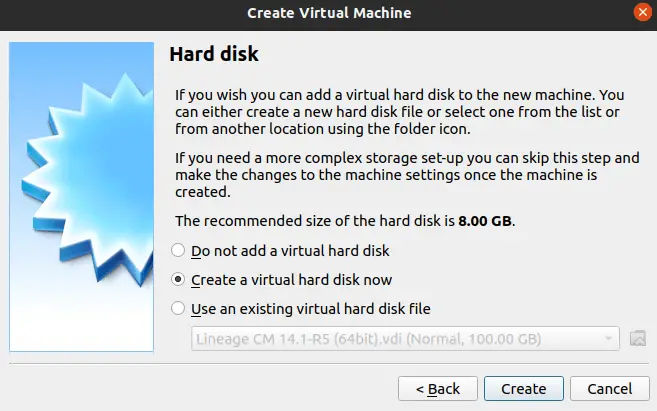
Create a hard disk for your virtual machine set the storage type and size.
Step 4. Add an Installation Media
After you have made the above settings, we now want to add an Installation media. In this case, we will use an ISO file. To add an installation media, navigate to the Settings -> Storage and add the ISO at contoller IDE click add optical drive as below.
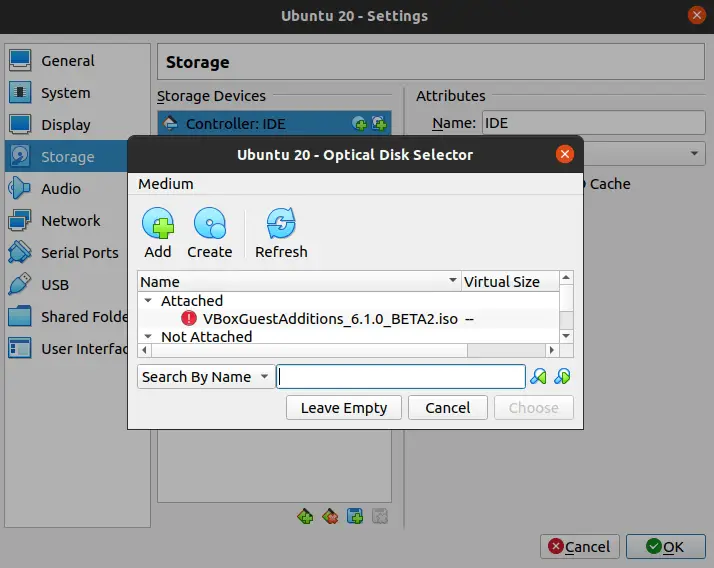
While on the above page, locate the ISO file for the virtual machine you want to create. Click on +Add to go to the files. After you have successfully added the ISO, click OK to apply the changes.
Step 4. Start the Installation.
Now click “start” to start your machine. When the machine starts, our installation starts as below.
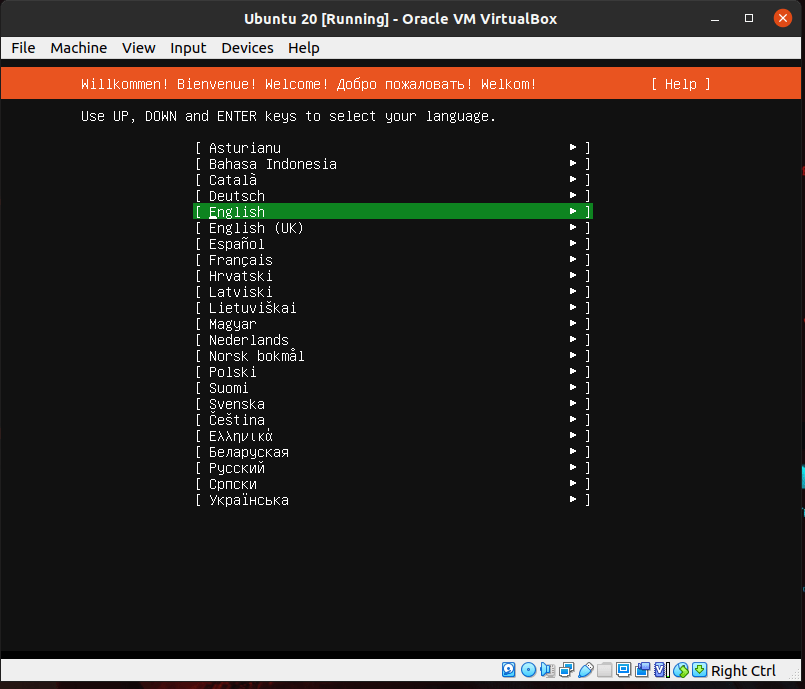
Go through the normal installation process of Ubuntu or whichever Operating system you are installing.
When installation is complete, shutdown your machine, navigate to the settings tab and unmount the ISO file by right clicking at it and select “Remove attachment”
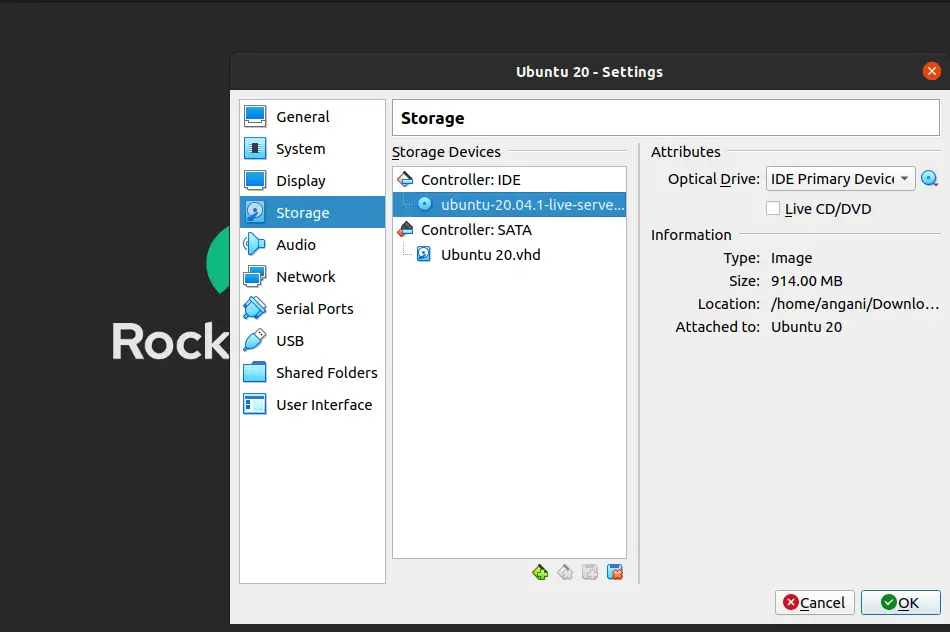
You can now run your installed virtual machine by clicking on “Start”
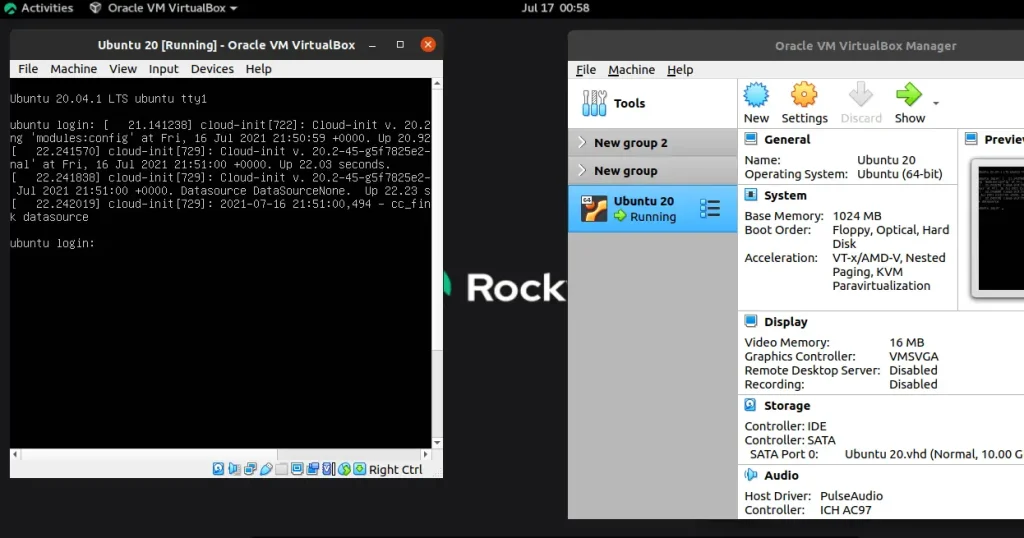
Virtualbox has many other features, one can run a virtual machine by importing a file such as an OVA/OVF file for the machine. You can also make network, display, audio and many other settings for the machine. It also allows one save snapshots and export Virtual Machine OVA and OVF files. With these files (templete), one can easily deploy a similar virtual machine from them
Conclusion
In this article, we have walked through a step by step demonstration on how to install VirtualBox on Rocky /AlmaLinux 8. I have also demonstrated how to set up a simple virtual machine with Virtualbox. I hope this article was helpful.
Explore More with CloudSpinx
Looking to streamline your tech stack? CloudSpinx, your cloud consultant of choice.
Other articles:

