Apache NetBeans is an Integrated Development Environment(IDE) that enables one create web, mobile or desktop applications from its components known as modules. It supports any programming language such as PHP, Java ,C , C++, HTML, Ruby on Rails, Ajax, Javascript and many other languages.
NetBeans can be installed on Linux, Windows, MacOS and Solaris operating systems. It has the following features:
- Has profiler, this provides expert experience for optimizing speed and memory usage of your application.
- Has Git and Mercurial, that work without need to install any plugins.
- It is easy to configure.
- It has a large community of developers, writers and designers to help improve it.
- Provides Internet of Things. You can create, test, debug and deploy profile applications that will work on mobile devices, PDAs, Raspberry and other embedded systems
- Has Maven. No plugins are required to use Maven in NetBeans.
Apache NetBeans is the latest version of IDE released on June 4, 2020. This article demonstrates how to install and configure NetBeans IDE.
Apache NetBeans installation consists of the following steps:
- Install Netbeans Dependencies (java JDK)
- Download and install NetBeans IDE
Step 1: Install NetBeans Dependencies
Let us begin with installing Java JDK.
sudo dnf install java-17-openjdk java-17-openjdk-develAccept the prompt to download the packages
....
Transaction Summary
======================================================================================================================================================================================================
Install  9 Packages

Total download size: 47 M
Installed size: 200 M
Is this ok [y/N]: y
In case you have other versions of Java installed, you can switch from the existing java version to a new one using this command.
$ sudo alternatives --config java
There are 2 programs which provide 'java'.

  Selection    Command
-----------------------------------------------
*+ 1           java-17-openjdk.x86_64 (/usr/lib/jvm/java-17-openjdk-17.0.3.0.7-2.el8_6.x86_64/bin/java)
   2           java-11-openjdk.x86_64 (/usr/lib/jvm/java-11-openjdk-11.0.15.0.10-2.el8_6.x86_64/bin/java)

Enter to keep the current selection[+], or type selection number: 1
To confirm the version on Java installed run:
$ java -version
Verifying...                          ################################# [100%]
Preparing...                          ################################# [100%]
Updating / installing...
   1:apache-netbeans-22-0             ################################# [100%]
Step 2: Install NetBeans IDE
We will download the latest release of NetBeans IDE installer package with wget or curl. Install if missing.
sudo dnf -y install wget curlDownload NetBeans RPM package:
### using curl ###
curl -O https://archive.apache.org/dist/netbeans/netbeans-installers/22/apache-netbeans-22-0.noarch.rpm

### Using wget ###
wget https://archive.apache.org/dist/netbeans/netbeans-installers/22/apache-netbeans-22-0.noarch.rpm
Run the script to install NetBeans.
$ sudo rpm -Uvh  apache-netbeans-*.noarch.rpm
Verifying...                          ################################# [100%]
Preparing...                          ################################# [100%]
Updating / installing...
   1:apache-netbeans-17-0             ################################# [100%]
Step 3: Launch NetBeans IDE
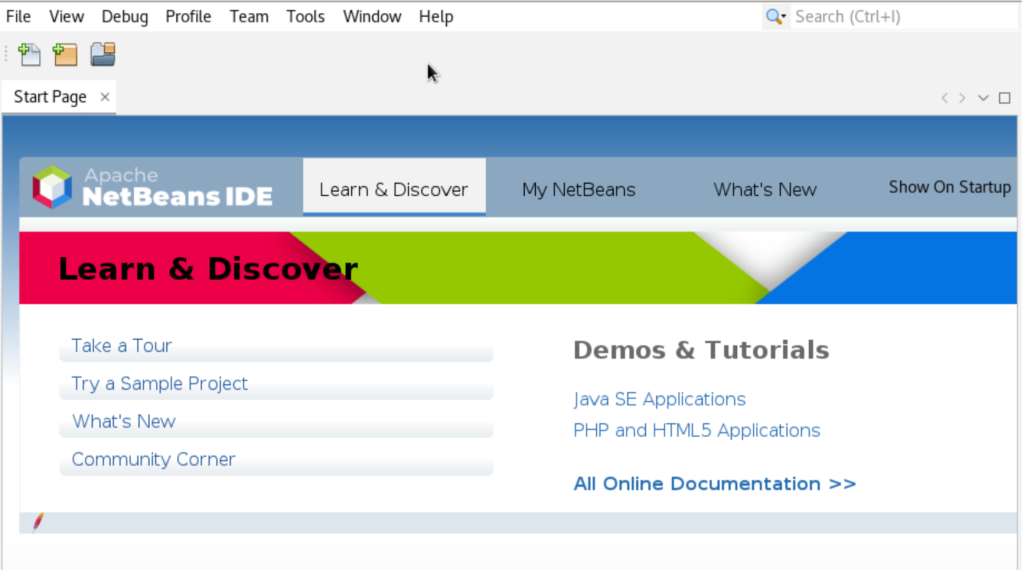
Now NetBeans IDE is successfully installed you can launch it by navigating to the App Menu. When launched, it opens this start up page.
Step 4: Create a Project in NetBeans IDE
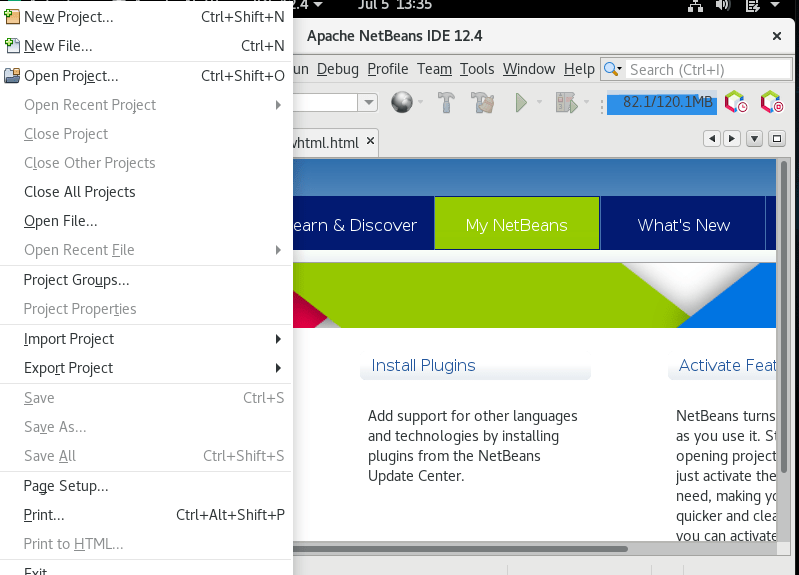
Creating projects in NetBeans IDE is easy. From the start up page above, navigate to File >>new project tab as shown.
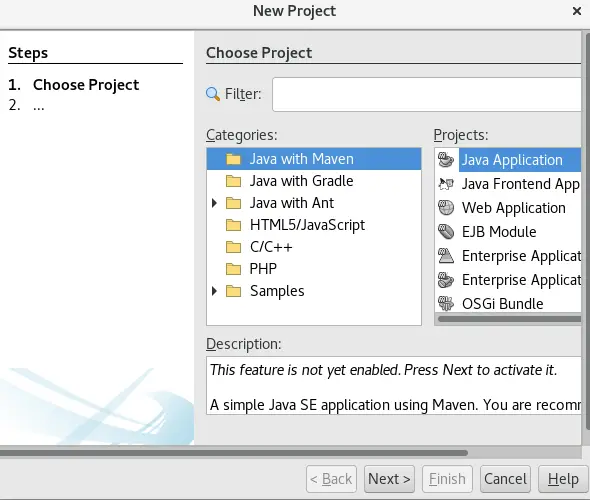
Here, we want to create a Java project with Maven.
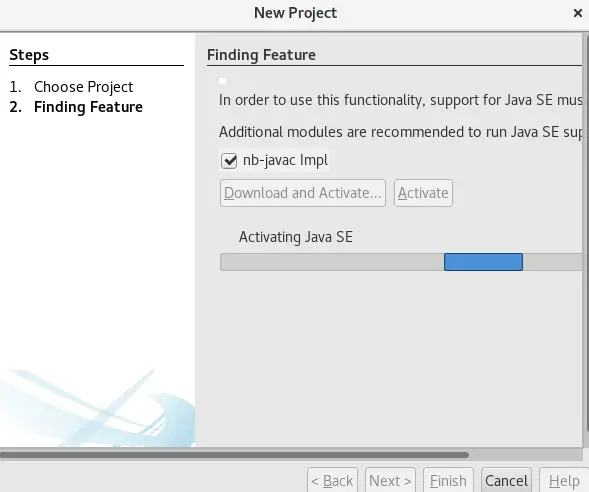
We will then download and activate the feature.
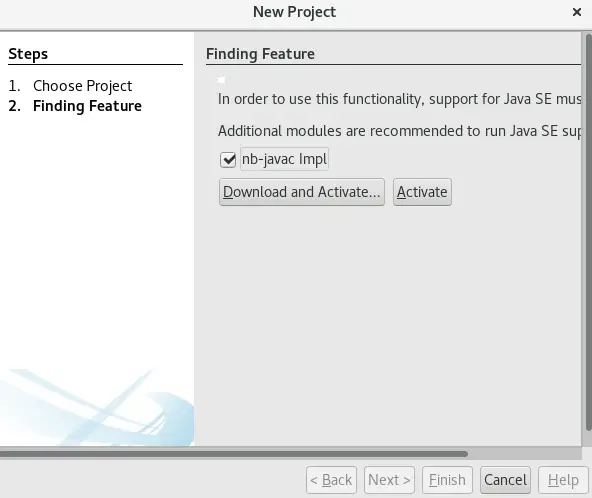
Confirm the installation as below.
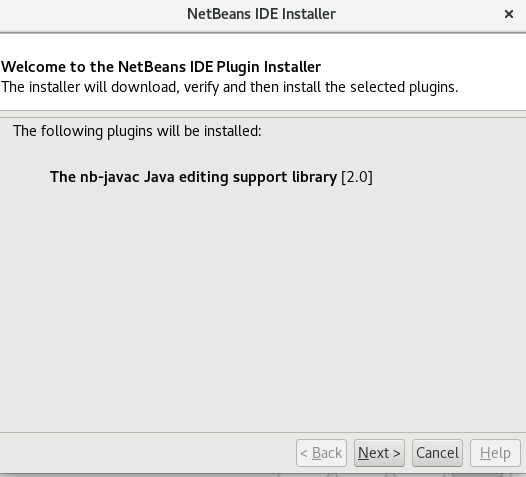
After a successful download, the plugin will be activated.
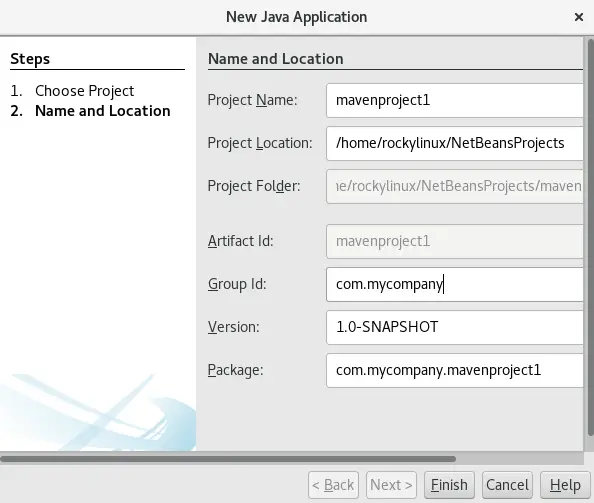
Set the name and location of your file.
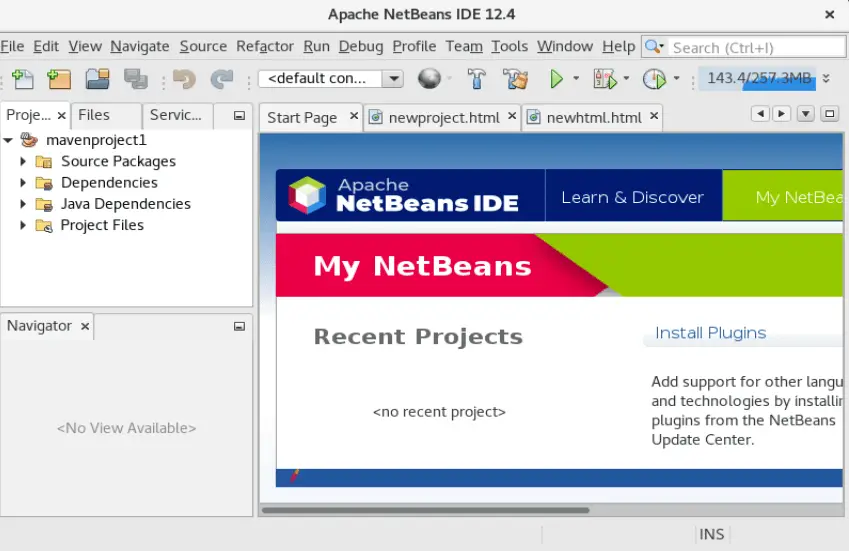
Click Finish and you will see your project appear as below.
Step 5: Installing NetBeans plugins
There are two ways to install plugins in NetBeans IDE namely:
- Install using the NetBeans update center
- Install plugins manually
1. Install Plugins using the Update Center
To install plugins using the update center navigate to Tools>>Plugins and open the plugins manager as below. On the plugins manager, navigate to the Settings tab and select update centers.
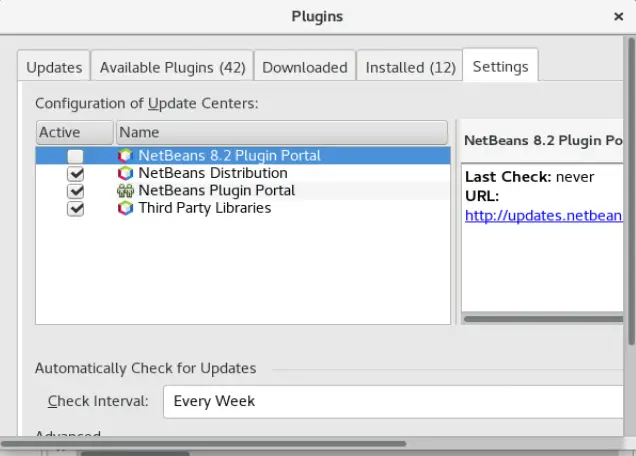
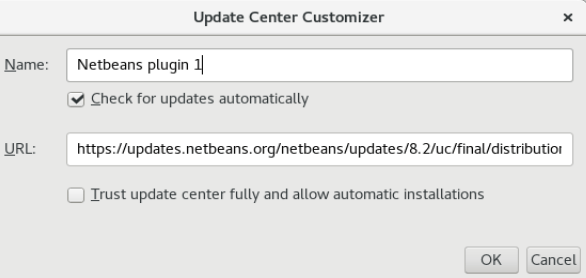
Then you add the update center. In the new window type the name and the URL of your update center Settings.
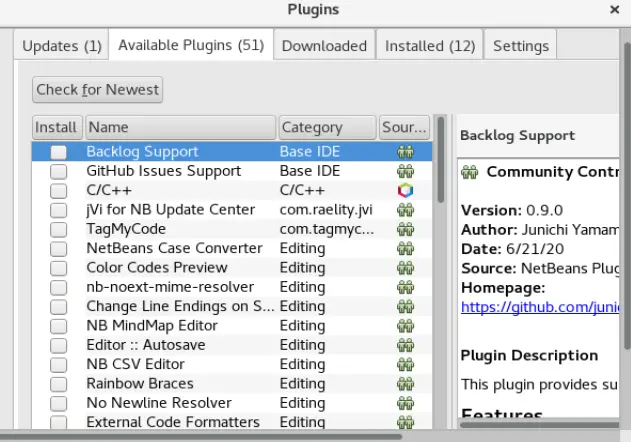
Plugins are then detected and displayed in the Available Plugins tab. Right click and Install the desired plugins and restart NetBeans.
2. Install NetBeans IDE Plugins Manually
Another way of installing plugins to NetBeans is by downloading them and adding them manually.
Download and extract the NetBeans plugins to a directory. Then navigate to the NetBeans plugin page and go to Tools>Plugins
Uninstall previous plugins by going to the “installed” tab and right click and select uninstall. Allow Netbeans to restart when requested.
Now proceed and add your downloaded plugins by clicking on the Downloaded tab and click add Plugins.
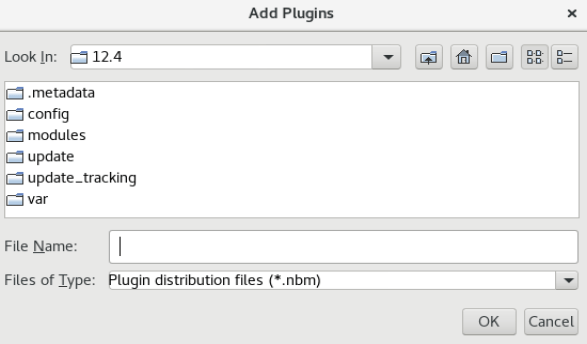
Browse to the download folder and select the .nbm files and click open. Then go to the Downloaded tab and install the loaded plugins as in the previous method. Agree to the Licence and click continue in case of additional validation.
After a successful installation Finish and restart Netbeans.
Conclusion
In the above article, I have demonstrated how to install and configure NetBeans IDE on Rocky Linux 8|AlmaLinux 8. I have also demonstrated how to add plugins to your NetBeans IDE. I hope this article was of help to you.
Explore More with CloudSpinx
Looking to streamline your tech stack? At CloudSpinx, we deliver robust solutions tailored to your needs.
Check out more articles:

