In this guide we shall discuss on how to setup Nagios on Rocky Linux 9. Nagios is an open source host, process, service and network monitoring tool for various operating systems such as Windows, Linux, BSD e.t.c.
Nagios provides a web interface for administration and monitoring. This application can send email, SMS and Phone call alerts in case of an outage on the devices you are monitoring.
The steps below will guide us on how to setup Nagios on Rocky Linux 9 system. But before you begin installation of packages, set SELinux to permissive mode:
sudo sed -i 's/SELINUX=.*/SELINUX=permissive/g' /etc/selinux/config
sudo setenforce 0
Step 1 – Update system
Update your system packages:
sudo dnf updateStep 2 – Install Dependencies
Install package dependencies required for installation of Nagios
sudo dnf install -y php perl httpd wget unzip glibc automake glibc-common gettext autoconf php php-cli gcc gd gd-devel net-snmp openssl-devel unzip net-snmp postfix net-snmp-utilsInstall Development tools:
sudo dnf -y groupinstall "Development Tools"After installation, start and enable httpd and php-fpm services:
sudo systemctl enable --now httpd php-fpmYou can check the status of the service as shown below:
systemctl status httpd php-fpmStep 3 – Download and Configure Nagios
Download the latest version of Nagios Core and extract Nagios tarball.
cd ~
rm -rf nagios*
curl -s  https://api.github.com/repos/NagiosEnterprises/nagioscore/releases/latest |grep browser_download_url  |  cut -d '"' -f 4  | wget -i -
tar -xvf nagios-*.tar.gz
After a successful download, navigate to the extracted folder to proceed with the installation:
cd nagios-*/Run the configure script:
./configureRun the make command to compile the main program:
sudo make allCreate a nagios user and add apache user to the nagios group
sudo make install-groups-users
sudo usermod -a -G nagios apache
Install Nagios on Rocky Linux 9.
sudo make installInstall the init script in /lib/systemd/system.
[root@rocky9 nagios-4.5.9]# sudo make install-daemoninit
/usr/bin/install -c -m 755 -d -o root -g root /lib/systemd/system
/usr/bin/install -c -m 755 -o root -g root startup/default-service /lib/systemd/system/nagios.service
Created symlink /etc/systemd/system/multi-user.target.wants/nagios.service → /usr/lib/systemd/system/nagios.service.

*** Init script installed ***
Install and configure permissions on the directory for holding the external command line:
[root@rocky9 nagios-4.5.9]# sudo make install-commandmode
/usr/bin/install -c -m 775 -o nagios -g nagios -d /usr/local/nagios/var/rw
chmod g+s /usr/local/nagios/var/rw

*** External command directory configured ***
Install sample config files in /usr/local/nagios/etc.
[root@rocky9 nagios-4.5.9]# sudo make install-config
/usr/bin/install -c -m 775 -o nagios -g nagios -d /usr/local/nagios/etc
/usr/bin/install -c -m 775 -o nagios -g nagios -d /usr/local/nagios/etc/objects
/usr/bin/install -c -b -m 664 -o nagios -g nagios sample-config/nagios.cfg /usr/local/nagios/etc/nagios.cfg
/usr/bin/install -c -b -m 664 -o nagios -g nagios sample-config/cgi.cfg /usr/local/nagios/etc/cgi.cfg
/usr/bin/install -c -b -m 660 -o nagios -g nagios sample-config/resource.cfg /usr/local/nagios/etc/resource.cfg
/usr/bin/install -c -b -m 664 -o nagios -g nagios sample-config/template-object/templates.cfg /usr/local/nagios/etc/objects/templates.cfg
/usr/bin/install -c -b -m 664 -o nagios -g nagios sample-config/template-object/commands.cfg /usr/local/nagios/etc/objects/commands.cfg
/usr/bin/install -c -b -m 664 -o nagios -g nagios sample-config/template-object/contacts.cfg /usr/local/nagios/etc/objects/contacts.cfg
/usr/bin/install -c -b -m 664 -o nagios -g nagios sample-config/template-object/timeperiods.cfg /usr/local/nagios/etc/objects/timeperiods.cfg
/usr/bin/install -c -b -m 664 -o nagios -g nagios sample-config/template-object/localhost.cfg /usr/local/nagios/etc/objects/localhost.cfg
/usr/bin/install -c -b -m 664 -o nagios -g nagios sample-config/template-object/windows.cfg /usr/local/nagios/etc/objects/windows.cfg
/usr/bin/install -c -b -m 664 -o nagios -g nagios sample-config/template-object/printer.cfg /usr/local/nagios/etc/objects/printer.cfg
/usr/bin/install -c -b -m 664 -o nagios -g nagios sample-config/template-object/switch.cfg /usr/local/nagios/etc/objects/switch.cfg

*** Config files installed ***

Remember, these are *SAMPLE* config files.  You'll need to read
the documentation for more information on how to actually define
services, hosts, etc. to fit your particular needs.
Install Apache config file for Nagios web interface:
[root@rocky9 nagios-4.5.9]# sudo make install-webconf
/usr/bin/install -c -m 644 sample-config/httpd.conf /etc/httpd/conf.d/nagios.conf
if [ 0 -eq 1 ]; then \
	ln -s /etc/httpd/conf.d/nagios.conf /etc/apache2/sites-enabled/nagios.conf; \
fi

*** Nagios/Apache conf file installed ***
Install the classic theme for Nagios web interface
[root@rocky9 nagios-4.5.9]# sudo make install-classicui

*** Classic theme installed ***
NOTE: Use 'make install-exfoliation' to use new Nagios theme
Install the exfoliation heme for Nagios web interface:
[root@rocky9 nagios-4.5.9]# sudo make install-exfoliation

*** Exfoliation theme installed ***
NOTE: Use 'make install-classicui' to revert to classic Nagios theme
Step 4 – Create Nagios Web user
We need to create a user account for accessing Nagios Web interface. Create user using htpasswd command:
[root@rocky9 nagios-4.5.9]# sudo htpasswd -c /usr/local/nagios/etc/htpasswd.users nagiosadmin
New password:
Re-type new password:
Adding password for user nagiosadmin
In the above command, we created a user called nagiosadmin and assigned a password to the user.
After the above exercise, restart apache service for the changes to take effect.
sudo systemctl restart httpdStep 5 – Install Nagios Plugins
Download and install Nagios plugins form Github releases page. Then extract the downloaded file.
cd ~
rm -rf nagios-plugins-*
curl -s  https://api.github.com/repos/nagios-plugins/nagios-plugins/releases/latest |grep browser_download_url  |  cut -d '"' -f 4 | wget -i -
tar -xvf nagios-plugins-*.tar.gz
Navigate to the plugins directory extracted and install the downloaded plugins as shown below:
cd nagios-plugins-*/
./configure --with-nagios-user=nagios --with-nagios-group=nagios
make
sudo make install
Step 6 – Start Nagios service
Verify thet the Nagios installation has been successful.
[root@rocky9 nagios-plugins-2.4.12]# sudo /usr/local/nagios/bin/nagios --verify-config /usr/local/nagios/etc/nagios.cfg

Nagios Core 4.5.9
Copyright (c) 2009-present Nagios Core Development Team and Community Contributors
Copyright (c) 1999-2009 Ethan Galstad
Last Modified: 2024-12-19
License: GPL

Website: https://www.nagios.org
Reading configuration data...
   Read main config file okay...
   Read object config files okay...

Running pre-flight check on configuration data...

Checking objects...
	Checked 8 services.
	Checked 1 hosts.
	Checked 1 host groups.
	Checked 0 service groups.
	Checked 1 contacts.
	Checked 1 contact groups.
	Checked 24 commands.
	Checked 5 time periods.
	Checked 0 host escalations.
	Checked 0 service escalations.
Checking for circular paths...
	Checked 1 hosts
	Checked 0 service dependencies
	Checked 0 host dependencies
	Checked 5 timeperiods
Checking global event handlers...
Checking obsessive compulsive processor commands...
Checking misc settings...

Total Warnings: 0
Total Errors:   0

Things look okay - No serious problems were detected during the pre-flight check
Start and enable Nagios service.
sudo systemctl restart nagios
sudo systemctl  enable --now nagios
For a service that is up and running:
[root@rocky9 nagios-plugins-2.4.12]# sudo systemctl status nagios
● nagios.service - Nagios Core 4.5.9
     Loaded: loaded (/usr/lib/systemd/system/nagios.service; enabled; preset: disabled)
     Active: active (running) since Tue 2024-12-24 08:47:40 EAT; 7s ago
       Docs: https://www.nagios.org/documentation
   Main PID: 123093 (nagios)
      Tasks: 6 (limit: 35870)
     Memory: 6.1M
        CPU: 326ms
     CGroup: /system.slice/nagios.service
             ├─123093 /usr/local/nagios/bin/nagios -d /usr/local/nagios/etc/nagios.cfg
             ├─123094 /usr/local/nagios/bin/nagios --worker /usr/local/nagios/var/rw/nagios.qh
             ├─123095 /usr/local/nagios/bin/nagios --worker /usr/local/nagios/var/rw/nagios.qh
             ├─123096 /usr/local/nagios/bin/nagios --worker /usr/local/nagios/var/rw/nagios.qh
             ├─123097 /usr/local/nagios/bin/nagios --worker /usr/local/nagios/var/rw/nagios.qh
             └─123131 /usr/local/nagios/bin/nagios -d /usr/local/nagios/etc/nagios.cfg

Dec 24 08:47:40 rocky9.cloudspinx.com nagios[123093]: qh: Socket '/usr/local/nagios/var/rw/nagios.qh' successfully initialized
Dec 24 08:47:40 rocky9.cloudspinx.com nagios[123093]: qh: core query handler registered
Dec 24 08:47:40 rocky9.cloudspinx.com nagios[123093]: qh: echo service query handler registered
Dec 24 08:47:40 rocky9.cloudspinx.com nagios[123093]: qh: help for the query handler registered
Dec 24 08:47:40 rocky9.cloudspinx.com nagios[123093]: wproc: Successfully registered manager as @wproc with query handler
Dec 24 08:47:40 rocky9.cloudspinx.com nagios[123093]: wproc: Registry request: name=Core Worker 123094;pid=123094
Dec 24 08:47:40 rocky9.cloudspinx.com nagios[123093]: wproc: Registry request: name=Core Worker 123096;pid=123096
Dec 24 08:47:40 rocky9.cloudspinx.com nagios[123093]: wproc: Registry request: name=Core Worker 123097;pid=123097
Dec 24 08:47:40 rocky9.cloudspinx.com nagios[123093]: wproc: Registry request: name=Core Worker 123095;pid=123095
Dec 24 08:47:42 rocky9.cloudspinx.com nagios[123093]: Successfully launched command file worker with pid 123131
Step 7 – Access Nagios Web Interface
Before we can access this web interface, we need to allow http service through the firewall as shown below:
sudo firewall-cmd --permanent  --add-service={http,https}
sudo firewall-cmd --reload
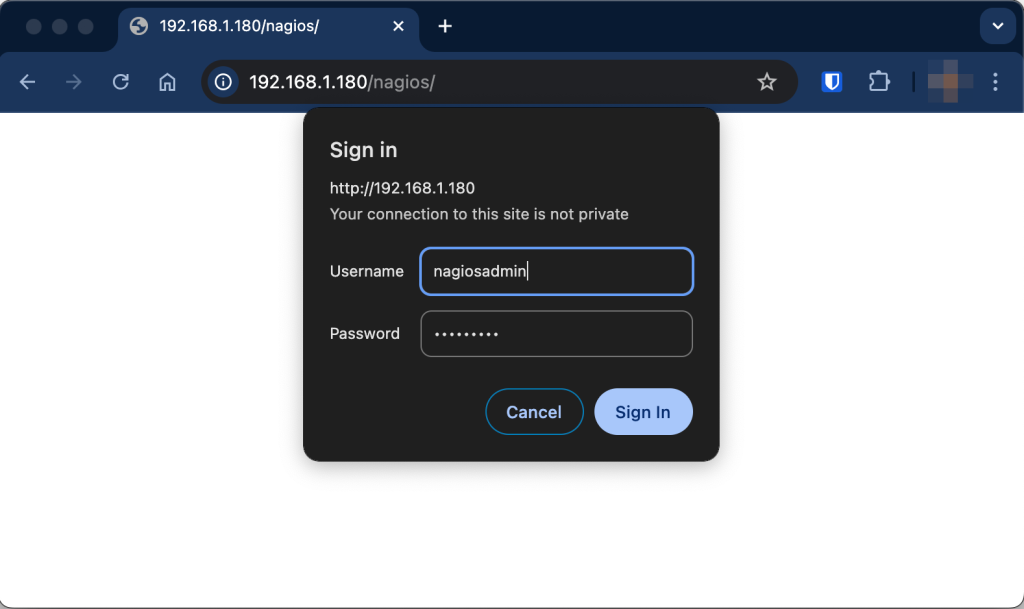
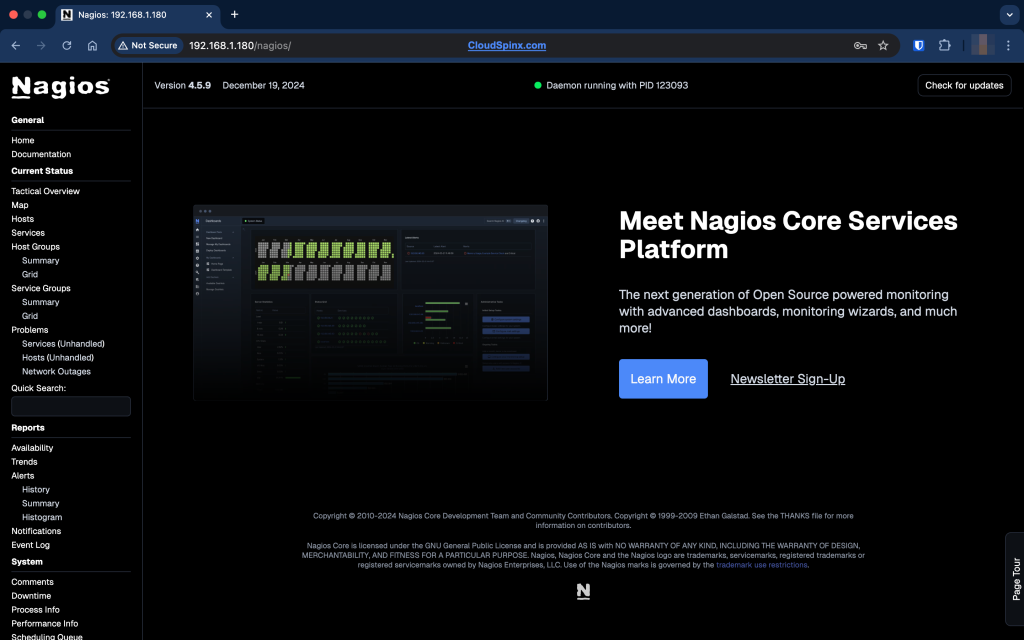
Then access the Nagios dashboard via http://[ip/hostname]/nagios/ of your rocky Linux 9 host.
You will get to the login interface where you can login with the credentials we set at step 4 for nagiosadmin user.

Viola! We now have our Nagios server installed on Rocky Linux 9:

You can now add your hosts for monitoring as discussed in the Nagios Documentation discussed in another article.
Explore More with CloudSpinx
Looking to streamline your tech stack? At CloudSpinx, we deliver robust solutions tailored to your needs.
More articles:


