Would you like to collaborate with others and manage your source code more easily? GitHub and Git are essential tools! They are very simple to set up and use Visual Studio Code. Even if you’re a Git newbie, you can use VS Code’s easy UI to build and merge branches, push and pull code, commit code changes, and more. Moreover, if you’re an expert, you’ll discover that you can execute jobs using the Git command-line interface, saving you time and effort. Because of the VS Code and Git workflow’s seamless transition, you can additionally continue to stay in your favorite editor and finish extra tasks.
Understand VS Code
Visual Studio Code is a free code editor available for Windows, Linux, and macOS that was developed by Microsoft. A very powerful tool that makes code debugging, task execution, and version control easier. Its many features, which distinguish it from other code editors, consist of syntax highlighting, refactoring, automated code completion, snippets, and much more.
Advantages of Git and GitHub
Let’s see some of the advantages that makes Git and GitHub to be a vital tools:
Git:
- Distributed Version Control
- Branching and merging capabilities
- Speed and Performance to work with
- It ensures data integrity
- Repositories are smaller
- Stash branches
GitHub:
- Enables tracking and archiving of software project modifications
- Makes code sharing easier
- Simplifies the code review process
- Facilitates cooperation amongst developers
- Serves as a social networking platform where developers may network and propose their ideas.
- Centralized Collaboration.
In this guide, I’ll take you through the steps on Cloning Git repository from GitHub in Visual Studio Code. Also, we shall demonstrate on Windows and Linux machine.
On Windows System
Kindly follow the steps given below to accomplish the process of Cloning Git repository from GitHub in Visual Studio Code on Windows System.
Install Git on Windows
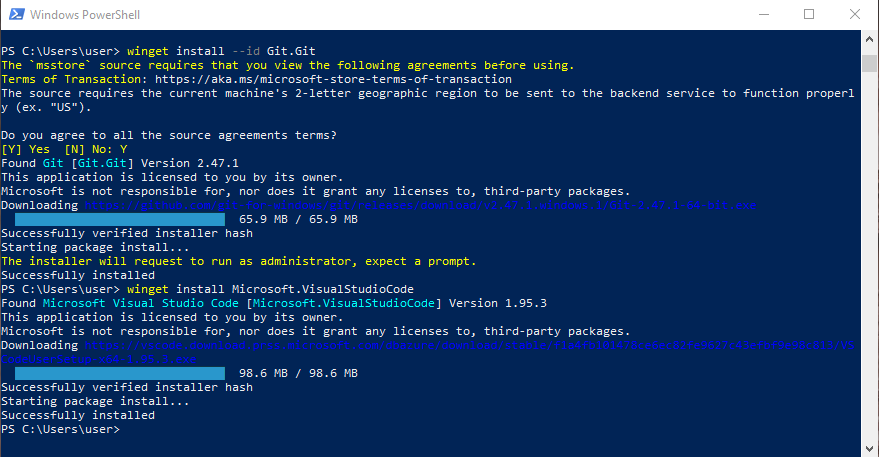
Installing Git on Windows requires running PowerShell or Terminal as Administrator after selecting the Windows Start button. Then, you can use the provided command to install Git. Ensure that you’ve installed Winget command.
winget install --id Git.GitAs an alternative, it is available for download via official website of Git.
Install Visual Studio Code
To install VS Code on Windows, utilize the command below, it’s the simplest way.
winget install Microsoft.VisualStudioCodeYou can even download by visiting the official website.
On Linux Machine
Check the instructions below to accomplish on Linux system:
Install Git on Linux Machine
Installing Git on Linux may be done most easily by utilizing your distribution’s favorite package manager.
# On Debian Based
sudo apt install git
#OR with PPA
sudo add-apt-repository ppa:git-core/ppa
sudo apt update && sudo apt install git

# On RHEL
sudo yum install git -y

# On macOS
brew install git
Once git is installed, continue to the next step to install VS Code.
Install VS Code on Linux
To install VS Code for instance on Ubuntu, perform the steps below. First, install the required packages by running the below line.
sudo apt install software-properties-common apt-transport-https wget -yNext, you’ve to import the repo for VS Code.
wget -O- https://packages.microsoft.com/keys/microsoft.asc | sudo gpg --dearmor | sudo tee /usr/share/keyrings/vscode.gpgLet’s now proceed with integrating the Microsoft Visual Source repository.
echo deb [arch=amd64 signed-by=/usr/share/keyrings/vscode.gpg] https://packages.microsoft.com/repos/vscode stable main | sudo tee /etc/apt/sources.list.d/vscode.listNow, run the system updates.
sudo apt updateAll you have to do now is type the command below into the console to install Visual Studio Code Editor.
sudo apt install codeWait for installation to finish.
Perform the below steps on both Windows & Linux
Access Git: Clone command
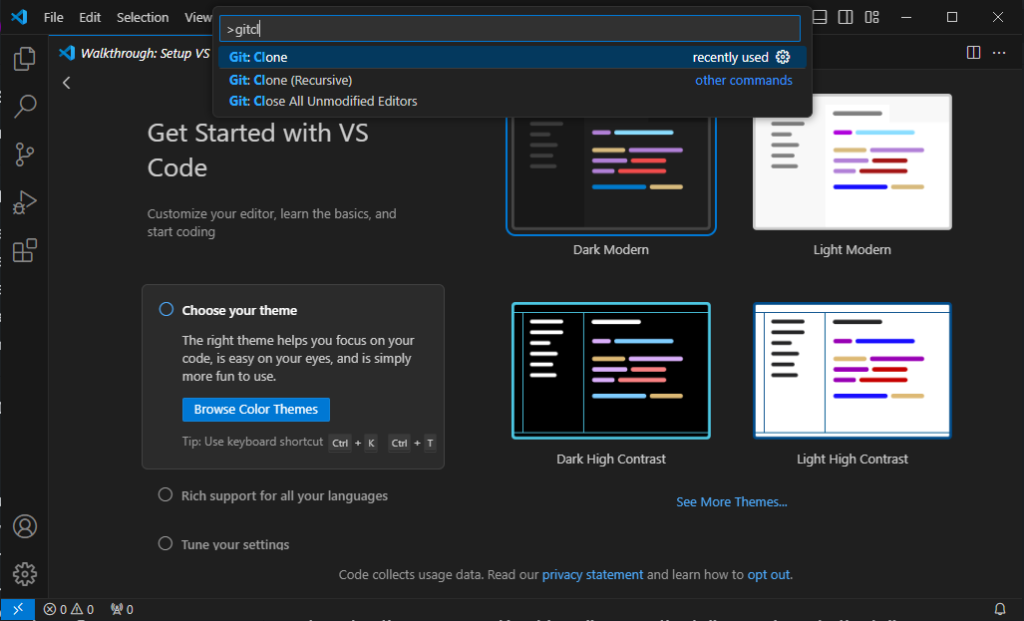
Once VS Code is launched, you may access the command palette by pressing Ctlr+Shift+P. Then type gitcl there, Git: Clone will appear in the search results; choose it.
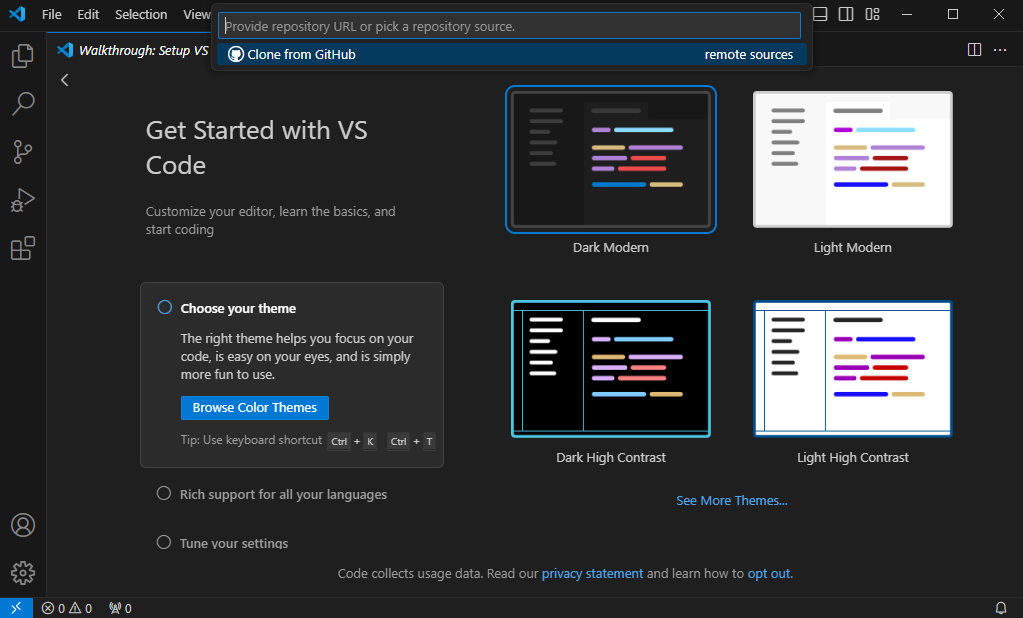
Next, you will be prompted to provide the repository URL. However, you may skip this step by selecting Clone from GitHub as we wish to clone the repository from GitHub.
A sign-in window for your GitHub account will appear. Opening a browser is as simple as clicking the Allow button. Now, enter your username and password if you already have an account, else create an account.
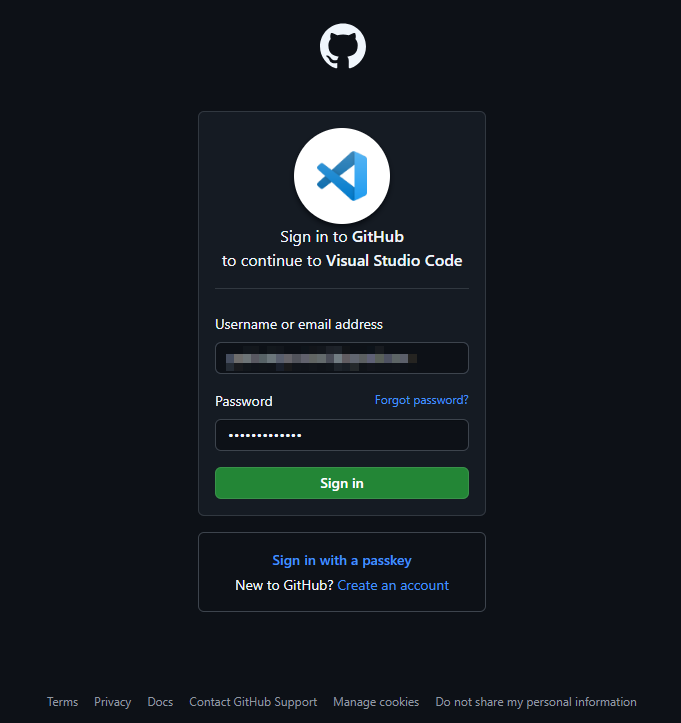
Upon logging in, Visual Studio Code will request authorization to get data and the repository hosted on your GitHub account. Click on the Authorize Visual-Studio-Code button.
Clone the GitHub Git Repository
In Visual Studio Code, paste the URL of the Git repository you wish to clone, then press Enter.
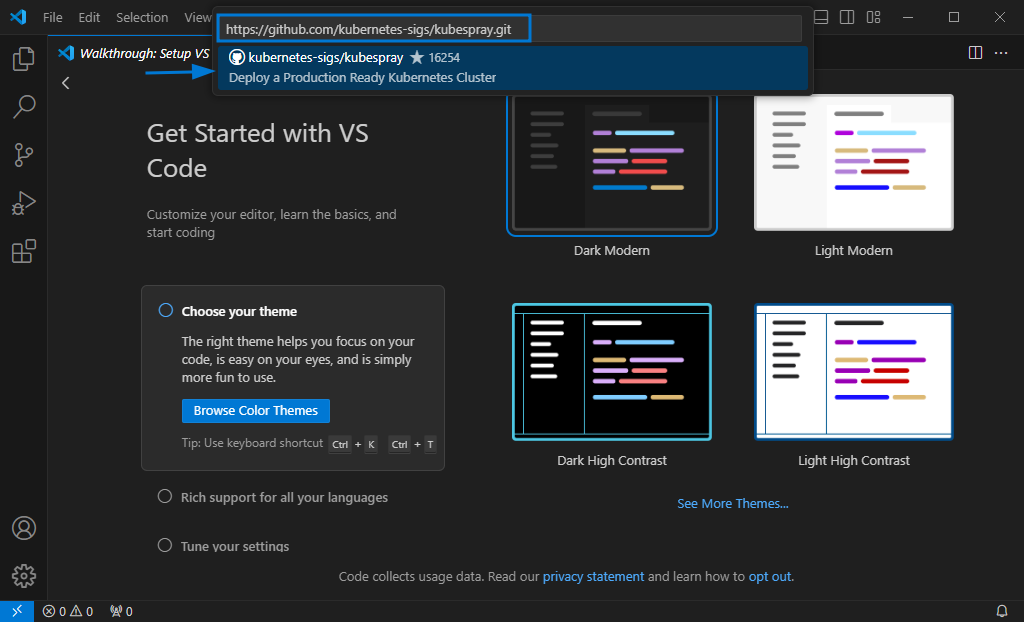
While you do this, VSCode will launch your system’s file manager and allow you to choose the folder to save the project or repository that it will clone using the provided URL. Thus, you may designate a new folder or choose an existing one to serve as your Git Repository Destination folder.
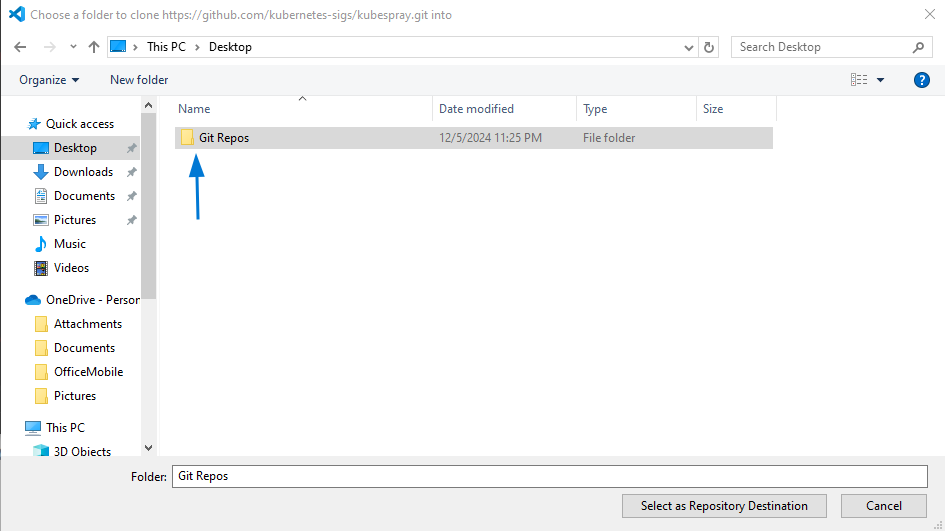
Cloning on process.

You will now be prompted to choose how to use the Cloned Git Repository. The decision is yours whether to open it or incorporate it into your existing workstation. Click Open. Your Visual Studio Code Interface will display a list of the files from the Cloned repository.
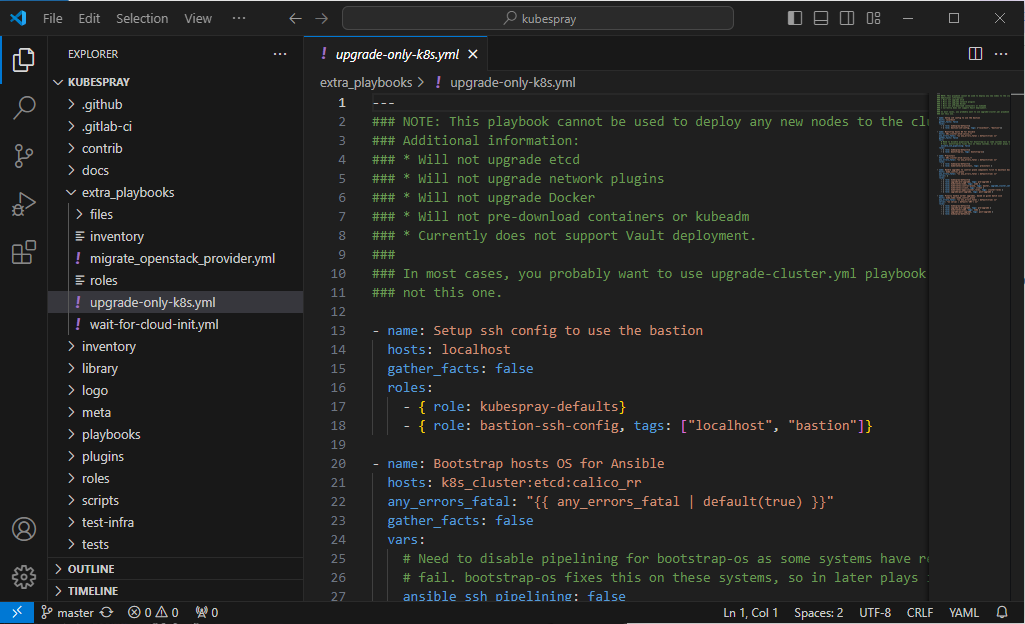
To Create a Branch
Having finally mastered the art of cloning a Git repository in VScode, we can now utilize the Command palette to execute other Git tasks or to establish a new branch. For instance, navigate to Source Control and choose the repository if you wish to establish a new branch.
To create a branch, press Ctrl+Shift+P, input “git branch,” choose “Git Create Branch,” and then give your branch a name. Likewise, you are able to push the local branch to Github and commit the modifications.
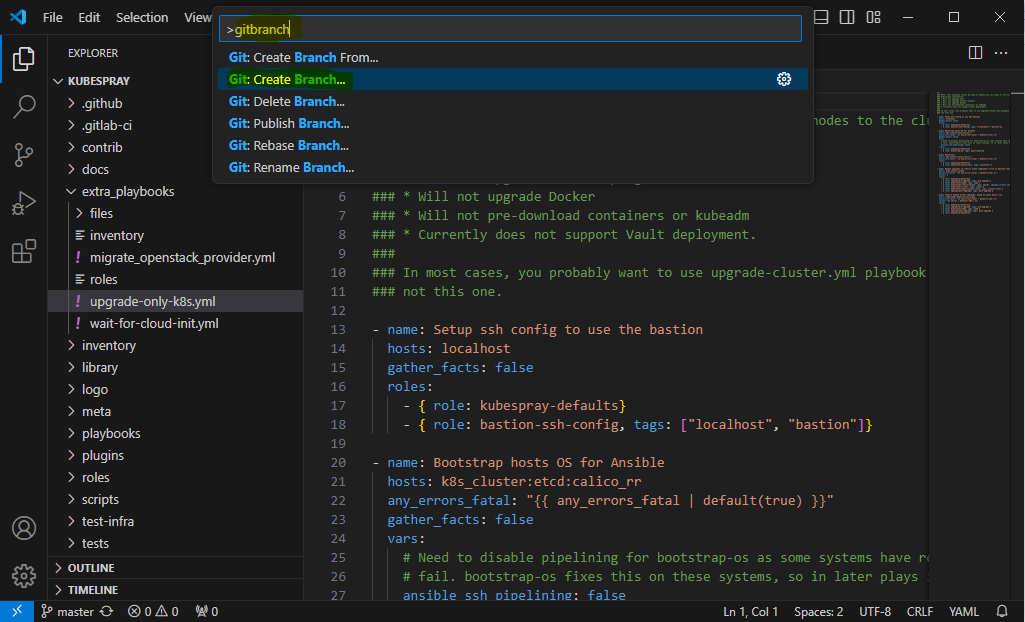
Closure
To this end, we’ve covered the required steps on Cloning Git repository from GitHub in Visual Studio Code. You now know how to clone Git repo from GithHub in Visual Studio Code on both Windows and Linux. Hope it was helpful.
Check out more articles:


