Greetings and salutations. In our guide today, we will analyze SELinux and how to troubleshoot SELinux issues with two very important tools namely SETroubleshoot and audit2allow. But before then, we will have a brief history of SELinux.
SELinux is Security-Enhanced Linux in full. As the name suggests, SELinux is a security architecture/module for Linux systems that gives System Administrators control over users who can access the system. This is because the standard access policy is based on user, group, and other permissions i.e. (Discretionary Access Control (DAC)) which restricts system administrators to create comprehensive and fine-grained security policies. SELinux was designed to add an extra layer of security to your Linux system while giving the system administrator control over the system.
Brief Background and History of SELinux
SELinux was originally developed by the United States National Security Agency (NSA). It is an implementation of the flask operating system security module. NSA integrated SELinux into the Linux Kernel as patches using the Linux Security Modules LSM after a suggestion by Linus Torvalds who wanted a modular approach to security instead of having SELinux incorporated in the Linux kernel in totality.
In 2000, SELinux was released to the open-source community but integrated into the upstream Linux Kernel in 2003. Initially, SELinux used persistent security IDs (PSIDs) stored in the unused ext2 inode. This was however disadvantageous as it required modifying each file system type to support PSIDs and would not be supported upstream in the Linux kernel by other file systems.
The solution was to have SELinux loaded in the kernel as a module from 2.4.<x> series of Linux kernels. This approach stored PSIDs in a separate file instead of the unused ext2 inode in the previous releases. This way SELinux could support more file systems. This solution though good was not optimal for performance and was inconsistent across various platforms.
To enhance performance and get rid of inconsistencies, SELinux code was integrated upstream to the 2.6.x kernel which has full support for LSM with extended attributes (xattrs) in the ext3 file system. Since then, SELinux uses xattrs to store security context information.
How SELinux works.
SELinux implements Mandatory Access Control (MAC) where every process and system resource has a unique security label called an SELinux context / SELinux label. An SELinux label abstracts away system-level details and focuses on the security properties of the entity. This provides a consistent way of referencing objects in the SELinux policy and removes any uncertainty found in other identification methods.
To achieve this, SELinux uses a number of rules to define how processes can interact with each other and the various system resources. By default, the policy does not allow any interaction unless a rule explicitly grants access. { Citation: Getting started with SELinux }
How to configure SELinux
SELinux can be configured in a number of ways. The most common methods are targeted policy or multi-level security (MLS). The targeted policy is the default method of SELinux configuration and covers a range of processes, tasks, and services. The MLS method is complex and mostly deployed by government institutions.
This default configuration file is found in the /etc/sysconfig/selinux configuration file. This file shows if the SELinux is in permissive mode, enforcing mode, or disabled, and which policy is supposed to be loaded
SELinux labeling and type enforcement
SELinux works as a labeling system. This means that all processes, ports, and files have an SELinux label associated with them. These are logical labels that define how the grouping of processes, ports, and files is done. These labels are managed by the kernel during the boot process.
The label has this format user:role:type:level (level is optional). The user, role, and level are used in more advanced implementations of SELinux like MLS. The type is used in the targeted policy. SELinux uses type enforcement to enforce a policy defined in the system. Type enforcement defines whether a process running in a particular type can access a file labeled with a specific type.
How to enable SELinux in your system
To enable SELinux in your system, simply edit the configuration file :
sudo vim /etc/selinux/configThen set :
SELINUX=permissiveTo force the system to automatically relable the file system, create an empty file called .autorelabel in the root directory and then reboot the system. If the system boots with many errors, reboot it in permissive mode. Once relabeling is done, set SELinux to enforcing by editing the file /etc/selinux/config followed by rebooting your system.
$ sudo vim / etc/selinux/config
SELINUX=enforcing
Alternatively, you can issue the command:
sudo setenforce 1How to handle SELinux errors/issues
Before we get to the business of the day, let’s analyze briefly how to handle SELinux errors. SELinux errors arise due to the following reasons.
- Wrong labels – If your labels are incorrect, you can use SETroubleShoot and audit2allow tools to fix the labels.
- A certain policy needs to be fixed – This can be fixed using booleans or policy modules.
- A bug exists in the policy – A bug in the policy will bring about an SELinux error.
- The system has been broken into – If your system has been broken into, take drastic measures.
Troubleshoot SELinux issues with SETroubleShoot and audit2allow
You now have a solid background of what SELinux is. we will now focus on how to troubleshoot SELinux issues with SETroubleShoot and audit2allow.
Troubleshoot SELinux issues with SETroubleShoot
Many Linux users have a perception that SELinux is difficult to use. Hence, RedHat initiated a project called the SELinux Usability Project to help make SELinux more user-friendly. The outcome of this project was setroubleshoot. SELinux presents two areas of difficulty i.e. Policy Authoring and SELinux Denials reported as AVC’s (Access Vector Cache) in the logging system. SETroubleshoot seeks to address this difficulty by Alerting the user in real-time when an AVC Denial has occurred and automatically analyzing the AVC Denial to provide a friendly interpretation. SETroubleshoot is thus divided into two independent components i.e. The framework and analysis plugins. These notifications are aided by the sealert tool which presents desktop notifications similar to email biff alerts.
SELinux must be enabled for this service to learn. We will now learn how to install this tool in our Linux system.
$ sudo vim / etc/selinux/config
SELINUX=enforcing
$ sudo setenforce 1
For demonstration, I will use my Rocky 9 VM. Ensure you have an updated system by running the command below.
sudo dnf -y updateOnce the system is updated, you are set to continue.
#1: Install the setroubleshoot server
To install SETroubleShoot in your system, issue the command:
sudo dnf install -y setroubleshoot-serverThe command installs the setroubleshoot server and all its dependencies.
To check the version of the setroubleshoot server installed, issue the command below:
$ rpm -q setroubleshoot-server
setroubleshoot-server-3.3.32-1.el9.x86_64
SETroubleShoot server logs SELInux issues in the /var/log/messages/ with a sealert command to run for further troubleshooting analysis. The sealert command also suggests a solution to the identified issue.
For demonstration purposes, I will create a dummy website and then analyze it using the setroubleshoot tool. I will therefore install the Apache web server on my Rocky 9 server.
#2: Install the Apache web server
Apache web server installation is a very easy process. Run the commands below.
sudo dnf check-update -y
sudo dnf install dnf-utils -y
Apache is available by default on the Rocky Linux repository. Install the Apache web server as below.
sudo dnf install httpd -yEnable and start the Apache web server services.
sudo systemctl enable httpd --now
sudo systemctl start httpd
sudo systemctl status httpd
Configure your firewall to allow HTTP, HTTPS, and port 80 on your server.
sudo firewall-cmd --permanent --add-service=http
sudo firewall-cmd --permanent --add-service=https
sudo firewall-cmd --reload
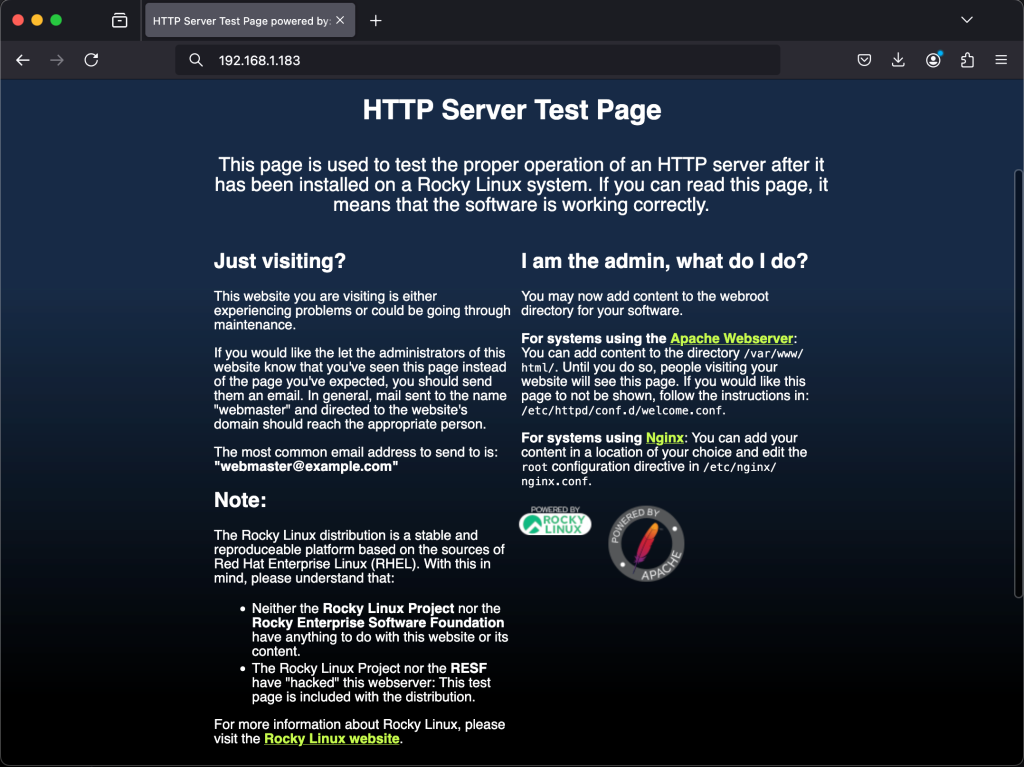
Test Apache Web Server on your web browser by:
http://<your_server_ip_address>Output:

The Apache web server is now configured in your system.
# 3: Create a test website file in your home directory.
Using the text editor of your choice, create a test website file on your home directory.
sudo vim sample_websiteIn the file, add any text.
<!DOCTYPE html>
<html lang="en">
<head>
    <meta charset="UTF-8">
    <meta name="viewport" content="width=device-width, initial-scale=1.0">
    <title>Apache Test Page</title>
    <style>
        body {
            font-family: Arial, sans-serif;
            margin: 0;
            padding: 0;
            background: linear-gradient(120deg, #2196F3, #E91E63);
            color: white;
            display: flex;
            justify-content: center;
            align-items: center;
            height: 100vh;
            overflow: hidden;
        }
        .container {
            text-align: center;
            background: rgba(0, 0, 0, 0.5);
            padding: 20px;
            border-radius: 10px;
            box-shadow: 0 4px 10px rgba(0, 0, 0, 0.3);
        }
        h1 {
            font-size: 3em;
            margin-bottom: 0.5em;
        }
        p {
            font-size: 1.2em;
            margin-bottom: 1.5em;
        }
        .button {
            padding: 10px 20px;
            font-size: 1em;
            color: white;
            text-decoration: none;
            background: #4CAF50;
            border-radius: 5px;
            transition: background 0.3s;
        }
        .button:hover {
            background: #45A049;
        }
    </style>
</head>
<body>
    <div class="container">
        <h1>Welcome to Apache!</h1>
        <p>Your Apache web server is working correctly.</p>
        <a href="https://httpd.apache.org/" class="button" target="_blank">Learn More About Apache</a>
    </div>
</body>
</html>
Save your file and exit from the editor.
Now move your website file to the Apache document root.
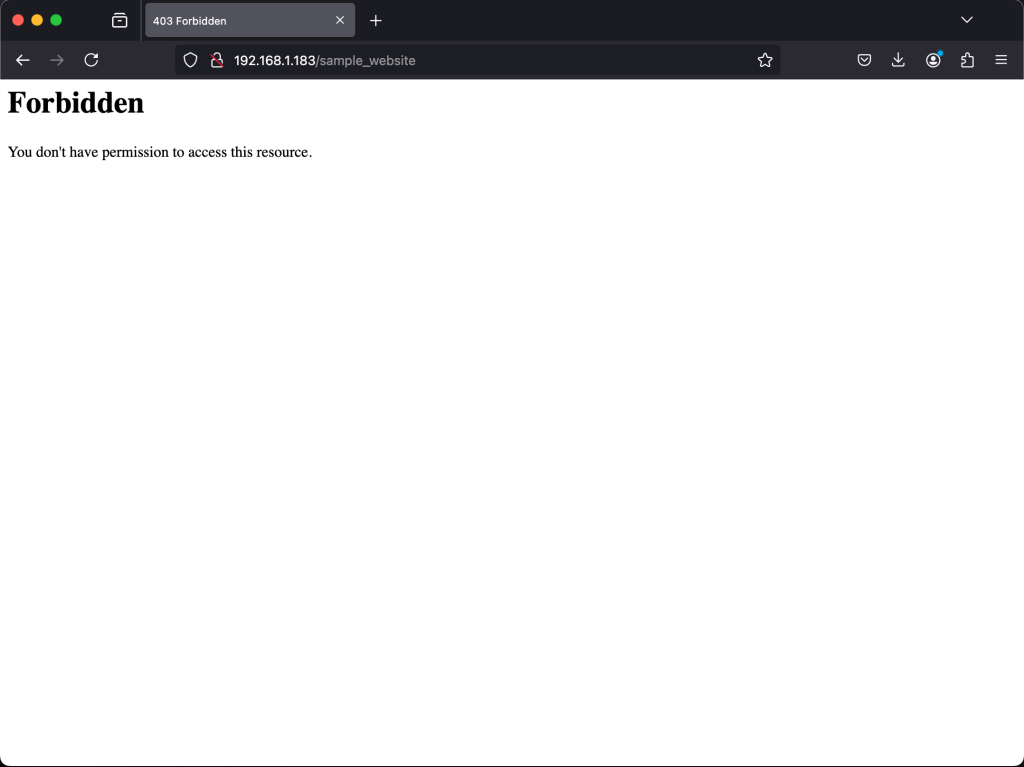
sudo mv sample_website /var/www/html/Access your website on your web browser by this address:
http://<server_ip_address>/sample_website
The website is not accessible with the error “you don’t have permission to access this resource“.
Confirm if the SETroubleShoot server has logged this error in the /var/log/messages file with a “sealert” command.
$ sudo less /var/log/messages | grep sealert
[root@rocky9 ~]# sudo less /var/log/messages | grep sealert
Jan 22 11:27:26 rocky9 setroubleshoot[13441]: SELinux is preventing /usr/sbin/httpd from getattr access on the file /var/www/html/sample_website. For complete SELinux messages run: sealert -l fe80ac67-a100-4244-a782-c56343b41ad7
Jan 22 11:27:26 rocky9 setroubleshoot[13441]: SELinux is preventing /usr/sbin/httpd from getattr access on the file /var/www/html/sample_website. For complete SELinux messages run: sealert -l fe80ac67-a100-4244-a782-c56343b41ad7
From the output, we can see the errors are thrown out and the suggested solution via the sealert command. The solution is to run:
sealert -l fe80ac67-a100-4244-a782-c56343b41ad7Let’s run the command to see what happens.
$ sealert -l acccc5a0-0386-42f5-abec-31a6c8ecf2f9
SELinux is preventing /usr/sbin/httpd from getattr access on the file /var/www/html/sample_website.

*****  Plugin restorecon (99.5 confidence) suggests   ************************

If you want to fix the label.
/var/www/html/sample_website default label should be httpd_sys_content_t.
Then you can run restorecon. The access attempt may have been stopped due to insufficient permissions to access a parent directory in which case try to change the following command accordingly.
Do
# /sbin/restorecon -v /var/www/html/sample_website

*****  Plugin catchall (1.49 confidence) suggests   **************************

If you believe that httpd should be allowed getattr access on the sample_website file by default.
Then you should report this as a bug.
You can generate a local policy module to allow this access.
Do
allow this access for now by executing:
# ausearch -c 'httpd' --raw | audit2allow -M my-httpd
# semodule -X 300 -i my-httpd.pp


Additional Information:
Source Context                system_u:system_r:httpd_t:s0
Target Context                unconfined_u:object_r:admin_home_t:s0
Target Objects                /var/www/html/sample_website [ file ]
Source                        httpd
Source Path                   /usr/sbin/httpd
Port                          <Unknown>
Host                          rocky9.cloudspinx.com
Source RPM Packages           httpd-core-2.4.62-1.el9_5.2.x86_64
Target RPM Packages
SELinux Policy RPM            selinux-policy-targeted-38.1.45-3.el9_5.noarch
Local Policy RPM              selinux-policy-targeted-38.1.45-3.el9_5.noarch
Selinux Enabled               True
Policy Type                   targeted
Enforcing Mode                Enforcing
Host Name                     rocky9.cloudspinx.com
Platform                      Linux rocky9.cloudspinx.com
                              5.14.0-503.14.1.el9_5.x86_64 #1 SMP
                              PREEMPT_DYNAMIC Fri Nov 15 12:04:32 UTC 2024
                              x86_64 x86_64
Alert Count                   2
First Seen                    2025-01-22 11:27:25 EAT
Last Seen                     2025-01-22 11:27:25 EAT
Local ID                      fe80ac67-a100-4244-a782-c56343b41ad7

Raw Audit Messages
type=AVC msg=audit(1737534445.414:326): avc:  denied  { getattr } for  pid=12517 comm="httpd" path="/var/www/html/sample_website" dev="dm-0" ino=67241070 scontext=system_u:system_r:httpd_t:s0 tcontext=unconfined_u:object_r:admin_home_t:s0 tclass=file permissive=0


type=SYSCALL msg=audit(1737534445.414:326): arch=x86_64 syscall=newfstatat success=no exit=EACCES a0=ffffff9c a1=7f661c045a28 a2=7f66187f78b0 a3=100 items=0 ppid=12514 pid=12517 auid=4294967295 uid=48 gid=48 euid=48 suid=48 fsuid=48 egid=48 sgid=48 fsgid=48 tty=(none) ses=4294967295 comm=httpd exe=/usr/sbin/httpd subj=system_u:system_r:httpd_t:s0 key=(null)

Hash: httpd,httpd_t,admin_home_t,file,getattr
From the output of the command, we see that SELinux is preventing /usr/sbin/httpd from read access on the file sample_website. We also get to see an issue around Boolean { If you want to allow httpd to read user content, Then you must tell SELinux about this by enabling the ‘httpd_read_user_content’ boolean }.
The solution given is to run the command:
$ sudo /sbin/restorecon -v /var/www/html/sample_websie
Relabeled /var/www/html/sample_website from unconfined_u:object_r:admin_home_t:s0 to unconfined_u:object_r:httpd_sys_content_t:s0
SELinux Boolean
SELinux booleans are SELinux functionalities of a policy that can be turned on and off. If the Boolean of a certain syscall function is turned off or disabled, the syscall will be terminated. To see all the booleans on your Linux system, issue the command:
sudo getsebool -aThe sample output will look like this:
abrt_anon_write --> off
abrt_handle_event --> off
abrt_upload_watch_anon_write --> on
antivirus_can_scan_system --> off
antivirus_use_jit --> off
auditadm_exec_content --> on
authlogin_nsswitch_use_ldap --> off
authlogin_radius --> off
.
.
.
To manage SELinux rules, we use the semanage command. To list the available Booleans, run the following command.
$ sudo semanage boolean -lThe command populates a long list of available booleans. To get a list of all the booleans of the httpd process, run the command:
$ getsebool -a | grep httpd
httpd_anon_write --> off
httpd_builtin_scripting --> on
httpd_can_check_spam --> off
httpd_can_connect_ftp --> off
httpd_can_connect_ldap --> off
httpd_can_connect_mythtv --> off
httpd_can_connect_zabbix --> off
httpd_can_manage_courier_spool --> off
httpd_can_network_connect --> off
httpd_can_network_connect_cobbler --> off
httpd_can_network_connect_db --> off
httpd_can_network_memcache --> off
httpd_can_network_relay --> off
httpd_can_sendmail --> off
httpd_dbus_avahi --> off
httpd_dbus_sssd --> off
httpd_dontaudit_search_dirs --> off
httpd_enable_cgi --> on
httpd_enable_ftp_server --> off
httpd_enable_homedirs --> off
httpd_execmem --> off
httpd_graceful_shutdown --> off
httpd_manage_ipa --> off
httpd_mod_auth_ntlm_winbind --> off
httpd_mod_auth_pam --> off
httpd_read_user_content --> on
httpd_run_ipa --> off
httpd_run_preupgrade --> off
httpd_run_stickshift --> off
httpd_serve_cobbler_files --> off
httpd_setrlimit --> off
httpd_ssi_exec --> off
httpd_sys_script_anon_write --> off
httpd_tmp_exec --> off
httpd_tty_comm --> off
httpd_unified --> off
httpd_use_cifs --> off
httpd_use_fusefs --> off
httpd_use_gpg --> off
httpd_use_nfs --> off
httpd_use_opencryptoki --> off
httpd_use_openstack --> off
httpd_use_sasl --> off
httpd_verify_dns --> off
The output reveals that the majority of the booleans are turned off. It is safe to turn them on instead of disabling SELinux. To turn the boolean on, run the command:
# Synatx looks like this
setsebool <boolean> on
For example to turn httpd_verify_dns –> off to on, run the command:
sudo setsebool httpd_verify_dns onVerify if the boolean has been set to on.
$ getsebool -a | grep httpd_verify_dns
httpd_verify_dns --> on
To make the boolean persistent, use the -P option with the setsebool command.
setsebool -P <boolean> onTo set the SELinux boolean off, issue the command below.
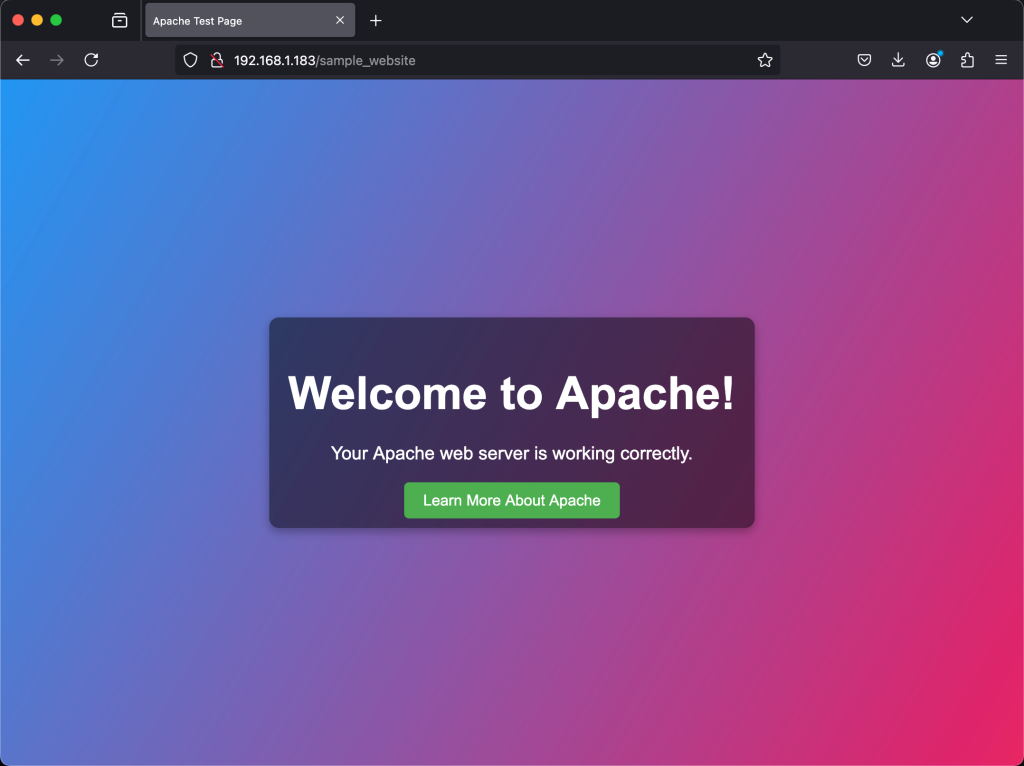
setsebool <boolean> offLet’s now test if our website page will load on our browser:

Boom, our page has now loaded successfully.
Troubleshoot SELinux issues with audit2allow
We now briefly look at audit2allow. audit2allow – generate SELinux policy allow/dontaudit rules from logs of denied operations. Once the denials are analyzed via the sealert messages as explained above, and if no label changes or booleans are allowed access, use the audit2allow tool to create a local policy module. audit2allow gathers information from logs of denied operations and then generates SELinux policy allow rules.
I will now demonstrate how to use the audit2allow tool.
1 ) A denial and the associated system call are logged in:
/var/log/audit/audit.logI will cat into this file as shown below:
$ sudo cat /var/log/audit/audit.log | grep sample_website
type=AVC msg=audit(1737534445.414:325): avc:  denied  { getattr } for  pid=12517 comm="httpd" path="/var/www/html/sample_website" dev="dm-0" ino=67241070 scontext=system_u:system_r:httpd_t:s0 tcontext=unconfined_u:object_r:admin_home_t:s0 tclass=file permissive=0
type=AVC msg=audit(1737534445.414:326): avc:  denied  { getattr } for  pid=12517 comm="httpd" path="/var/www/html/sample_website" dev="dm-0" ino=67241070 scontext=system_u:system_r:httpd_t:s0 tcontext=unconfined_u:object_r:admin_home_t:s0 tclass=file permissive=0
From the output, httpd was denied { read } access to a file admin_home_t type { context=unconfined_u:object_r:admin_home_t:s0 }
Run the audit2allow command with -w and -a options to produce a human-readable description of why access was denied as shown below.
$ sudo audit2allow -w -a
type=AVC msg=audit(1737534445.414:325): avc:  denied  { getattr } for  pid=12517 comm="httpd" path="/var/www/html/sample_website" dev="dm-0" ino=67241070 scontext=system_u:system_r:httpd_t:s0 tcontext=unconfined_u:object_r:admin_home_t:s0 tclass=file permissive=0
	Was caused by:
		Missing type enforcement (TE) allow rule.

		You can use audit2allow to generate a loadable module to allow this access.

type=AVC msg=audit(1737534445.414:326): avc:  denied  { getattr } for  pid=12517 comm="httpd" path="/var/www/html/sample_website" dev="dm-0" ino=67241070 scontext=system_u:system_r:httpd_t:s0 tcontext=unconfined_u:object_r:admin_home_t:s0 tclass=file permissive=0
	Was caused by:
		Missing type enforcement (TE) allow rule.

		You can use audit2allow to generate a loadable module to allow this access.
The -a option causes all audit logs to be read. -w option produces the human-readable description. The command must be run as a superuser as the tool accesses the /var/log/audit/audit.log
From the output of the command, there appears to be a mismatch between current in-memory boolean settings vs. permanent ones
We need to check the Type Enforcement rule that allows denied access. Run the command below.
$ sudo audit2allow -a

#============= httpd_t ==============
allow httpd_t admin_home_t:file getattr;
To run the rule displayed from the output of the command, run the following command as a superuser.
$ sudo audit2allow -a -M httpd
******************** IMPORTANT ***********************
To make this policy package active, execute:

semodule -i httpd.pp
The -M option creates a Type Enforcement file ( .te ) with the name specified with -M on your current working directory as shown on the ls command output.
$ ls
anaconda-ks.cfg  httpd.pp  httpd.te
Additionally, audit2allow will compile the Type Enforcement rule into a policy package (.pp) as shown in the output above.
I will now install the module as per the output of the command run above.
sudo semodule -i httpd.ppFor multiple denials from multiple processes, and only want to create a custom policy for a single process, deploy the grep command to narrow down the input for audit2allow.
$ sudo grep httpd /var/log/audit/audit.log | audit2allow -M httpd2
******************** IMPORTANT ***********************
To make this policy package active, execute:

semodule -i httpd2.pp
For more information regarding the audit2allow, see the manpages
$ man audit2allow Wrapping Up
That marks the end of our guide today. In the Blogspot, we have looked at a brief history of SELInux, examined how SELinux works, how to configure SELInux and finally, focused on setroubleshoot and audit2allow tools for troubleshooting SELinux issues. I hope the guide was helpful. See more guides below.


