Exatorrent is a simple and rich in feature BitTorrent client written in Go language. Exatorrent is lightweight and comes with a beautiful web client written in Svelte and Typescript. This program can be hosted on a remote server or locally.
Exatorrent has WebSocket API support that allows one to write their own client as well as multiple ways of adding torrents i.e info hash, magnet, or torrent file.
The other features associated with exatorrent are:
- Peer blocklist
- Stop torrents when reaching a certain ration
- Single Executable File with No Dependencies
- Start, stop, remove or delete torrents
- Multi-user support
- Open and stream audio / video torrents in your web browser or using VLC, mpv and other media players
- Retrieve or Stream Files via HTTP
- Uses Sqlite3 (embedded database with no setup and no configuration) by Default for Database but PostgreSQL can be used instead too
- Fetch torrent metainfo from online cache
- Add trackers to torrent from trackerlist URLs
- Besides streaming, files downloaded by exatorrent can be shared (with authentication) – directories can be retrieved as zip / tarballs
Exatorrent is a cross-platform tool supported on Linux, Windows, macOS, and Android (via Termux). This guide will illustrate how you can install and use exatorrent BitTorrent Client with Web UI.
Install exatorrent BitTorrent Client on Linux
Exatorrent can be installed on your system in multiple ways:
- Using binaries
- Using Docker
Option 1 – Install exatorrent BitTorrent Client from a Binary file
With this method, you first have to download the latest exatorrent binary file from the official exatorrent GitHub release page.
This process can as well be accomplished by pulling the latest exatorrent binary file using Wget as below.
wget https://github.com/varbhat/exatorrent/releases/latest/download/exatorrent-linux-amd64With a successful download, make the file executable:
chmod u+x ./exatorrent-linux-amd64Now install exatorrent BitTorrent Client on your system as below.
./exatorrent-linux-amd64In the above command, replace the IP Address with your system’s IP address
Sample Output:
[INFO] 2025/02/07 22:35:50 Starting server on :5000
Directory => exadir

[INFO] 2025/02/07 07:22:39 Adding Admin user with username "adminuser" and password "adminpassword"
[INFO] 2025/02/07 07:22:39 Torrent Client Created
[INFO] 2025/02/07 07:22:39 Starting server on 192.168.1.188:5000
[INFO] 2025/02/07 07:22:39 Loaded  20  trackers from  https://ngosang.github.io/trackerslist/trackers_best.txt
[INFO] 2025/02/07 07:22:39 Loaded  20  trackers in total , eliminating duplicates
[INFO] 2025/02/07 07:22:39 Added Loaded Trackers to Torrents
At this point, exatorrent is listening on the default port 5000 and can be accessed via the web.
Option 2 – Install exatorrent BitTorrent Client using Docker.
This is another option to get exatorrent BitTorrent Client installed on your system. The greatest requirement to be met here is installing Docker on your system.
There is a quick method to install docker on your Linux system.
curl -fsSL get.docker.com -o get-docker.sh
sudo sh get-docker.sh
Verify your installation.
$ docker --version
Docker version 27.5.1, build 9f9e405- On CentOS/Rocky Linux.
- On Ubuntu/Linux Mint
- On Manjaro.
With Docker installed successfully, start and enable Docker as below.
sudo systemctl enable --now docker
sudo usermod -aG docker $USER
newgrp docker
Verify the status of the service.
$ systemctl status docker
● docker.service - Docker Application Container Engine
     Loaded: loaded (/lib/systemd/system/docker.service; enabled; preset: enabled)
     Active: active (running) since Fri 2025-02-07 18:35:50 EAT; 2min 17s ago
TriggeredBy: ● docker.socket
       Docs: https://docs.docker.com
   Main PID: 4291 (dockerd)
      Tasks: 11
     Memory: 26.7M
        CPU: 511ms
     CGroup: /system.slice/docker.service
             └─4291 /usr/bin/dockerd -H fd:// --containerd=/run/containerd/containerd.sock

Feb 07 18:35:49 debian systemd[1]: Starting docker.service - Docker Application Container Engine...
Create a persistent volume for exatorrent:
mkdir ~/exatorrentFor RHEL based systems, allow the directory to be accessed by modifying SELinux.
sudo sed -i 's/^SELINUX=.*/SELINUX=permissive/g' /etc/selinux/configProceed and pull the latest exatorrent docker image:
docker pull ghcr.io/varbhat/exatorrent:latestSample output:
latest: Pulling from varbhat/exatorrent
619be1103602: Pull complete
c1b92c1782b6: Pull complete
979dd101a122: Pull complete
5f46554c1017: Pull complete
6d2ef1799d3a: Pull complete
Digest: sha256:554c79e764e2e85e032f30ba530301c4ab072acc0e3af5a4a0abbfc2b99cf846
Status: Downloaded newer image for ghcr.io/varbhat/exatorrent:latest
ghcr.io/varbhat/exatorrent:latest
Now run the exatorrent docker container.
docker run -d --name exatorrent \
  -p 5000:5000 -p 42069:42069 \
  -v ~/exatorrent:/exa/exadir \
  ghcr.io/varbhat/exatorrent:latest
Sample output:
$ sudo docker run -d --name exatorrent -p 5000:5000 -p 42069:42069 -v /opt/exatorrent ghcr.io/varbhat/exatorrent:latest
383487b037bb3cf56b049962929312bc35061dd1ca2f45c8acfadca89542fda6
$ sudo docker ps
CONTAINER ID   IMAGE                               COMMAND         CREATED          STATUS          PORTS                                                                                      NAMES
383487b037bb   ghcr.io/varbhat/exatorrent:latest   "/exatorrent"   30 seconds ago   Up 29 seconds   0.0.0.0:5000->5000/tcp, :::5000->5000/tcp, 0.0.0.0:42069->42069/tcp, :::42069->42069/tcp   exatorrent
Manage the exatorrent docker container as below.
## Stop exatorrent
docker stop exatorrent

## Start exatorrent
docker start exatorrent
Use exatorrent BitTorrent Client with Web UI.
Now regardless of the method you used to install exatorrent on your system, you can proceed and access the web UI using the URL http://SERVER_IP:5000
You need to allow the port through the firewall.
##For firewalld
sudo firewall-cmd --zone=public --permanent --add-port=5000/tcp
sudo firewall-cmd --reload

##For UFW
sudo ufw allow 5000
You will be granted the below page:
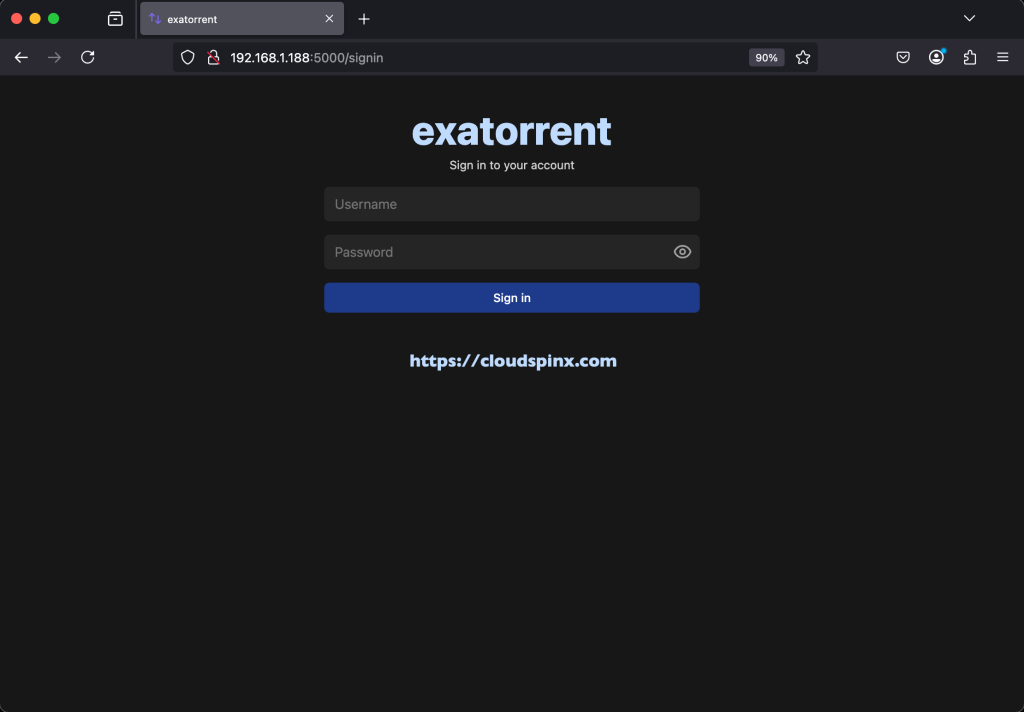
Default login credentials:
Username: adminuser
Password: adminpassword
Login with the default credentials and proceed to the exatorrent dashboard:
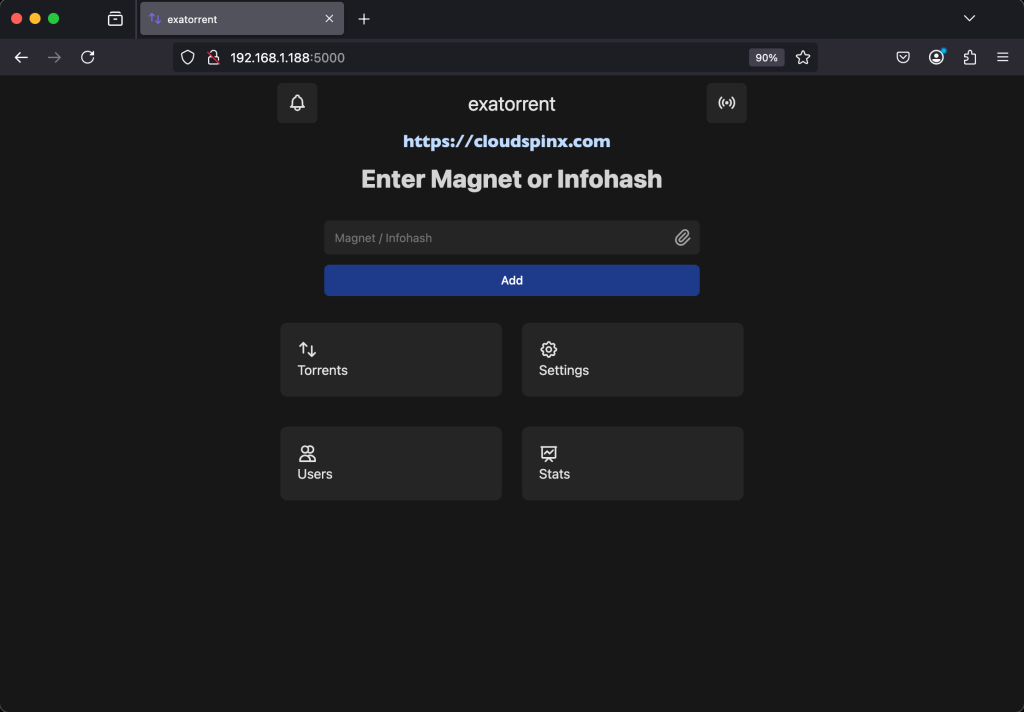
Add new user and delete default admin user
Click on “Users” icon to create new user. The “Add User” section is where you create a new user.
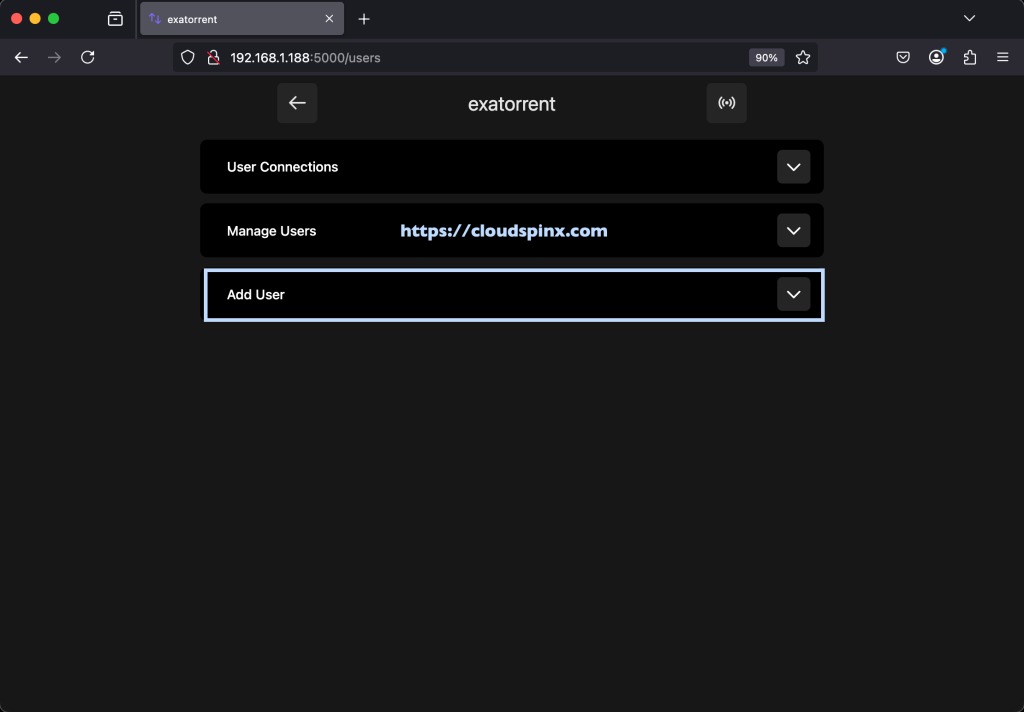
Input new username, Password and role.
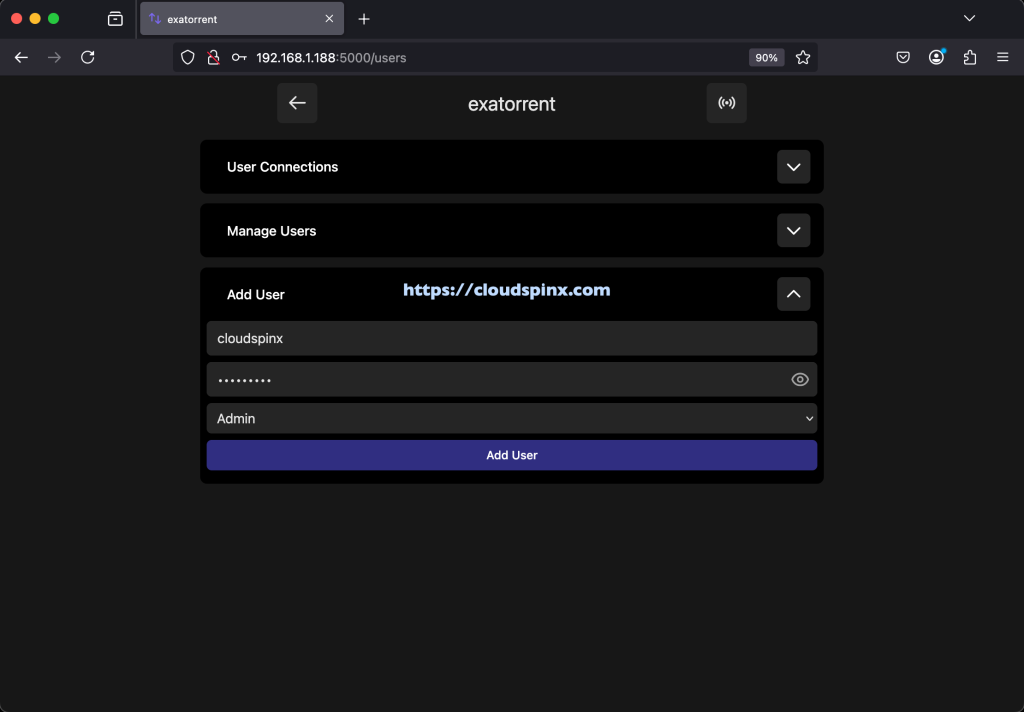
Logout from adminuser and login with the created account.
Using exatorrent BitTorrent Client
You can now delete default admin user account.
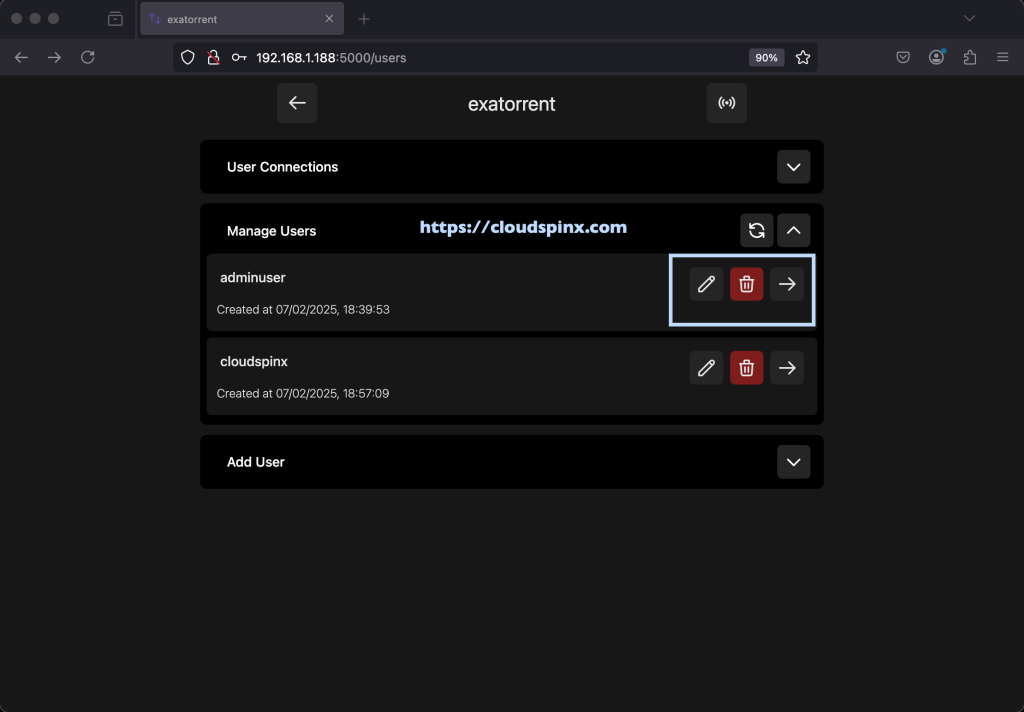
Add a magnet or Info hash on exatorrent.
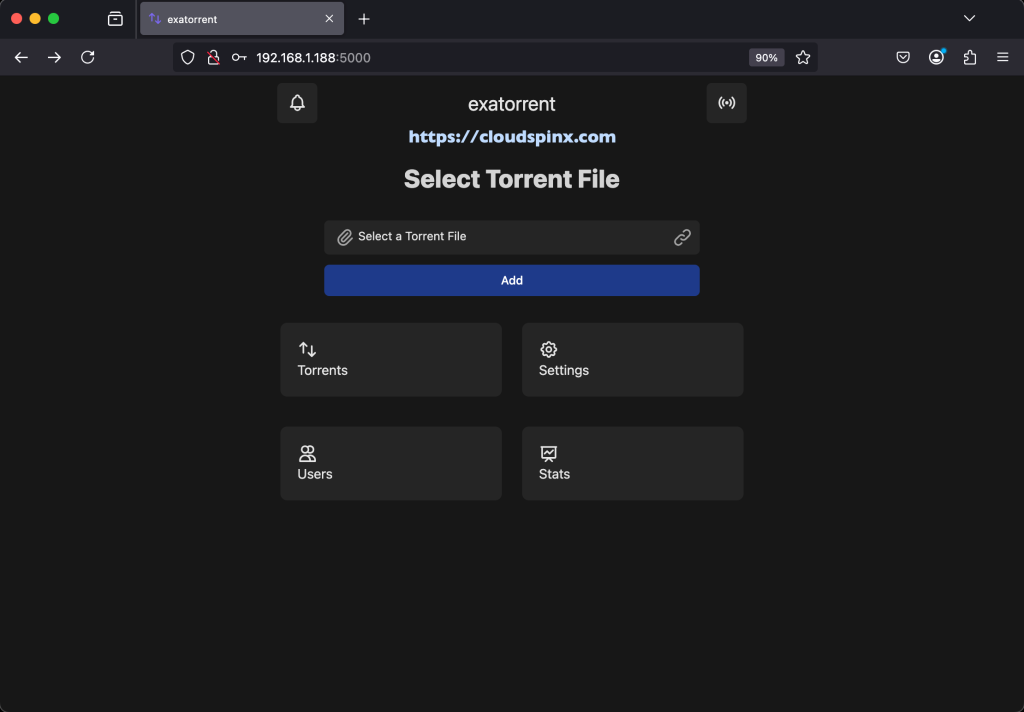
With the required magnet or Info hash entered, click Add. You will see a window pop up as below. Click Ok to add the magnet or Infohash.
The download will commence and can be viewed by clicking on Torrents.
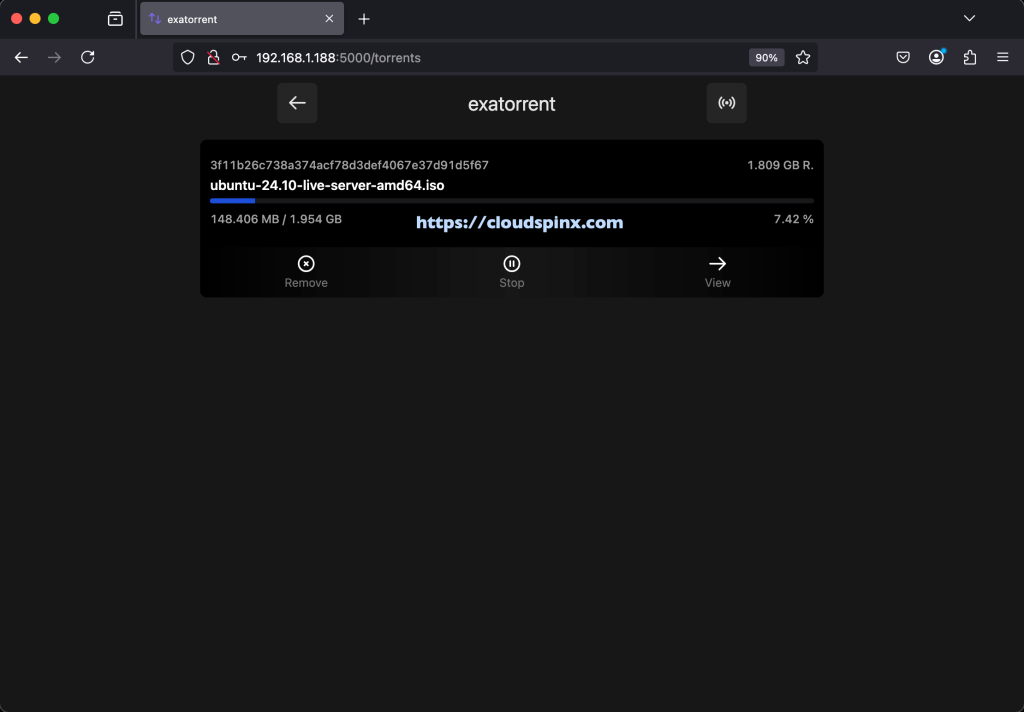
Here, you can pause/resume, or stop a download. From the main exatorrent dashboard, you can manage users and change passwords under the users and settings tabs respectively.
Conclusion.
AT this point, it is safe to assume that we have succeeded in installing and using exatorrent BitTorrent Client with Web UI. I hope this was helpful.
See more guides:

