

By default, when you open a windows/Linux system’s file manager, you will see network shares that are automatically advertised across your local network. Remote users are only allowed to connect to the network and access the shared files when they are directly connected to the machine.
Samba is an extremely powerful tool that allows one to create file and printer sharing to SMB/CIFS clients in both Windows and Unix systems. When it comes to file sharing, Windows 11 and Ubuntu work seamlessly since they both use the SMB protocol. Samba share was developed by Andrew Tridgell and runs on many Unix-Operating systems such as Linux, Solaris, BSD variants and AIX.
Samba share, is so significant in that:
- It allows Windows systems to share files and printers on the Unix host and allows Unix users to access the resources shared by Windows systems.
- It is so reliable it runs on a Unix host resulting in few problems and low maintenance costs. It also offers good performance under heavy loads.
- It offers secured data transfer
- Message signing-with didgital signing users who receive the data packets are assured of the origin point authenticity.
- SMB encryption.
- Allows concurrent operations.(simultaneous access to the files)
- Multichanel technology.
This guide demonstrates how to install and Configure Samba Share on Windows 11. For Samba share set up, you will need the following:
- Windows 11 installation.
- A Linux machine
Step 1: Enable Network Discovery in Windows 11
The network needs to be advertised for other devices to view and access it. This is made possible In Windows 11 by Enabling Network discovery.
On your Windows 11 start menu, launch settings as below:
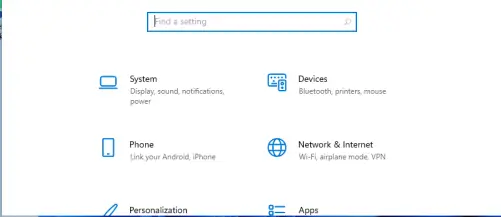
On the settings tab, click on Network & internet then select Ethernet:
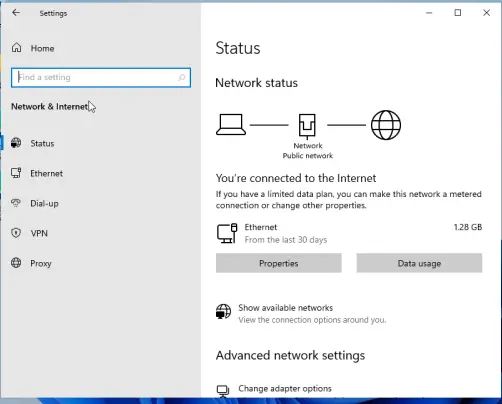
In the Ethernet settings tab, select Ethernet properties:
Here, select private under the network profile as shown:
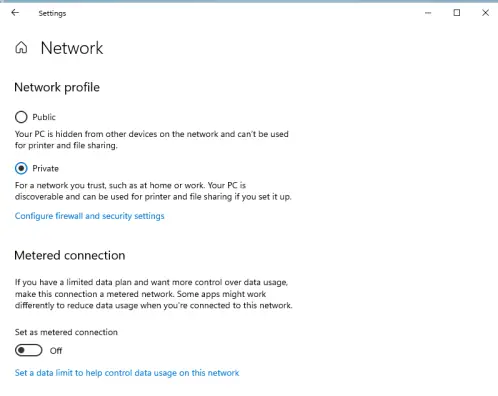
If you are connected with Wi-Fi, you will need to enable Private in the Profile settings. This profile should be selected if you need file-sharing or you are using apps that communicate over the network. With this done, exit and the network should now be discoverable.
Step 2: Turn on Public Folder Sharing in Windows 11
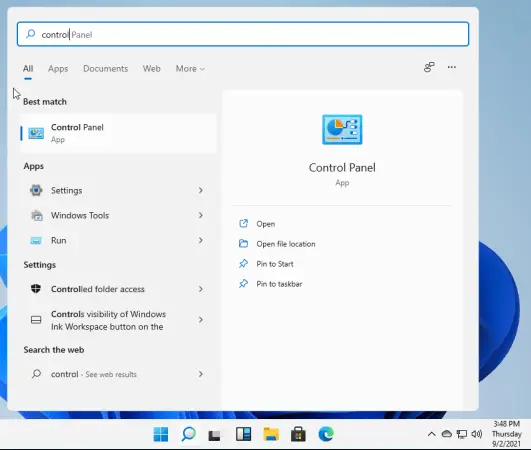
On the Windows 11 start menu, launch the Control Panel:
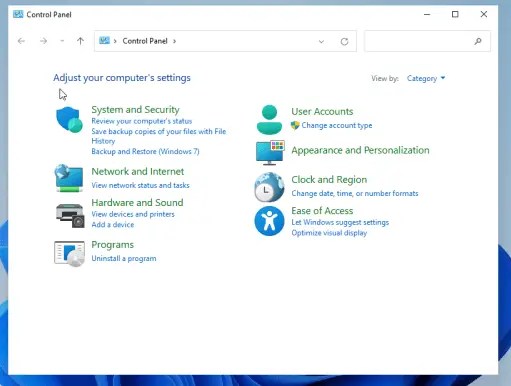
While in the Control Panel, select Network and Internet as shown:
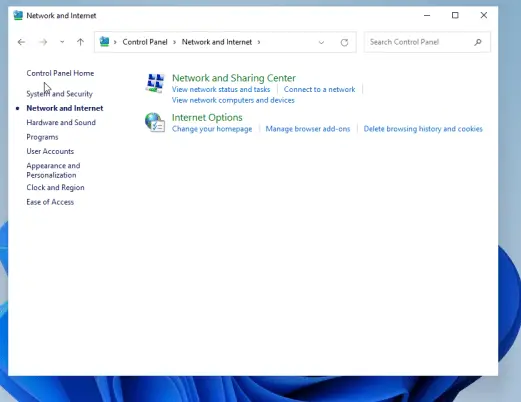
On the next page select Network and Sharing Center:
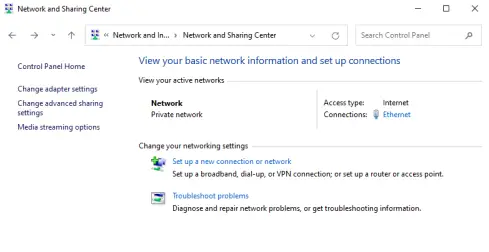
Go to the Change advanced sharing settings option on the right-hand side panel:
While here, select the Private(current profile) and make the below settings:
Turn on file and printer sharing:
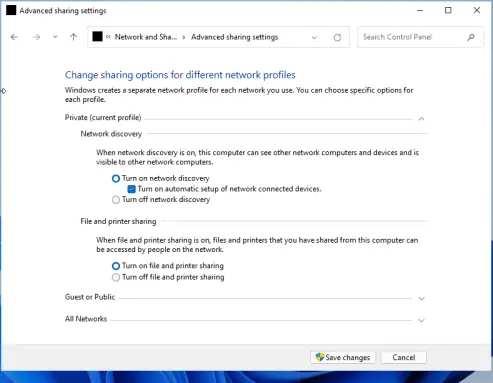
Save the changes made and exit.
While in the Advanced settings tab, Click the all networks option, and scroll down. Here there are several options such as Public folder sharing, Media streaming, File sharing connections, and Password protected sharing. By default, Windows turns on file and printer sharing, but in some cases, it is not enabled.
With password-protected sharing turned on, anyone connecting to your shared network will have to authenticate with the set password to be allowed to access your network.
While here, you can also allow Public folder sharing as shown.

With your desired changes made, save and exit.
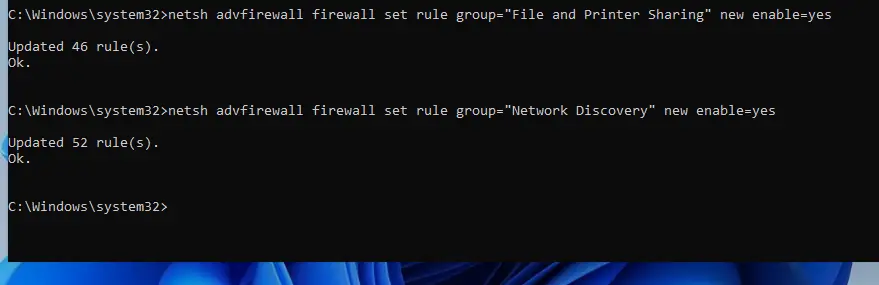
Alternatively, all the above settings can easily be done using the below commands. Run Command prompt as Administrator and issue the below commands.
netsh advfirewall firewall set rule group="File and Printer Sharing" new enable=Yes
netsh advfirewall firewall set rule group="Network Discovery" new enable=Yes
Sample Output:
Step 3: Access Windows 11 shares from Linux
In this guide, I will be using Ubuntu to access the Windows 11 shared files. Now I will have to make a few configurations on my Ubuntu system to be able to connect to the Windows network.
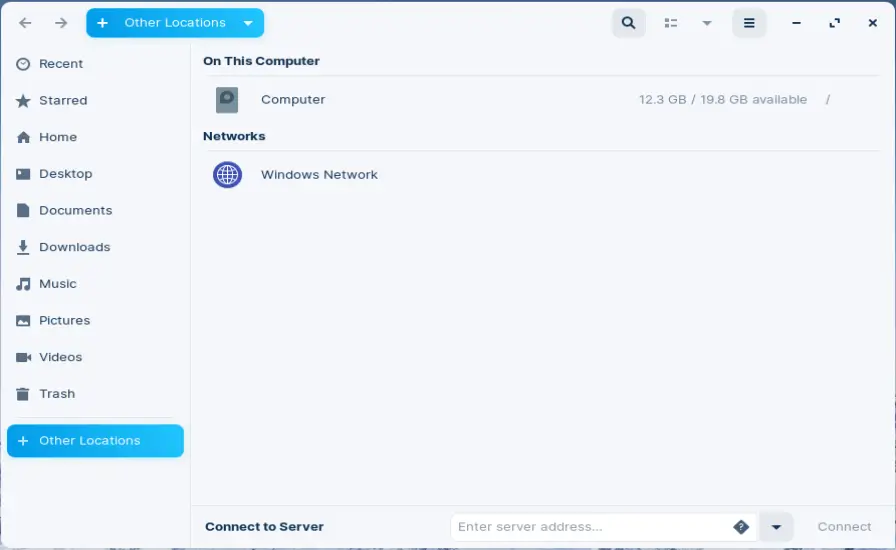
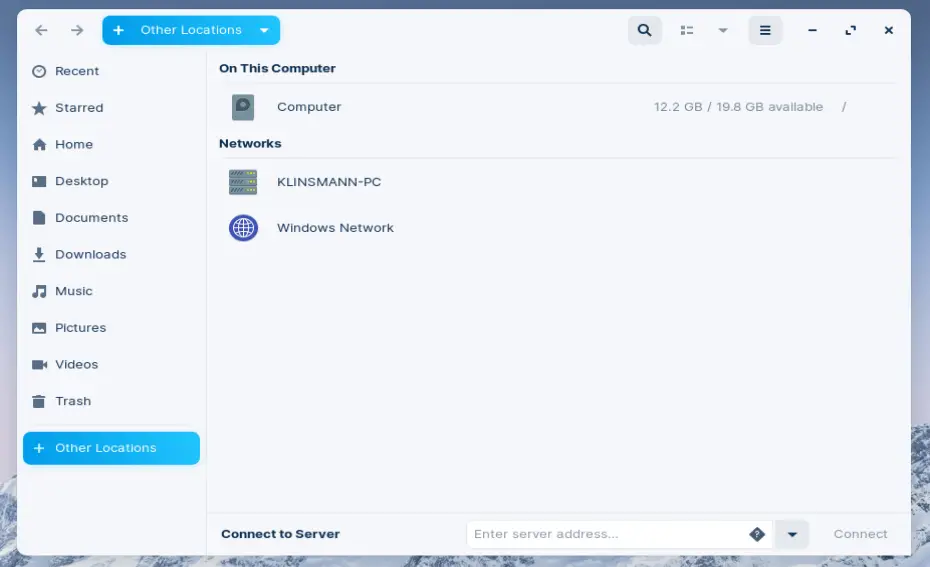
Before we install Samba your Ubuntu File Manager appears as below after clicking on Other Locations:
Install Samba file-sharing system on Ubuntu using the below command:
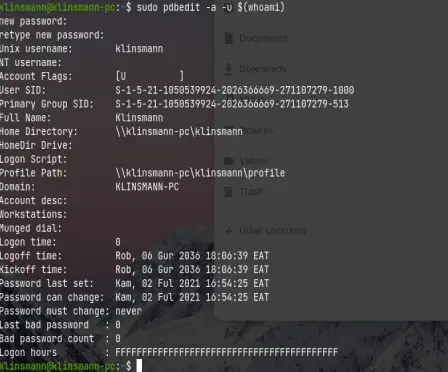
sudo apt update && sudo apt install sambaAdd users to Samba and create a password:
sudo pdbedit -a -u $(whoami)Sample Output:
You have successfully set a Samba password which you will use to log in to samba share.
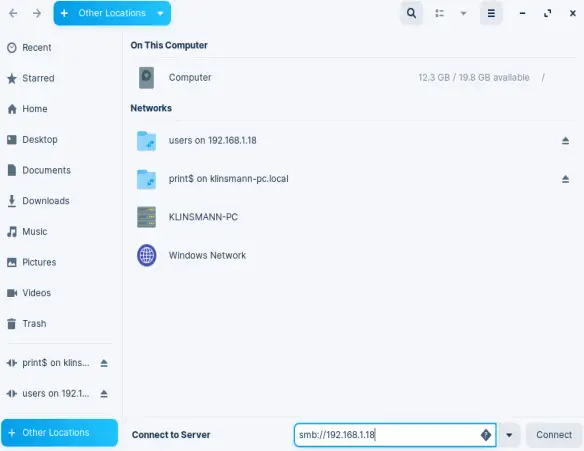
Now launch the Ubuntu File Manager, click on other locations as shown.
Now the Windows system is visible. Launch file sharing by adding the connection as shown. Enter the address of the server with the below syntax.
smb://servername/Share_nameFor example, I will use this syntax to access my Windows System.
smb://192.168.1.18See below screenshot:
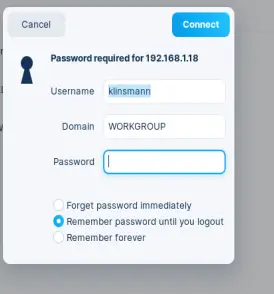
In case you are prompted to enter a password for login, use the Samba login password:
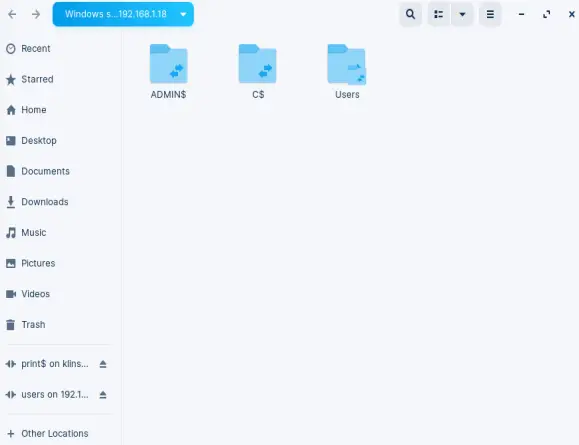
You will successfully be connected to the Network and you can access files from the windows system.
Now you are set to access the files on your Windows system. Click on Users> Default, you should be able to see these files.

Access Ubuntu Files from Windows 11
Now we want to access the Ubuntu files from Windows 11. This is done in the following steps.
First, we need to find the workgroup name in Windows 11. Launch the command prompt and issue the command below.
net config workstationSample Output:
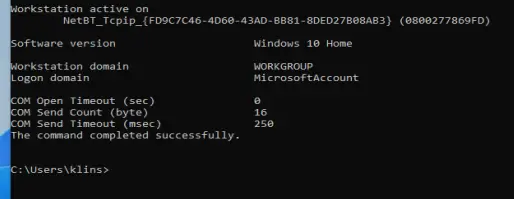
On my system, the workgroup name is WORKGROUP. This is the default workgroup name for Windows systems.
The next step is to configure Samba on Ubuntu. Since we already have samba installed we will make configuration settings as below.
Edit the Samba default configuration:
sudo cp /etc/samba/smb.conf /etc/samba/smb.conf.bak
sudo vi /etc/samba/smb.conf
Edit your file as below replacing appropriately.
[global]
........
# Configure correct UTP
 unix charset = UTF-8
# Change this to the workgroup/NT-domain name your Samba server will be part of
  workgroup = WORKGROUP
  server min protocol = NT1
  ntlm auth = yes
  netbios name = UbuntuVM
  security = user
  #interfaces = 127.0.0.0/8 eth0
  bind interfaces only = yes

# add at the end
[Public]
   comment = Ubuntu File Share
   path = /srv/samba/share
   browsable = yes
   writable = yes
   guest ok = yes
   read only = no
   create mode = 0777
   directory mode = 0777
   force user = nobody
In the configuration file, we have set to share /srv/samba/share directory. So we need to create it. This is used for experiment purposes, but you can share an existing directory.
sudo mkdir -p /srv/samba/share
sudo chown nobody:nogroup /srv/samba/share
sudo chmod -R 0777 /srv/samba/share
sudo chgrp sambashare /srv/samba/share
Now restart the Samba service.
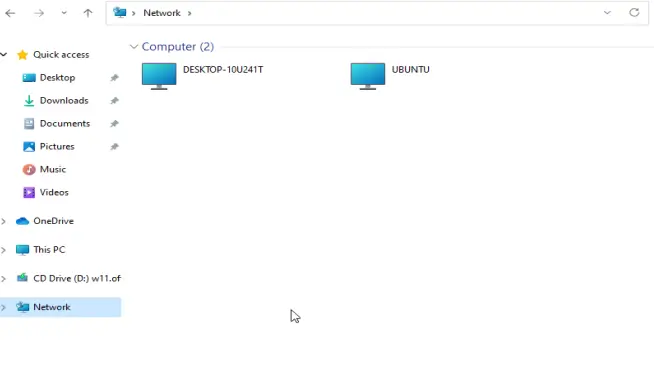
sudo systemctl restart smbd.service nmbd.serviceOn the Windows system, open the file manager and click on Network. You will see the Ubuntu system added as below. Open it and view the contents of your shared folder:
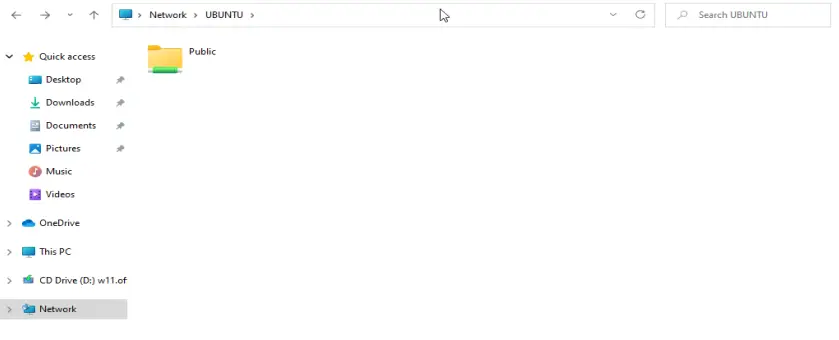
This Public folder contains contents of your shared path. For this guide, our shared path is /srv/samba/share :
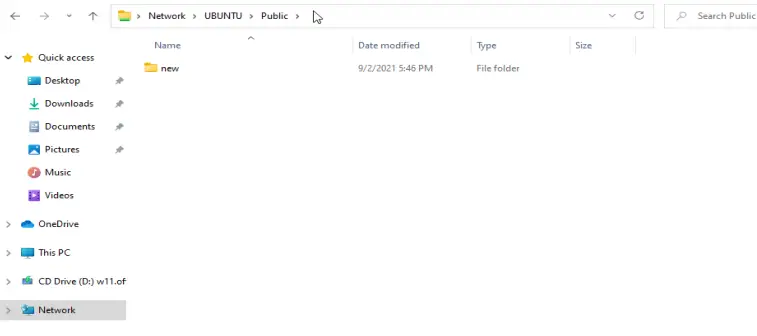
Suppose I add a new directory in the path /srv/samba/share using the command:
sudo mkdir /srv/samba/share/newOn Windows, the shared file will appear inside the Public folder as below:
Alternatively, you can create a file on this Windows tab that will appear on our Ubuntu system.
That is it! We have successfully gone through how to install and configure Samba Share on Windows 11. I hope you found this guide helpful.
See more on this page:


