
GNS3 community is the world’s largest community of network professionals who love building better networks, sharing ideas and making connections on the Global sphere of networking. GNS3 tool enables you to emulate, configure, test and troubleshoot virtual and real networks in your Infrastructure. It helps you Learn networking concepts without heavy investment on real hardware appliances. In this article we’re performing an installation of GNS3 on macOS.
It is worth taking a note that GNS3 is a free to use software, released under open source licensing. Packages are provided for Windows, macOS and Linux users. With recent improvements and provision of pre-packaged VM image you can run GNS in Cloud. GNS3 over 10 million times to date. Just so you know how big the community is.
if you’re preparing for certification exams such as the Cisco CCNA, GNS3 will help you with testing and required verifications of real world deployments without purchasing any hardware. We’re grateful to Jeremy Grossman, the original developer of GNS3, for creating this amazing software.
Features of GNS3
- The software is free to use – No monthly or yearly license fees required to use
- It is open source meaning you can tweak or improve it to suit your needs
- You can run GNS with or without hypervisors
- It supports both free and paid hypervisors (Virtualbox, VMware workstation, VMware player, ESXi, Fusion)
- It supports all VIRL images (IOSv, IOSvL2, IOS-XRv, CSR1000v, NX-OSv, ASAv)
- It doesn’t have a limit on the number of devices supported (Limitation is the hardware resources – CPU and memory)
- GNS3 has support for multiple switching options (NM-ESW16 Etherswitch module, IOU/IOL Layer 2 images, VIRL IOSvL2)
- You can use GNS in multi vendor environments
- There is a native support for Linux without the need for additional virtualization software
- Has large and active community – over 800,000 members
Install GNS3 GUI & Server on macOS
In a nutshell, GNS3 consists of these two software components:
- The GNS3-all-in-one software – the graphical user interface (GUI)
- The GNS3 virtual machine (VM)
In macOS, both the GNS3 GUI and the local GNS3 server will be running as processes in the same system.
Step 1: Download GUI GNS3 software on macOS
There are two ways you can download .dmg package:
Option 1: Download the package for macOS using curl
VER=$(curl -s https://api.github.com/repos/GNS3/gns3-gui/releases/latest|grep tag_name | cut -d '"' -f 4|sed 's/v//g')
wget https://github.com/GNS3/gns3-gui/releases/download/v$VER/GNS3-$VER.dmg
Confirm the package is available in now current working directory:
$ file GNS3-$VER.dmg
GNS3-2.2.32.dmg: zlib compressed data
Option 2: Download GNS3 package for macOS from Website
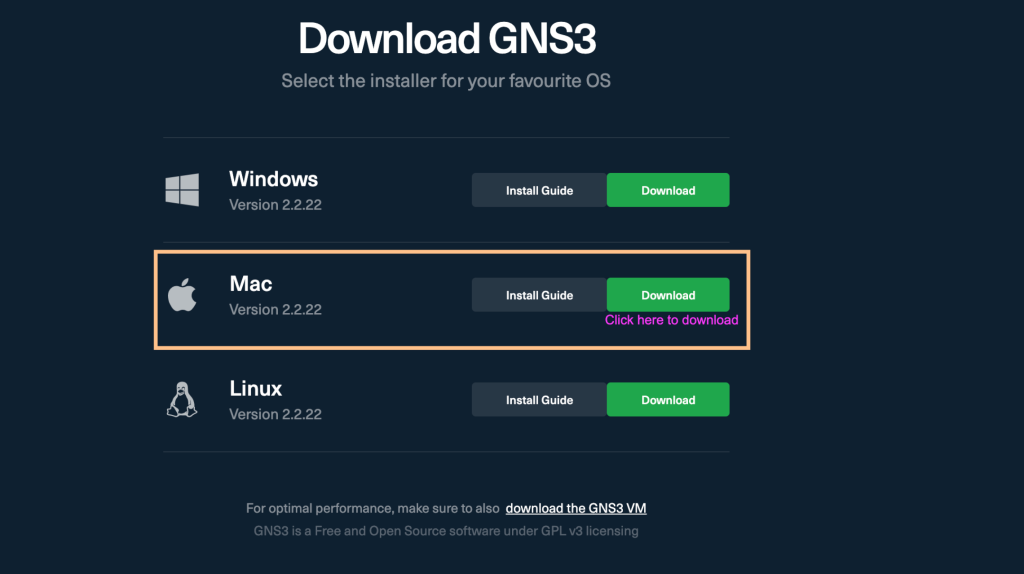
If you don’t like the terminal way, visit GNS3 downloads page and click on “Free Download” to download the software.

On Mac section click “Download“:
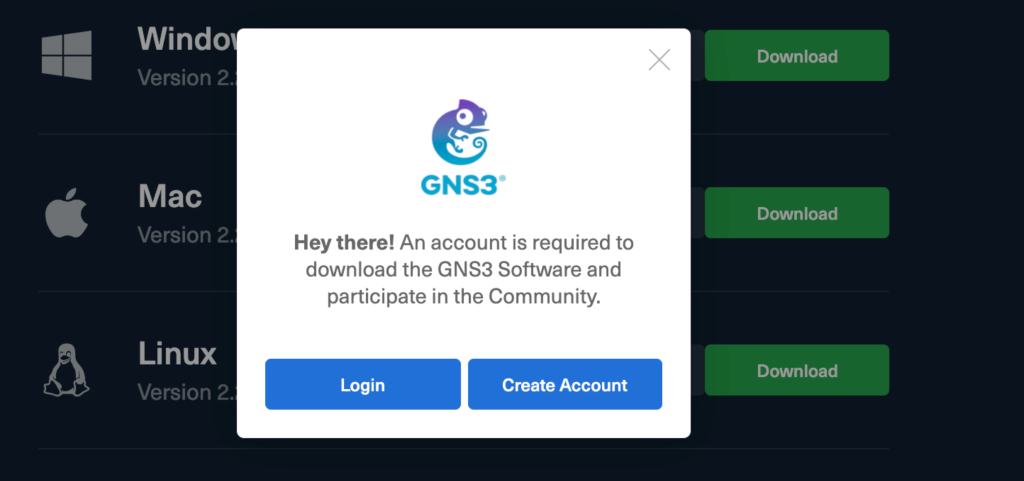
If you already have GNS3 account login with it, hence create a new account. This is required before you can download the software.
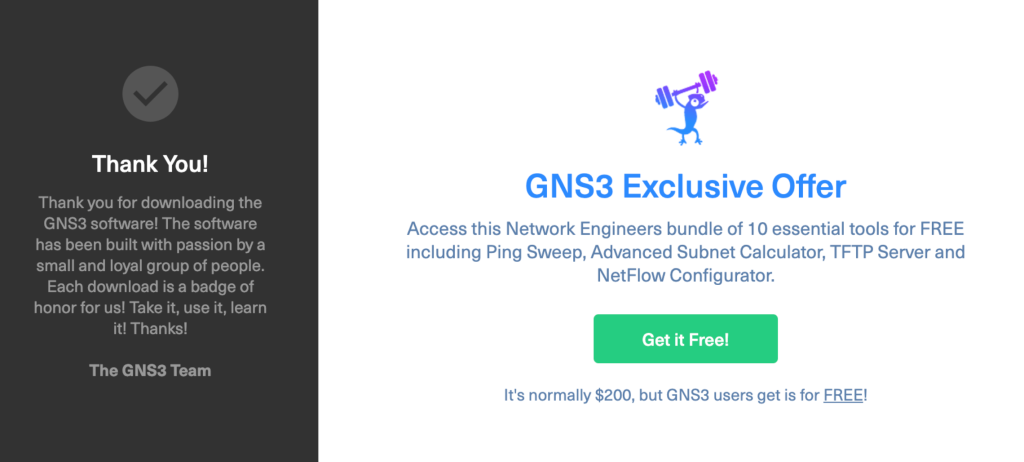
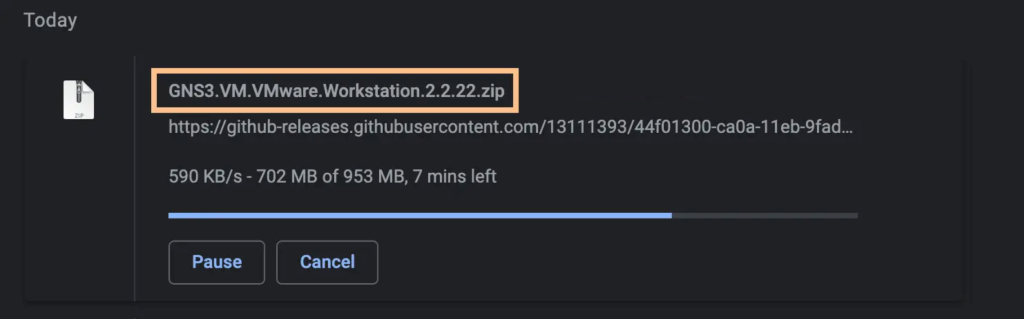
Wait for GNS3 package to be downloaded locally then you can begin installation.
Step 2: Install GNS3 on macOS
Now run the the installer package to have to complete the installation process:
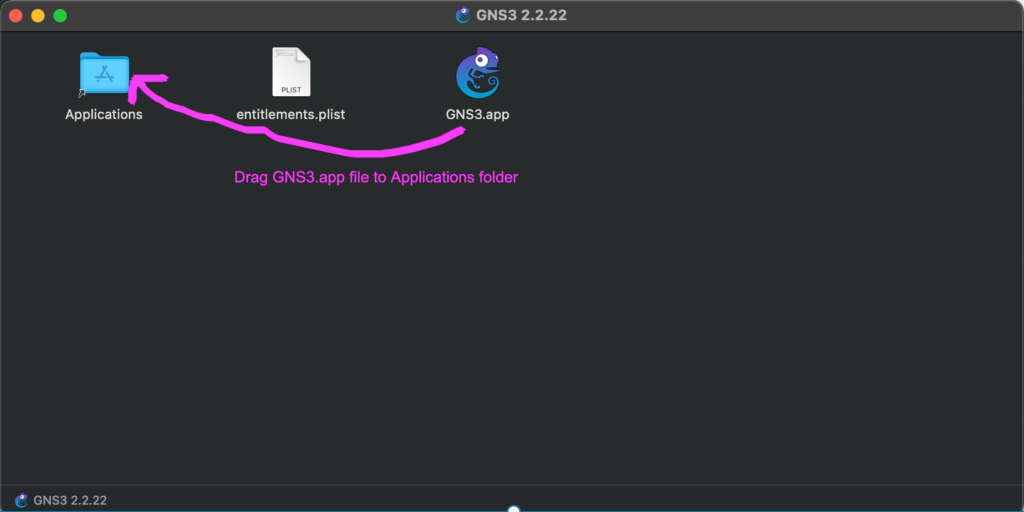
open GNS3-*.dmgYou can as well use File manager – Finder to click on the file and uncompress the dmg file.
Once the package has been extracted, drag resulting file GNS3.app to the Applications folder
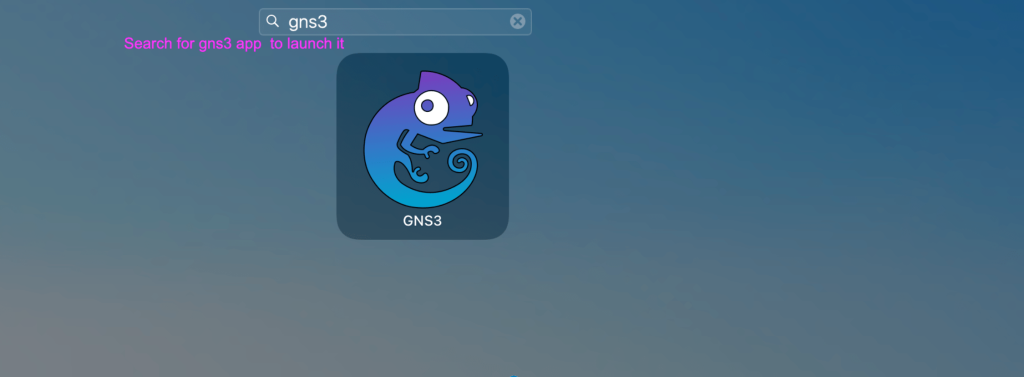
Search GNS3 application in Launchpad and start configurations.
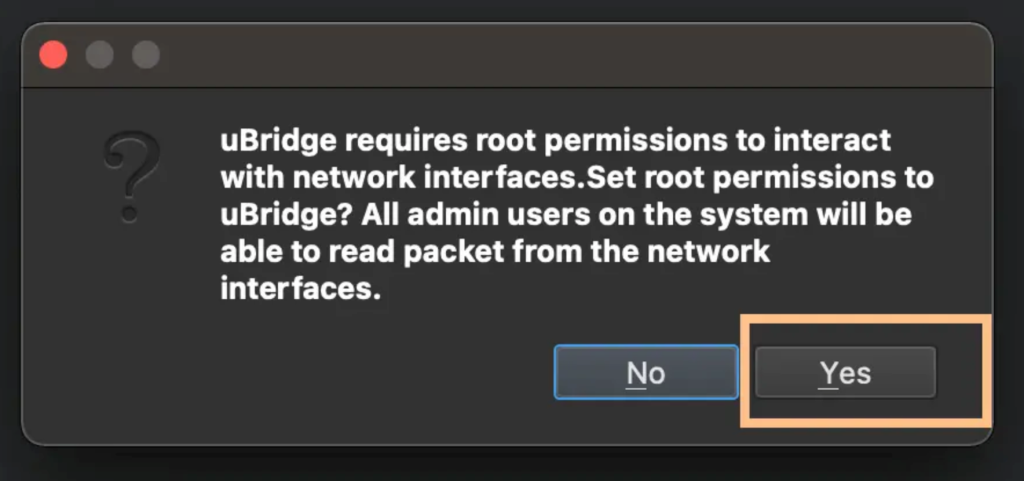
The first time you run the application you’re asked to set root permissions to uBridge. Hit Yes and authenticate to grant required permissions.
Step 3: Configure GNS3 Server on macOS
You can run GNS3 server on your local macOS system, or in a Virtual Machine, choose an option that works better for you.

Using GNS3 VM
If option 1 – Running GNS3 Server in a Virtual Machine, you need to download the appliance for download the GNS3 VM
The GNS3 VM is recommended for macOS users. The VM way provides a robust way of creating GNS3 topologies that avoids multiple common issues experienced when using a local install of GNS3. Depending on your Virtualization Hypervisor choose the ideal VM image type.
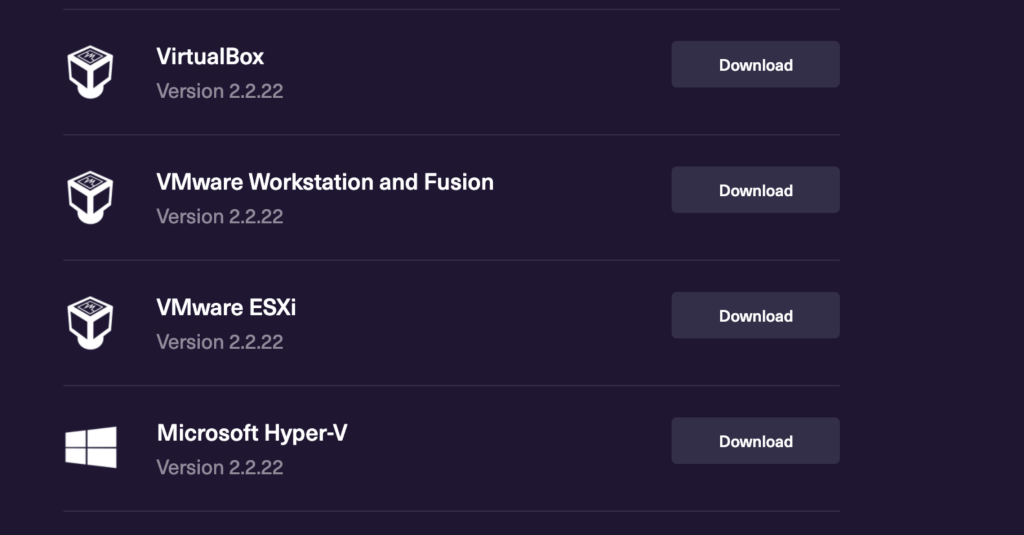
I have VMWare Fusion installed on my macOS. For this reason I’ll download VMWare Workstation and Fusion VM boot image.
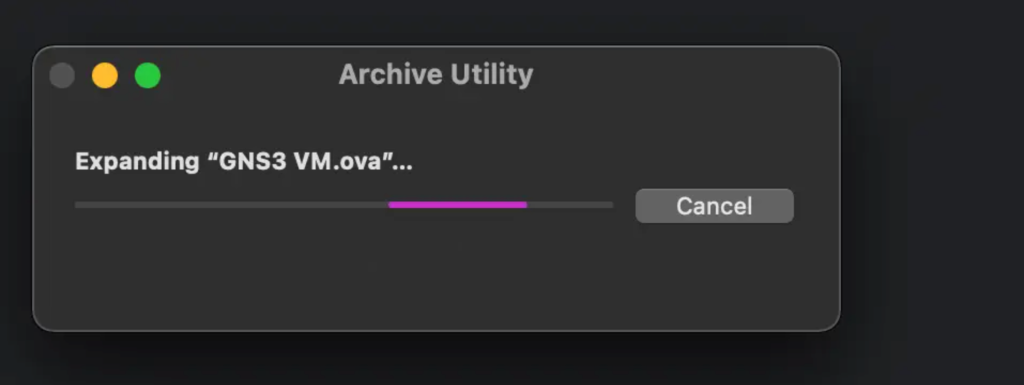
Extract downloaded archive file – Applies to both VirtualBox or VMWare Virtual Machine image.
In the resulting folder, right click “GNS3 VM.ovf”

Choose the application to ope VM meta information file – VirtualBox or VMware Workstation/Fusion.

Choose “GNS3 VM” for Virtual Machine name and hit Continue button.
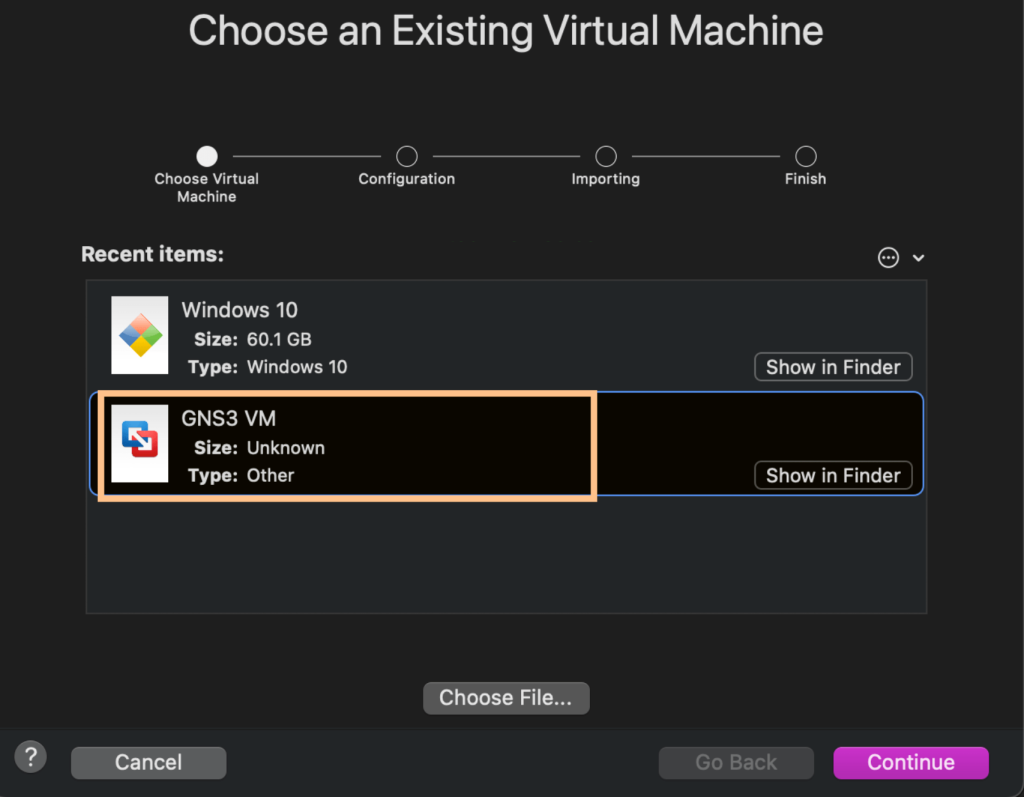
Importation of GNS3 VM in your Virtualization environment should now start.

Wait for the importation process to complete the select “Finish” to finalize the process.

Start GNS3 Virtual Machine to start using it in your Networking Labs.
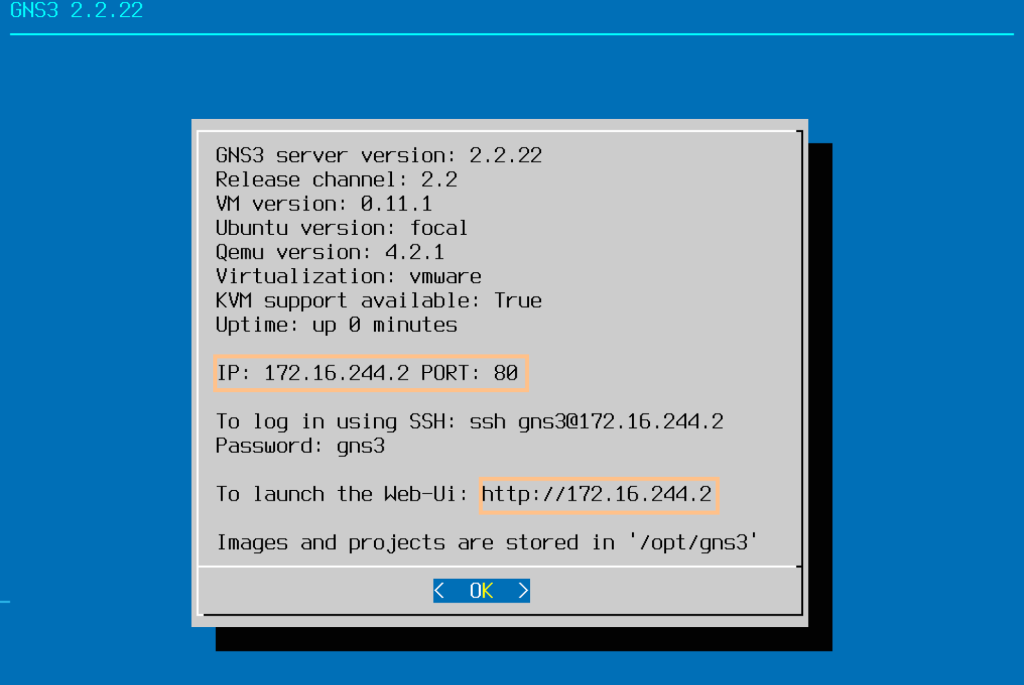
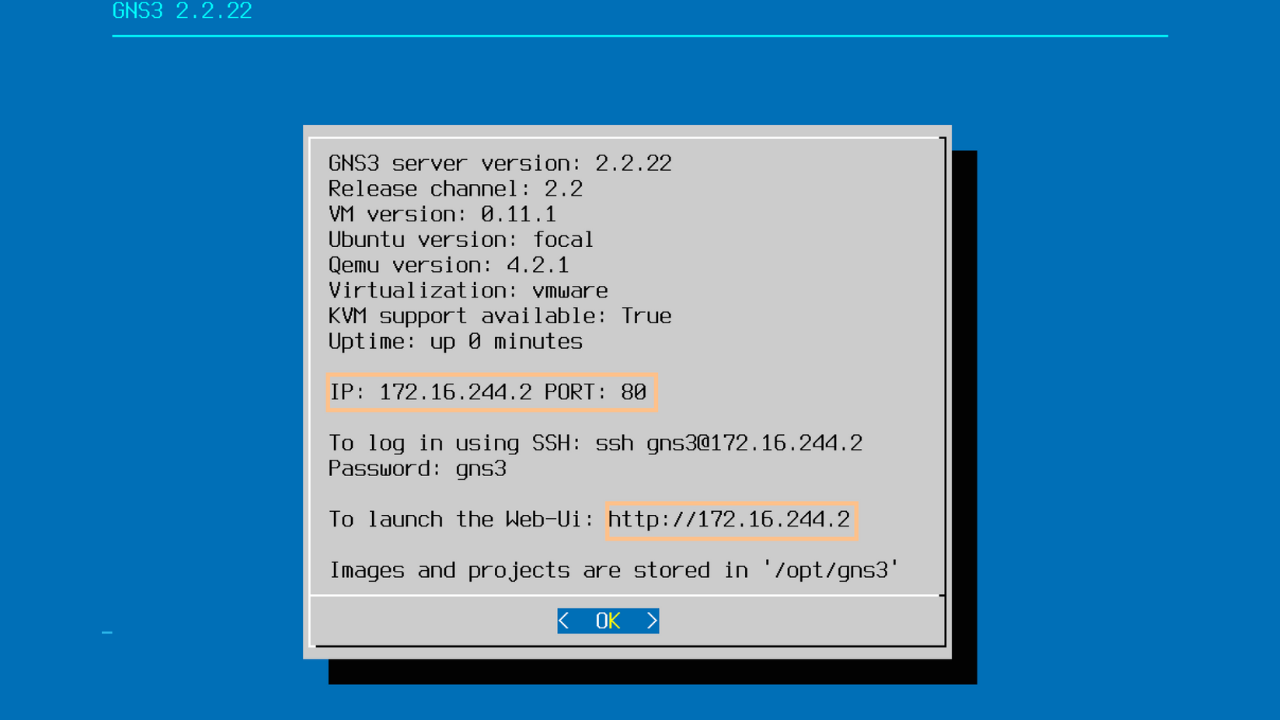
Let’s test SSH access to GNS3 server instance:
$ ssh [email protected]
Warning: Permanently added '172.16.244.2' (ED25519) to the list of known hosts.
[email protected]'s password:
Welcome to Ubuntu 20.04.2 LTS (GNU/Linux 5.8.0-48-generic x86_64)

 * Documentation:  https://help.ubuntu.com
 * Management:     https://landscape.canonical.com
 * Support:        https://ubuntu.com/advantage
Last login: Wed Jul  7 18:10:49 2021
Step 4: Connect GNS3 Server from GUI
Open GNS3 GUI application and enable GNS3 VM under Preferences > GNS3 VM > Enable the GNS3 VM

You are now ready to start creating Networking Projects in your GNS3 installation on macOS. You can visit Getting Started with GNS3 documentation pages for further reading.
Similar guides:


