
GNS3 is an open source Network Simulator that is used to emulate, configure, test and troubleshoot virtual and real networks. GNS3 can run on Windows, Linux and MacOS. It can also run on a virtualized environment such as VMware, Docker and Virtualbox.
Below are some of the features of GNS3:
- Fully free and Open Source – No monthly or yearly license fees
- There is no limit on the number of devices supported – CPU and RAM hardware is your only limitation
- GNS3 supports all VIRL images (IOSv, IOSvL2, IOS-XRv, CSR1000v, NX-OSv, ASAv)
- GNS3 can run with or without hypervisors in multi-vendor environments
- It has support for multiple switching options (ESW16 Etherswitch, IOU/IOL Layer 2 images, VIRL IOSvL2)
- GNS3 supports both free and paid hypervisors – Virtualbox, VMware Workstation, VMware Player, ESXi, Fusion
- GNS3 has native support for Linux without the need for need for additional virtualization software
This article shall be covering how to run GNS3 VM on Virtualbox. In this setup, you have your GNS3 application running on your host but the GNS3 server runs on a VirtualBox instance and there is a remote connection between the application and the VM using the VirtualBox network bridge
Install GNS3 VM on Oracle VirtualBox
Follow the steps below to setup GNS3 VM on Virtualbox.
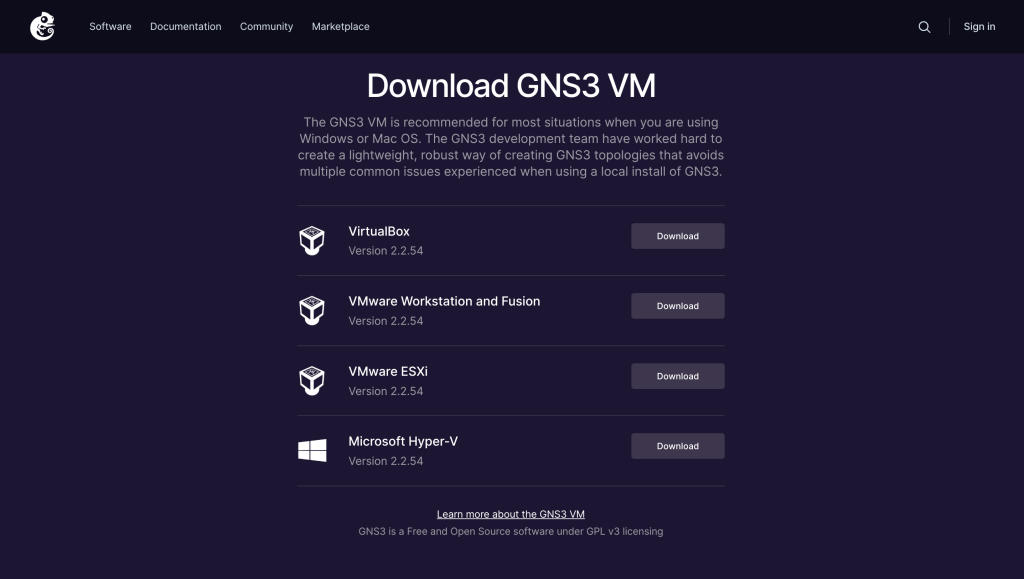
Download the latest version of GNS3 VM Virtualbox edition from the release page.
Extract the downloaded zip file to a directory. The downloaded zip file contains a VirtualBox disk image that will be imported to VirtualBox.

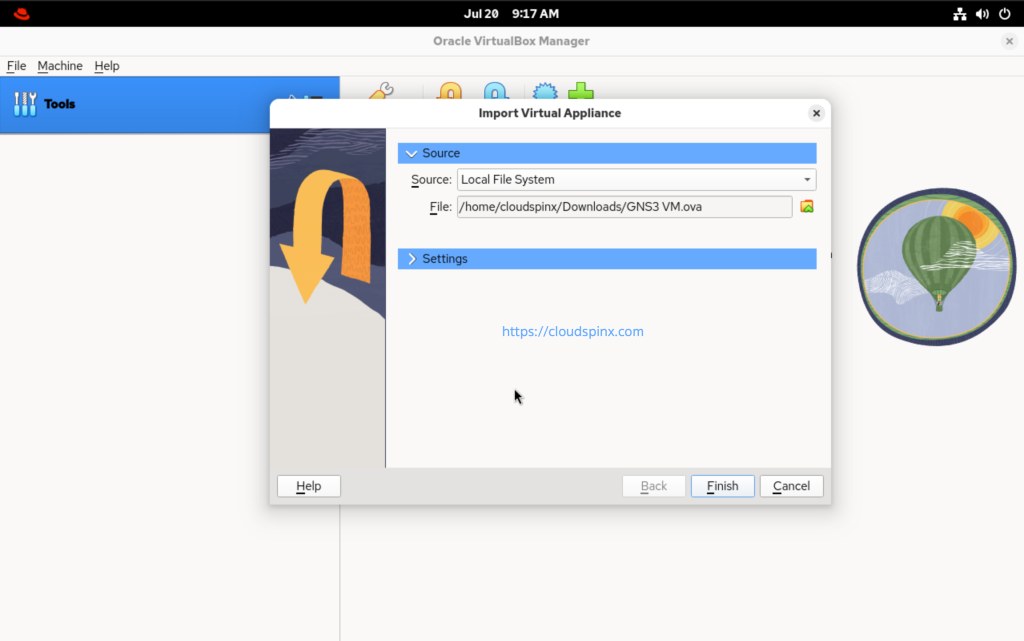
Open VirtualBox application and select ‘File‘ then ‘Import Appliance‘ option.

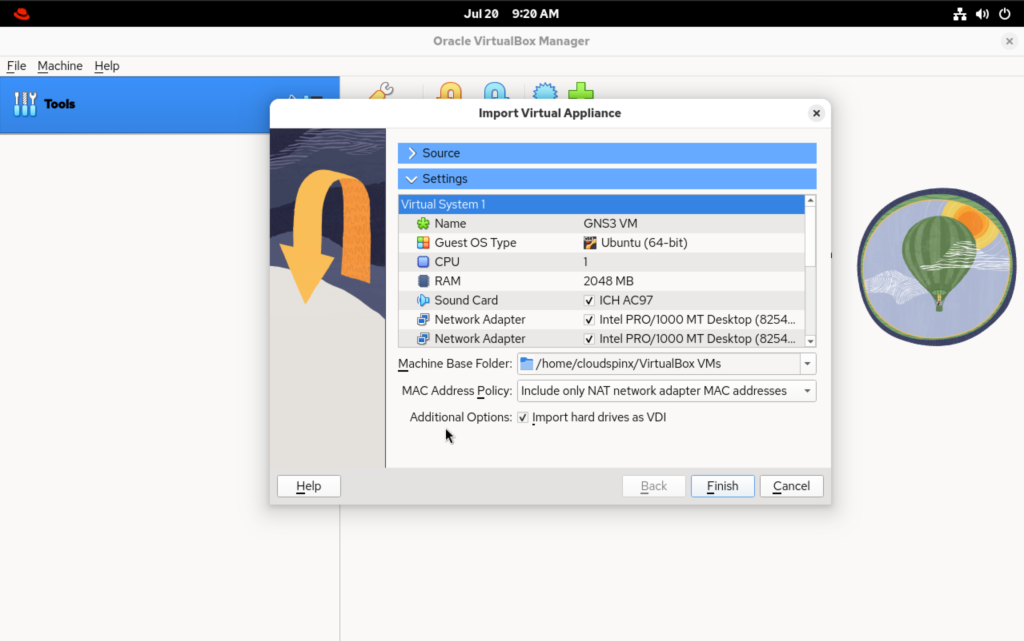
Navigate to the location where you extracted the downloaded disk image and select it. VirtualBox then opens up an interface with some pre-defined resources.
You can adjust the resources by double-clicking on any of them, in accordance to the host machine then click ‘Finish‘.
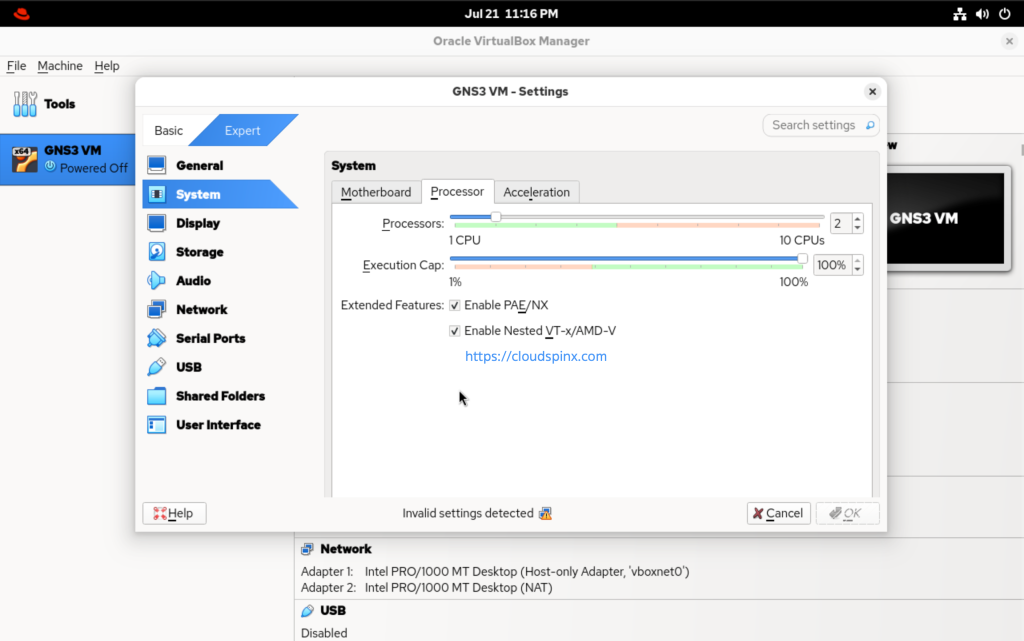
Enable Nested Virtualization
This is a feature that allows to virtualize an environment that is already virtualized. For example, running KVM on a virtual machine running on virtualbox.
This feature is needed for GNS3 server as it initiates instances within the VM itself when you setup your lab images e.g Cisco instances.
To enable this feature:
- Select the VM that we have imported, then go to the settings tab.
- Navigate to System option then select Processor
- Make sure the ‘Enable Nested VT-x/AMD-V’ option is checked.
You can also enable the same from the command-line using the command below:
$ vboxmanage modifyvm "GNS3 VM" --nested-hw-virt onWhere ‘GNS3 VM‘ is the name of the VirtualBox VM on my computer. Replace it with the appropriate name as you have named it in your environment.
Run GNS3 Instance on VirtualBox
Before we can power on our VM, make sure that we have a network adapter that has the “Bridged Adapter” option, and select our network interface:
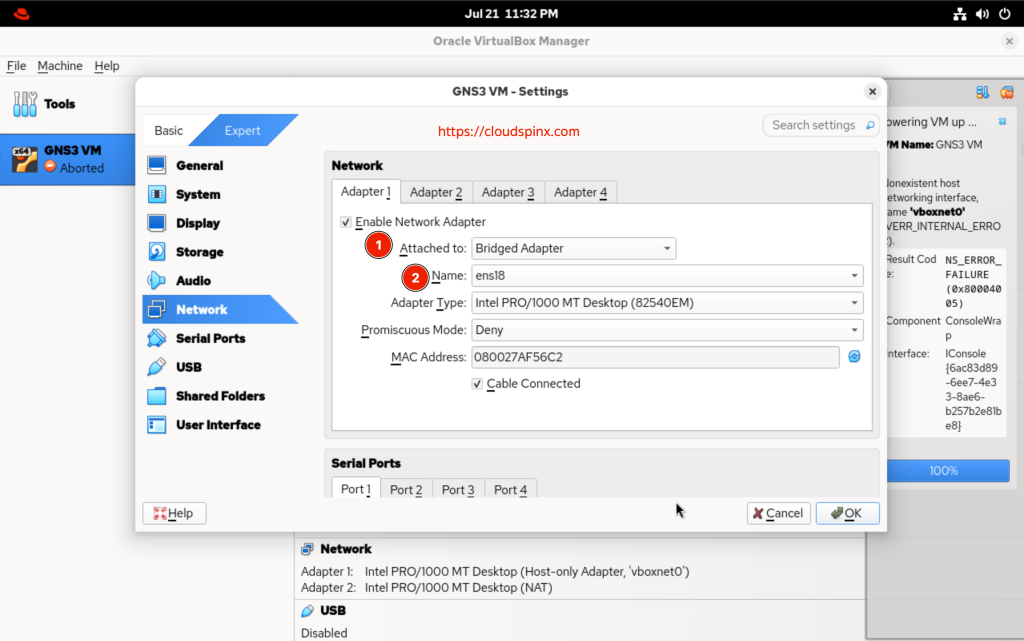
Otherwise, please select “Host-Only Adapter”.
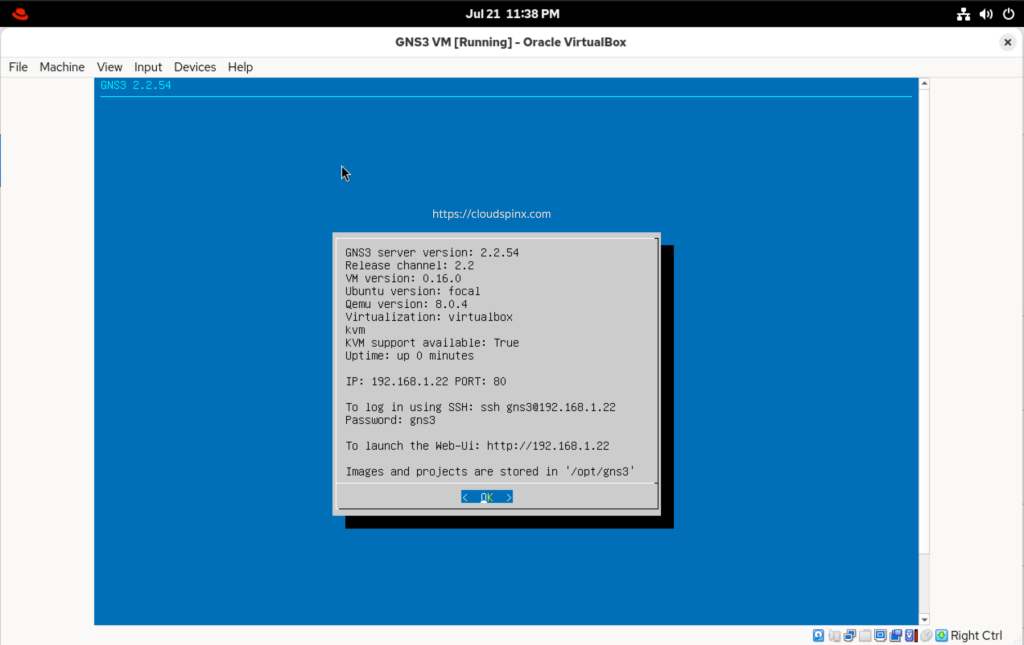
Power on the instance. On successful boot, you will get an interface similar to the one below:
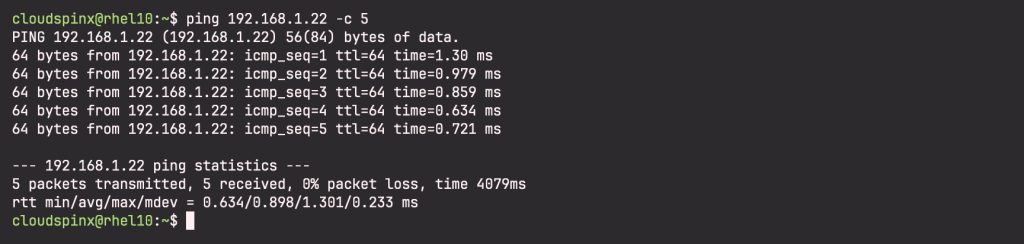
Make sure you can reach the VM ip from the host through ping.
Also make sure that the ‘KVM support available‘ value is “True“. Otherwise, check that nested virtualization is enabled.
Configure GNS3-GUI with GNS3 VM
We now need to configure our GNS3 application to use the VM created. Use the steps below:
- Open your GNS3-gui application and navigate to ‘Help‘ tab then choose ‘Setup Wizard‘.
- On the pop-up window, select ‘Run appliances in a virtual machine‘ option, for local server.
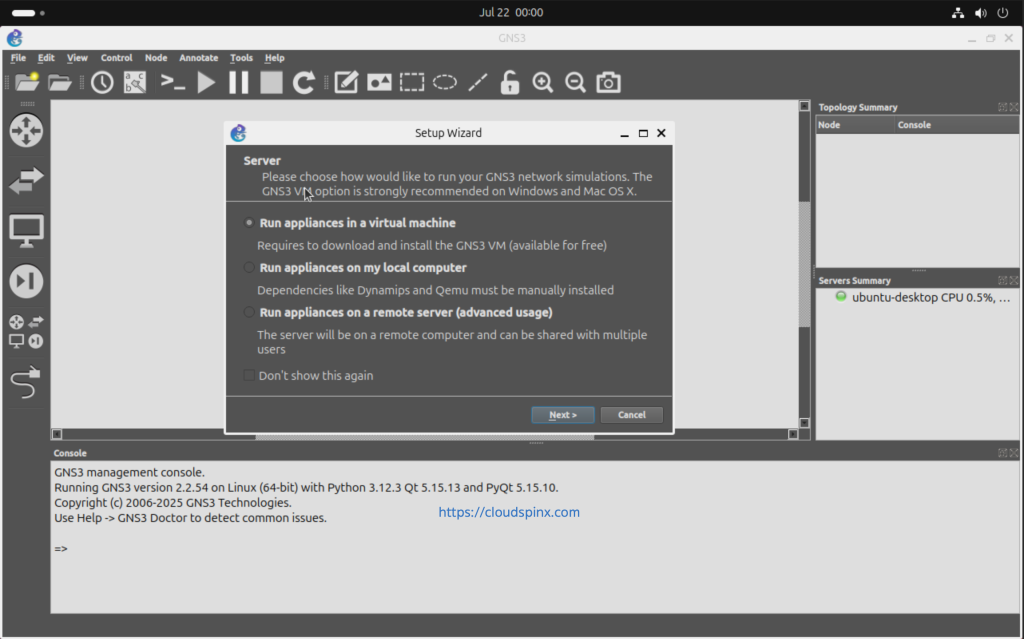
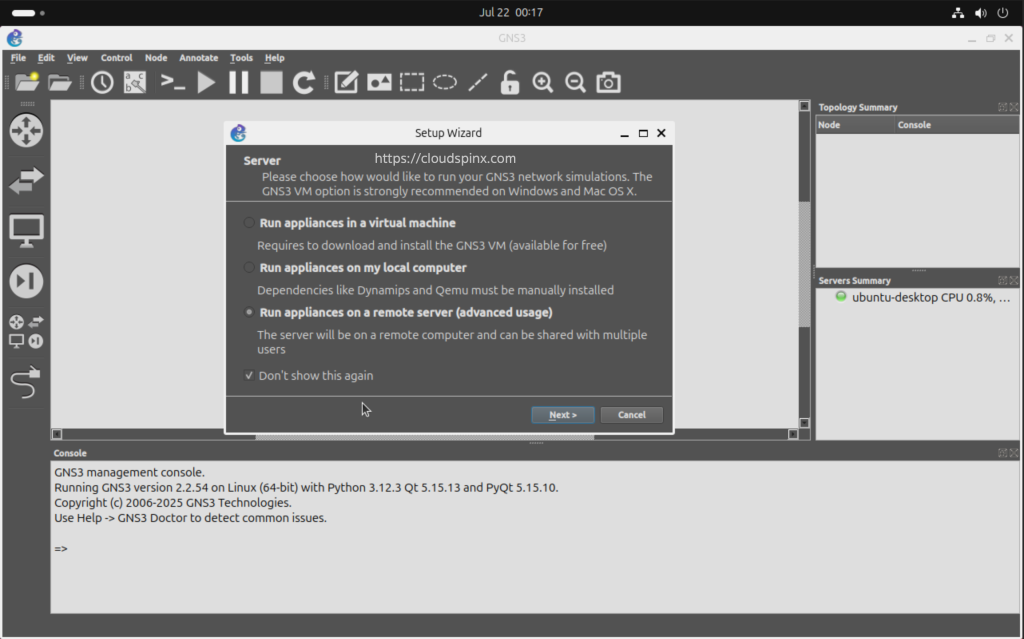
- For my case, am running the VM on another machine, so I’ll select the third option.
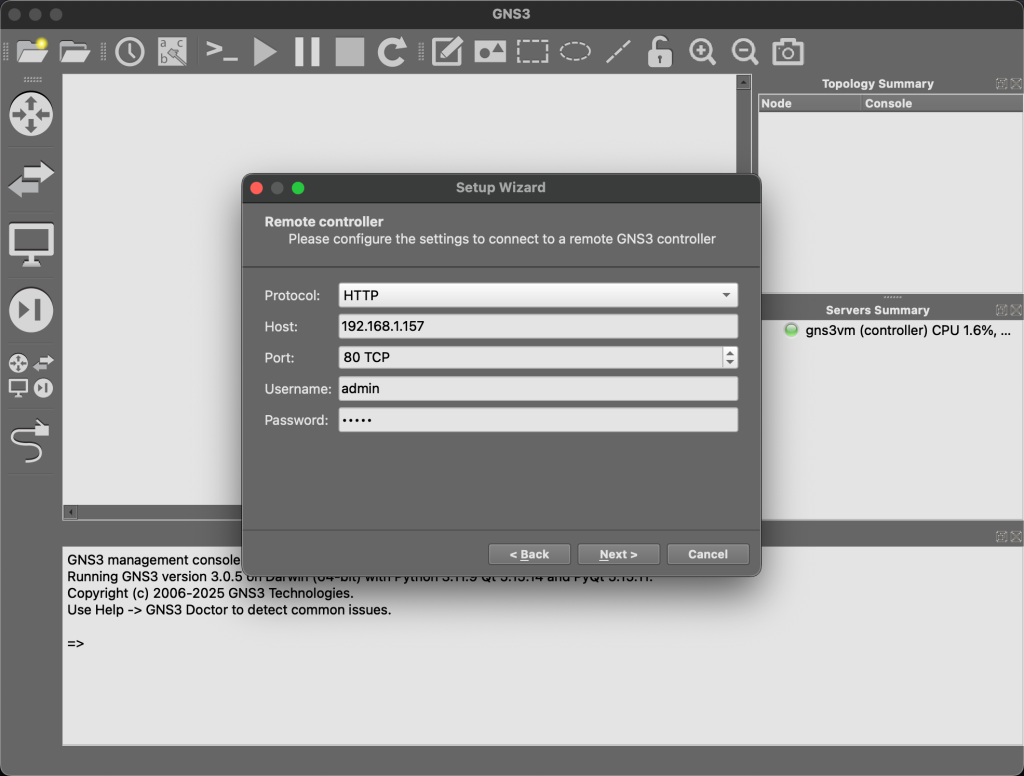
- If you are running the appliances in a VM on your machine, choose the Host binding IP that is in the Server’s subnet, the server path and port remain as it is.
- For a remote server, you can connect to it as follows: (Please ignore the change in server ip address, I just used a different GNS3 VM, but with the same setup.)
The connection to the VM network should be successful.
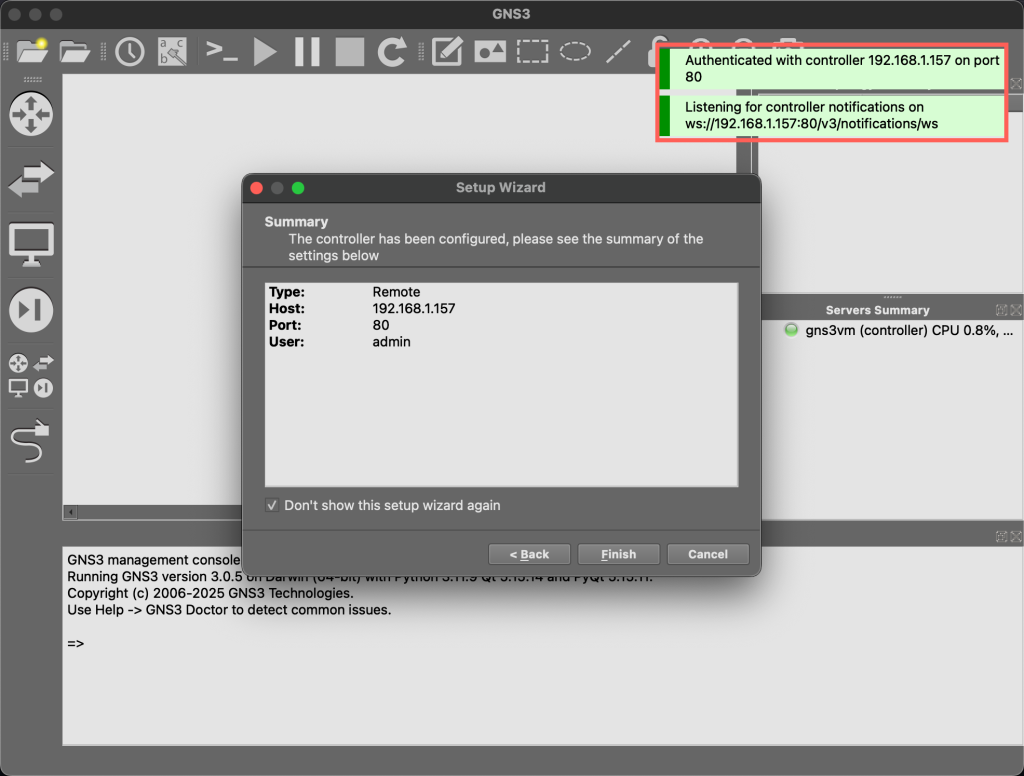
You can now use your GNS3 application to deploy labs with the server running on the VirtualBox VM. Congratulations! Now roll your sleeves and start deploying your labs comfortably.
Check out these interesting links:


