In today’s tutorial, we are looking at how to install Invoice Ninja on Debian 11|12 with Nginx as a web server. Invoice Ninja is an open source self-hosted software for billing and invoicing customers, an alternative to commercial online invoice platforms.
Some interesting features of Invoice Ninja include:
- Ability to send invoices to clients with own domain name and brand
- Easy to create and send beautiful proposals to clients
- Creates projects, tasks and track time
- Automatically bills long-term clients with recurring invoices thus saving time
- Attach third party files and invoices
- Notifies when clients view invoices and make payments
- Ability to manage various businesses invoicing all under one account
- Clients see all their transactions with you
- Remind clients of pending invoices
- With Zapier automation, you can transfer data the invoicing account and apps such as MailChimp, Google Sheets, QuickBooks etc
Step 1: Update System
Update your Debian to packages first with the below commands:
sudo apt-get update && sudo apt-get upgrade -y
sudo reboot
Step 2: Install Required Dependencies
Invoice Ninja requires a webserver, a database server and PHP. In my guide, I am going to be installing Nginx, MariaDB and PHP. Run the below command to install the required packages and php modules:
sudo apt-get install nginx php-fpm php-cli php-common php-curl php-gd php-mysql php-xml php-mbstring php-zip php-bcmath mariadb-server mariadb-clientConfirm nginx and php-fpm status with the below commands:
sudo systemctl status nginx
sudo systemctl status php*-fpm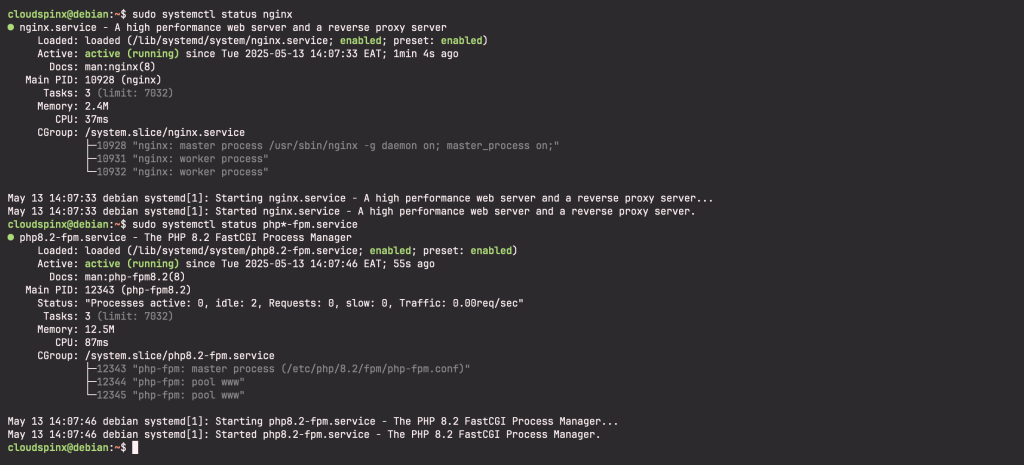
Enable nginx and php-fpm to automatically start at system boot:
sudo systemctl enable nginx
sudo systemctl enable php*-fpm.service
Start and enable mariadb:
sudo systemctl start mariadb
sudo systemctl enable mariadb
sudo systemctl status mariadb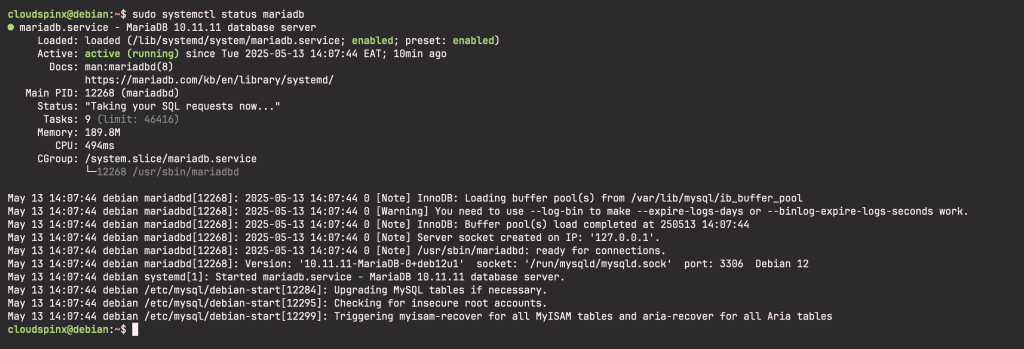
Now run mariaDB post installation:
$ sudo mariadb-secure-installation
---
Enter current password for root (enter for none):  PRESS ENTER
---
Set root password? [Y/n] Y
New password:
Re-enter new password:
---
Remove anonymous users? [Y/n] Y
---
Disallow root login remotely? [Y/n] Y
---

Remove test database and access to it? [Y/n]  Y
---
Reload privilege tables now? [Y/n] Y
... Success!

Cleaning up...

--
Thanks for using MariaDB!
Create Ninja Database. Launch mysql cli and create a database to be used by Ninja invoice:
mariadb -u root -pProvide the password you created earlier to login. Once in Mysql cli, run the following commands to create a database:
CREATE DATABASE ninja;
GRANT ALL PRIVILEGES ON ninja.* TO 'ninja'@'localhost' IDENTIFIED BY 'strongpassword';
FLUSH PRIVILEGES;
QUIT
Step 3: Install Invoice Ninja on Debian
We are going to download Invoice Ninja zip archive as below:
VER=$(curl -s https://api.github.com/repos/invoiceninja/invoiceninja/releases/latest|grep tag_name|cut -d '"' -f 4|sed 's/v//')
sudo wget https://github.com/invoiceninja/invoiceninja/releases/download/v${VER}/invoiceninja.tar.gz
Extract the downloaded content to /var/www/html and set the right ownership:
sudo mkdir /var/www/html/ninja
sudo tar -xzf invoiceninja.tar.gz -C /var/www/html/ninja
Then from your root Invoice Ninja application, copy the environment file:
cd /var/www/html/ninja
sudo cp .env.example .env
Then set the correct permissions:
sudo chown -R www-data:www-data /var/www/html/ninjaStep 4: Configure Nginx to serve Invoice Ninja
Create Nginx server block for Ninja as below using your preferred editor:
sudo vim /etc/nginx/sites-available/your_ninja_domain.com.confAdd the following content and edit to suit your server name:
server {
    listen 80;
    listen [::]:80;
    server_name invoice.yourdomain.com;

    root /var/www/html/ninja/public/;
    index index.php index.html index.htm;
    charset utf-8;

    location / {
        try_files $uri $uri/ /index.php?$query_string;
    }

    location = /favicon.ico { access_log off; log_not_found off; }
    location = /robots.txt  { access_log off; log_not_found off; }

    access_log  /var/log/nginx/invoiceninja.access.log;
    error_log   /var/log/nginx/invoiceninja.error.log;

    location ~ \.php$ {
        fastcgi_split_path_info ^(.+\.php)(/.+)$;
        fastcgi_pass unix:/run/php/php8.2-fpm.sock;
        fastcgi_index index.php;
        include fastcgi_params;
        fastcgi_param SCRIPT_FILENAME $document_root$fastcgi_script_name;
        fastcgi_intercept_errors off;
        fastcgi_buffer_size 16k;
        fastcgi_buffers 4 16k;
    }

    location ~ /\.ht {
        deny all;
    }
}
Create a symbolic link to activate the server block:
sudo ln -s /etc/nginx/sites-available/your_ninja_domain.com.conf /etc/nginx/sites-enabled/your_ninja_domain.com.confThen disable the default site by removing the symlink:
sudo rm /etc/nginx/sites-enabled/defaultTest Nginx configuration:
sudo nginx -tIf successful, restart nginx service:
sudo systemctl restart nginx
sudo systemctl status nginx
Step 5: Configure Invoice Ninja on Debian 11|12
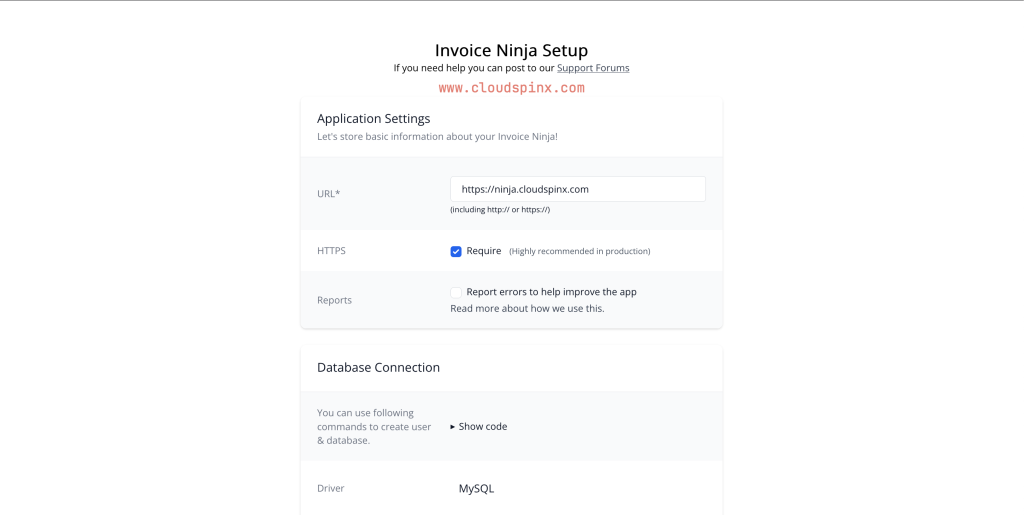
Now access Invoice Ninja from the browser. Once done with installation, key in your server hostname (http://ninja.yourdomain.com) or (http://your_server_ip)on your browser to access Invoice Ninja and finish up the set up. You should see a page as below:
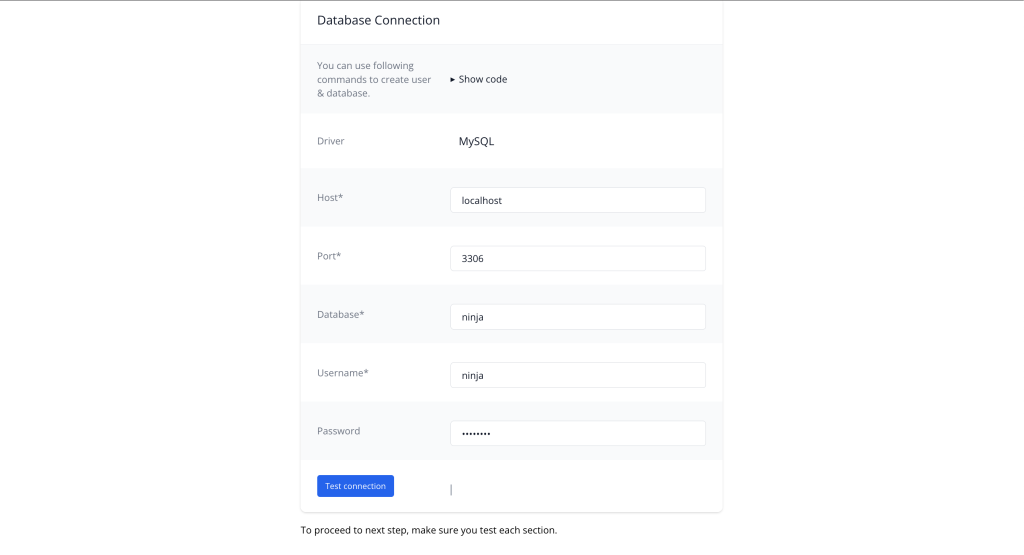
Then inout the database details and test database connectivity.
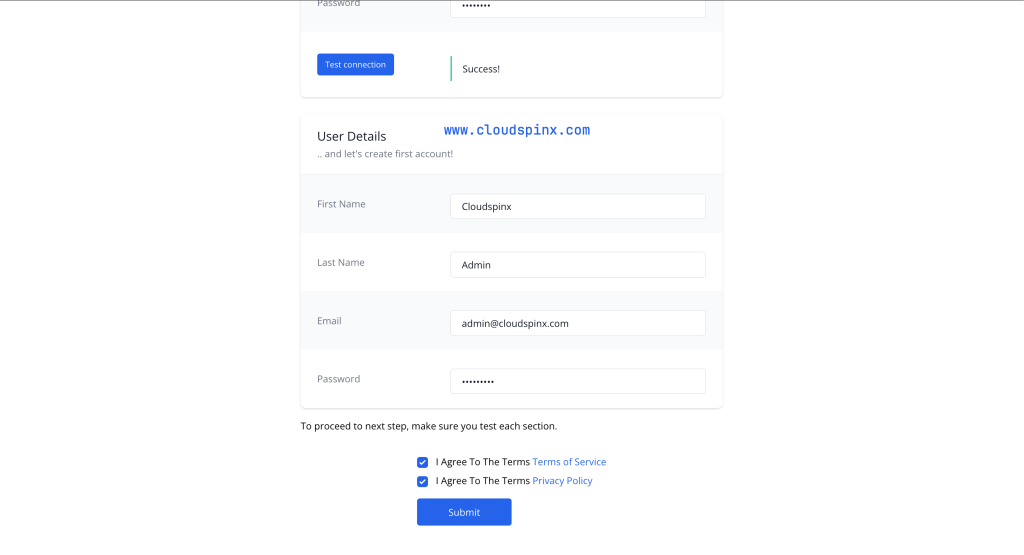
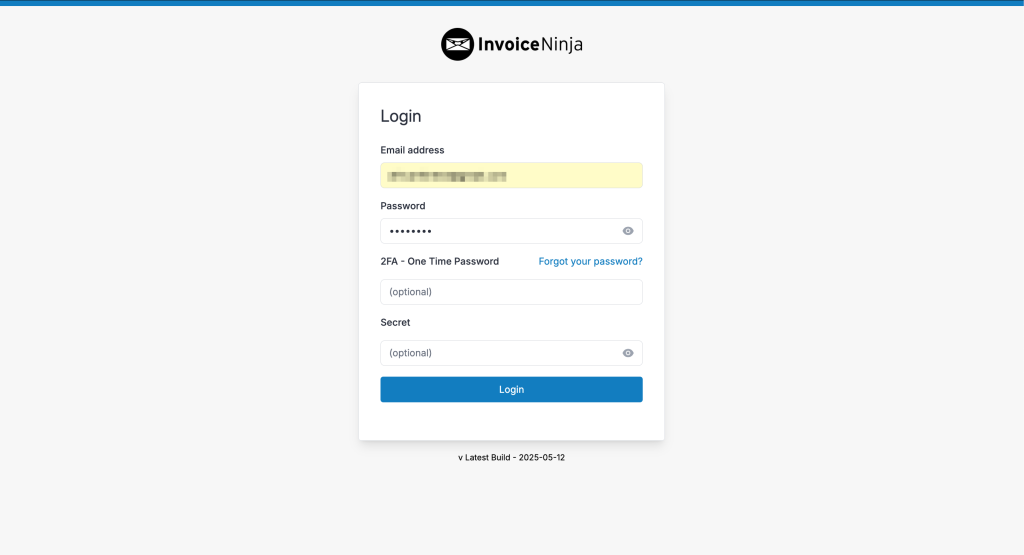
With a successfull Database connection, proceed to create the first user account. Agree to terms of service and privacy policy and click ‘submit’ at the bottom of the page. You should then be presented with a login page as below:
Provide email address and password previously set to login.
Then provide your company Name and preferred currency:
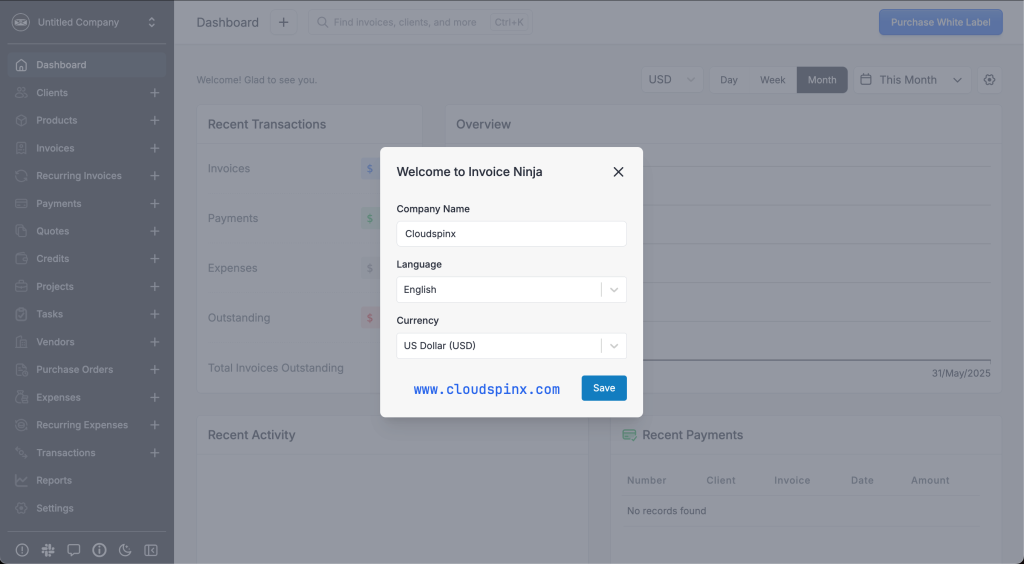
That’s it. You have successfully installed Invoice Ninja on Debian 11|12.
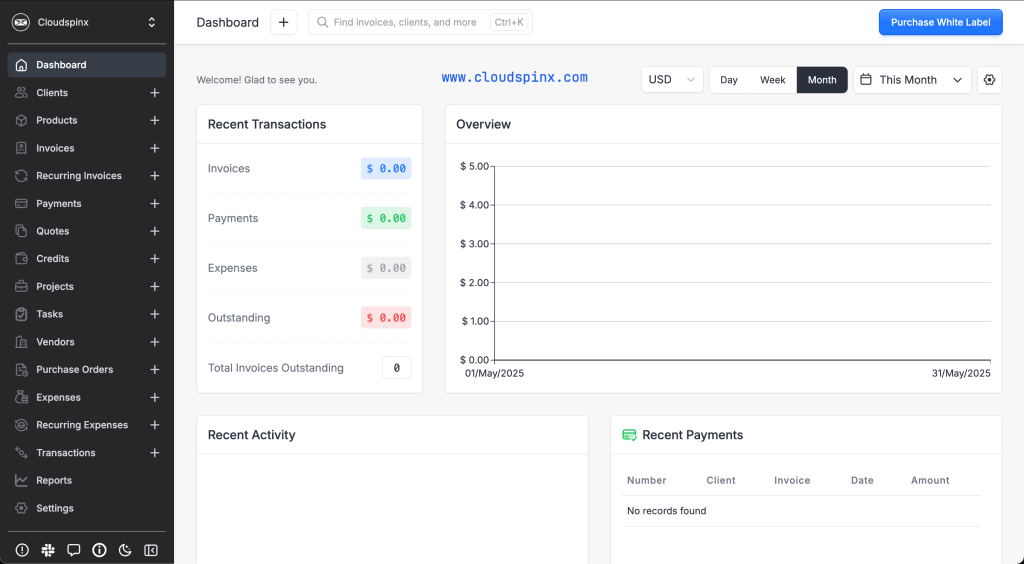
I hope the guide has been useful. Enjoy using your self-hosted customer billing and invoicing software, having quite a number of important features and a good alternative to expensive online invoicing platforms.
More articles:

