Statping is an opensource website and http monitor. It provides very easy to use status page that you can further modify to make it even better. Statping automatically fetches the application, renders a beautiful status page with lots of features that one can build from to make the status page suit their needs. With sass styling and easy to use variables, you can completely customize your status page.
The status page generator allows one to use MySQL, Postgres or SQLite on various operating systems. You should not configure statping service on the same server you are monitoring because if the server fails, statping service will be offline and you will not get any alert. Statping email notifications are configured through SMTP. It also supports slack integration using incoming webhook. You only need to insert the Webhook URL in the settings and enable slack integration.
Statping is a very lightweight application, available for Linux, Windows and MacOS. The docker image is also very small, approximately 16Mb, therefore will use very small hard drive space. It also has a mobile app that is available on Google store and App store. The app is free and notifies one when systems are down. To connect Statping to the mobile app, you just need to start statping server then scan the QR code in settings.
Installing Statping on Linux using install.sh script
Being build in Go language, statping installation only requires a precompile library specific to the distribution to be installed in.
If you require to use custom theme features, first install sass for compiling SCSS into CSS. Run the following commands:
# Apt
sudo apt update
sudo apt install ruby-sass -y

# Node
sudo npm install sass -g

# Ruby
gem install sass
Now install Statping on Linux by running the below command:
curl -o- -L https://statping.com/install.sh | bashEnsure to run the command as root, and not using sudo, so that you don’t run into permission problems.
Install Statping using snap
Or using SnapCraft by running the command below:
sudo snap install statpingConfigure Statping Systemd Service
We can create a systemd service for Statping to easily manage it, and more importantly to ensure that it automatically starts on system reboot. Using your preferred editor, create a file as below:
sudo tee /etc/systemd/system/statping.service<<EOF
[Unit]
Description=Statping Server
After=network.target
After=systemd-user-sessions.service
After=network-online.target

[Service]
Type=simple
Restart=always
ExecStart=/usr/local/bin/statping
WorkingDirectory=/usr/local/bin

[Install]
WantedBy=multi-user.target
EOF
Activate and enable the service as below:
sudo systemctl daemon-reload
sudo systemctl enable statping.service
sudo systemctl start statping
Statping runs on port 8080. Allow the port on the firewall if running an active firewall
sudo ufw allow 8080/tcpNow go to your browser on port 8080, with : http://<your-server-IP>:8080
Running Statping with Docker
To run Statping with Docker, ensure that you have Docker installed on your system.
Ubuntu:
# Add Docker's official GPG key:
sudo apt-get update
sudo apt-get install ca-certificates curl
sudo install -m 0755 -d /etc/apt/keyrings
sudo curl -fsSL https://download.docker.com/linux/ubuntu/gpg -o /etc/apt/keyrings/docker.asc
sudo chmod a+r /etc/apt/keyrings/docker.asc

# Add the repository to Apt sources:
echo \
  "deb [arch=$(dpkg --print-architecture) signed-by=/etc/apt/keyrings/docker.asc] https://download.docker.com/linux/ubuntu \
  $(. /etc/os-release && echo "${UBUNTU_CODENAME:-$VERSION_CODENAME}") stable" | \
  sudo tee /etc/apt/sources.list.d/docker.list > /dev/null
sudo apt-get update

# Install the Docker Packages:
sudo apt-get install docker-ce docker-ce-cli containerd.io docker-buildx-plugin docker-compose-plugin
Debian:
# Add Docker's official GPG key:
sudo apt-get update
sudo apt-get install ca-certificates curl
sudo install -m 0755 -d /etc/apt/keyrings
sudo curl -fsSL https://download.docker.com/linux/debian/gpg -o /etc/apt/keyrings/docker.asc
sudo chmod a+r /etc/apt/keyrings/docker.asc

# Add the repository to Apt sources:
echo \
  "deb [arch=$(dpkg --print-architecture) signed-by=/etc/apt/keyrings/docker.asc] https://download.docker.com/linux/debian \
  $(. /etc/os-release && echo "$VERSION_CODENAME") stable" | \
  sudo tee /etc/apt/sources.list.d/docker.list > /dev/null
sudo apt-get update

# Install the Docker Packages:
sudo apt-get install docker-ce docker-ce-cli containerd.io docker-buildx-plugin docker-compose-plugin
RHEL | CentOS:
# Uninstall Old Versions
sudo dnf remove docker \
                  docker-client \
                  docker-client-latest \
                  docker-common \
                  docker-latest \
                  docker-latest-logrotate \
                  docker-logrotate \
                  docker-engine \
                  podman \
                  runc

# Set up the repository
sudo dnf -y install dnf-plugins-core
sudo dnf config-manager --add-repo https://download.docker.com/linux/rhel/docker-ce.repo

# Install the Docker Packages
sudo dnf install docker-ce docker-ce-cli containerd.io docker-buildx-plugin docker-compose-plugin

# Start Docker Engine
sudo systemctl enable --now dockerFedora:
# Uninstall Old Versions
sudo dnf remove docker \
                  docker-client \
                  docker-client-latest \
                  docker-common \
                  docker-latest \
                  docker-latest-logrotate \
                  docker-logrotate \
                  docker-engine \
                  podman \
                  runc

# Set up the repository
sudo dnf -y install dnf-plugins-core
sudo dnf-3 config-manager --add-repo https://download.docker.com/linux/fedora/docker-ce.repo

# Install the Docker Packages
sudo dnf install docker-ce docker-ce-cli containerd.io docker-buildx-plugin docker-compose-plugin

# Start Docker Engine
sudo systemctl enable --now docker
Now pull and run Statping with the below command:
$ sudo docker run -it -p 8080:8080 statping/statping
[sudo] password for lorna
Unable to find image 'statping/statping:latest' locally
latest: Pulling from statping/statping
df20fa9351a1: Pull complete
7df0b22b9dbc: Pull complete
427d1d496a57: Pull complete
c99405be08e6: Pull complete
0bf9e51f6219: Pull complete
d8d017c2bcbd: Pull complete
Digest: sha256:281286d8a2bc7079122e3c4c7195ff16e2584fe03ced584a815920abbbb7a004
Status: Downloaded newer image for statping/statping:latest
Here, we have exposed Statping application on port 8080. Open the port if you are running an active firewall:
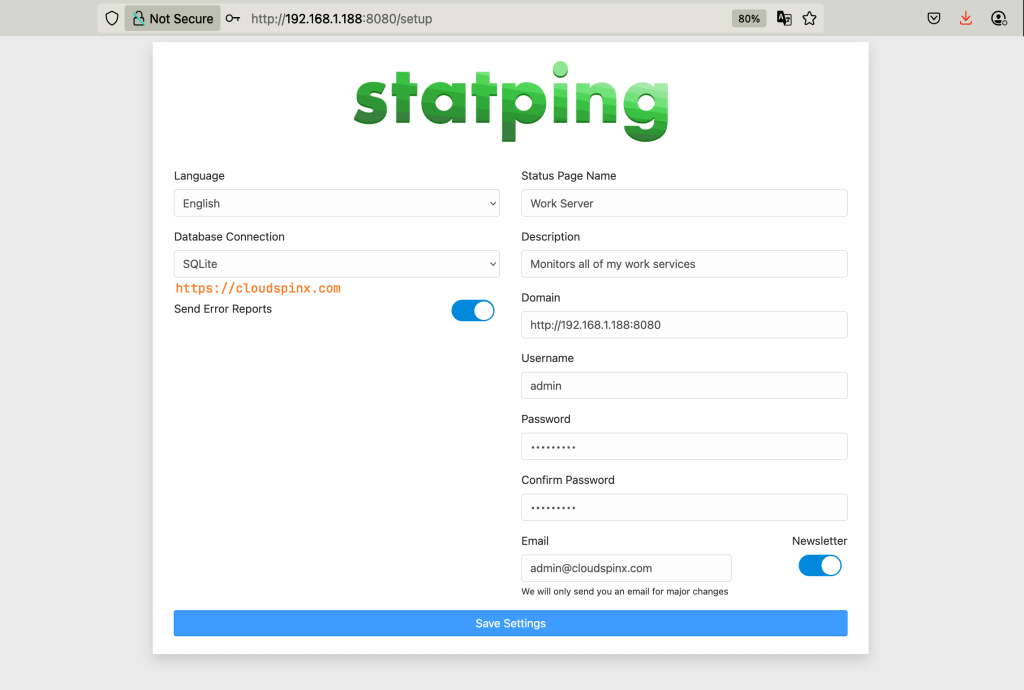
sudo ufw allow 8080/tcpNow go to your browser to access statping UI: http://<your-server-ip>:8080. You should see a page as below. Fill in the required areas and click save settings.
Once you click ‘Save settings‘ you are taken to a page as below:
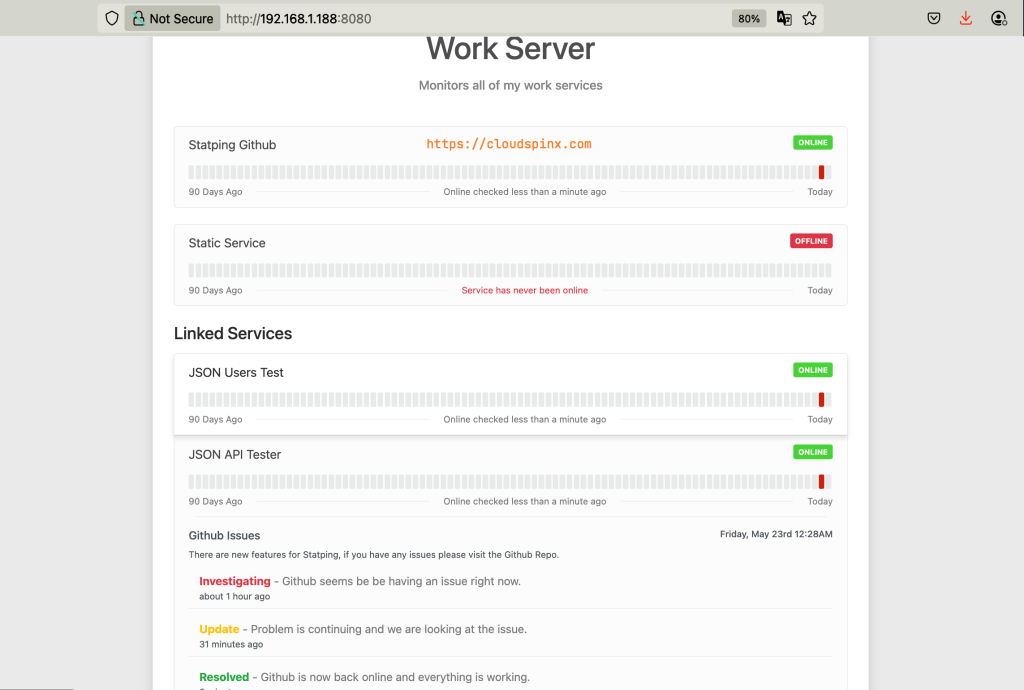
Scroll to the bottom of the page and click on Dashboard. You should be presented with a page to sign in as below:
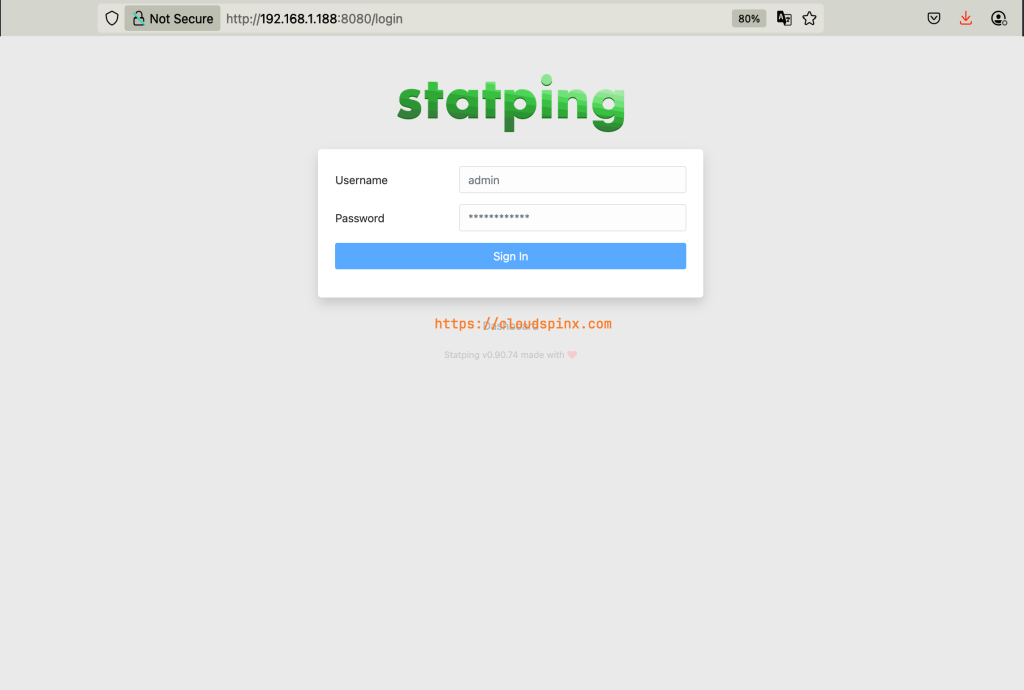
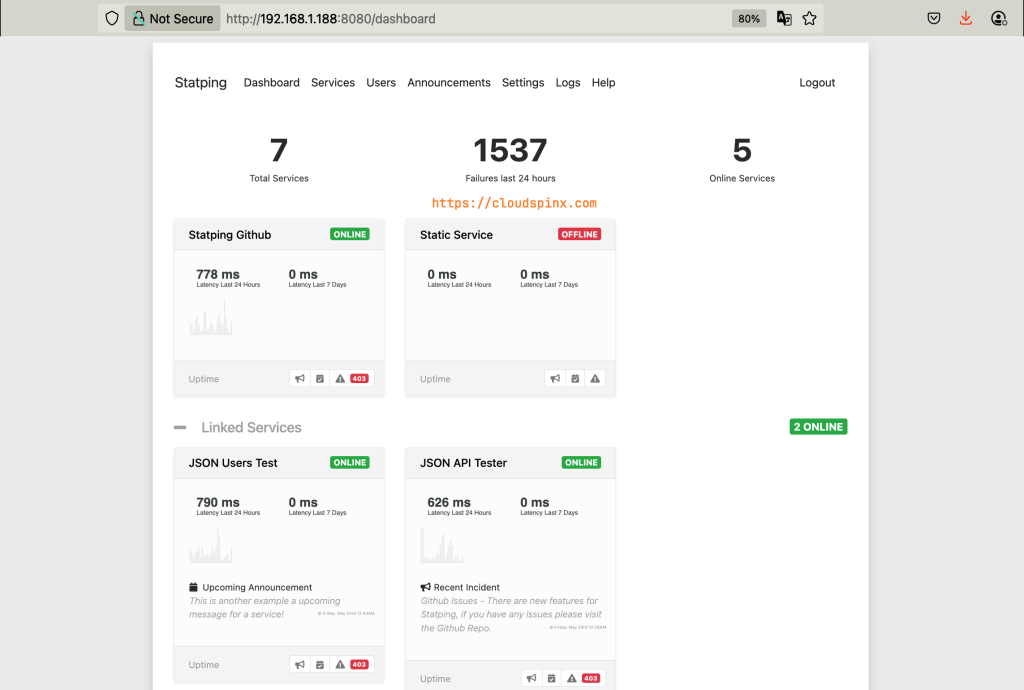
Once you login, you should a page that looks like the one below. You can create a new group then create a service and add to your new group, or use existing groups. You can also choose to have your group exposed to the public or not.
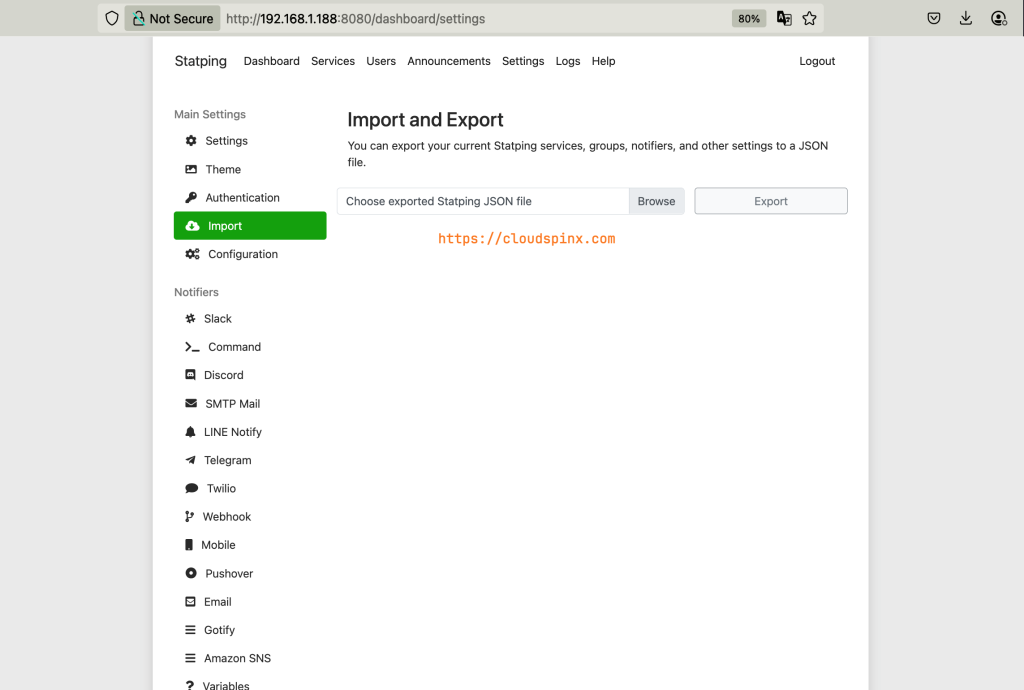
If you click on settings, you should be able to see various options to configure, including email notifications, Slack integration, mobile QR code scan and you can even export your current statping configuration to a JSON file.
Statping Prometheus Exporter
With Statping prometheus exporter you will have more powerful monitoring for your services. You simply need to create another exporter in the prometheus config and Use Statping API Secret for the Authorization Bearer header. To get API secret, click on settings and scroll to the bottom part of the page.
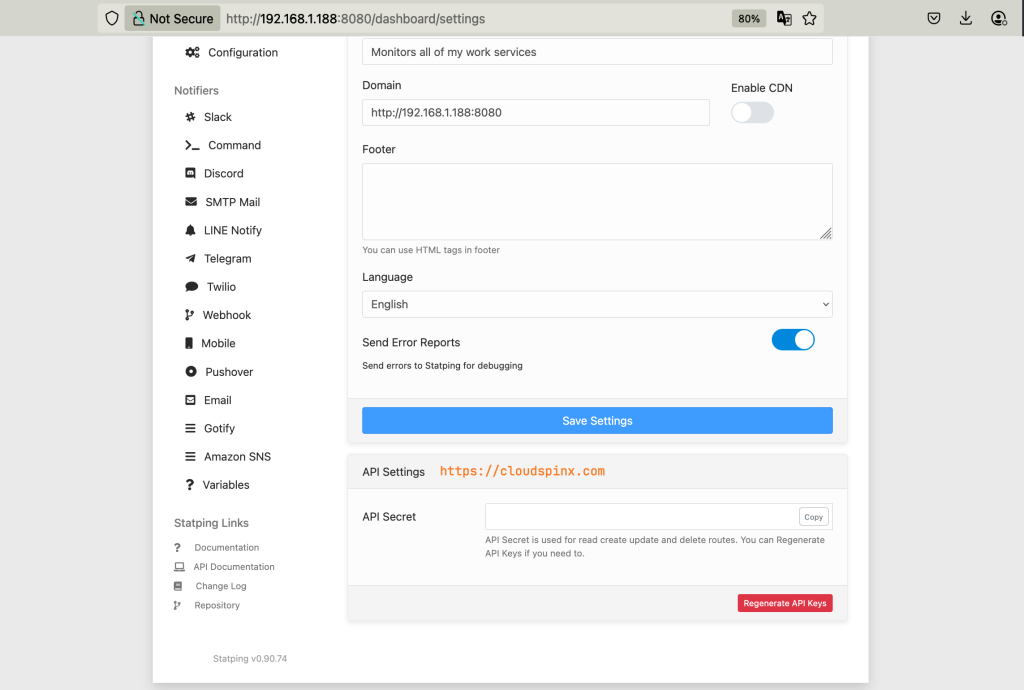
An example on Promethues exporter configuration
scrape_configs:
  - job_name: 'statping'
    bearer_token: 'MY API SECRET HERE'
    static_configs:
      - targets: ['statping:8080']
That’s it. Configure and enjoy your websites and applications monitoring! Don’t forget to check more guides below:

