A configuration management system is meant to ease the process of controlling many servers. With configuration management systems, one can control many servers at one go by a running configuration file from a central point. The configuration file is a YAML file that defines the servers to be controlled and the commands to be executed on these hosts. Examples of configuration management tools are Puppet, Salt, Chef and Ansible.
How does Ansible works?
With Ansible, you need a controller node, where Ansible is going to be installed and the host nodes, which are servers to be controlled. Ansible controller reaches and executes commands on the remote servers through ssh. You, therefore, do not need to install any client on the node servers.
What are the advantages of using Ansible?
- You do not need to install agent on the host nodes
- Ansible is easy to understand and set up
- Ansible is written in Python which makes it easy to install in Linux systems
- With Ansible you can deploy a big infrastructure in few minutes
Ansible Terminologies
To work with Ansible, there are a number of things needed and these are defined below:
- Ansible controller node and host nodes – Ansible controller is where ansible is installed. It can be a dedicated server or your local machine. In the controller, ensure you have a non-root user with root privileges and ssh key associated with this user. Host nodes are the machines to be controlled. They should have ssh enabled and should be reachable from the controller.
- Ansible Inventory File – This is a file that lists all the hosts to be controlled by receiving commands from the control node. The hosts can be standalone or put in groups, either using their IP address or hostnames. By default, the inventory file is locate in /etc/ansible/hosts. It is possible to alter this location by editing ansible.cfg file in /etc/ansible/ansible.cfg. Look out for inventory parameter and uncomment or change to your preferred path.
- Ansible ad-hoc commands – These are commands run on Ansible controller to perform one task on one or more host nodes. The commands run directly from the terminal without being put in a file and enables one to perform specific commands quite easily. For example, you do not need to write a playbook to run ping on the remote hosts.
- Ansible modules – Modules are used in Ansible to accomplish most tasks. They are used to copy files, install software, use templates and much more. A module is defined with -m in ansible.
- Ansible Tasks – A task define a single procedure to be performed on a server, for example, installing a package.
- Ansible Playbooks – A playbook consists of organized scripts and tasks that define an automated process that is to be executed on remote hosts.
In this guide, we are going to look at how to install and use Ansible in Linux Mint. We will be seeing how to use ad-hoc commands as well as playbooks to execute commands on hosts nodes.
Environment set-up
For my installation, I have the following systems for Ansible controller node and host nodes.
- Ansible controller node.
- Operating system: Linux Mint
- IP address: 192.168.1.210
- User: cloudspinx
- Ansible Host Nodes.
- node1: 192.168.1.183
- node2: 192.168.1.184
- Non-root users with passwordless sudo access and ssh key associated with them.
Installing Ansible on Linux Mint
To give non-root users passwordless sudo access:
sudo visudoAdd the line as below, replacing user1 with your user then save:
user1 ALL=(ALL) NOPASSWD:ALLAnsible can easily be installed from the official package repository. Login to your Ansible controller and open the terminal. To begin installation, first update your system.
sudo apt-get update
sudo apt install -y ansible
You can verify Ansible installation by checking the installed version
$ ansible --version
ansible [core 2.16.3]
  config file = None
  configured module search path = ['/home/cloudspinx/.ansible/plugins/modules', '/usr/share/ansible/plugins/modules']
  ansible python module location = /usr/lib/python3/dist-packages/ansible
  ansible collection location = /home/cloudspinx/.ansible/collections:/usr/share/ansible/collections
  executable location = /usr/bin/ansible
  python version = 3.12.3 (main, Feb  4 2025, 14:48:35) [GCC 13.3.0] (/usr/bin/python3)
  jinja version = 3.1.2
  libyaml = True
Generating ssh key
Ansible controller node uses ssh keys to access the host nodes and run commands. Generate ssh key and copy public key to the hosts’ authorized keys file.
ssh-keygenOutput:

How to configure host nodes for Ansible automation
The host nodes are required to have the public key to communicate with the controller via ssh. Copy the key from the controller node to the host nodes
ssh-copy-id -i ~/.ssh/id_rsa.pub [email protected]
ssh-copy-id -i ~/.ssh/id_rsa.pub [email protected]
Also ensure that ssh is running in the host nodes. If firewall is running, ssh should be allowed through the firewall. If ssh is not installed in your host nodes, install and start with the following commands:
sudo apt install openssh-server
sudo systemctl start ssh
sudo systemctl enable ssh
sudo ufw allow ssh
sudo ufw enable
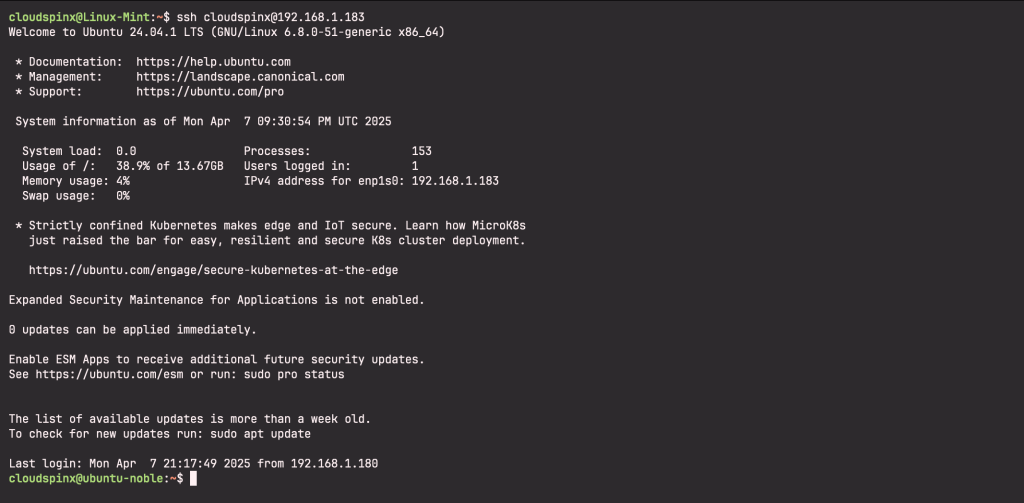
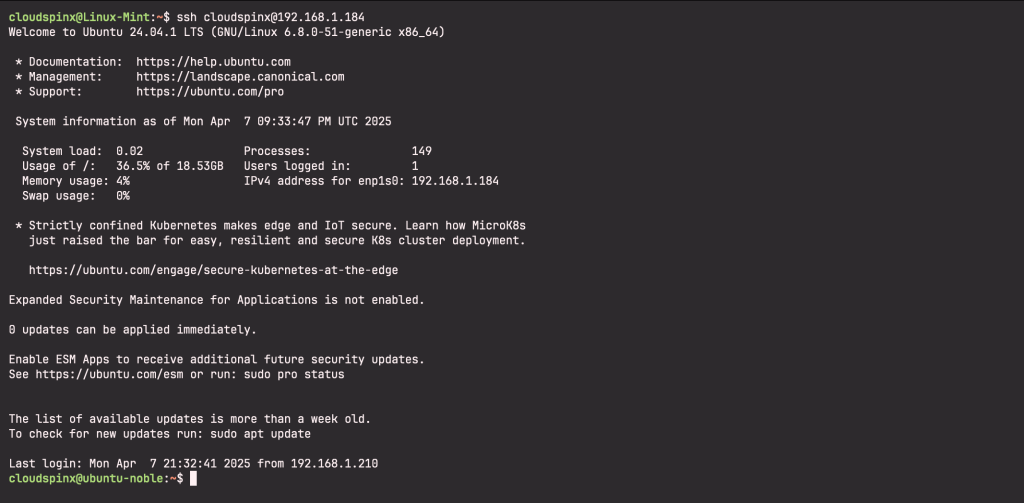
Test if you can access the host nodes from the controller
ssh [email protected]
ssh [email protected]
The output below shows that I am able to log in.
Node 1:
Node 2:
Create Ansible inventory
As explained before, Ansible inventory is a file that contains the hosts to be managed by the Ansible controller. The hosts can be put in groups or as single servers using either hostnames or IP addresses. Ansible default inventory directory is found in /etc/ansible/hosts. You can alter this path by either editing inventory parameter in ansible.cfg file or creating a custom inventory path and calling it using a -i when running Ansible commands.
In our guide, we will edit the default inventory file and add host nodes as below. For my case, I have grouped the node hosts under webservers. If you are just managing single hosts, you can just add node IP addresses. I am using vim file editor but you can use any other of you choice. If you do not have vim already, you can install it by running sudo apt install vim
sudo mkdir -p /etc/ansible
sudo vim /etc/ansible/hosts
I have added the below lines:

To confirm the servers, list the content of the inventory file with the command as shown below:

How to run Ansible Ad-hoc Commands
At this point, you have successfully configured both Ansible controller node and host nodes. It is now to run managing the host nodes from the controller. Let us start by seeing how to use ad-hoc comands. If you can recall, ad-hoc commands are run directly from the terminal to execute specific tasks, which do not necessarily have to be put in a playbook.
Ping command can easily be executed as ad-hoc command. To ping all the hosts in the inventory file, use the tag all while to ping a specific host, specify the name of that host as save in the inventory file:
ansible all -m ping -u cloudspinx
ansible node1 -m ping -u cloudspinx
Output for ping all:

Ping on node1:

check available space on node1
ansible node1 -a "df -h" -u cloudspinx
ansible node2 -a "df -h" -u cloudspinx
Output:

To update all the nodes, run:
ansible all -m apt -a "upgrade=yes update_cache=yes" --become -KIn the above command, ‘become -K‘ prompts you for password to run commands that require root privileges. There are more and more tasks that you can accomplish with ad-hoc commands such as manage packages, transfer files, manage services and more.
Ansible playbooks
Playbooks consist of tasks and host nodes put is a single file and written in YAML format to define Ansible automation process.
How to create ansible playbook
For our example, we are going to see how to create ansible playbook which add users to host nodes and put the users in the admin group with passwordless sudo access. I am using vim file editor to create a file called users.yml
sudo vim /etc/ansible/users.ymlPress i for insert and add the content as shown and save the file.
- hosts: all
  vars:
    users:
      - John
      - Jane
      - Jack

  tasks:
    - name: "Create admin group"
      become: true
      group:
        name: "admin"
        state: "present"

    - name: "Create users and add users to groups"
      become: true
      user:
        name: "{{ item }}"
        groups: "admin"
        append: true
        create_home: true
      with_items: "{{ users }}"

    - name: "Give admin users sudo privileges without password prompt"
      become: true
      lineinfile:
        dest: "/etc/sudoers"
        state: "present"
        regexp: "^%admin"
        line: "%admin ALL=(ALL) NOPASSWD: ALL"
To save, press Esc followed by : then type wq!. Press Enter.
- hosts: all – tells the execution to affect all the hosts defined in the inventory file
- vars – these are variables that will be called during execution. In our case, we have defined a variable called users that will be used later in the code. As you can see, user names are later represented by ‘item’ which reference to users variable using ‘with_items’
- become: true – enables running commands with root privileges
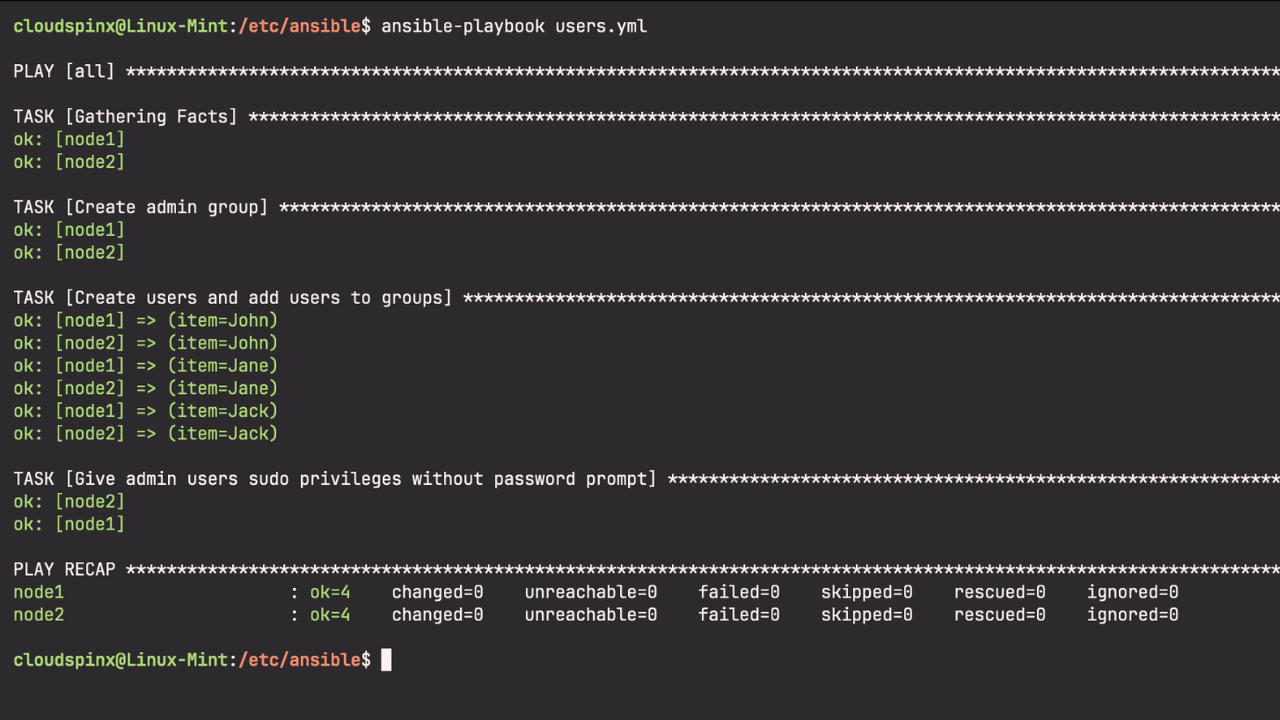
Now run the playbook
cd /etc/ansible
ansible-playbook users.yml
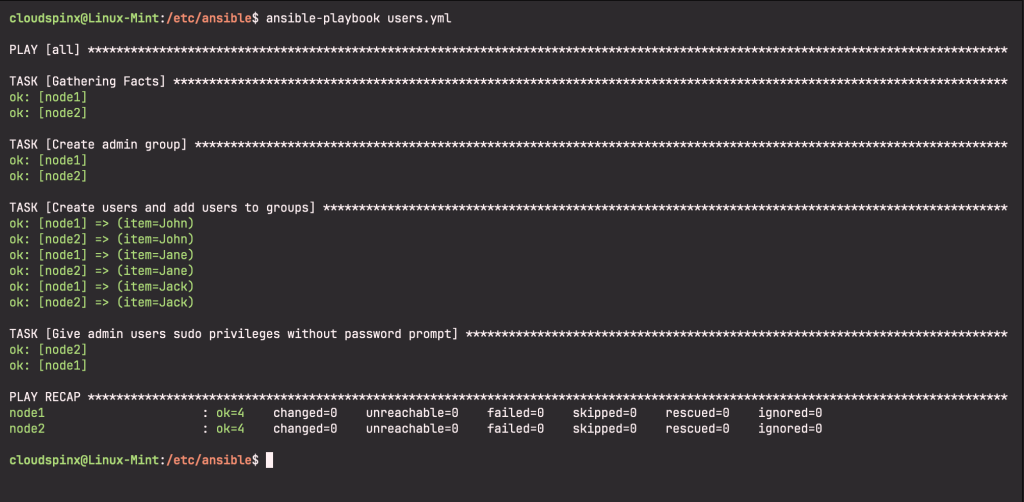
This is the output showing a summary of what has happened. Access to both nodes was successful.
In my case here, it shows that node1 is unchanged because on the first run had ran into an error with node2, so I had to fix it and rerun the palybook, whic changes nothing since the users and groups had already been added on the first run:
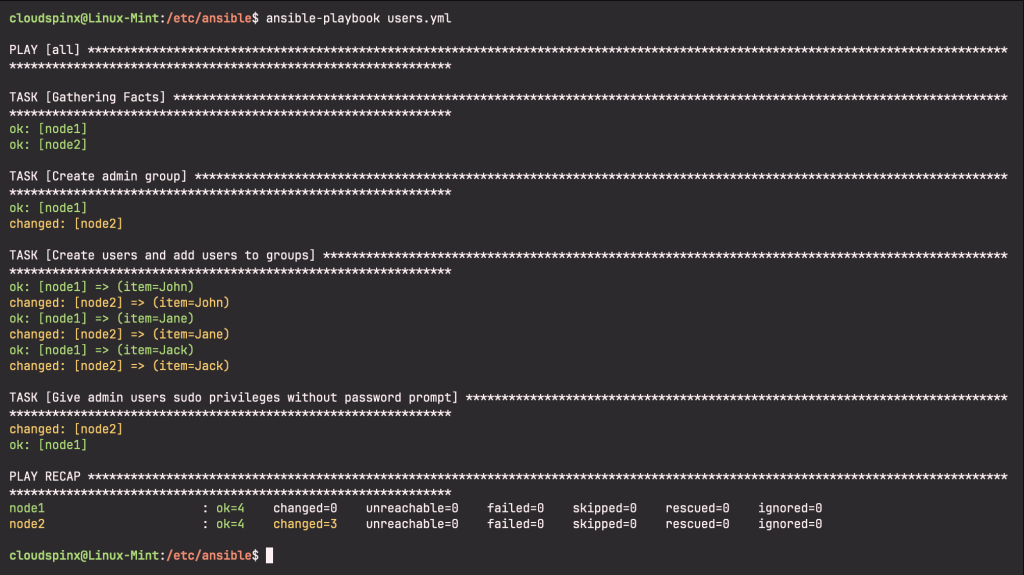
If I rerun the playbook again, both will be ok and nothing changes:
You have successfully installed and configured Ansible management tool on Linux mint. Enjoy your automation journey!
For more guides on your day-to-day Linux installations, click the links below:

