

InfluxDB is a popular open source time series database with APIs for querying and storing data and processing the data in the background for visualization, monitoring and alerting purposes and user dashboards. InfluxDB is designed to handle high write and query loads and provides a SQL-like query language called InfluxQL for interacting with data. The time series database is part of the TICK (Telegraf, InfluxDB, Chronograf, Kapacitor) stack.
In this article we will be performing an installation of InfluxDB on Amazon Linux 2023. The server can be running in the Cloud or as a VM in your home or company’s Infrastructure. The edition of InfluxDB that we’ll be installing is the open source (OSS). With this installation you’ll get the influx command line interface (CLI), which is included in all InfluxDB packages and is a lightweight and simple way to interact with the database.
Install InfluxDB on Amazon Linux 2023
The first step is addition of YUM repository. This is done by executing the commands below in the terminal.
sudo tee /etc/yum.repos.d/influxdb.repo > /dev/null <<'EOF'
[influxdb]
name = InfluxDB Repository - RHEL 9
baseurl = https://repos.influxdata.com/rhel/9/x86_64/stable
enabled = 1
gpgcheck = 0
gpgkey = https://repos.influxdata.com/influxdb.key
EOF
Run the yum repolist command to confirm we’ve the repository added to our Amazon Linux 2 server.
sudo dnf makecache
$ sudo yum repolist
repo id                                                                                        repo name
amazonlinux                                                                                    Amazon Linux 2023 repository
influxdb                                                                                       InfluxDB Repository - RHEL 9
kernel-livepatch                                                                               Amazon Linux 2023 Kernel Livepatch repository
If all is good proceed with the installation of InfluxDB on Amazon Linux 2023 server.
sudo yum install influxdbAll that is required to complete the installation is hitting a y key.
Last metadata expiration check: 0:01:29 ago on Thu Jan 29 11:07:07 2026.
Dependencies resolved.
==========================================================================================================================================================================================================================
 Package                                                          Architecture                                 Version                                               Repository                                      Size
==========================================================================================================================================================================================================================
Installing:
 influxdb                                                         x86_64                                       1.12.2-4                                              influxdb                                        30 M
Installing weak dependencies:
 influxdata-archive-keyring                                       noarch                                       2026.01.09-1                                          influxdb                                        20 k

Transaction Summary
==========================================================================================================================================================================================================================
Install  2 Packages

Total download size: 30 M
Installed size: 125 M
Is this ok [y/N]: y
Then make sure the service is started:
sudo systemctl enable --now influxdbSet the service to be started every time the server is restarted.
sudo systemctl enable influxdbCheck service status.
sudo systemctl status influxdb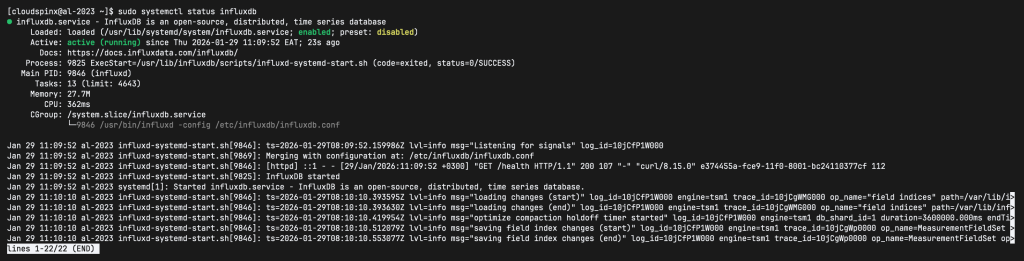
The network ports used by InfluxDB are:
- TCP port 8086 is used for client-server communication over InfluxDB’s HTTP API
- TCP port 8088 is used for the RPC service for backup and restore.
If you have an active firewalld service add these ports to the allowed list.
sudo firewall-cmd --add-port=8086/tcp --permanent
sudo firewall-cmd --add-port=8088/tcp --permanent
sudo firewall-cmd --reload
Let’s test InfluxDB by sending curl request to show databases.
curl -G http://localhost:8086/query --data-urlencode "q=SHOW DATABASES"Output:
{"results":[{"statement_id":0,"series":[{"name":"databases","columns":["name"],"values":[["_internal"]]}]}]}Enable Authentication (optional)
The InfluxDB API and the command line interface (CLI), which connects to the database using the API, include simple, built-in authentication based on user credentials.
To enable authentication edit InfluxDB configuration file and turn auth-enabled to true.
sudo vim /etc/influxdb/influxdb.confLook for the [http] section in the configuration file – Around line 245
[http]
  enabled = true
  bind-address = ":8086"
  auth-enabled = true # Set to true
  log-enabled = true
When you enable HTTP authentication, InfluxDB requires you to create at least one admin user before you can interact with the system.
$ influx
Connected to http://localhost:8086 version 1.12.2
InfluxDB shell version: 1.12.2
>
Create Admin user.
CREATE USER admin WITH PASSWORD 'InfluxDBP@ssw0rd' WITH ALL PRIVILEGESTo create an additional admin user the same syntax is used.
CREATE USER <username> WITH PASSWORD '<password>' WITH ALL PRIVILEGESExample:
CREATE USER cloudspinx WITH PASSWORD 'Str9ngPassw0rd' WITH ALL PRIVILEGESTo grant Admin privileges to existing user run:
GRANT ALL PRIVILEGES TO <username>When done exit the InfluxDB shell.
> exitRestart influxdb service.
sudo systemctl restart influxdbThis is how you’ll use the influx command line tool to connect to InfluxDB with authentication.
$ influx -username admin -password 'InfluxDBP@ssw0rd'

Connected to http://localhost:8086 version 1.8.10
InfluxDB shell version: 1.8.10
> SHOW DATABASES;
name: databases
name
----
_internal
>
For curl use:
$ curl -G "http://localhost:8086/query?u=admin&p=InfluxDBP@ssw0rd" --data-urlencode "q=SHOW DATABASES"

{"results":[{"statement_id":0,"series":[{"name":"databases","columns":["name"],"values":[["_internal"]]}]}]}
Or
curl -G http://localhost:8086/query -u admin:InfluxDBP@ssw0rd --data-urlencode "q=SHOW DATABASES"If you try without providing the username and password you should get authentication error message.
curl -G http://localhost:8086/query --data-urlencode "q=SHOW DATABASES"
{"error":"unable to parse authentication credentials"}
Enjoy using InfluxDB to store time series data and build and end-to-end monitoring platform for both Applications and Infrastructure.
More on Monitoring.


