The best place to start is the beginning. In the introduction, we will familiarise ourselves with the definition of terms i.e AMP and EMP, and carefully explain their components and later their uses.
LAMP comprises Apache, MYSQL, and PHP as its components. It is known as LAMP stack with L denoting Linux. LAMP is a collection of software to create a dynamic web application. LAMP is free and open-source. Apache is a free and open-source cross-platform web server, which uses HTTP and HTTPS communication protocols between servers and clients. MYSQL is a SQL-based relational database ideal for large and small applications. MYSQL is used to create, modify and manage data in the database via the query language. PHP is the server-side scripting language for communication between the server and the database. PHP is used for backend web development as well as OOP.
LEMP stack comprises of Nginx Server, MySQL Database, and PHP. As in the LEMP stack, the E denotes Nginx ( Engine-X), which is a web server. It’s preferred for its advanced security features. The explanations for MySQL and PHP are as described in the above paragraph.
Install Apache, Nginx, PHP, and MySQL on OpenBSD 7
We now shift focus to how to install the AMP and EMP stack on OpenBSD 7. In our previous article we looked at How to Install OpenBSD 7 on Proxmox VE .Please skim through the article and give it a thumbs up. And right about now we will get to today’s business on how to install Apache, Nginx, PHP, and MySQL on OpenBSD 7.
To run the commands below, ensure you have sudo user account.
Step 1: Update the packages
Run the command below to update your system packages.
sudo pkg_add -uStep 2: Install Apache web server
To install Apache web server, run the command below.
$ sudo pkg_add -i apache-httpd
quirks-7.147 signed on 2025-10-25T13:57:07Z
apache-httpd-2.4.65p0:brotli-1.0.9p1: ok
apache-httpd-2.4.65p0:jansson-2.14.1: ok
apache-httpd-2.4.65p0:ngtcp2-1.16.0: ok
apache-httpd-2.4.65p0:nghttp3-1.12.0: ok
apache-httpd-2.4.65p0:nghttp2-1.67.1: ok
apache-httpd-2.4.65p0:curl-8.16.0: ok
apache-httpd-2.4.65p0:db-4.6.21p8v0: ok
apache-httpd-2.4.65p0:apr-1.7.5p0: ok
apache-httpd-2.4.65p0:apr-util-1.6.3p0: ok
apache-httpd-2.4.65p0: ok
The following new rcscripts were installed: /etc/rc.d/apache2
See rcctl(8) for details.
Start Apache webserver service:
$ sudo /etc/rc.d/apache2 start
apache2(ok)
Step 3: Install Nginx webserver
Nginx is available by default on OpenBSD7. To install the package, run the command below.
$ sudo pkg_add nginx
quirks-7.147 signed on 2025-10-25T13:57:07Z
nginx-1.28.0p1: ok
The following new rcscripts were installed: /etc/rc.d/nginx
See rcctl(8) for details.
New and changed readme(s):
	/usr/local/share/doc/pkg-readmes/nginx
If you have apache enabled, first disable it and stop the service.
sudo rcctl disable apache2
sudo rcctl stop apache2
Start and Enable Nginx to start at boot time.
sudo rcctl enable nginx
sudo rcctl start nginx
Step 4: Install PHP on OpenBSD7
Run the command below.
sudo pkg_add phpThis command will populate a list of PHP versions to choose from as shown below.
Ambiguous: choose package for php
a	0: <None>
	1: php-8.3.27
	2: php-8.4.14
Your choice:
Enter the choice of your preferred version. For system wide compatibility, i will choose php-8.4.14 by entering 2 then pressing Enter.
The command output looks like this:
Your choice: 2
php-8.4.14:oniguruma-6.9.10: ok
php-8.4.14:femail-1.0p1: ok
php-8.4.14:femail-chroot-1.0p3: ok
php-8.4.14:argon2-20190702p0: ok
php-8.4.14:capstone-5.0: ok
php-8.4.14: ok
The following new rcscripts were installed: /etc/rc.d/php84_fpm
See rcctl(8) for details.
New and changed readme(s):
	/usr/local/share/doc/pkg-readmes/femail-chroot
	/usr/local/share/doc/pkg-readmes/php-8.4
From the output, PHP_FPM is installed while installing PHP.
Enable and start PHP_FPM service to be available on boot time by executing the command:
sudo rcctl enable php84_fpm
sudo rcctl start php84_fpm
Now install the PHP Modules to help connect to MYSQL database, for any module we install from here, we’ll a version that corresponds the version of PHP we just installed. i.e PHP-8.4.14
sudo pkg_add php-mysqli php-pdo_mysqlThis command will prompt you to choose the version of php-mysql as shown below. Choose option 2 and press Enter. See the output.
Ambiguous: choose package for php-mysqli
a	0: <None>
	1: php-mysqli-8.3.27
	2: php-mysqli-8.4.14
Your choice: 2
php-mysqli-8.4.14: ok
Ambiguous: choose package for php-pdo_mysql
a	0: <None>
	1: php-pdo_mysql-8.3.27
	2: php-pdo_mysql-8.4.14
Your choice: 2
https://cdn.openbsd.org/pub/OpenBSD/7.8/packages-stable/amd64/php-pdo_mysql-8.3.27.tgz: Retrying https://cdn.openbsd.org/pub/OpenBSD/7.8/packages-stable/amd64/php-pdo_mysql-8.3.27.tgz
php-pdo_mysql-8.4.14: ok
Next install PHP modules required by web application.
sudo pkg_add php-gd php-intlThis gives this output:
quirks-7.147 signed on 2025-10-25T13:57:07Z
Ambiguous: choose package for php-gd
a	0: <None>
	1: php-gd-8.3.27
	2: php-gd-8.4.14
Your choice: 2
php-gd-8.4.14:giflib-5.2.2p0: ok
php-gd-8.4.14:libwebp-1.6.0p0: ok
php-gd-8.4.14:gd-2.3.3: ok
php-gd-8.4.14: ok
Ambiguous: choose package for php-intl
a	0: <None>
	1: php-intl-8.3.27
	2: php-intl-8.4.14
Your choice: 2
php-intl-8.4.14:icu4c-wwwdata-77.1v0: ok
php-intl-8.4.14:icu4c-77.1v0: ok
php-intl-8.4.14: ok
After installation of the necessary modules , enable the PHP modules by doing the following.
sudo cp /etc/php-8.4.sample/* /etc/php-8.4/modules
sudo ln -sf /usr/local/bin/php-8.4 /usr/local/bin/php
In the code above, all the php-8.4.sample modules are copied into the /etc/php-8.4.
You might need to run this command:
sudo ln -sf /usr/local/bin/php-8.x /usr/local/bin/phpStep 5 : Configure Nginx for PHP-FPM on OpenBSD7
To default Nginx configuration file is found in /etc/nginx/nginx.conf. Using the text editor of your choice edit this file.
sudo pkg_add vimChoose your preferred version package from the populated list to install vim editor.
Edit the Nginx configuration file.
sudo vim /etc/nginx/nginx.confNavigate to the Server parameters and uncomment the location block by removing the # symbol in every line inside the block. Your code should now look like this.

After the changes, save your parameters and exit from the editor.
Now test your Nginx configurations.
sudo nginx -tOutput of the command above.
nginx: the configuration file /etc/nginx/nginx.conf syntax is ok
nginx: configuration file /etc/nginx/nginx.conf test is successful
Next, we will configure the PHP_FPM file. The file is located in the /etc/php-fpm.conf . Once in the file, confirm that PHP-FPM listens through /var/www/run/php-fpm.sock and that Unix user/group is set to www as shown in the screenshot.
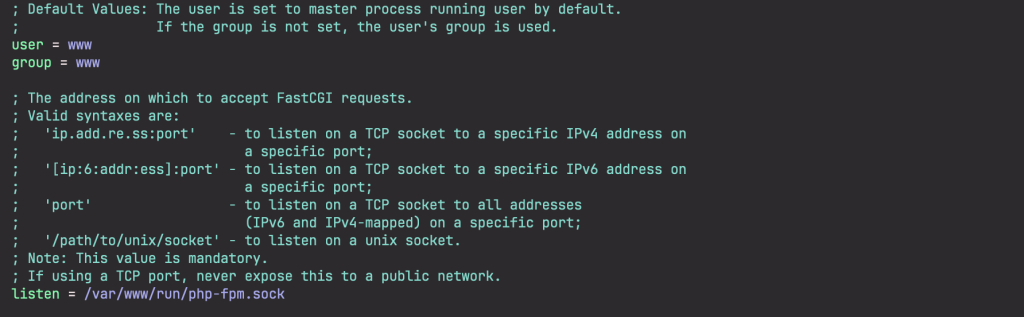
Once done, save and exit from your editor.
Step 6: Install MySQL Database Server on OpenBSD7
We will now install our last LEMP stack component i.e the MYSQL database. Start by checking if the MYSQL database server package is installed in your system.
sudo pkg_info -Q mysqlInstall MariaDB server.
$ sudo pkg_add -V mariadb-server
quirks-7.147 signed on 2025-10-25T13:57:07Z
mariadb-server-11.4.7v1:findutils-4.10.0p0: 2/7
mariadb-server-11.4.7v1:coreutils-9.7: 3/7
mariadb-server-11.4.7v1:mariadb-client-11.4.7v1: 4/7
mariadb-server-11.4.7v1:p5-Clone-0.47: 5/15
mariadb-server-11.4.7v1:p5-Math-Base-Convert-0.11p0: 6/15
mariadb-server-11.4.7v1:p5-Module-Runtime-0.016p0: 7/15
mariadb-server-11.4.7v1:p5-Params-Util-1.102: 8/15
mariadb-server-11.4.7v1:p5-SQL-Statement-1.414: 9/15
mariadb-server-11.4.7v1:p5-FreezeThaw-0.5001p0: 10/16
mariadb-server-11.4.7v1:p5-MLDBM-2.05p0: 11/16
mariadb-server-11.4.7v1:p5-Net-Daemon-0.49: 12/17
mariadb-server-11.4.7v1:p5-PlRPC-0.2020p0: 13/17
mariadb-server-11.4.7v1:p5-DBI-1.644: 14/17
mariadb-server-11.4.7v1:p5-DBD-MariaDB-1.23: 15/17
mariadb-server-11.4.7v1:snappy-1.1.10p2: 16/17
mariadb-server-11.4.7v1: 17/17
The following new rcscripts were installed: /etc/rc.d/mysqld
See rcctl(8) for details.
New and changed readme(s):
	/usr/local/share/doc/pkg-readmes/mariadb-server
Install Mariadb client.
$ sudo pkg_add -v mariadb-client
Update candidates: quirks-7.147 -> quirks-7.147
quirks-7.147 signed on 2025-10-25T13:57:07Z
Start MariaDB on boot.
sudo rcctl enable mysqld Initialize the database server.
$ sudo mariadb-install-db
WARNING: The host 'openbsd.home.cloudlabske.io' could not be looked up with /usr/local/bin/resolveip.
This probably means that your libc libraries are not 100 % compatible
with this binary MariaDB version. The MariaDB daemon, mariadbd, should work
normally with the exception that host name resolving will not work.
This means that you should use IP addresses instead of hostnames
when specifying MariaDB privileges !
Installing MariaDB/MySQL system tables in '/var/mysql' ...
OK


Two all-privilege accounts were created.
One is root@localhost, it has no password, but you need to
be system 'root' user to connect. Use, for example, sudo mysql
The second is _mysql@localhost, it has no password either, but
you need to be the system '_mysql' user to connect.
After connecting you can set the password, if you would need to be
able to connect as any of these users with a password and without sudo

See the MariaDB Knowledgebase at https://mariadb.com/kb

You can start the MariaDB daemon with:
/etc/rc.d/mysqld start

Please report any problems at https://mariadb.org/jira

The latest information about MariaDB is available at https://mariadb.org/.

Consider joining MariaDB's strong and vibrant community:
https://mariadb.org/get-involved/
Start and stop Mariadb.
sudo rcctl start mysqld
sudo rcctl stop mysqld
To restart the service, run the command:
sudo rcctl restart mysqldCheck MariaDB status.
sudo rcctl check mysqld Secure your database with a password.
sudo mariadb-secure-installationOutput.
NOTE: RUNNING ALL PARTS OF THIS SCRIPT IS RECOMMENDED FOR ALL MariaDB
      SERVERS IN PRODUCTION USE!  PLEASE READ EACH STEP CAREFULLY!

In order to log into MariaDB to secure it, we'll need the current
password for the root user. If you've just installed MariaDB, and
haven't set the root password yet, you should just press enter here.

Enter current password for root (enter for none):
OK, successfully used password, moving on...

Setting the root password or using the unix_socket ensures that nobody
can log into the MariaDB root user without the proper authorisation.

You already have your root account protected, so you can safely answer 'n'.

Switch to unix_socket authentication [Y/n] y
Enabled successfully!
Reloading privilege tables..
 ... Success!

You already have your root account protected, so you can safely answer 'n'.

Change the root password? [Y/n] y
New password: Strong_Password
Re-enter new password: Strong_Password
Password updated successfully!
Reloading privilege tables..
 ... Success!

By default, a MariaDB installation has an anonymous user, allowing anyone
to log into MariaDB without having to have a user account created for
them.  This is intended only for testing, and to make the installation
go a bit smoother.  You should remove them before moving into a
production environment.

Remove anonymous users? [Y/n] y
 ... Success!

Normally, root should only be allowed to connect from 'localhost'.  This
ensures that someone cannot guess at the root password from the network.

Disallow root login remotely? [Y/n] y
 ... Success!

By default, MariaDB comes with a database named 'test' that anyone can
access.  This is also intended only for testing, and should be removed
before moving into a production environment.

Remove test database and access to it? [Y/n] y
 - Dropping test database...
 ... Success!
 - Removing privileges on test database...
 ... Success!

Reloading the privilege tables will ensure that all changes made so far
will take effect immediately.

Reload privilege tables now? [Y/n] y
 ... Success!

Cleaning up...

All done!  If you've completed all of the above steps, your MariaDB
installation should now be secure.

Thanks for using MariaDB!
Test MariaDB installation on OPenBSD.
Run the command.
sudo mariadb -u root -pOnce you are logged in, create a sample database.
MariaDB [(none)]> CREATE DATABASE sampledb;
Query OK, 1 row affected (0.005 sec)
Create the database user and set his password.
MariaDB [(none)]> CREATE USER 'openbsd'@'localhost' IDENTIFIED BY 'STRONGPASSWORD';
Query OK, 0 rows affected (0.005 sec)
Grant full permissions to the sampledb.
MariaDB [(none)]> use sampledb;
Database changed

MariaDB [sampledb]> GRANT ALL PRIVILEGES ON sampledb.* TO 'openbsd'@'localhost';
Query OK, 0 rows affected (0.003 sec)
Reload the privileges.
MariaDB [sampledb]> FLUSH PRIVILEGES;
Query OK, 0 rows affected (0.001 sec)
MariaDB [sampledb]> QUIT;
Bye
Type exit to quit from the sampledb console.
Login to database as the testuser and password.
$ mariadb -u openbsd -p
Enter password:
Welcome to the MariaDB monitor.  Commands end with ; or \g.
Your MariaDB connection id is 14
Server version: 11.4.7-MariaDB OpenBSD port: mariadb-server-11.4.7v1

Copyright (c) 2000, 2018, Oracle, MariaDB Corporation Ab and others.

Type 'help;' or '\h' for help. Type '\c' to clear the current input statement.

MariaDB [(none)]>
Show sample databases:
MariaDB [(none)]> SHOW DATABASES;
+--------------------+
| Database           |
+--------------------+
| information_schema |
| sampledb           |
+--------------------+
2 rows in set (0.001 sec)

MariaDB [(none)]>
Step 7 : Test the MySQL connection
The webroot default location for Nginx is /var/www/htdocs/. I will create a sample PHP script inside this directory for test purposes.
Use the text editor of your choice to create the same PHP script.
# vim /var/www/htdocs/test.php

<?php

$servername = "127.0.0.1";
$user = "openbsd";
$pass = "STRONGPASSWORD";

// Create connection to MariaDB

$conn = new mysqli ($servername, $user, $pass);

//Test connection to MariaDB

if ($conn->connect_error){
die ("Database Connection failed: " . $conn->connect_error);
}
echo "Database connected successfully";
?>
Save your changes and exit from the editor. Be sure to change the user and password with your actual parameters for your user and his password.
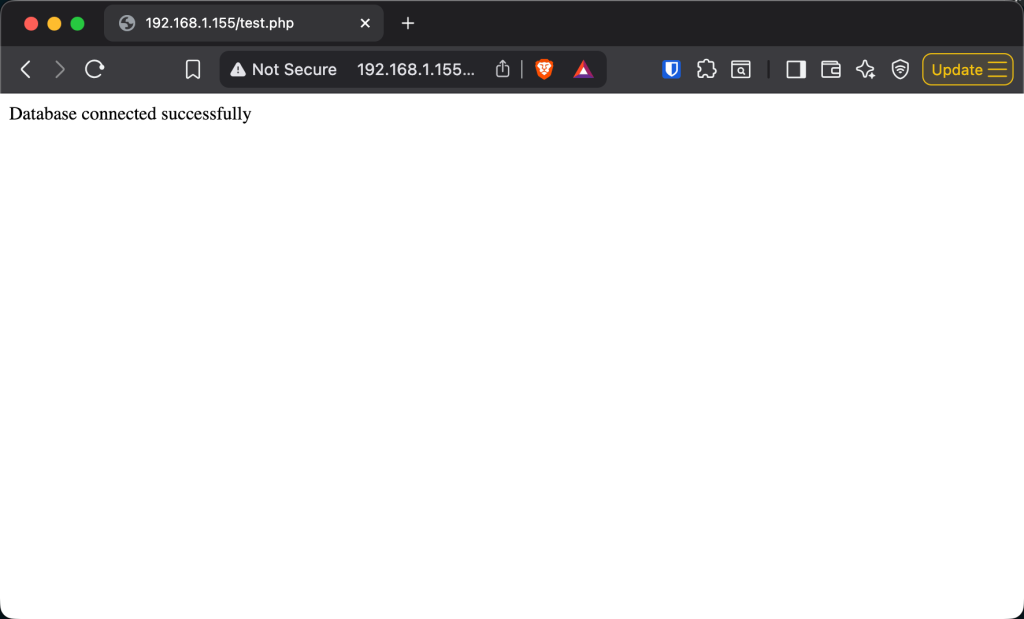
To test the connection visit your server IP in your browser and load the test.php.
On your web browser URL enter the address :
http://<server_ip_address>/test.phpIf your PHP configuration is successful, you should see such an output:
Conclusion
In our guide today, we have looked at how to Install Apache, Nginx, PHP, and MySQL on OpenBSD 7. Thank you for following along.
For more guides.