
The acronym LAMP is derived from Linux, Apache, MySQL and PHP, which are open-source software that work together to build powerful web applications. Installation of the LAMP stack on Red Hat Enterprise Linux (RHEL) or CentOS Stream is one of the most popular and effective setups for hosting dynamic websites that need server-side processing capabilities. To help you complete this process successfully, I have given below a detailed step-by-step guide that will take you through the installation steps required to set up the LAMP stack on your RHEL or CentOS Stream system.
Step 1: Update Your System
Before you begin, make sure your system is up-to-date:
sudo dnf update -yThen reboot your system:
sudo rebootStep 2: Install Apache Web server
Apche is avaiable in the official repository of RHEL and CentOS as httpd. Run the command below to install it:
sudo dnf -y install httpdAfter the installation, start and enable the Apache service:
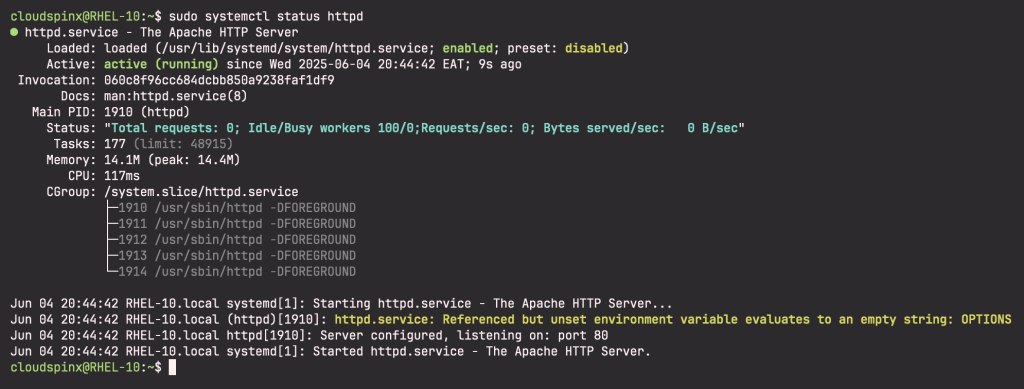
sudo systemctl start httpd
sudo systemctl enable httpd
sudo systemctl status httpd
Sample Output:
Now, configure the firewall to allow traffic through port 80, since that is the default port for Apache Web Server:
sudo firewall-cmd --permanent --add-service={http,https}
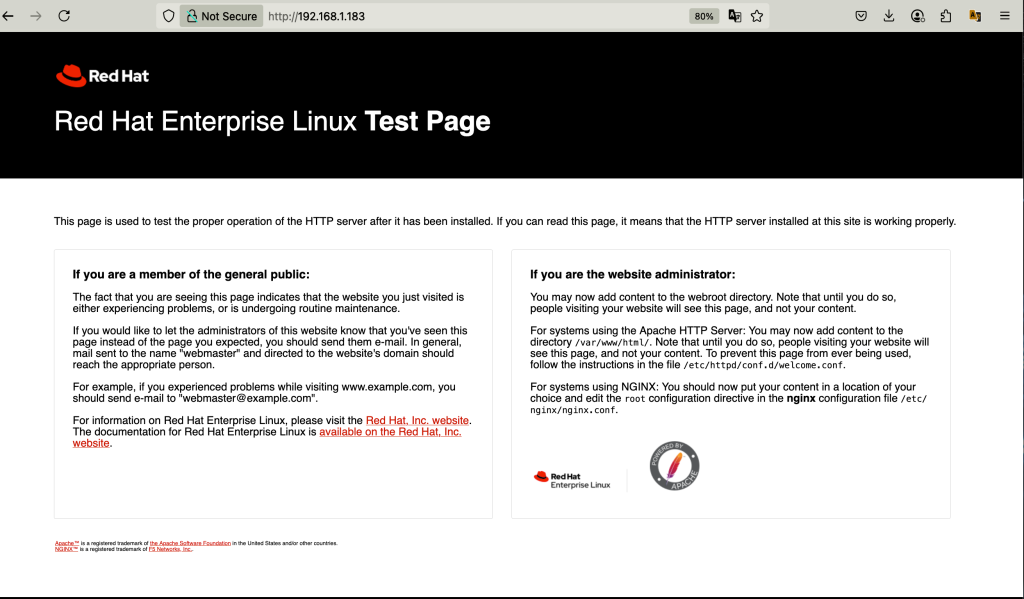
sudo firewall-cmd --reloadVerify that Apache web server has been installed and running successfully by pointing your browser to your server ip. On your browser, type http://<your-server-ip> and you should be able to see Apache default page as shown:
Step 3: Install PHP on RHEL 10 | CentOS Stream 10
PHP is also included in the RHEL and CentOS Stream official repositories and this makes the installation easier. Run the following command to install PHP and it’s modules on RHEL 10 | CentOS Stream 10:
sudo dnf -y install php php-fpm php-mysqlnd php-opcache php-gd php-xml php-mbstringThen start and enable php-fpm:
sudo systemctl start php-fpm
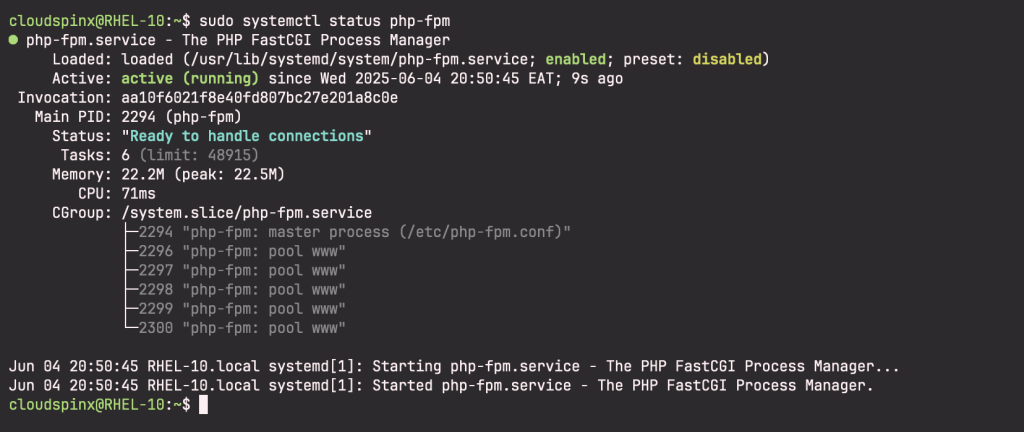
sudo systemctl enable php-fpmVerify that php-fpm is running:
sudo systemctl status php-fpmSample Output:
Restart Apache to use PHP:
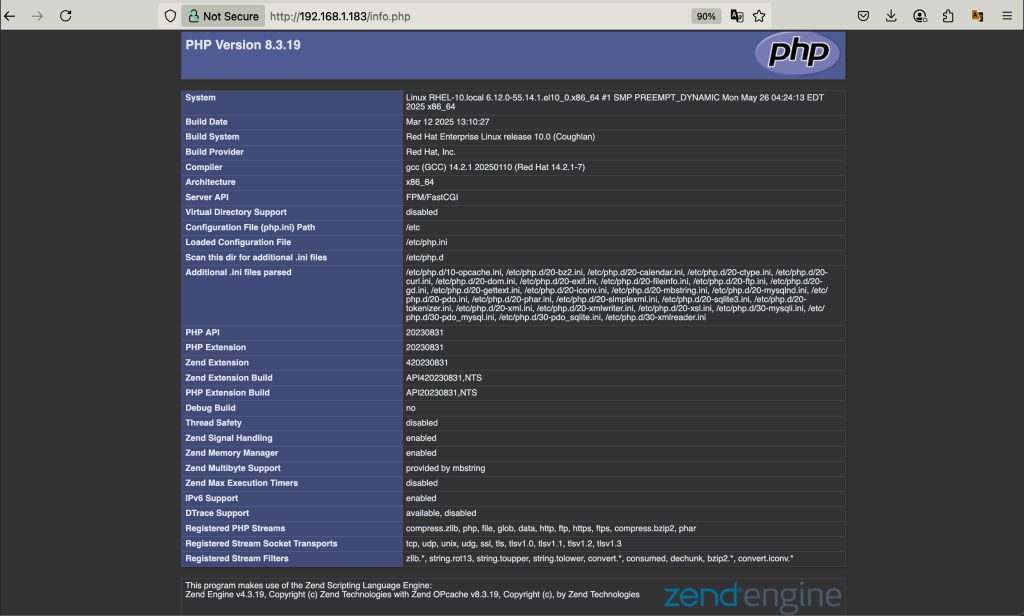
sudo systemctl restart httpdThen create a test page to test the PHP installation. Create an info.php file in Apache’s root directoty(/var/www/html) and populate it using the command below:
sudo tee /var/www/html/info.php > /dev/null << EOF
<?php
phpinfo();
?>
EOF
Then restart Apache Web Server once again:
sudo systemctl restart httpdThen open your browser and point it to http://<your-server-ip>/info.php:
Step 3: Install MariaDB server on RHEL 10 | CentOS Stream 10
The other component of LAMP is MariaDB which is used for managing web application databases. Install it using the command below:
sudo dnf -y install mariadb mariadb-serverStart and enable MariaDB:
sudo systemctl start mariadb
sudo systemctl enable mariadb
Now secure MariaDB and set root password by running the below command:
sudo mariadb-secure-installationWhen prompted for the root password, enter it and continue to harden your MariaDB installation. Answer the questions as follows:
NOTE: RUNNING ALL PARTS OF THIS SCRIPT IS RECOMMENDED FOR ALL MariaDB
      SERVERS IN PRODUCTION USE!  PLEASE READ EACH STEP CAREFULLY!

In order to log into MariaDB to secure it, we'll need the current
password for the root user. If you've just installed MariaDB, and
haven't set the root password yet, you should just press enter here.

Enter current password for root (enter for none):
OK, successfully used password, moving on...

Setting the root password or using the unix_socket ensures that nobody
can log into the MariaDB root user without the proper authorisation.

You already have your root account protected, so you can safely answer 'n'.

Switch to unix_socket authentication [Y/n] n
 ... skipping.

You already have your root account protected, so you can safely answer 'n'.

Change the root password? [Y/n] Y
New password:
Re-enter new password:
Password updated successfully!
Reloading privilege tables..
 ... Success!


By default, a MariaDB installation has an anonymous user, allowing anyone
to log into MariaDB without having to have a user account created for
them.  This is intended only for testing, and to make the installation
go a bit smoother.  You should remove them before moving into a
production environment.

Remove anonymous users? [Y/n] Y
 ... Success!

Normally, root should only be allowed to connect from 'localhost'.  This
ensures that someone cannot guess at the root password from the network.

Disallow root login remotely? [Y/n] Y
 ... Success!

By default, MariaDB comes with a database named 'test' that anyone can
access.  This is also intended only for testing, and should be removed
before moving into a production environment.

Remove test database and access to it? [Y/n] Y
 - Dropping test database...
 ... Success!
 - Removing privileges on test database...
 ... Success!

Reloading the privilege tables will ensure that all changes made so far
will take effect immediately.

Reload privilege tables now? [Y/n] Y
 ... Success!

Cleaning up...

All done!  If you've completed all of the above steps, your MariaDB
installation should now be secure.

Thanks for using MariaDB!
Configure a database for your Web application, but first, connect to MariaDB using the command below:
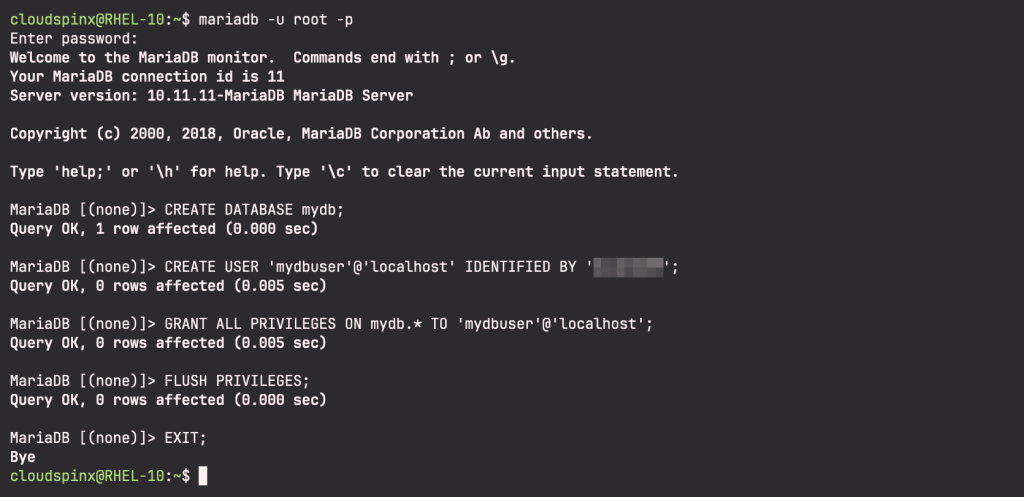
mariadb -u root -pThen configure a database as follows:
CREATE DATABASE mydb;
CREATE USER 'mydbuser'@'localhost' IDENTIFIED BY 'StrongP@asswd';
GRANT ALL PRIVILEGES ON mydb.* TO 'mydbuser'@'localhost';
FLUSH PRIVILEGES;
EXIT;
Use Case:
Step 4: Configure an Apache virtual host for your site
Create a virtual host for your site using the command below:
sudo tee /etc/httpd/conf.d/yourdomain.conf > /dev/null << EOF
<VirtualHost *:80>
    ServerName www.yourdomain.com
    ServerAlias yourdomain.com
    DocumentRoot /var/www/yourdomain
    ErrorLog /var/www/yourdomain/error.log
    CustomLog /var/www/yourdomain/requests.log combined
</VirtualHost>
EOF
Now create a demo web page:
sudo mkdir /var/www/yourdomainThen create an index.html file using the following command:
sudo tee /var/www/yourdomain/index.html > /dev/null << EOF
<html>
  <head>
    <title>This is a test page</title>
  </head>
  <body>
    <h2>Hello, It actually works!</h2>
  </body>
</html>
EOF
Chnage the directory permissions and ownership of the web root directory to apache.
sudo touch /var/www/yourdomain/error.log /var/www/yourdomain/requests.log
sudo chown -R apache:apache /var/www/*
sudo chmod -R 755 /var/www/*
Configure SELinux
If you are using SELinux, you need to configure it to allow Apache access to your domain error files. Run the commands below to set SELinux policy permanently using semanage:
sudo semanage fcontext -a -t httpd_sys_rw_content_t "/var/www/yourdmain(/.*)?"
sudo restorecon -Rv /var/www/yourdomain
sudo semanage fcontext -a -t httpd_sys_rw_content_t 'error.log'
sudo setsebool -P httpd_unified 1
sudo ausearch -c 'httpd' --raw | audit2allow -M my-httpd
sudo semodule -X 300 -i my-httpd.pp
Then restart Apache:
sudo systemctl restart httpdIf it does not restart and instead throws errors, it probably an SELinux issue, check for the specific SELinux Policy issues with the command below:
sudo journalctl -xe | grep httpdThen follow the instructions provided to fix the issue.
Now open your demo web page on the browser to confirm that your virtual host is working properly. If well set, you should see the content from your demo html file.

That’s it. You have successfully installed LAMP stack on RHEL 10 | CentOS Stream 10 and configured Virtual Host. Enjoy! Do not forget to check more Linux guides below:


