

Rocky Linux still stands out as the preferred enterprise-grade Linux distribution for RHEL compatibility without paying for licensing charges. Now, with next-generation Rocky Linux 10 coming on its way, system administrators, developers, and IT practitioners can anticipate revolutionary improvements to its performance, security, and ecosystems.
In this article, we are going to walk you through how to install Rocky Linux 10 and highlight some of the top new features making this release stand out.
🧠 Don’t just learn KVM – master it with the best-selling eBook trusted by thousands.
Top Features of Rocky Linux 10
While Rocky Linux 10 is an improvement on its forebear when it comes to stability, it shares with it basic feature improvements expected from its upstream counterpart (Red Hat Enterprise Linux 10). Some of its most significant features are:
- Architecture & Platform Support:
- x86-64-v3 Baseline Only: Rocky Linux 10 now requires CPUs compatible with x86-64-v3 (e.g., Haswell or newer). Older v2 CPUs are no longer supported.
- No 32-bit Packages: In this new release, all 32-bit package support has been entirely removed; thus, any older 32-bit applications will now need to run by using 64-bit libraries or by being executed inside special containers that offer the required environment.
- RISC‑V Support Added: There is a full GA implementation of support for several RISC‑V architectures. This encompasses significant hardware platforms like the StarFive VisionFive2, the SiFive P550, and the various QEMU environments that enable emulation and testing.
- Installer & System Management:
- Installer: The root account is deactivated by default, and instead, there is a configuration for an admin user with sudo privileges. Another thing to mention here is that the graphical installer has now moved to using RDP instead of VNC for its functionality.
- Networking: Legacy
ifcfg‑rhscripts have been entirely eliminated from the system; accordingly, using NetworkManager available through several interfaces likenmcli,nmtui, ornmstate, has become obligatory for network management and configuration. Also, the internal DHCP subsystem built into NetworkManager is now a direct substitute for the ISC DHCP client, whereas the Kea DHCP system replaces the ISC DHCP server’s functionality that was provided previously. - Wayland by Default: Xorg server has been entirely dropped from the system; therefore, both the GNOME and KDE desktop environments now default to using Wayland sessions. Moreover, Xwayland is still present for those users who require running legacy applications that were initially created to run on the Xorg server.
- Security & Kernel:
- Linux Kernel 6.12.0: Major performance and feature improvements; EEVDF scheduling replaces CFS
- Enhanced Cryptographic Solutions and Security-Enhanced Linux:
- Integrated post‑quantum algorithms for OpenSSL/OpenSSH.
- The OpenSSH package has been upgraded to provide more restrictive permissions for host keys.
- GnuTLS has now added a feature to compress certificates. The default user password hash has been updated to use the yescrypt algorithm.
- Updated Software Stack:
- Rocky Linux 10, has updated its software stack substantially;
- Programming Languages: PHP 8.3, Python 3.12
- Databases & Web Servers: PostgreSQL 16.8, MySQL 8.4, MariaDB 10.11, NGINX 1.26
- Developer Tools: LLVM 19.1.7, Rust 1.84.1, Go 1.23, GDB 14.2, Valgrind 3.23, Grafana 10.2.6, Performance Co‑pilot 6.3.0
- New Repositories & Release Process:
- Several new official repositories have been added:
- plus (e.g., Valkey DB), NFV tools, crb (CodeReady Builder), real-time (rt), HighAvailability, ResilientStorage, SAP/SAPHANA
The release engineering process has now moved to building via Koji, instead of the old system called Peridot. This makes it possible to introduce IMA signing and makes it easier to move to other build systems that might be created in the future.
System Requirements
Minimum Requirements:
- CPU: 2+ cores (x86_64 or ARM64)
- RAM: 2 GB minimum (4 GB recommended)
- Disk: 20 GB or more
- Network: Internet access recommended for updates
Install Rocky Linux 10: Step-by-Step
Let’s get started with the installation steps:
Step 1: Download the ISO
To download the various architecture ISO files, head over to the Rocky Linux Download Page. Choose between the minimal installation, the DVD ISO, or the boot ISO depending on your needs.
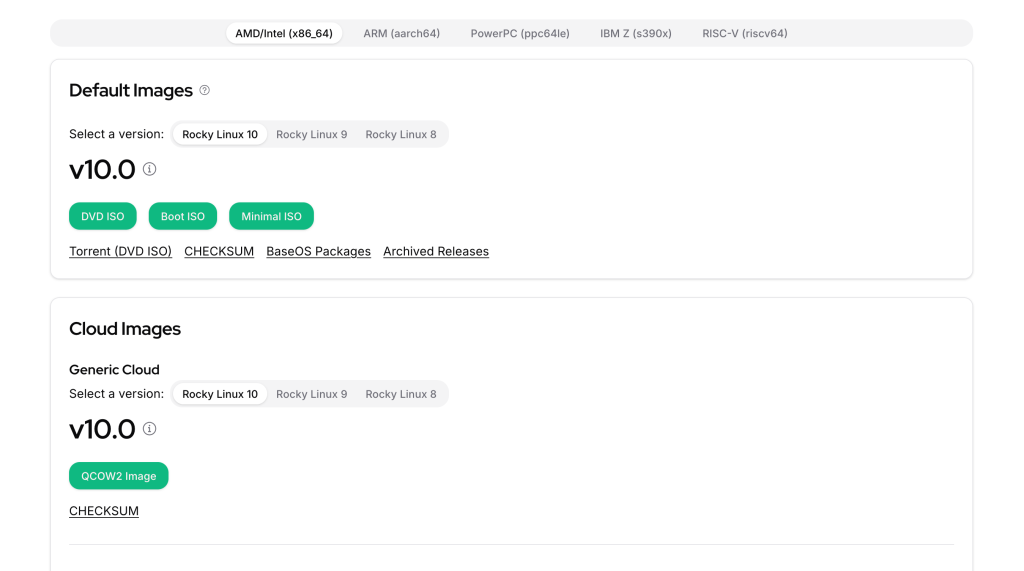
Alternatively, run either one of the following commands to download the ISO file:
## The DVD ISO
wget https://download.rockylinux.org/pub/rocky/10/isos/x86_64/Rocky-10.0-x86_64-dvd1.iso

## The Boot ISO
wget https://download.rockylinux.org/pub/rocky/10/isos/x86_64/Rocky-10.0-x86_64-boot.iso

## The Minimal ISO
wget https://download.rockylinux.org/pub/rocky/10/isos/x86_64/Rocky-10.0-x86_64-minimal.iso
Step 2: Create a Bootable USB Drive | Create a VM
In the step, we cover how we can create either a bootable installation media or create a virtual machine which will be used to install the Rocky Linux 10 operating system.
Create a Bootable Drive
This step is only necessary if you are installing Rocky Linux 10 on a physical device rather than a virtualized environment. Today, tools such as Rufus and Balena Etcher make the process very easy and simple.
To create a bootable USB, you can use the following tools:
- Windows users: Rufus
- Linux & macOS users: Balena Etcher
dd– Linux CLI tool
All of the mentioned tools are excellent choices and are pretty much straightforward when it comes to using them. That being said, let’s briefly have a look at how we can create a bootable USB using the dd CLI tool.
First, connect the USB device and ensure that it is unmounted. Use lsblk to identify your USB drive.
lsblk
#OR
sudo fdisk -l
Then, unmount the drive, and format it:
# unmount
umount /dev/sdb*
# format the drive
sudo mkfs.ext4 /dev/sdb1
Now you are ready to copy the ISO file to the USB drive using the dd command. Navigate to the directory where you have downloaded the ISO. Then use the command below to create your bootable drive:
sudo dd if=Rocky-10.0-x86_64-dvd1.iso of=/dev/sdb status="progress"Replace ‘Rocky-10.0-x86_64-dvd.iso‘ with the actual name of the ISO image. The process will take a significant amount of time to complete. Typically, it takes 15–20 minutes per gigabyte using a USB 2.0.
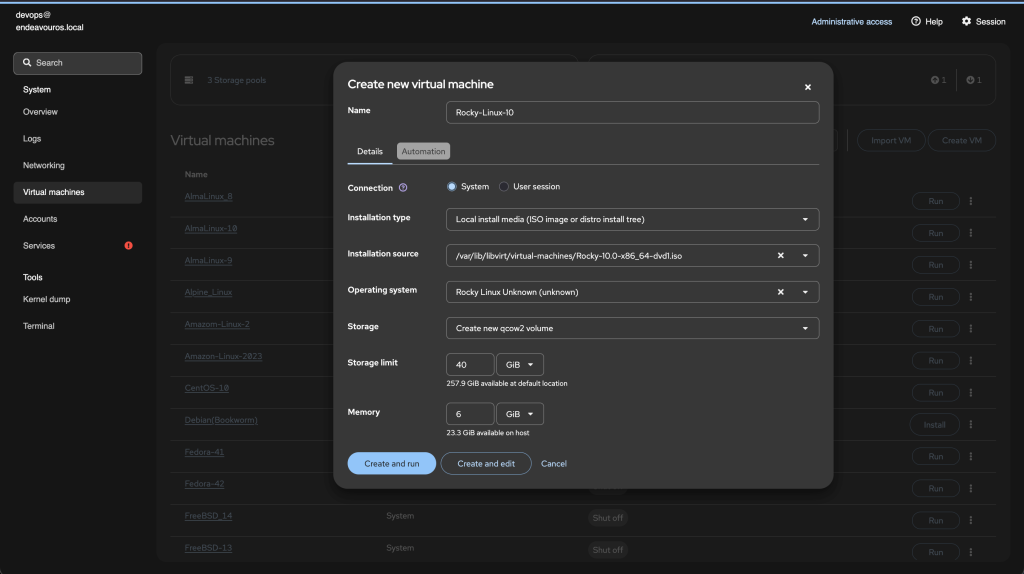
Create a Virtual Machine
If you are installing Rocky Linux 10 in a virtualized environment such as Proxmox VE, VirtualBox, VMware, or KVM, you need to set up a VM. Setting up a VM in any of these environments is pretty much straightforward.
For instance, to setup a VM on KVM, you’d execute such a command on the KVM host:
sudo virt-install \
  --name Rocky-Linux-10 \
  --ram 4096 \
  --vcpus 2 \
  --disk path=/var/lib/libvirt/virtual-machines/Rocky-Linux-10.qcow2,size=40 \
  --os-variant rocky-unknown \
  --cdrom /var/lib/libvirt/virtual-machines/Rocky-10.0-x86_64-dvd.iso \
  --network network=bridged-network \
  --graphics vnc \
  --console pty,target_type=serial \
  --noautoconsole
Or, via a KVM GUI such as Cockpit:
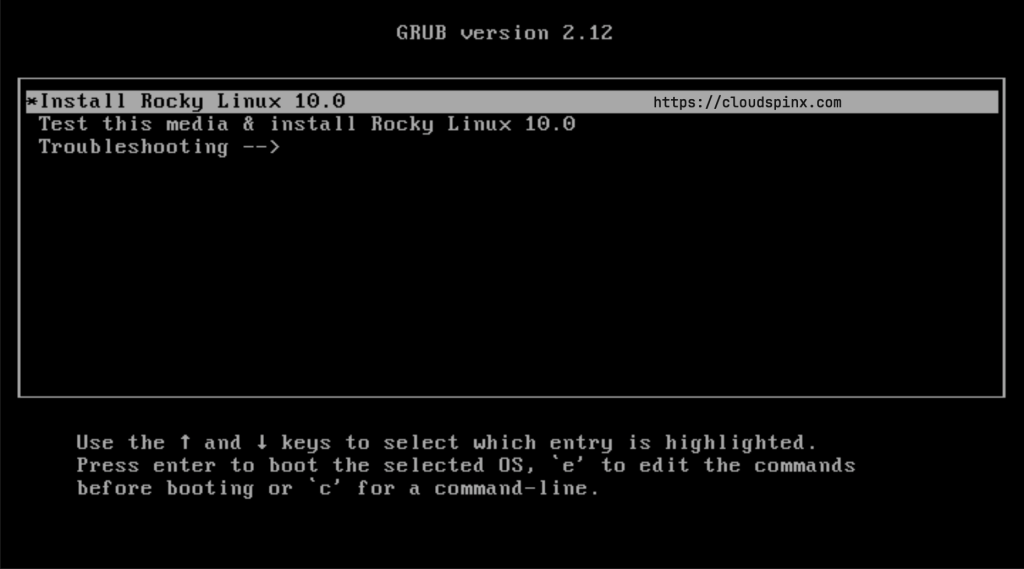
Step 3: Start the Installation
Boot up your VM or physical device(from the bootable USB).
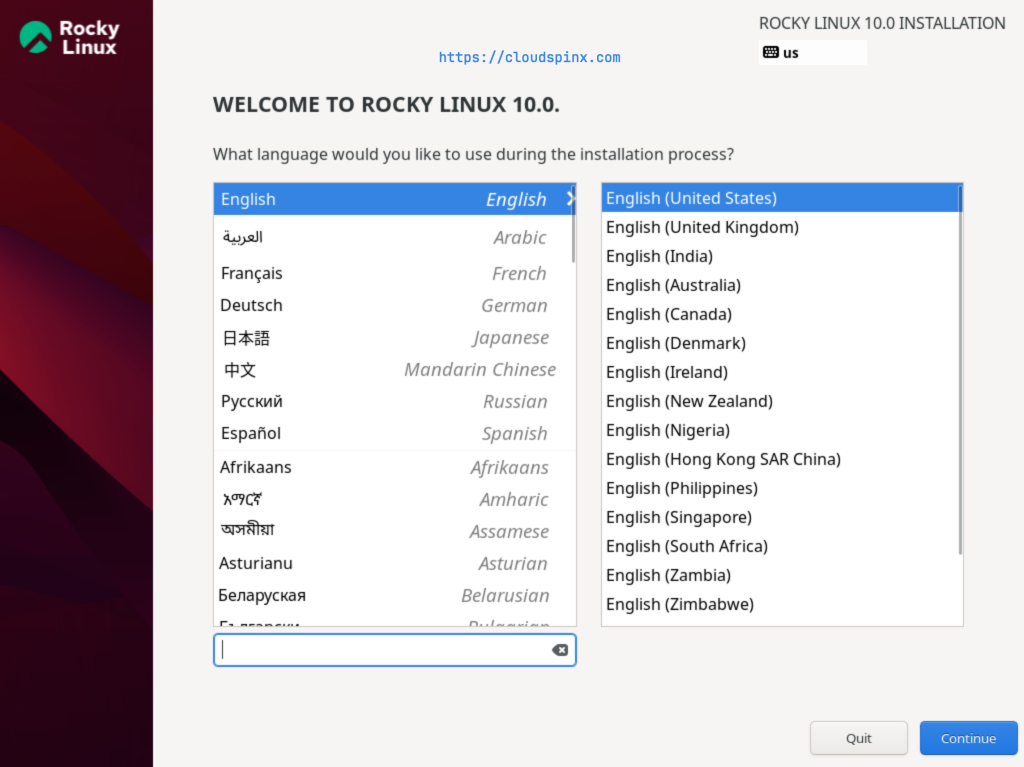
When the installer starts, select the language you would like to use during the installation, then click continue:
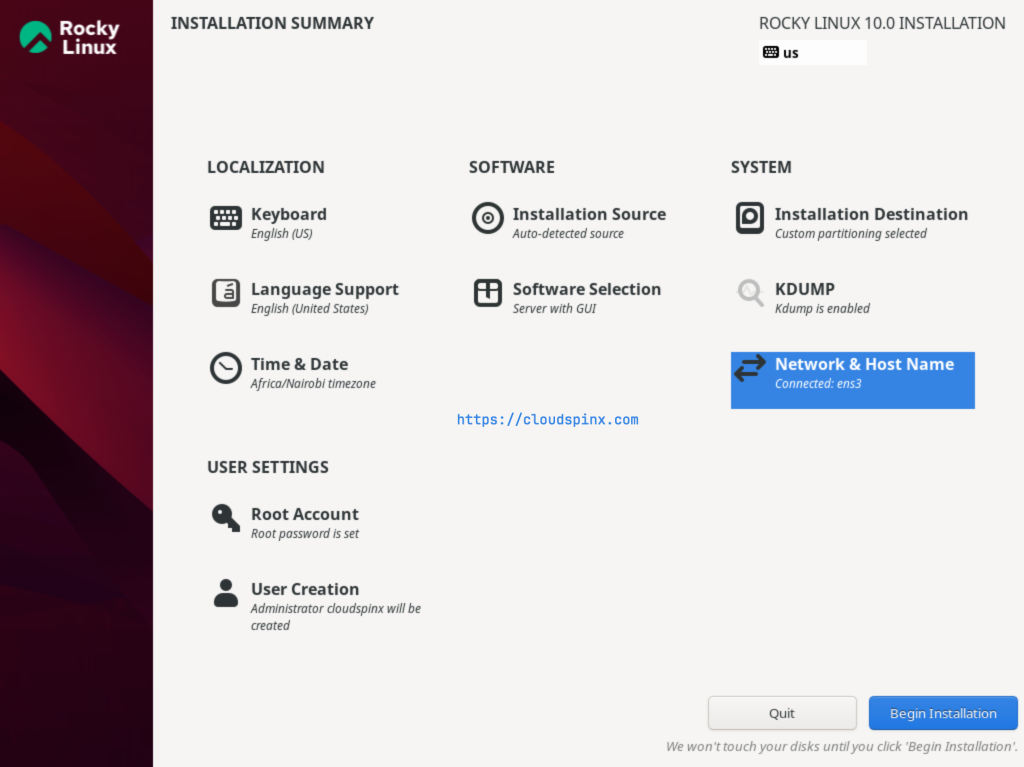
The next screen is the Installation Summary. Here, every items marked with an exclamation mark must be completed before you can proceed with the installation:
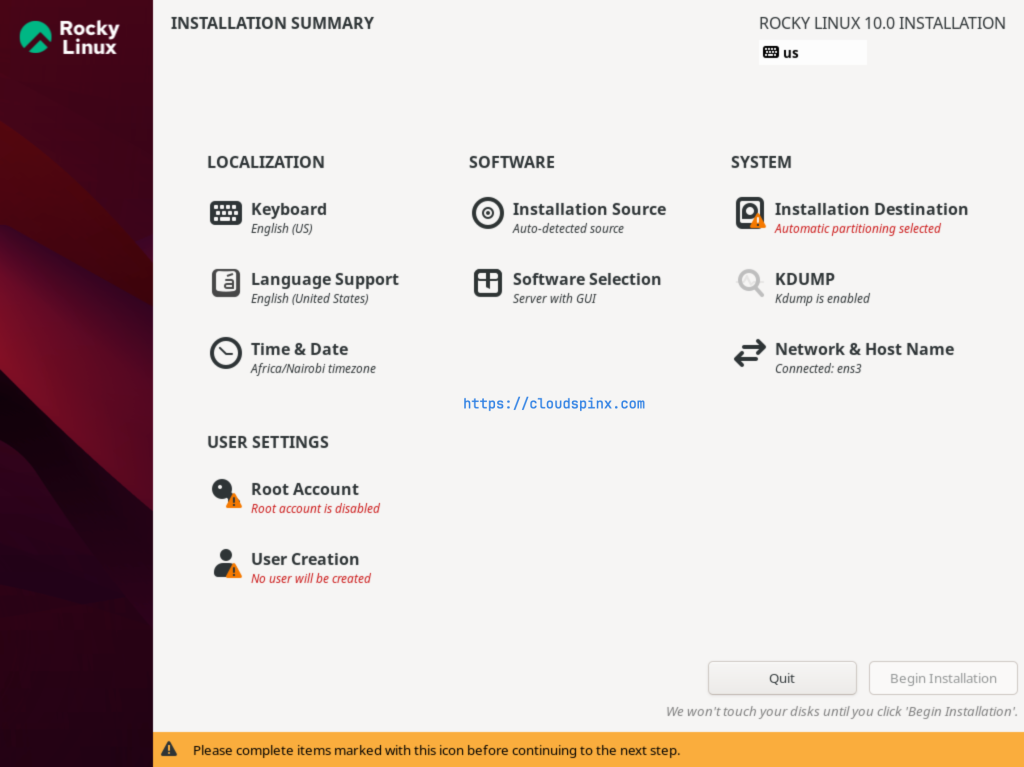
You can start with any section, it’s up to you and it has no order. Let’s start with the Installation Destination section. Click on it to proceed. Once open, you can configure the system storage and data encryption.
Automatic Disk Partitioning
For beginners, it’s best to choose Automatic Partitioning unless you have specific needs.
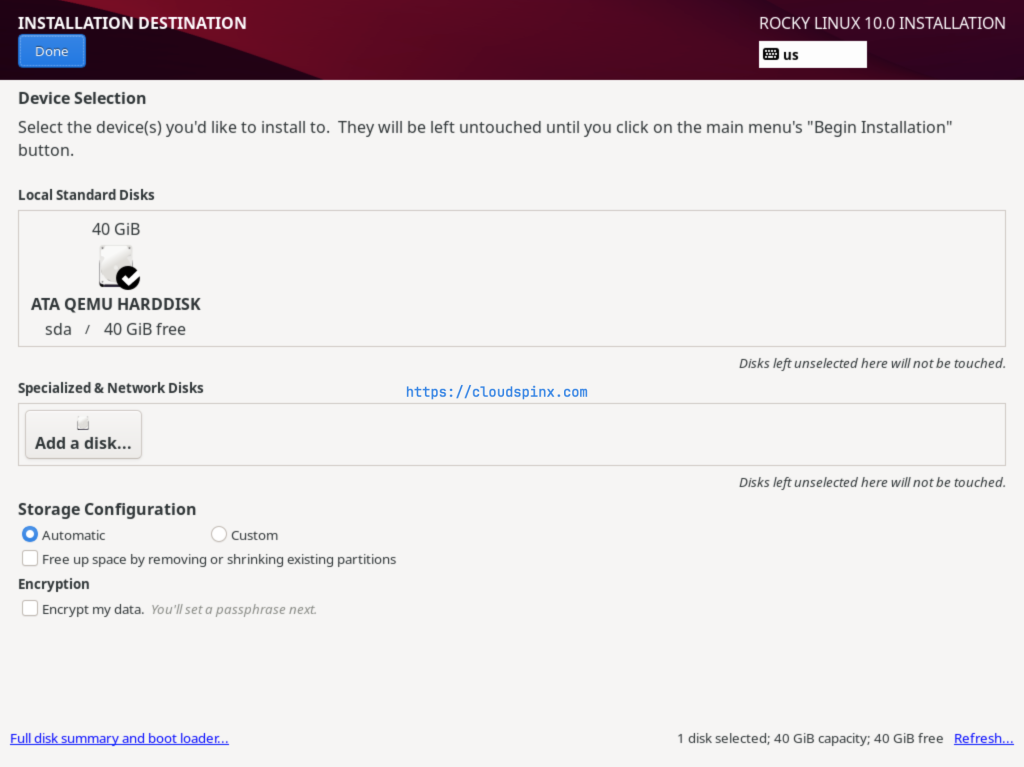
Manual Disk Partitioning
For advanced users, you can opt for manual partitioning and customize the disk layout according to your requirements. Select Custom, then click Done. This will open the disk partitioning wizard and you can select the partitioning scheme you prefer.
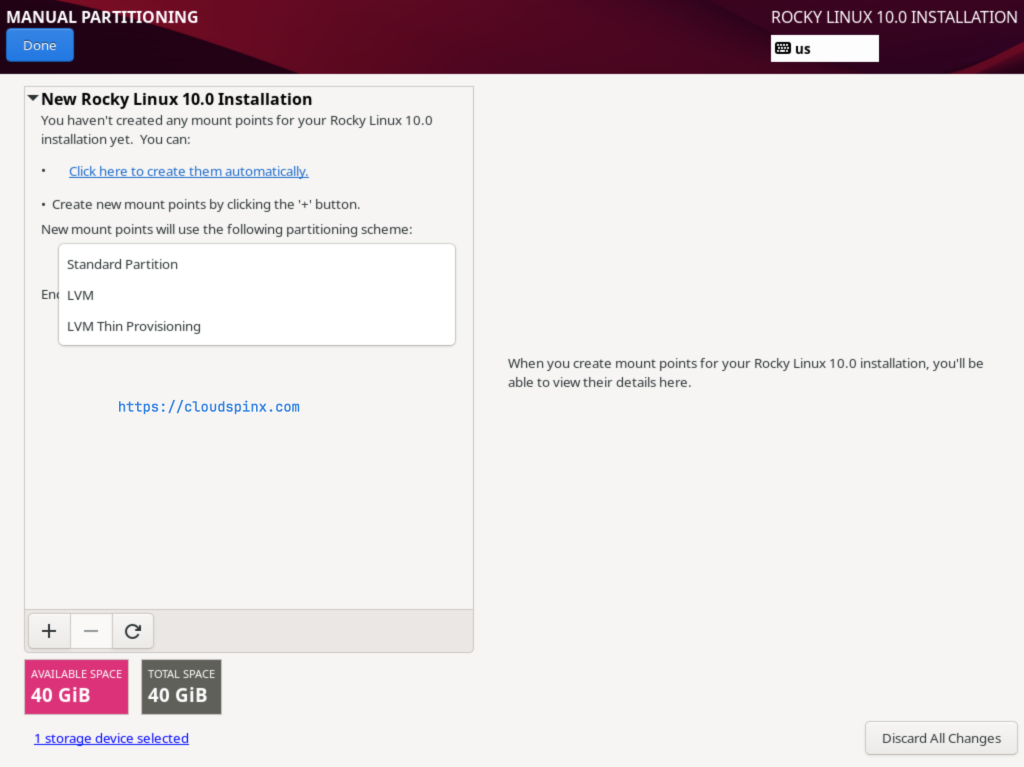
Use the plus(+) button to create new mount points and their desired capacity:
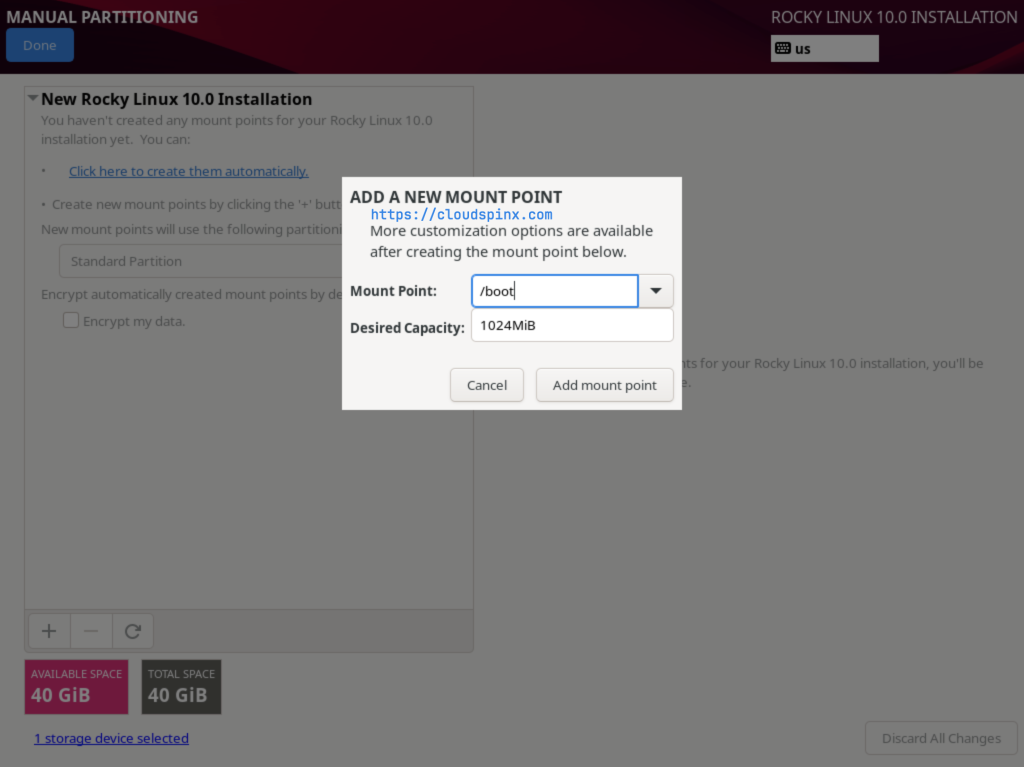
Ensure that you create a root partition(/) and a boot partition(/boot) and any other partition you need.
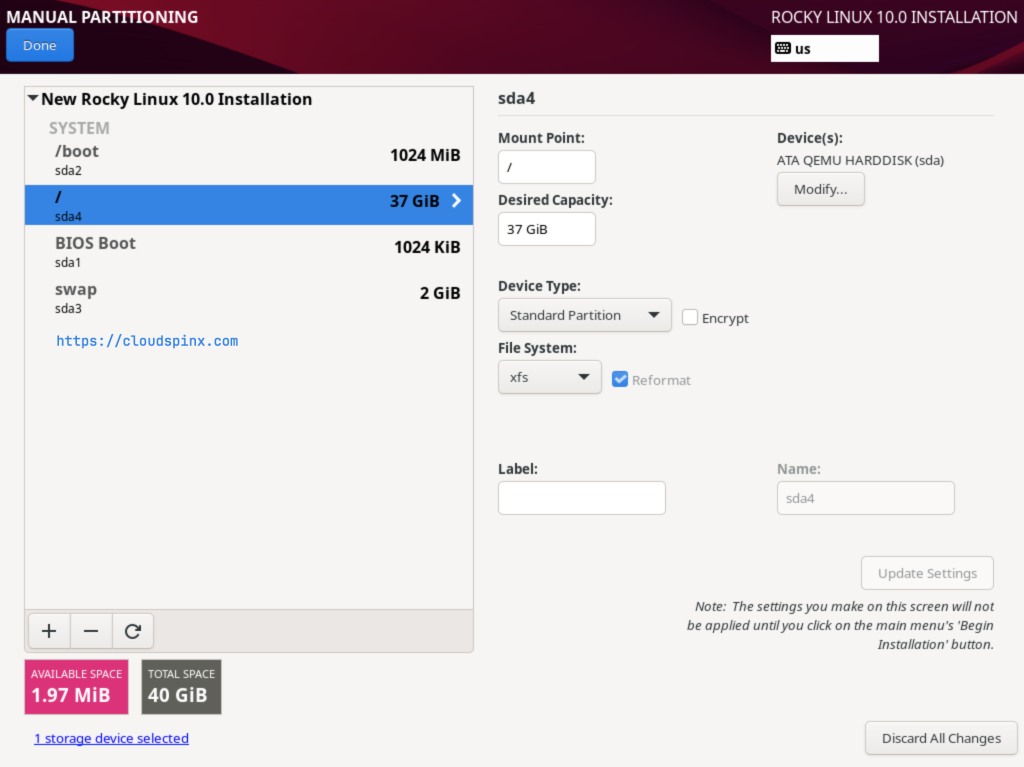
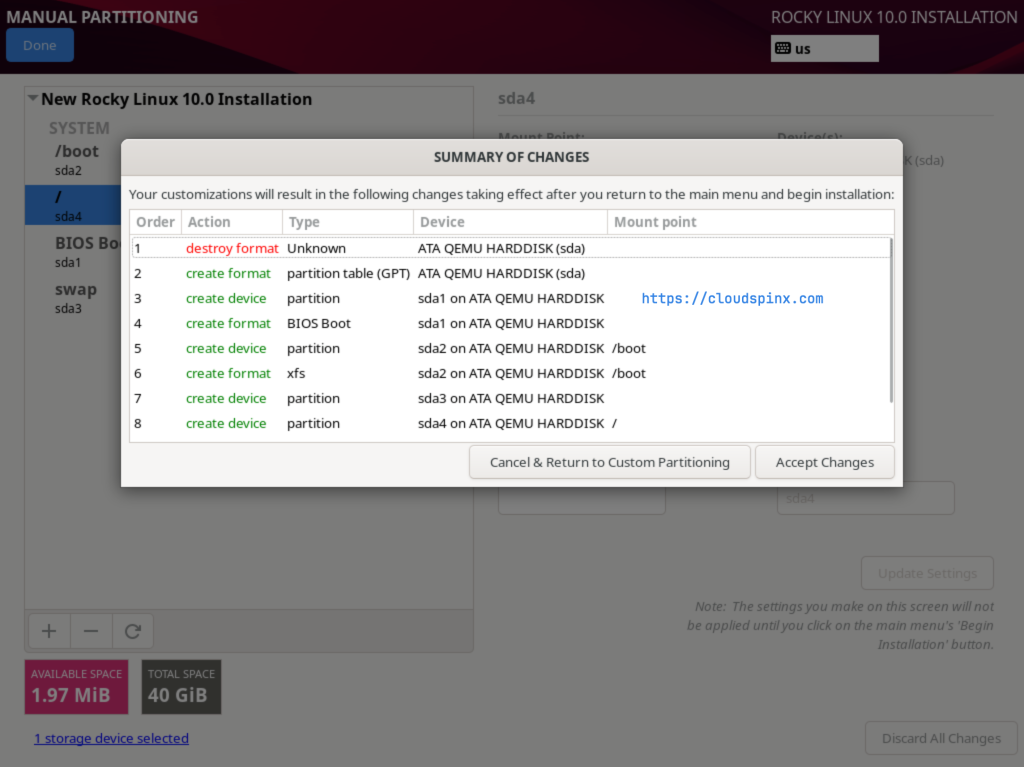
When you are satisfied with the disk partitioning, click Done to proceed and accept the changes to be made to the disk:
User Account Settings
Now, proceed to the USER SETTINGS section. This section is where you can configure the root account and the user account. You can start with either one of them.
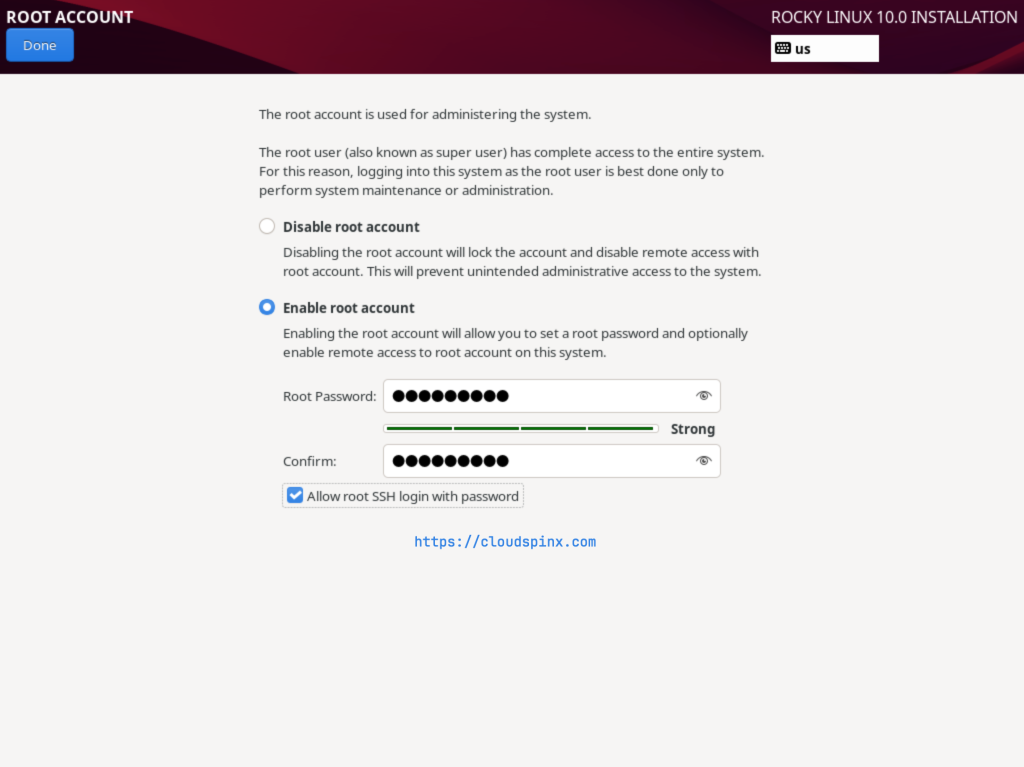
Root Account
By default, the root user account is disabled, enable it by checking the Enable root account option, and setting a password. If you want to allow root SSH Login with password, also check that option:
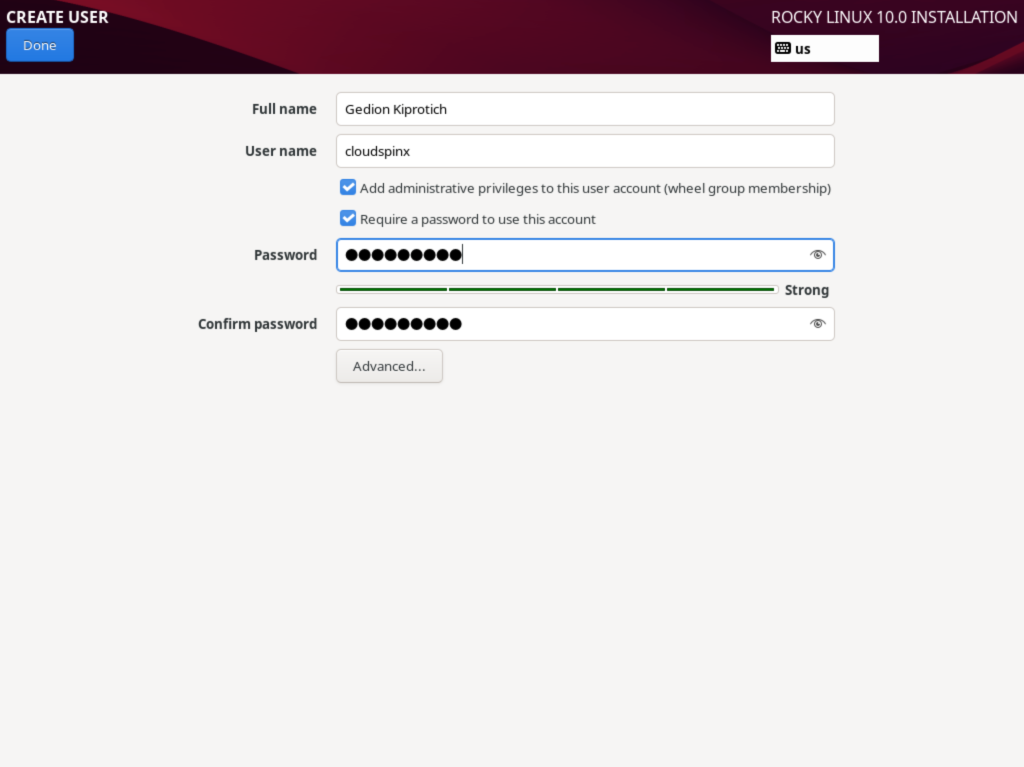
Non-root Account Settings
Then proceed to set up a user account. Click Done when you are done configuring your user:
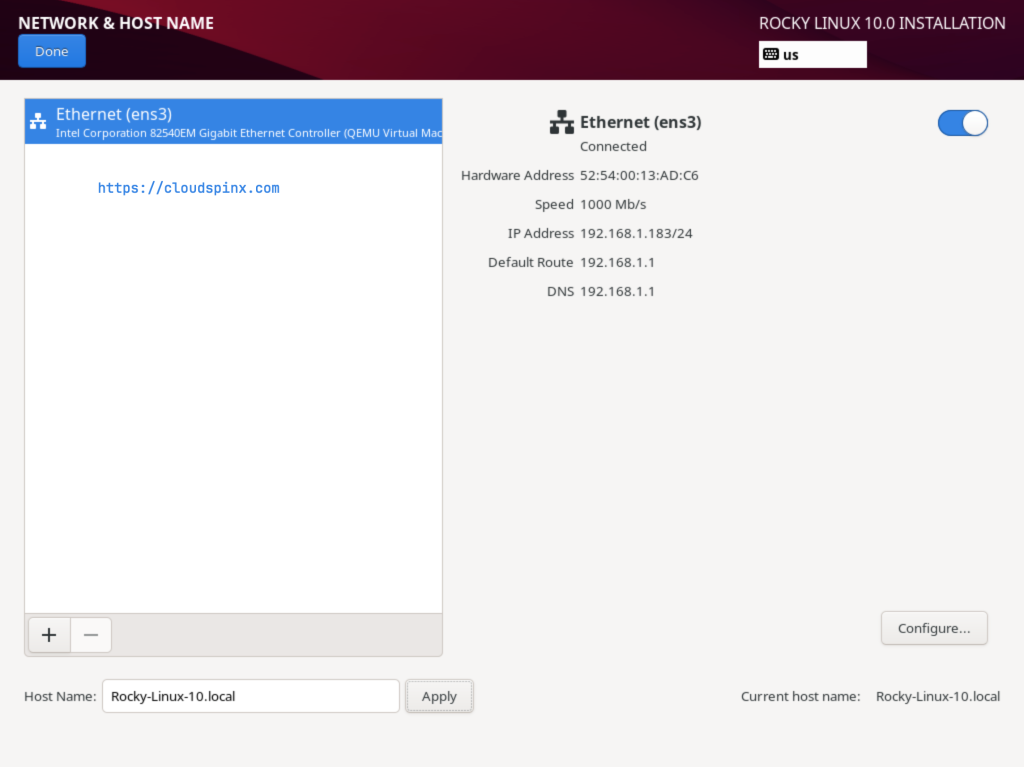
Network Settings
The installer should have already picked up an IP address from your DHCP server, but you can also manually configure the network settings for your system and set a static IP address:
You should now be able to begin the installation without any sections marked with an exclamation mark:
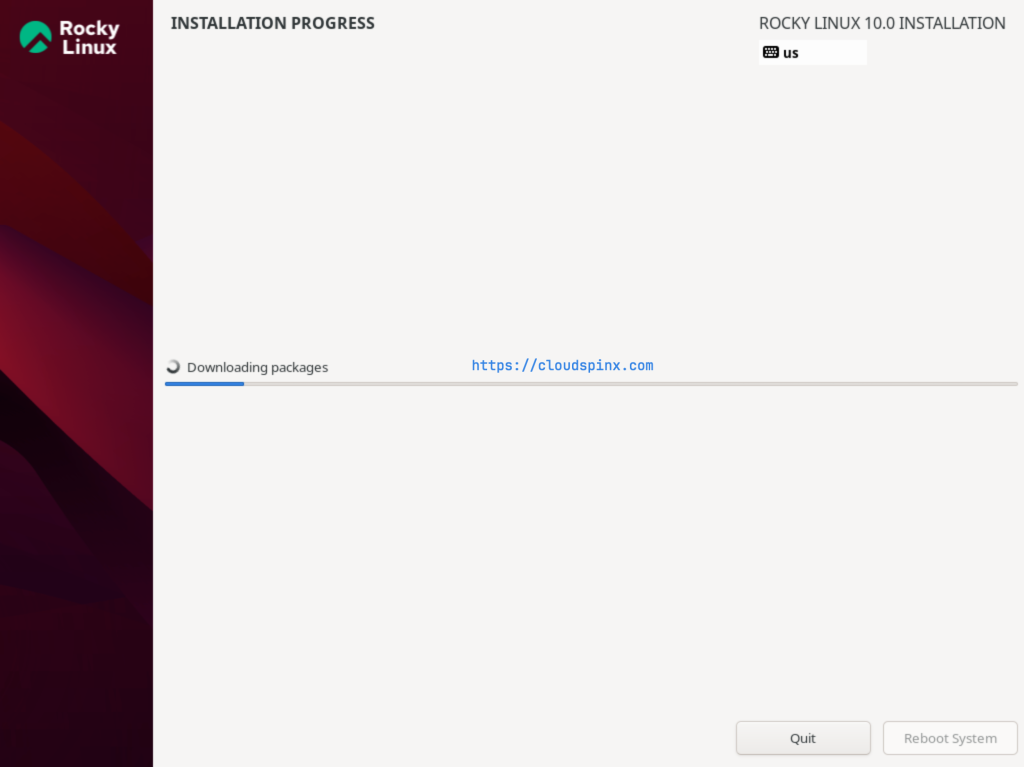
Now begin the installation and wait for it to complete:
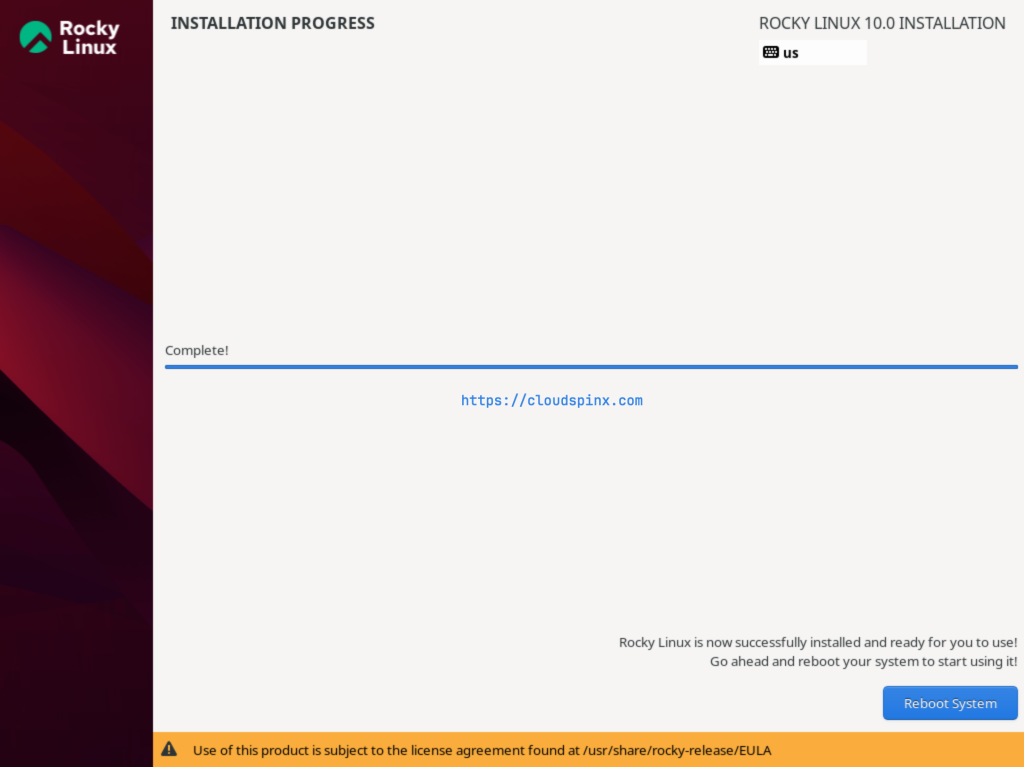
Reboot the system when the installation is completed:
Post-Installation Steps
After the reboot, be sure to remove the installation media to prevent system booting from it again. You wil then be presented with AlmaLinux 10’s login screen:
Log in to the system with the user password you had set earlier. Welcome to AlmaLinux 10:
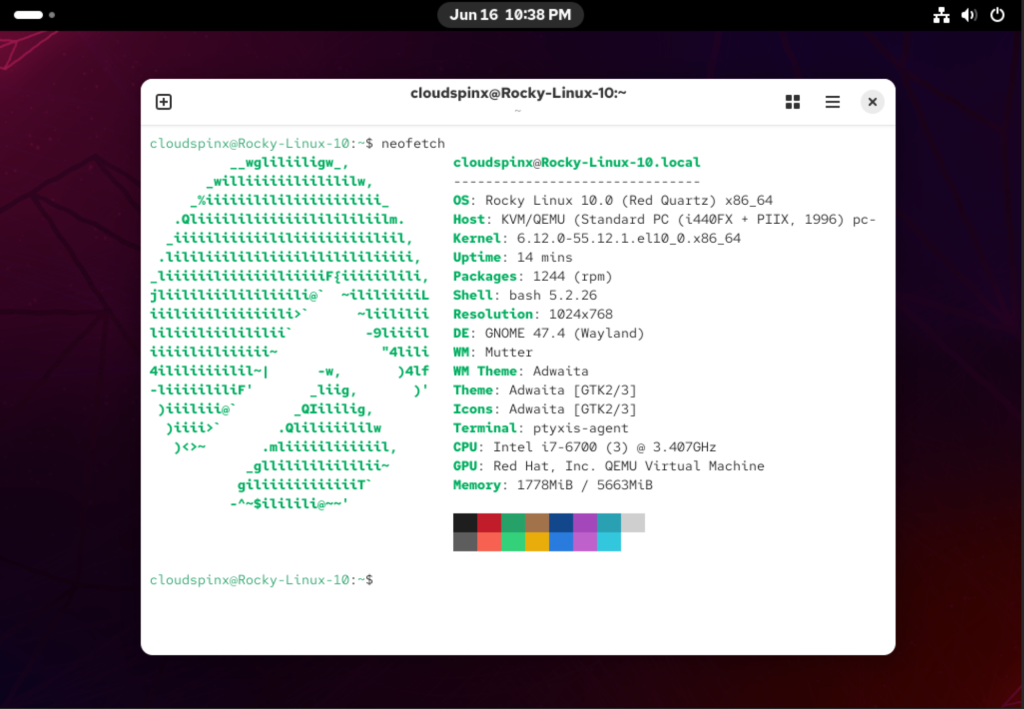
# Update the System
Run the following command to ensure that your system is up-to-date:
sudo dnf update# Enable EPEL repository
The EPEL repository provides additional software packages that are typically not found in the default AlmaLinux repositories. Run the command below to install epel-release:
sudo dnf install epel-releaseConclusion
Rocky Linux 10 is a bold and unrelenting dedication to offering a powerful, stable, and secure operating system that is particularly well-suited for use in production environments. This means it is well-matched to every aspect of the use case, whether you’re running virtual machines, using bare metal hardware, or running containers.


