
Installation of Windows operating systems on a KVM hypervisor is a common requirement in varying environments. While the process is straightforward, it can involve some nuances to ensure perfomance optimization and ensure smooth operation.
You can create a fully-virtualized Windows machine on a KVM host, launch the graphical Windows installer inside the virtual machine (VM), and optimize the installed Windows guest operating system (OS). In this section of the book we provide a comprehensive guide with tips and tricks to get the most out of your Windows installation on KVM. However, there are few prerequisites for this setup.
- Windows Server ISO
Visit the official Microsoft website and download Windows Server ISO. See direct links below:
- VirtIO Drivers
VirtIO drivers helps to optimize the performance and compatibility of Windows VMs running on KVM. These drivers are designed to bridge the gap between the emulated hardware of the virtual machine and the host system, enabling faster and more efficient communication.
- Improved network performance
- Improved disk performance
- Enhanced display performance
- Efficiency in memory management
- Low CPU overhead
The VirtIO drivers are not included natively in Windows, which is why the VirtIO drivers ISO must be mounted during installation to load the necessary drivers. After installation, it is essential to install all available VirtIO drivers to maximize performance and functionality.
Mastering KVM Virtualization - The Ultimate eBook
From home labs to production clouds - master KVM Host management, automating KVM administration using Terraform, Vagrant, and cloud automation. This eBook will enable you to build scalable virtual infrastructure that works whether you're learning at home or deploying enterprise solutions. Get your full copy today
Download the VirtIO drivers ISO from the Fedora Project. It’s recommended to get the latest available version. If you prefer to use the CLI downloaders like wget you can use the following commands:
- Downloading latest release (recommended)
wget https://fedorapeople.org/groups/virt/virtio-win/direct-downloads/latest-virtio/virtio-win.iso- Dowloading stable release:
wget https://fedorapeople.org/groups/virt/virtio-win/direct-downloads/stable-virtio/virtio-win.isoCopy the VirtIO drivers ISO to default KVM storage pool.
sudo mv virtio-win.iso /var/lib/libvirt/images
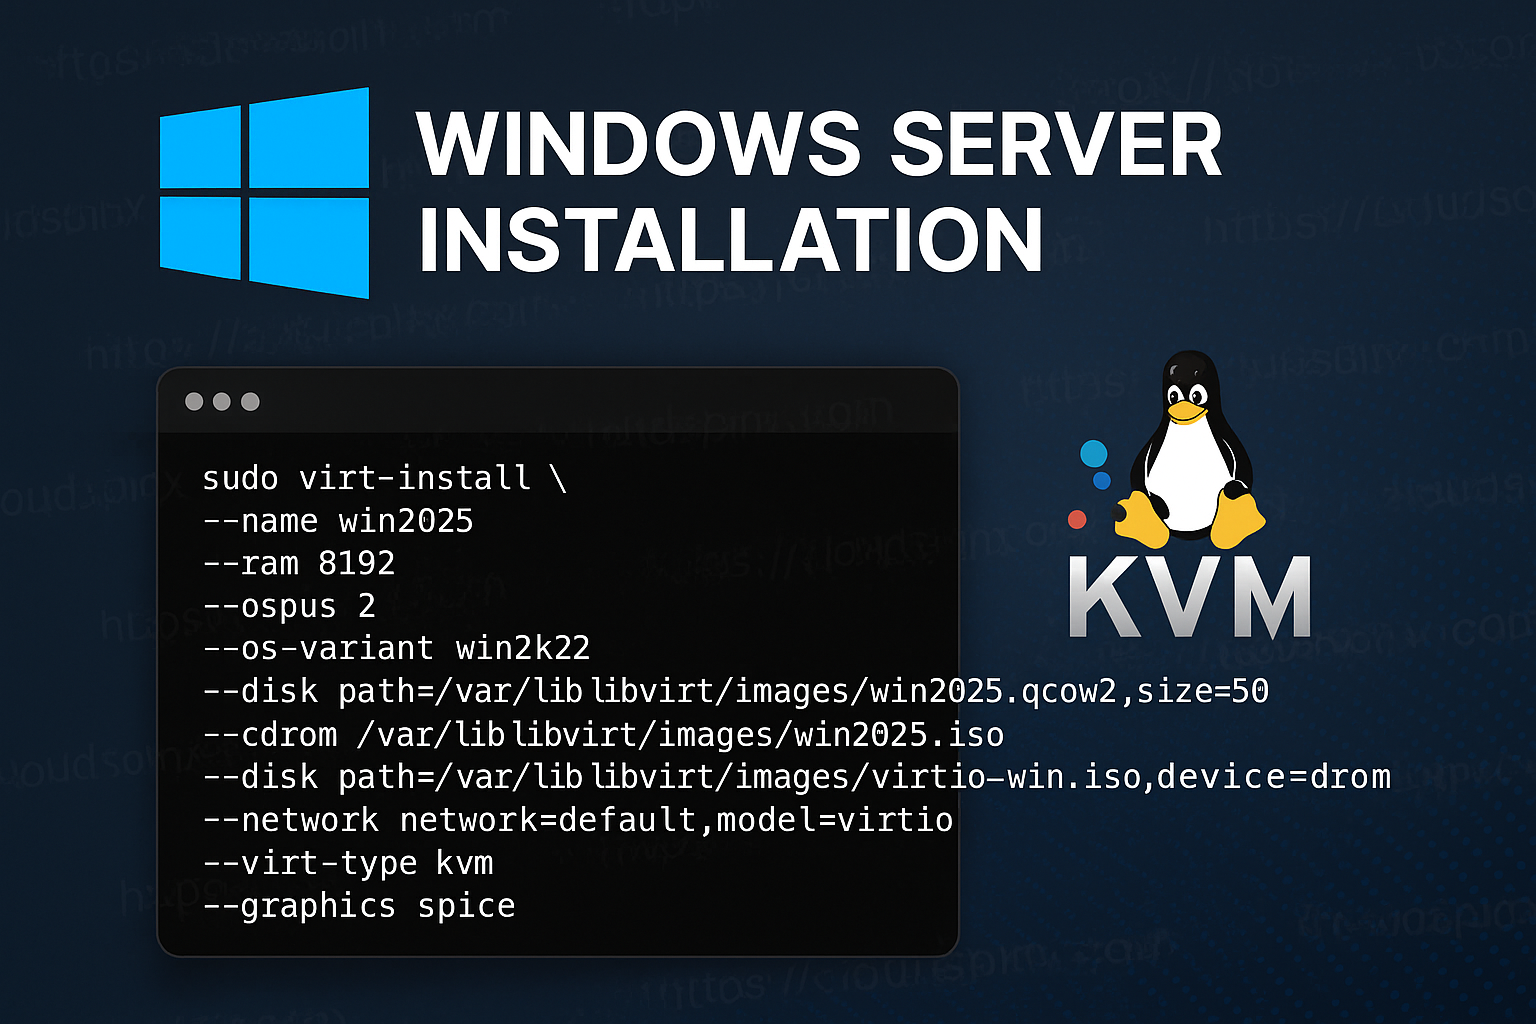
1 – Install Windows Server 2025 / 2022 / 2019
Here’s a detailed walkthrough of installing a Windows server using the virt-install command-line utility. For installation of Windows OS, you should have a Desktop Environment installed and functional in your Linux machine where KVM is running.
Install UEFI Firmware for Virtual Machines:
- Debian based systems
sudo apt update && sudo apt -y install ovmf- RHEL based systems
sudo dnf -y install edk2-ovmfWindows Server 2025 installation example:
sudo virt-install \
 --name win2025 \
 --ram 8192 \
 --vcpus 2 \
 --os-variant win2k22 \
 --disk path=/var/lib/libvirt/images/win2025.qcow2,size=50,bus=virtio,format=qcow2 \
 --cdrom /var/lib/libvirt/images/win2025.iso \
 --disk path=/var/lib/libvirt/images/virtio-win.iso,device=cdrom \
 --network network=default,model=virtio \
 --virt-type kvm \
 --graphics spice
Where:
--name win2025– Specifies the name of the virtual machine.--ram 8192– Allocates 8GB of RAM to the VM.--vcpus 2– Allocates 2 virtual CPUs to the VM.--os-variant win2k22– Indicates the OS variant for optimization. List avalable variants usingosinfo-query os|grep win. At the time of creating this content, exact match for Windows server 2025 was not available.--disk– Path to primary disk. Specifies the location, size (50GB), and format (qcow2). Bus type: virtio is recommended for better performance.- Additional VirtIO ISO: Mounts the VirtIO drivers ISO as a second CD-ROM to load drivers during installation.
--cdrom /path/to/Windowsserver.iso– Path to the Windows installation ISO. This is the bootable media for installing Windows.--network network=default,model=virtio– Connects the VM to the defaultlibvirtnetwork using thevirtiodriver for optimized network performance.--virt-type kvm– Specifies that the VM will run on KVM, leveraging hardware virtualization for better performance.--graphics spice– Enables SPICE for graphical display.
Other installation options that can be used are:
--boot uefi. Enables UEFI firmware boot. Necessary for modern Windows versions, especially if Secure Boot is required.--machine q35– Sets the machine type toq35, which emulates a modern chipset with PCIe support. This is often required for UEFI compatibility.
To use custom network bridge, specify its name using --network option with bridge name. In the following example the bridge name is vmbr0:
--network bridge=vmbr0If using using Open vSwitch network bridge, specify like below:
--network=bridge:vmbr1,model=virtio,virtualport_type=openvswitchWhere vmbr1 is the OVS bridge name configured on the KVM host machine.
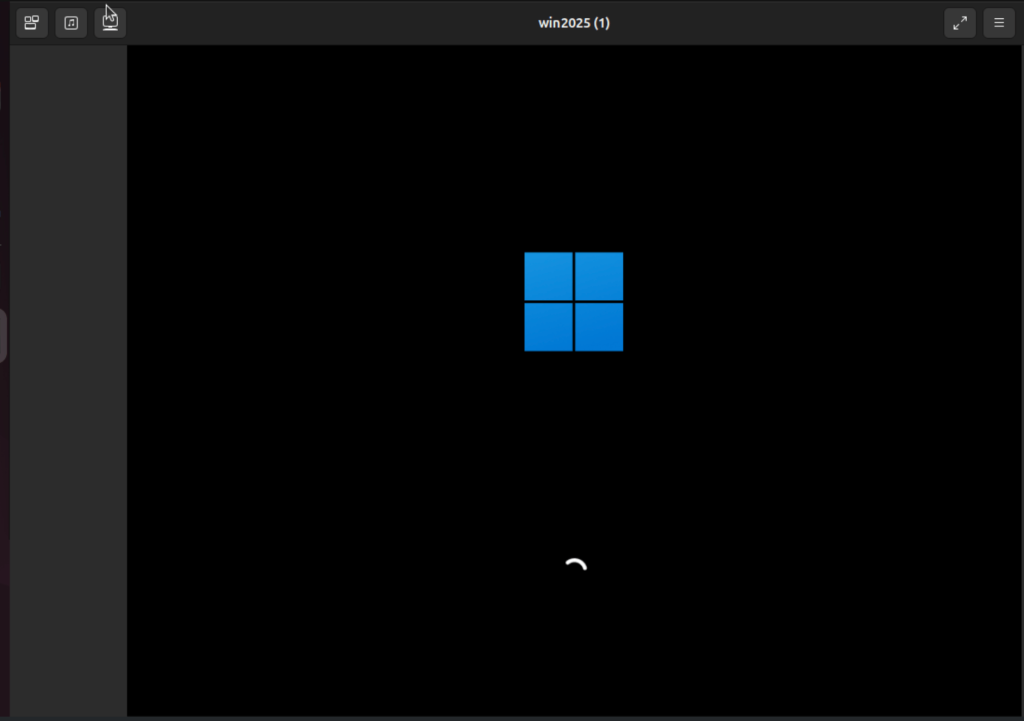
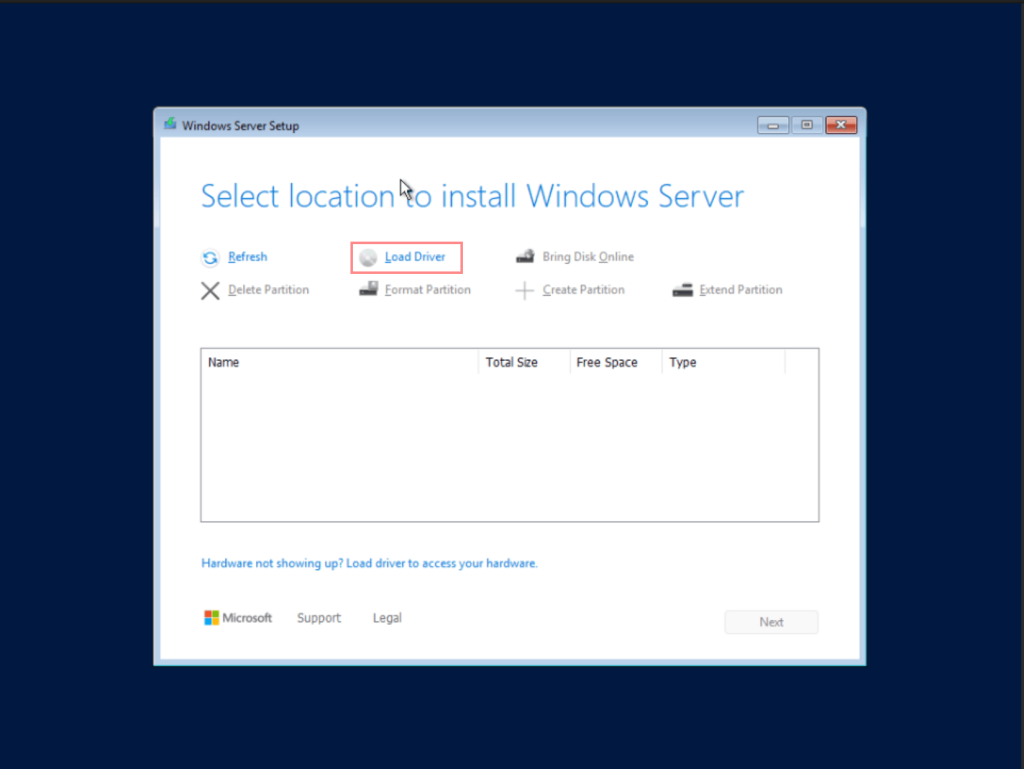
Windows Server Installation Process
After initiating the installation the boot up screen should be shown.
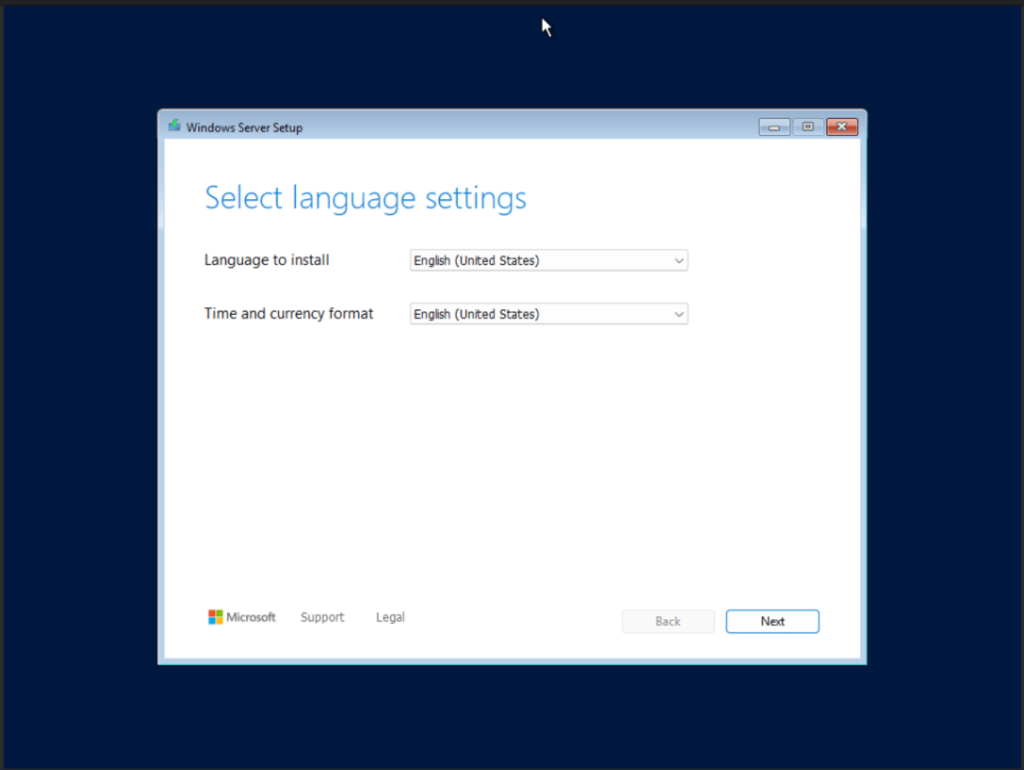
Choose language to proceed with the installation.
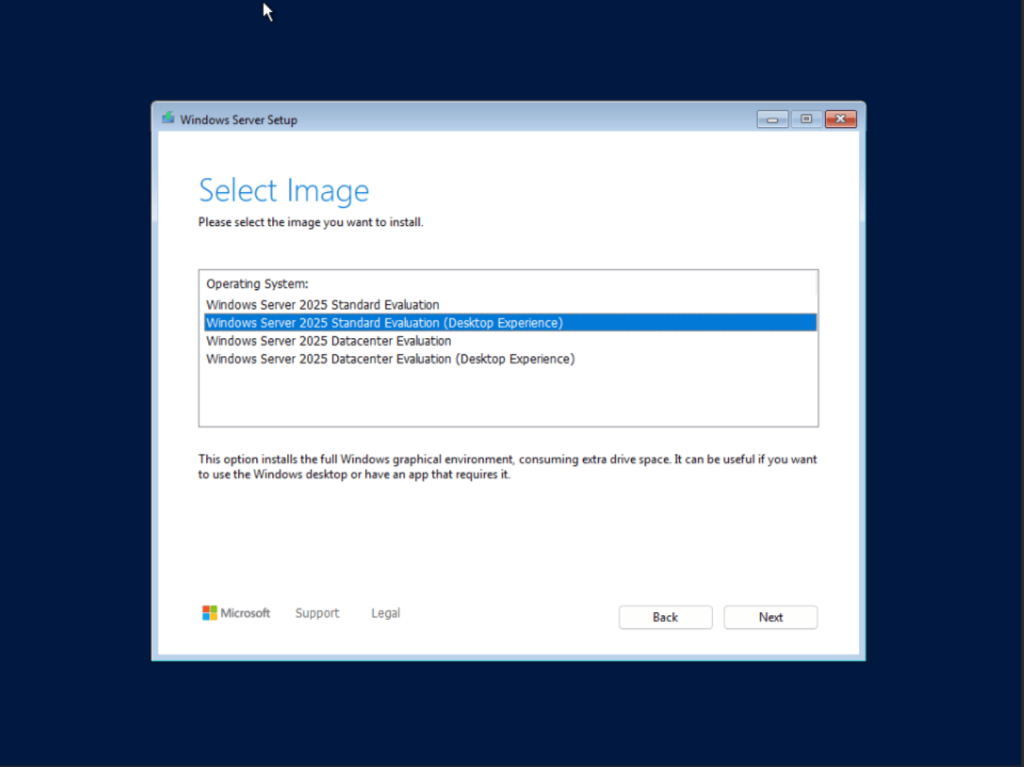
Choose the windows server type to install. For GUI select “Desktop Experience“
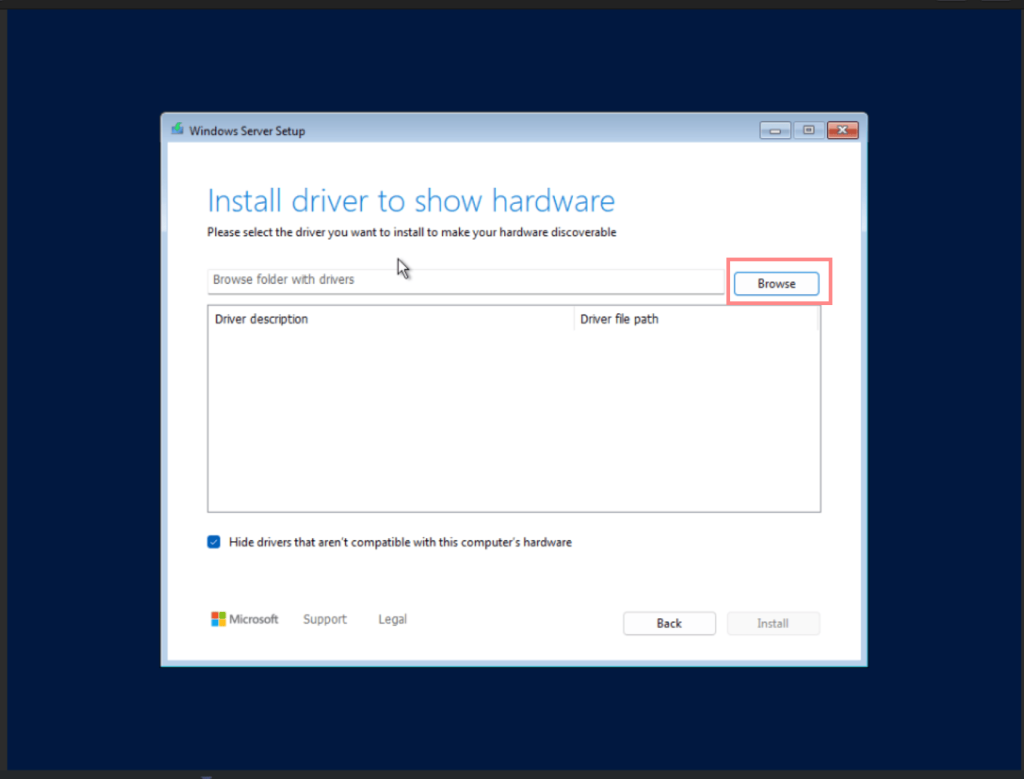
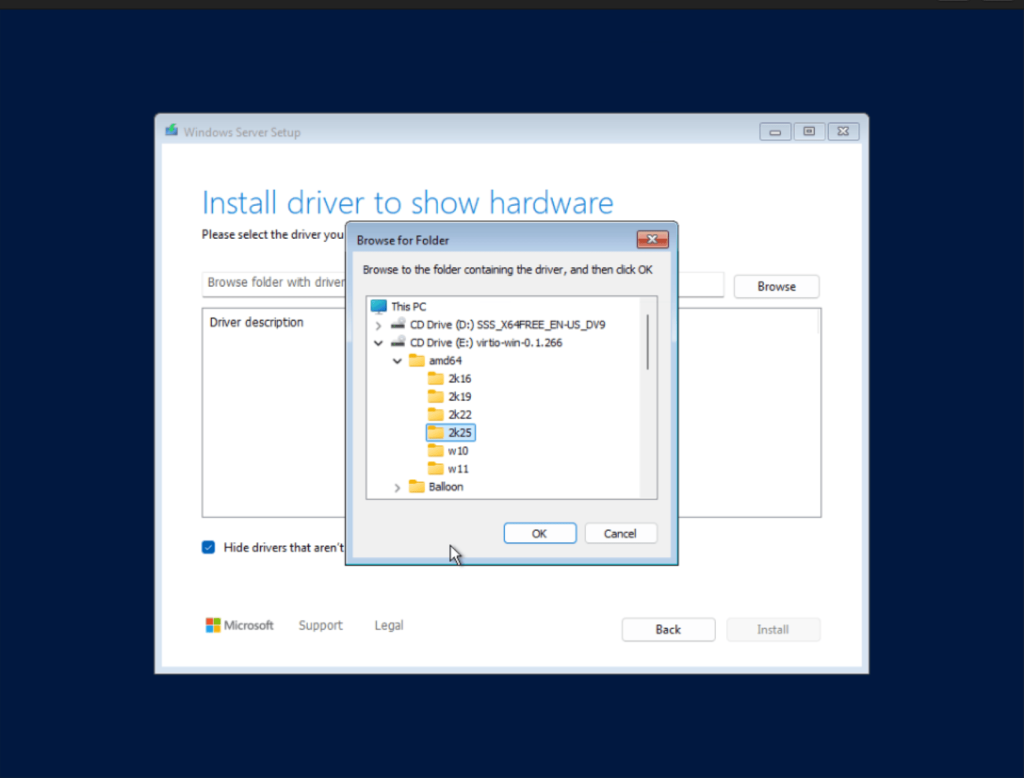
We need to load two drivers from virtio iso image attached.
Load VirtIO Ethernet driver
Click “Load Driver“.
Then “Browse“.
Open the CD-ROM labeled “virtio-win“.
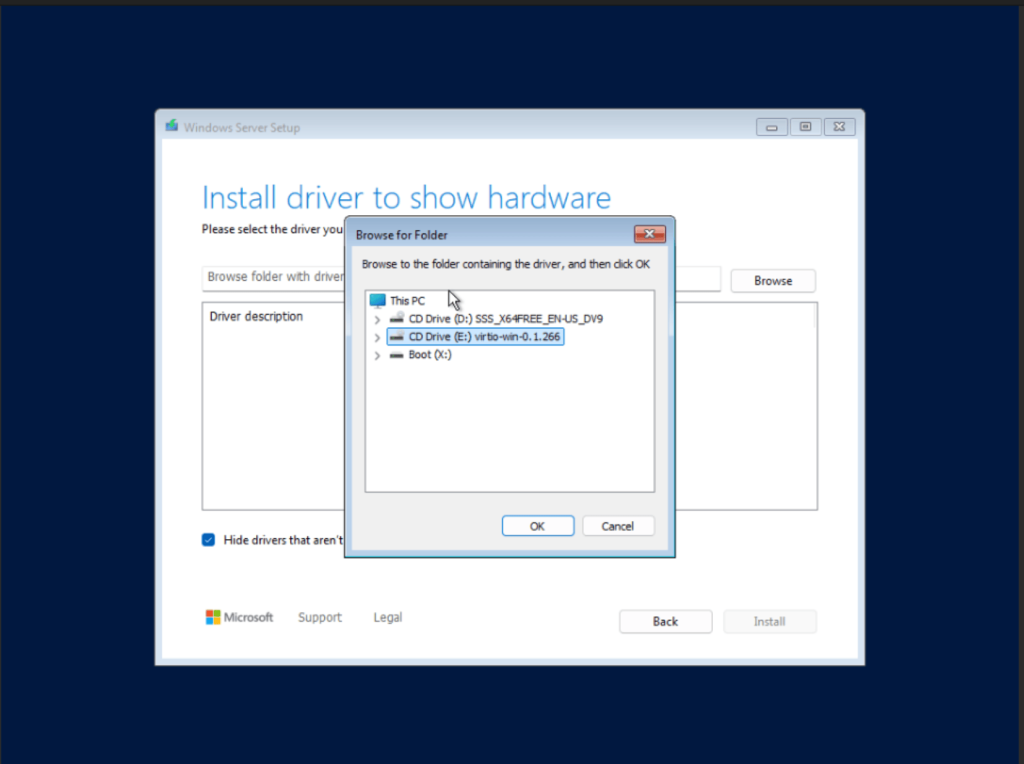
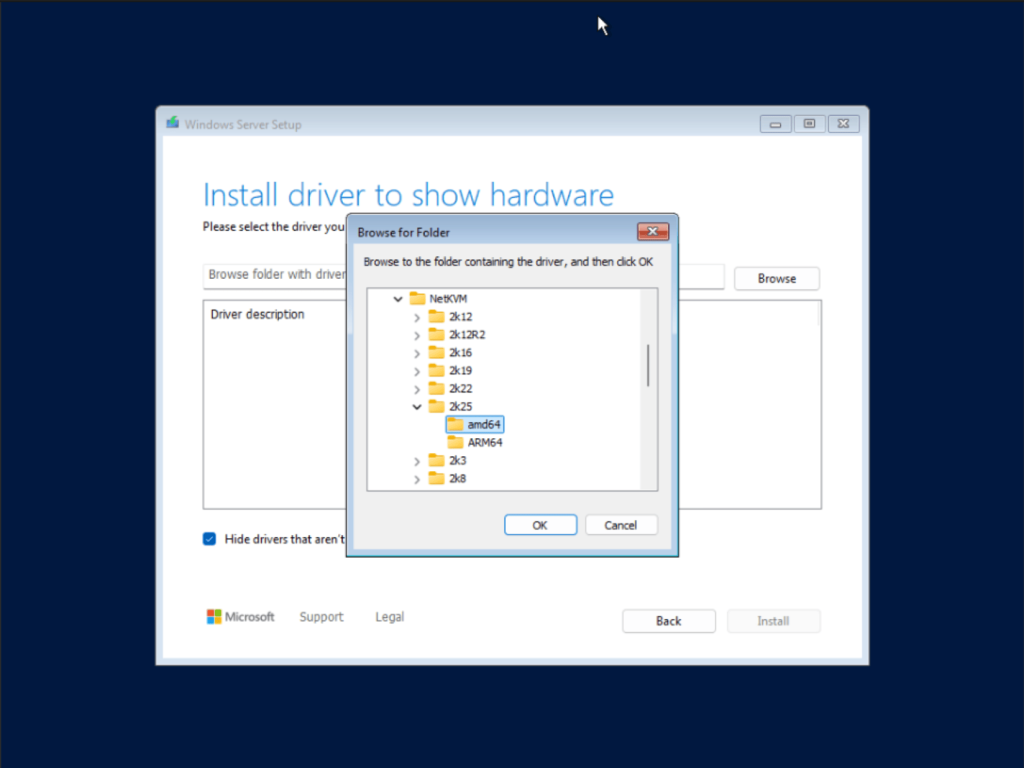
Navigate to “NetKVM” > “2k25” (for windows server 2025) > “amd64” or “arm64” depending on your host cpu type. Click “OK” once selected.
Click on the loaded driver name in the description and hit “Install” button.

Installing VirtIO SCSI Controller driver
To resolve “No drives were found.” During windows installation on KVM we need to load the VirtIO SCSI Driver.
Click “Load driver” to manually provide the VirtIO SCSI driver. Go to the “amd64” folder and corresponding folder to your Windows version, example is “2k25” for Windows Server 2025.
Select the driver loaded and click “Install“.

The VirtIO SCSI disk should now appear in the list of drives.
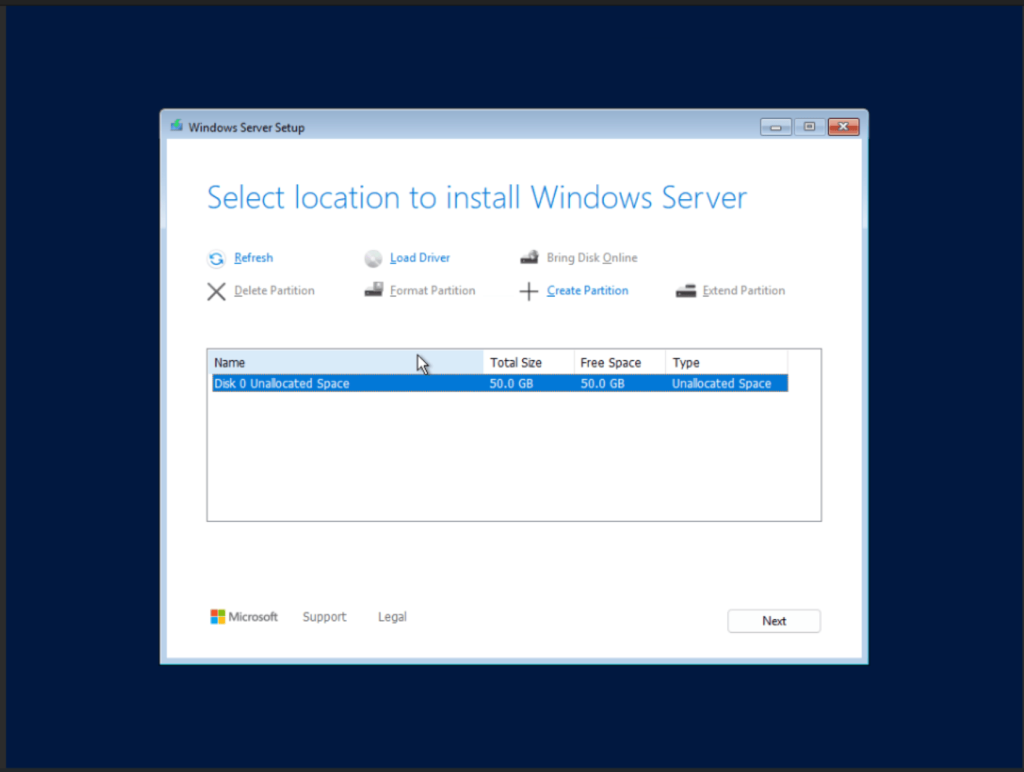
Select the VirtIO SCSI disk and proceed with the Windows installation as usual.
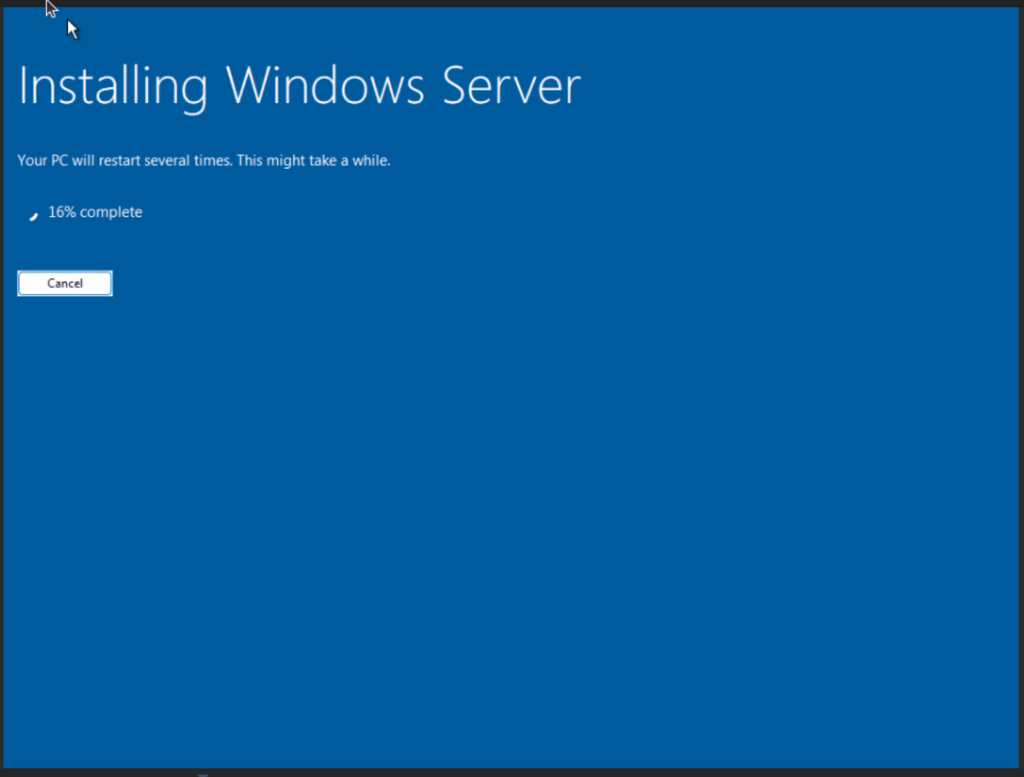
The installation should start as shown below:
🌍
Our KVM eBook covers all this in details and more. In the book you will learn:
- Understanding Virt-install
- Linux VM Installation from ISO image
- Linux VM Installation using Cloud-Init
- Windows installation (Desktop and Server) using virt-install
- VMs Installation using Virt-builder
- VMs Install using PXE Boot and virt-install
- VMs Installation using virt-install and kickstart
- GPU Passthrough to Virtual Machines


