
In today’s life, there is a need to take a regular backup of important files so that you do not lose them permanently. It is preferred that you store them in more than one place. Dropbox is a popular cloud-based productivity tool used by individuals and a team to store and access files from any system over the internet. It is used on Windows, Linux, macOS, and Android to sync files between local devices and the cloud. If a file is placed in the Dropbox folder on your local system, it is automatically synchronized to the Dropbox cloud.
Dropbox offers 2 GB of free storage but you can still upgrade to a paid account that offers more storage and added functionalities. Dropbox offers the following features:
- Offers free storage up to 2 GB of free storage on the free plan
- It allows one to access files anytime, everywhere.
- It offers encryption security to keep your files confidential by using 256-bit AES encryption security.
- Allow one to extend storage up to 100 GB on the paid platform.
- Allows one to share files with others.
- It allows one to add comments to files
- It is available for various operating systems such as Android, Linux, Windows, macOS e.t.c
- It allows one share screenshots quickly using the screenshot sharing feature.
- It uses selective sync to save on space
- It allows one customize Dropbox notifications
- Ability to edit Microsoft Office files online for free
- File requests feature allows one request for their files from others
In this guide, we will walk through how to install and use Dropbox Client on Rocky Linux 10 | CentOS Stream 10.
Step 1 – Install Flatpak
Since Dropbox is not available in the default repositories of Rocky Linux 10 | CentOS Stream 10 we will install it easily from FlatHub using Flatpak. Flatpak is available in the default repositories and can be installed using the command:
sudo dnf install -y flatpakBy default, Flatpak is installed on Rocky Linux 10 | CentOS Stream 10 systems. If not, use the DNF command above to install it. Now verify your installation by checking the version as below:
$ flatpak --version
Flatpak 1.16.0
Then proceed and enable the FlatHub repository on your Rocky Linux 10 | CentOS Stream 10 system.
sudo flatpak remote-add --if-not-exists flathub https://flathub.org/repo/flathub.flatpakrepoOnce the repository is added, list all the configured Flatpak repositories on your machine.
flatpak remote-list --show-detailsSample Output:

Step 2 – Install Dropbox Client
With Flatpak installed and repositories added successfully, we can now install Dropbox client on Rocky Linux 10 | CentOS Stream 10.
First, begin by searching for Dropbox Client as below:
flatpak search dropboxSample Output:

Now that Dropbox Client is available, we will install it on Rocky Linux 10 | CentOS Stream 10 using:
sudo flatpak install flathub com.dropbox.ClientGive Flatpak the required permissions
Looking for matches…
Required runtime for com.dropbox.Client/x86_64/stable (runtime/org.gnome.Platform/x86_64/40) found in remote flathub
Do you want to install it? [Y/n]: y
....
com.dropbox.Client permissions:
.....
Proceed with these changes to the system installation? [Y/n]: y
The required files will then be downloaded from Flathub. Once complete, you will see this
  .........
          ID                                             Branch                Op            Remote             Download
 1. [✓] org.freedesktop.Platform.GL.default            24.08                 i             flathub            154.9 MB / 155.4 MB
 2. [✓] org.freedesktop.Platform.GL.default            24.08extra            i             flathub             23.7 MB / 155.4 MB
 3. [✓] org.freedesktop.Platform.openh264              2.5.1                 i             flathub            913.7 kB / 971.4 kB
 4. [✓] org.gnome.Platform.Locale                      48                    i             flathub             18.6 kB / 389.1 MB
 5. [✓] org.gnome.Platform                             48                    i             flathub            340.6 MB / 397.0 MB
 6. [✓] com.dropbox.Client                             stable                i             flathub            111.9 MB / 112.1 MB

Installation complete.
Step 3 – Configure Dropbox
Once the installation is successful, now launch Dropbox client from the App Menu. Dropbox will prompt to open a login page on the browser as below.
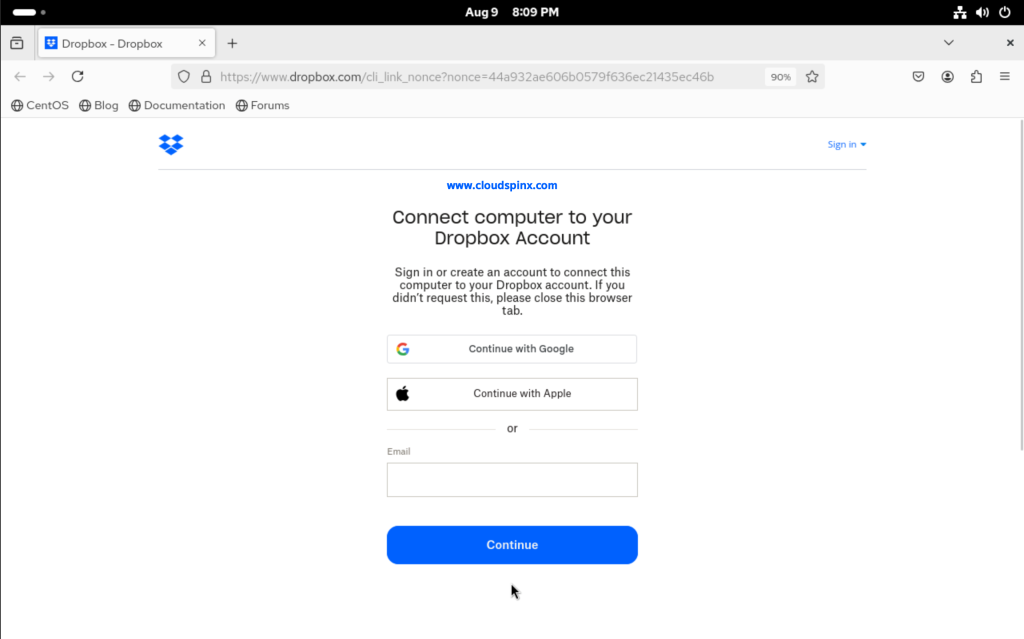
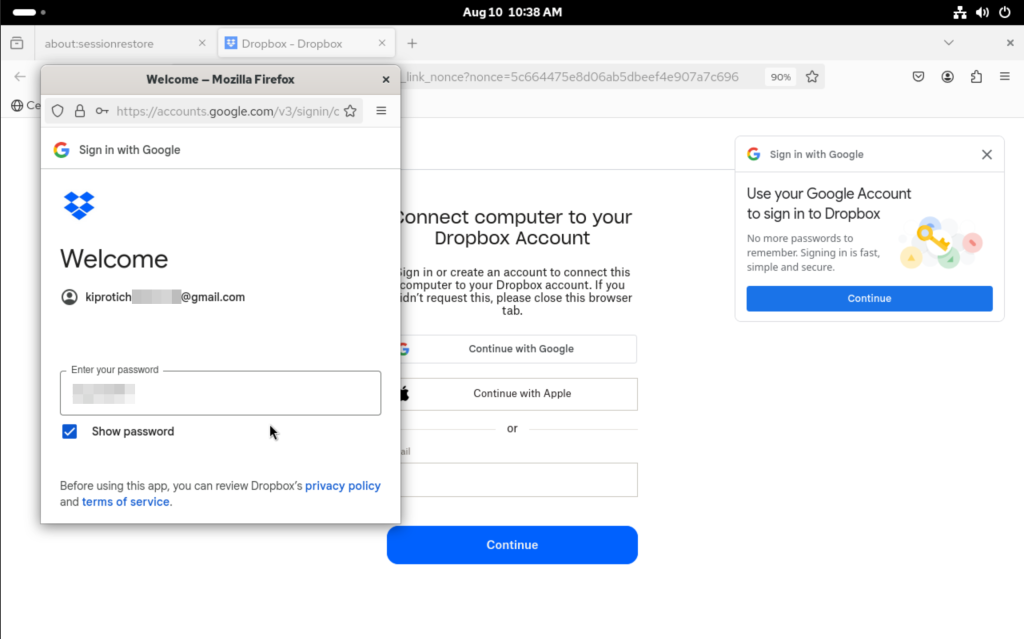
Here, you are required to sign in if you have an existing Dropbox account, otherwise, use your google or apple account:
After clicking Continue in the next screen, click Agree and sign up to continue to DropBox.

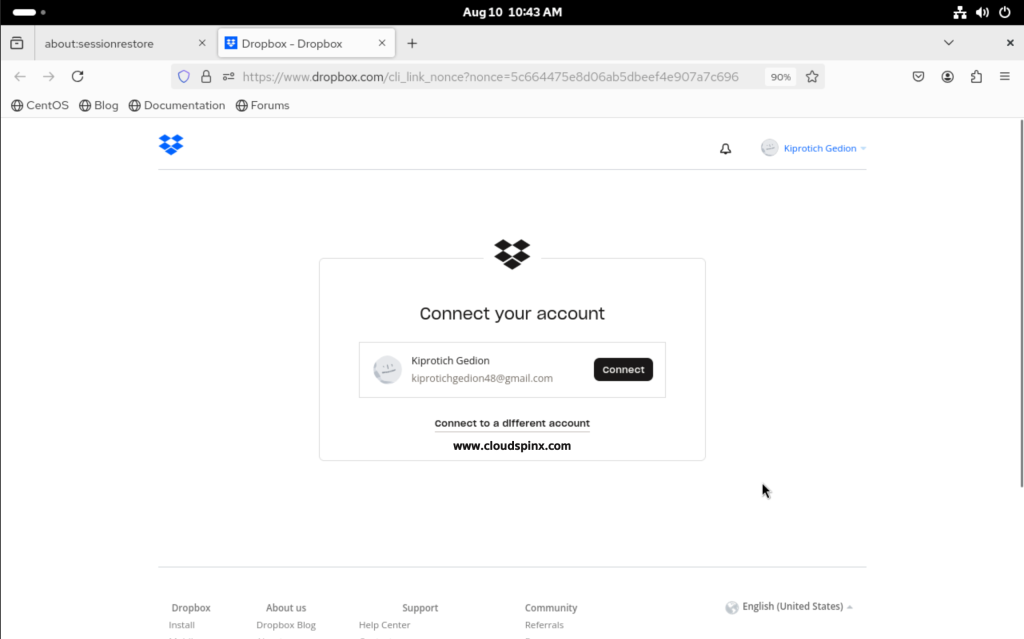
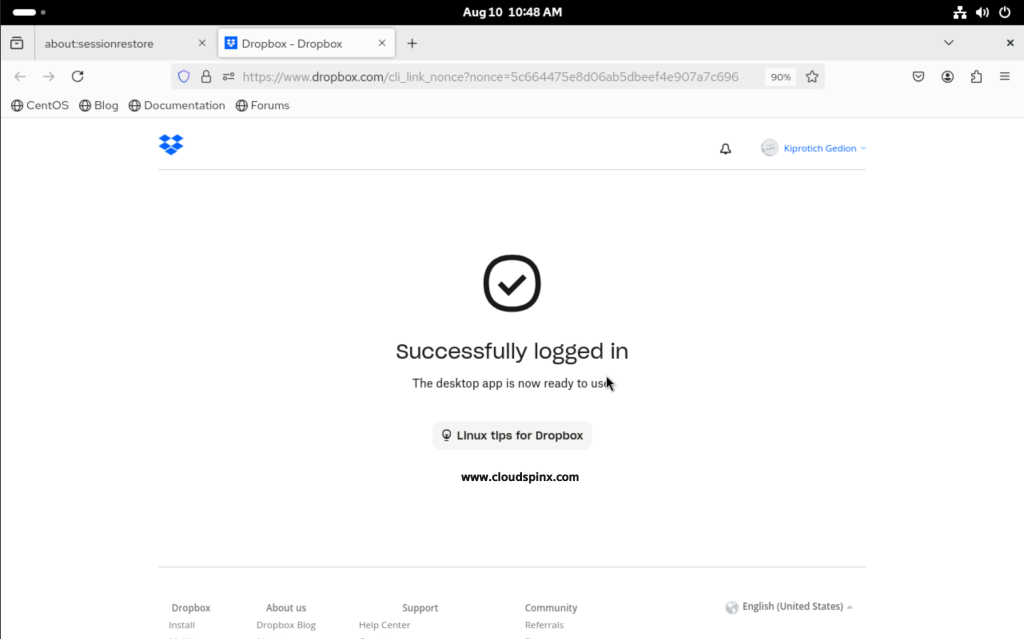
Click on Connect in the next page to allow your machine to connect to DropBox.
You should see the screen below:
Click on the DropBox icon to start onboarding and you should see the following page:
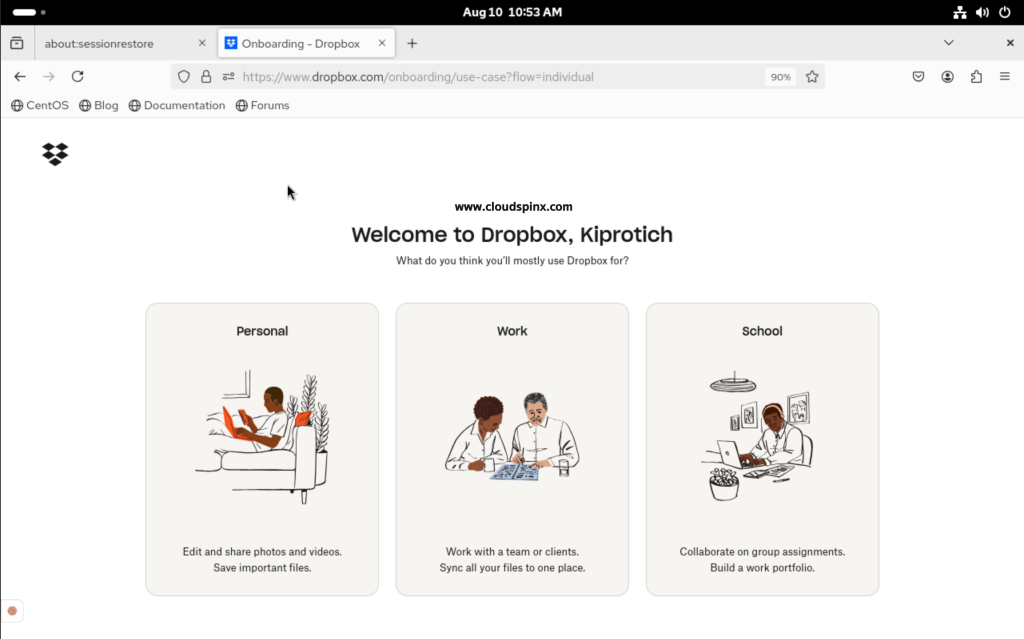
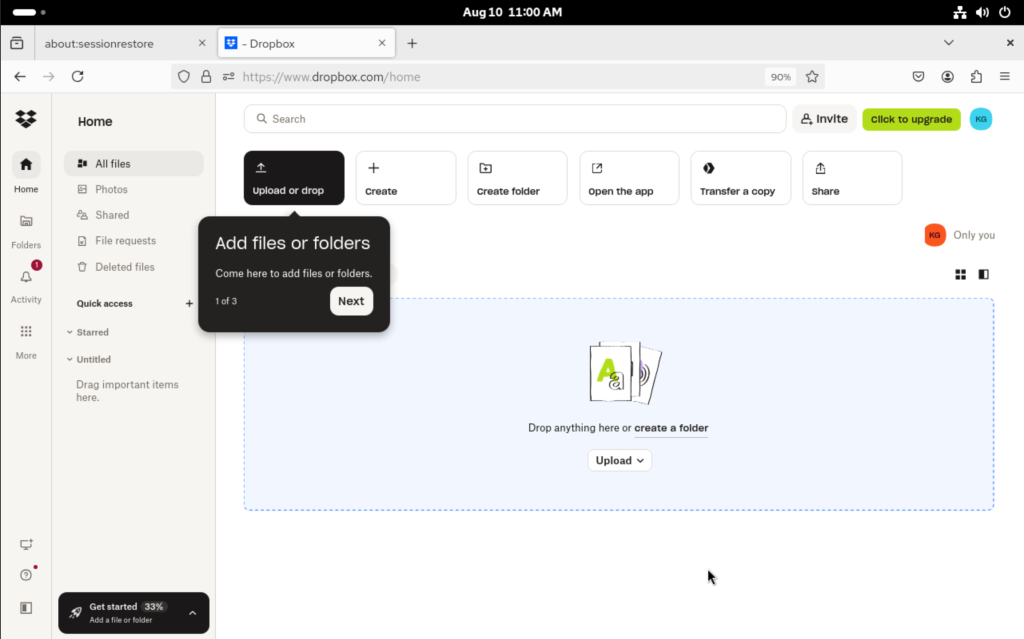
Since you’ve already installed the desktop app, skip the next step and you should the Dropbox dashboard.
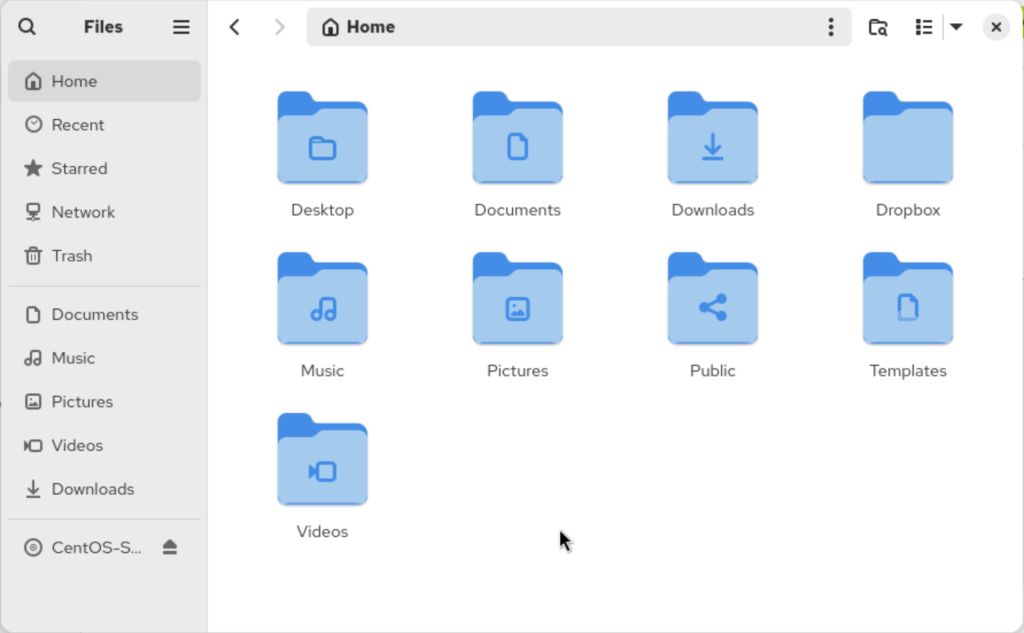
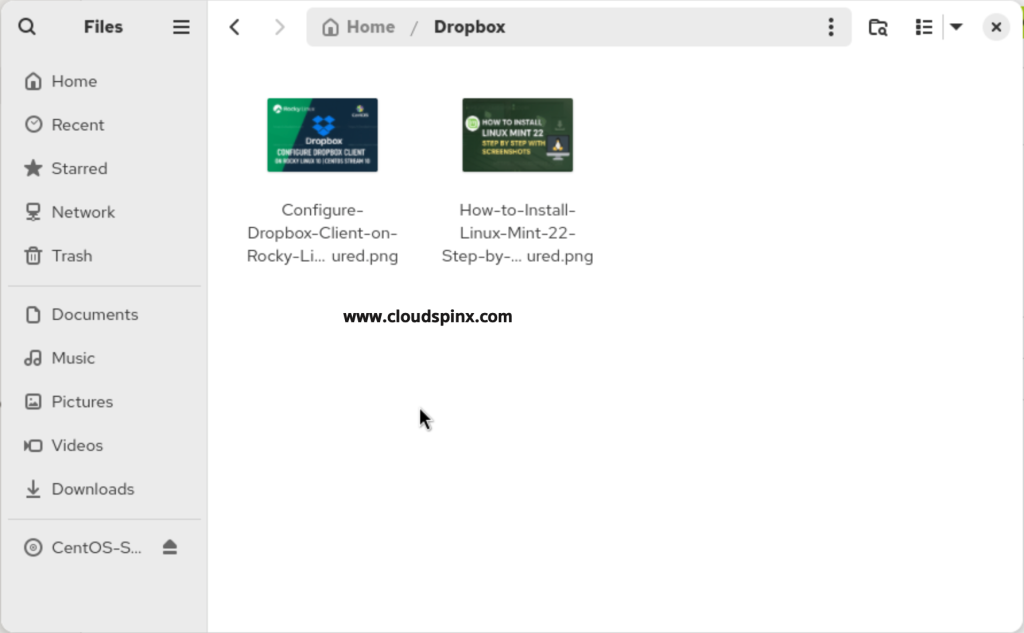
In your file manager, a new ~/Dropbox has been created in your home directory. This is the default directory that syncs automatically with your Dropbox account.
Now add the files you want to sync to your Dropbox account to your to the new Dropbox folder. For this demonstration, I have copied two images as shown below:
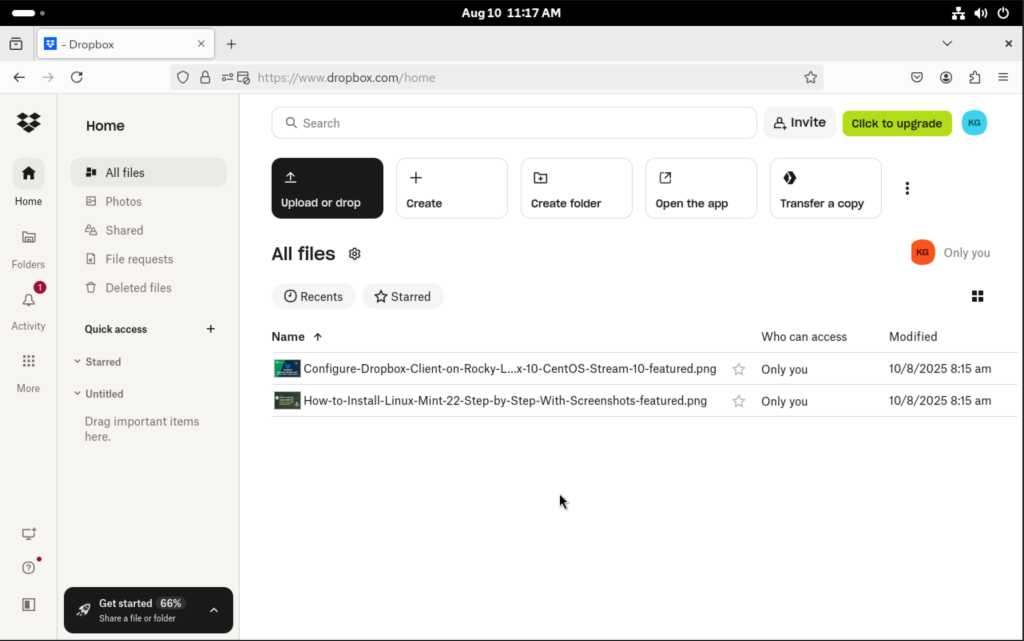
Go back to your Dropbox web page and your files should appear as below.
Congratulations! You have successfully gone through installing Dropbox Client on Rocky Linux 10 | CentOS Stream 10. I hope you found this guide amazing.
See more:


