Load balancing is a common technique used on the Internet to distribute network traffic among multiple servers. As a result, each server has less stress and becomes more effective, resulting in faster performance and lower latency.
Kubernetes clusters require load balancing in order to operate correctly. For applications deployed on Kubernetes, tens of thousands of requests, if not hundreds, are made those applications at the same time, and those requests have to be serviced accurately and efficiently.
A prime example is a grocery store checkout line where there are eight checkout lanes, but only one is active. It takes a while for a consumer to finish paying for their groceries because everyone has to get in line. Imagine now that all eight checkout lines are opened by the store. Customers in this instance have to wait for roughly eight times less time (depending on factors like how much food each client is buying).
In this article, we will configure our OPNsense, as a load balancer for our K8s cluster. This guide assumes that you have a Kubernetes cluster up and running, and you also have OPNsense setup and configured for routing and firewall services on your network.
Step 1. Adding a Virtual IP
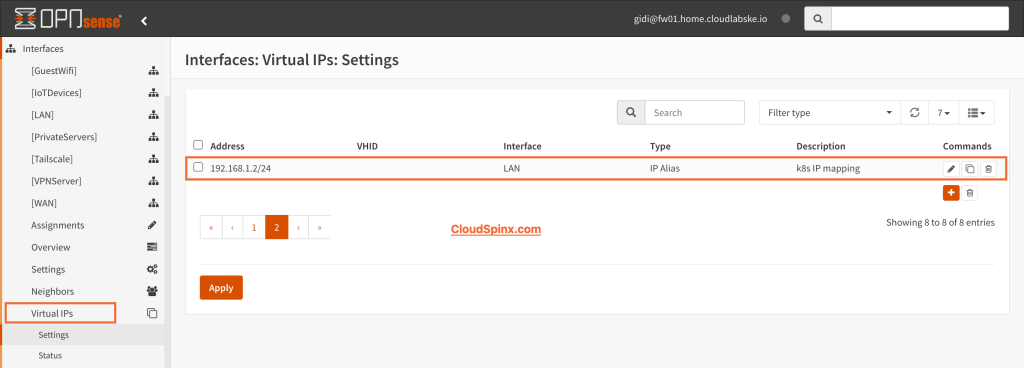
A virtual IP is an IP address that doesn’t actually match a real network interface but points to one or more real network interfaces. We need to add a virtual IP to OPNsense interface, which will be used to map the actual IP addresses of the cluster nodes. Go to Interfaces>Virtual IPs>Settings and click on the plus(+) button to add one.
Step 2. Installing HAProxy Package
Now that we have added our virtual IP, we need to install the actual load balancer that will do all the magic on OPNsense. On the OPNsense web UI, go to System>Firmware>Packages and then search for haproxy package and click on Install.

Step 3. Configuring HAProxy backend
Now that we have HAProxy installed, let’s go ahead and configure. To access HAProxy, go to Services>HAProxy>Settings, the first page you’ll see is the quick start guide.
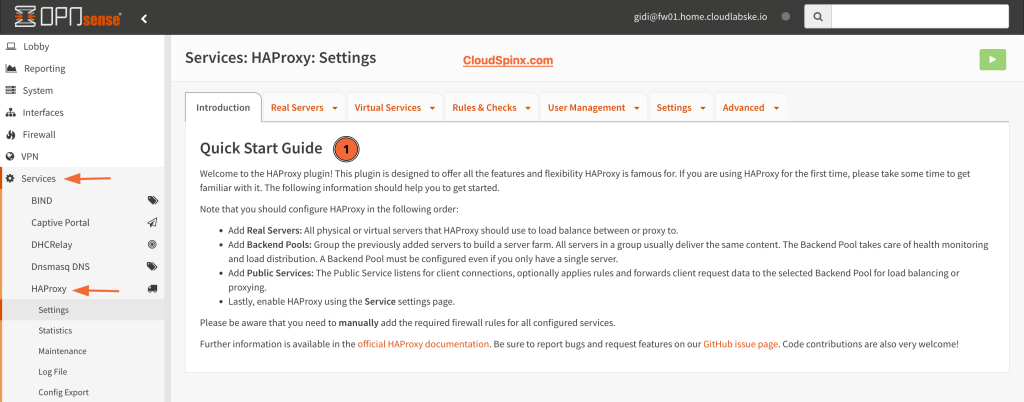
From there, you’ll find the second tab labeled real servers, click on it and click on the plus button on the next page. Here, you need to configure the name/prefix, server type, IP address, port, and mode of the server. When done, click on save to save the changes.
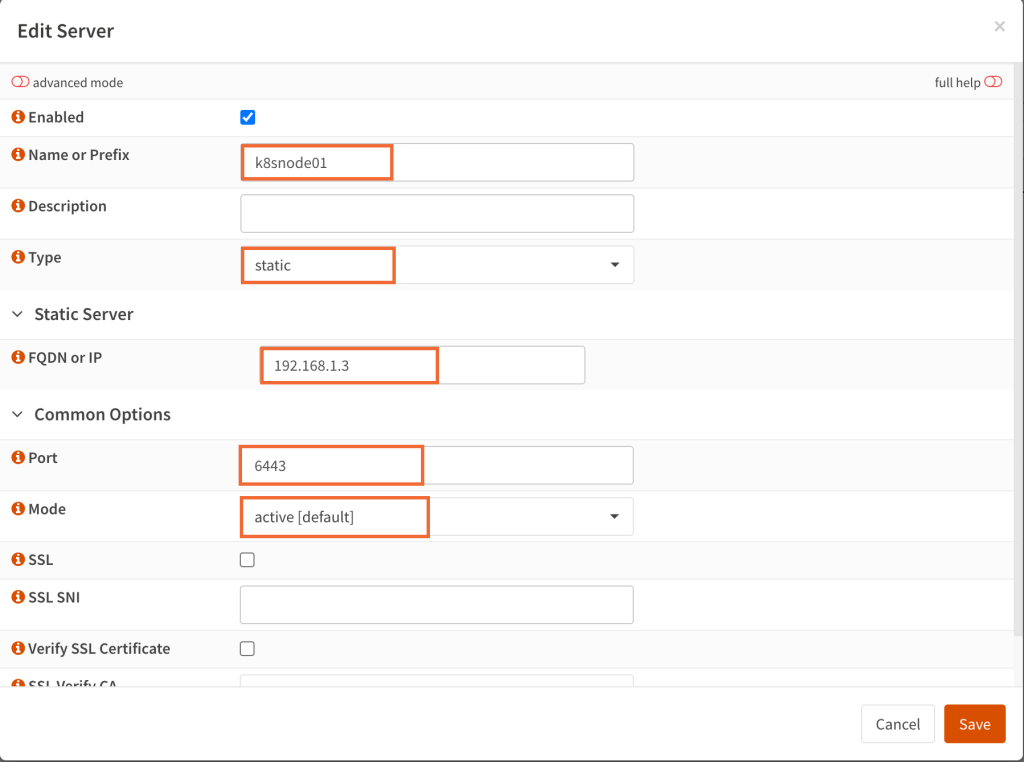
Do this for all the servers on your cluster. After adding all the servers in your cluster, you can proceed to configure the backend server pool. Switch to the next tab Virtual Services and click on Backend Pools.
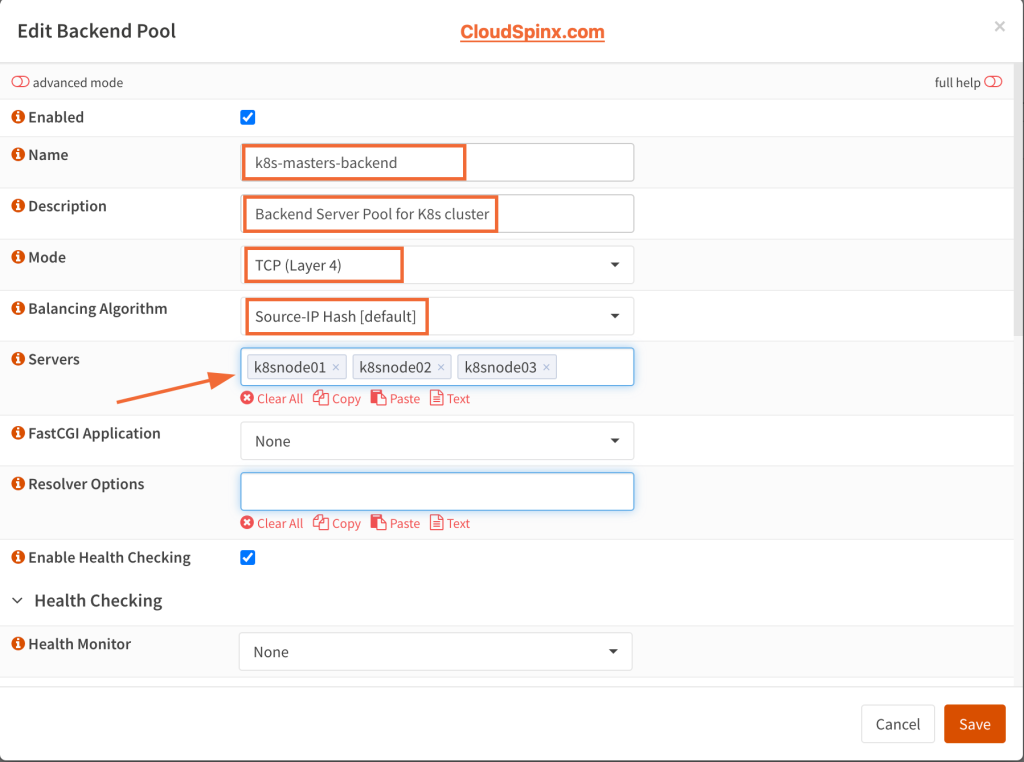
The most important thing here is the protocol of the backend server pool, which you can specify in the mode section of the configuration, and the servers themselves. You can also define the load balancing algorithm to be used in a Backend Pool.
Step 4. Configuring HAProxy Frontend
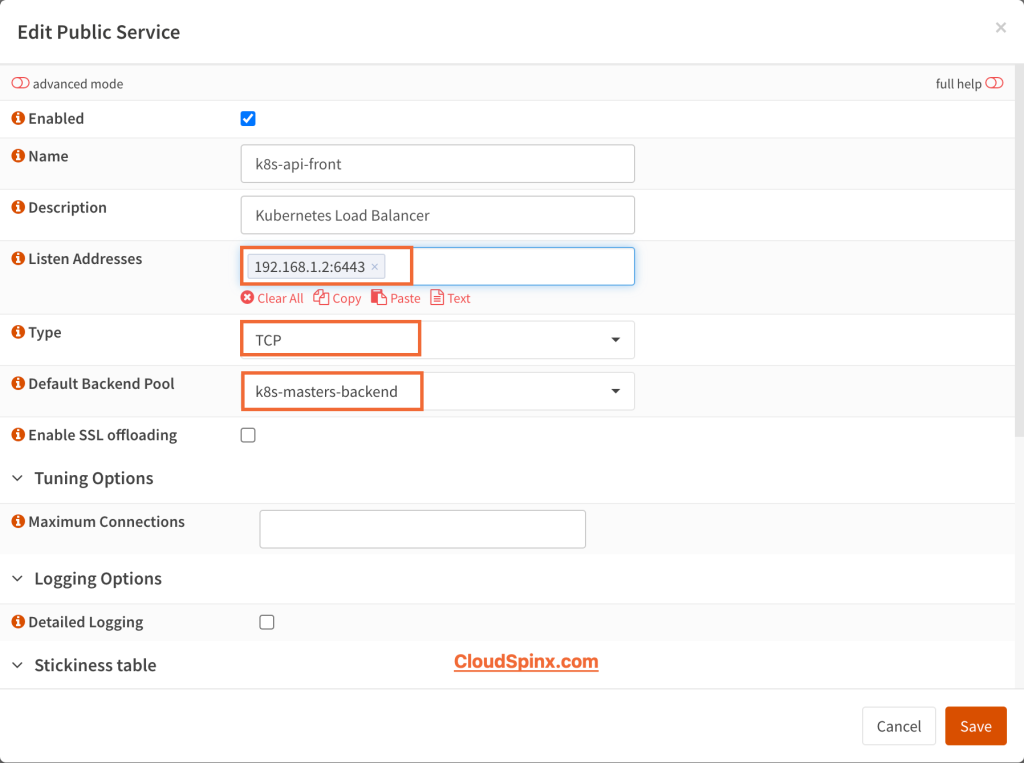
To configure the frontend, click on the virtual services tab and select Public Services from the drop down menu. Here, we’ll configure the listening address, the port, the connection type, and also bind a default backend.
Here, we’ll configure our virtual IP as the listening address that will map the actual addresses of the k8s cluster servers. We’ll select TCP as the running protocol for the public service since we won’t be using SSL offloading.
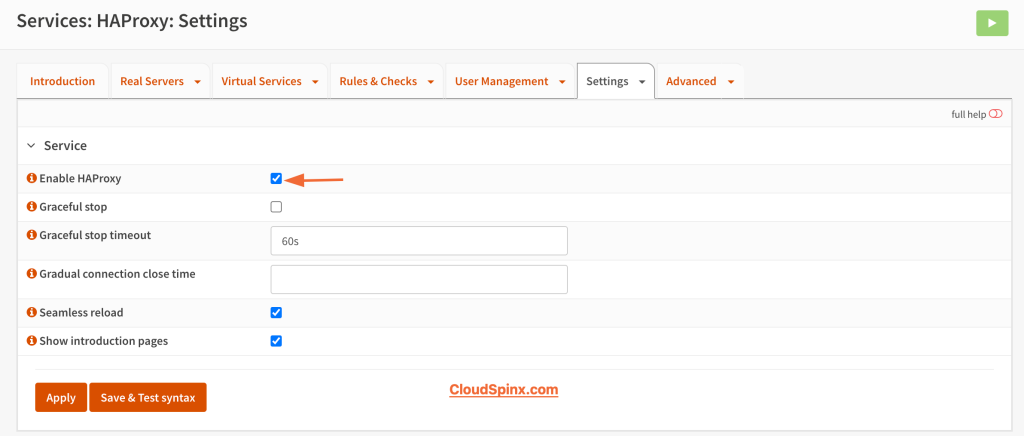
No we’ll save the changes to apply the configuration. The only thing remaining now is to startup HAProxy, and to do that, we will switch to the settings tab, then click on service from the dropdown menu and check the box that says Enable HAProxy.
Step 5. Testing the Load Balancer
Since the ~/.kube/config file is configured to point to the hostname of one of the control plane nodes, we can then go ahead and map the IP address of the OPNsense load balancer to that hostname, instead of directly to one of the control plane nodes.
clusters:
- cluster:
    server: https://192.168.88.2:6443
The we can run:
kubectl get nodesOutput:
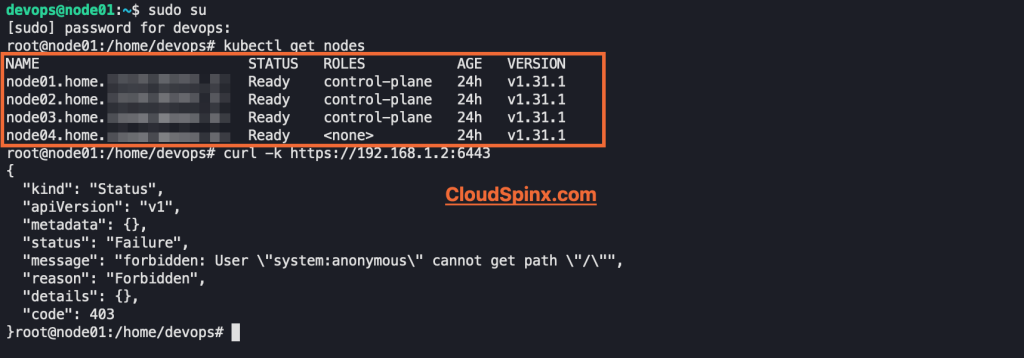
This command should succeed and show the nodes in your cluster, with the requests being balanced across the control plane nodes by HAProxy.
We can also make a request to the Kubernetes API server, either through a browser or using curl. If this is correctly routed through the load balancer, you’ll get a 403 Forbidden response, indicating the request was received but not authenticated:
root@node01:/home/devops# curl -k https://192.168.1.2:6443
{
  "kind": "Status",
  "apiVersion": "v1",
  "metadata": {},
  "status": "Failure",
  "message": "forbidden: User \"system:anonymous\" cannot get path \"/\"",
  "reason": "Forbidden",
  "details": {},
  "code": 403
}root@node01:/home/devops#
Conclusion
In this guide, we have covered how we can configure HAProxy load balancer from scratch on OPNsense, until we have a fully functioning load balancer for our Kubernetes cluster. This is a very simple and easy to configure set up which ensures that traffic is evenly distributed across your Kubernetes cluster. You can contact CloudSpinx for support in any Kubernetes related project.

