Security Enhanced Linux (SELinux) provides an additional layer of system security, mostly adopted in Red Hat based Linux systems. SELinux implements Mandatory Access Control (MAC) to enable system administrators to create comprehensive and fine-grained security policies.
In SELinux, every system resource and process has a special security label called an SELinux context, also referred to as SELinux label. SELinux context is an identifier which abstracts away the system-level details and focuses on the security properties of the entity. An SELinux policy use the contexts defined in a series of rules that defines how a process interacts with other processes and various system resources.
In this article we walk you through how you can configure your WordPress website to work with SELinux in enforcing Mode. We will do a complete setup of wordpress website and how all the configurations are performed.
Step 1: Install PHP & Web Server
We will setup a wordpress website which uses Nginx as web server and PHP-FPM to serve PHP pages.
I’m working on RHEL 9 server and below commands will be used to install PHP and required extensions.
## PHP and Extensions
sudo dnf -y install php php-cli php-fpm php-mysqlnd php-zip php-devel php-gd php-mbstring php-curl php-xml php-pear php-bcmath php-json
Install Nginx or Apache Web server:
## Using Nginx Web Server
sudo dnf -y install nginx

## Using Apache httpd server
sudo dnf -y install httpd
Step 2: Setup MariaDB Database Server
Install MariaDB database server.
sudo dnf install mariadb-serverStart and enable MariaDB service:
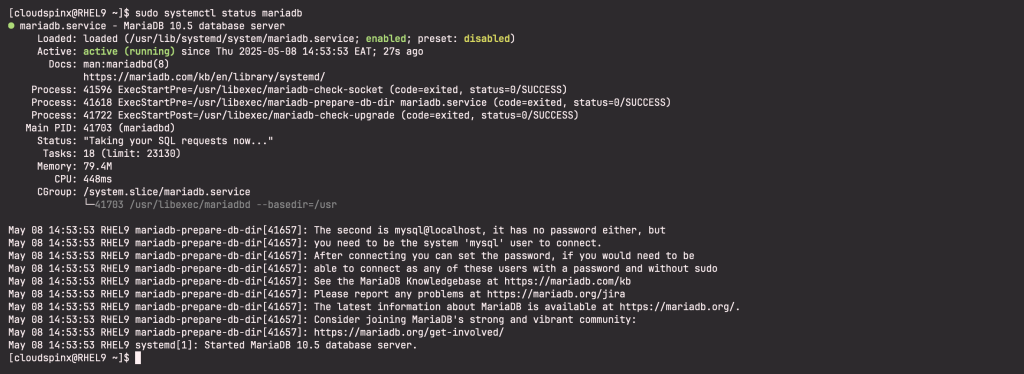
sudo systemctl enable --now mariadbConfirm that MariaDB service is in running state:
Secure your database server installation:
[cloudspinx@RHEL9 ~]$ sudo mariadb-secure-installation

NOTE: RUNNING ALL PARTS OF THIS SCRIPT IS RECOMMENDED FOR ALL MariaDB
      SERVERS IN PRODUCTION USE!  PLEASE READ EACH STEP CAREFULLY!

In order to log into MariaDB to secure it, we'll need the current
password for the root user. If you've just installed MariaDB, and
haven't set the root password yet, you should just press enter here.

Enter current password for root (enter for none):
OK, successfully used password, moving on...

Setting the root password or using the unix_socket ensures that nobody
can log into the MariaDB root user without the proper authorisation.

You already have your root account protected, so you can safely answer 'n'.

Switch to unix_socket authentication [Y/n] n
 ... skipping.

You already have your root account protected, so you can safely answer 'n'.

Change the root password? [Y/n] Y
New password:
Re-enter new password:
Password updated successfully!
Reloading privilege tables..
 ... Success!


By default, a MariaDB installation has an anonymous user, allowing anyone
to log into MariaDB without having to have a user account created for
them.  This is intended only for testing, and to make the installation
go a bit smoother.  You should remove them before moving into a
production environment.

Remove anonymous users? [Y/n] Y
 ... Success!

Normally, root should only be allowed to connect from 'localhost'.  This
ensures that someone cannot guess at the root password from the network.

Disallow root login remotely? [Y/n] Y
 ... Success!

By default, MariaDB comes with a database named 'test' that anyone can
access.  This is also intended only for testing, and should be removed
before moving into a production environment.

Remove test database and access to it? [Y/n] Y
 - Dropping test database...
 ... Success!
 - Removing privileges on test database...
 ... Success!

Reloading the privilege tables will ensure that all changes made so far
will take effect immediately.

Reload privilege tables now? [Y/n] Y
 ... Success!

Cleaning up...

All done!  If you've completed all of the above steps, your MariaDB
installation should now be secure.

Thanks for using MariaDB!
Login to MariaDB shell and create wordpress website database:
$ mariadb -u root -p
CREATE DATABASE wordpressDB;
GRANT ALL ON wordpressDB.* TO wordpressuser@localhost IDENTIFIED BY "StrongDBPassw0rd";
FLUSH PRIVILEGES;
QUIT
Test connection to the database with the user we created.
$ mariadb -u wordpressuser -p'StrongDBPassw0rd'
Welcome to the MariaDB monitor.  Commands end with ; or \g.
Your MariaDB connection id is 12
Server version: 10.5.27-MariaDB MariaDB Server

Copyright (c) 2000, 2018, Oracle, MariaDB Corporation Ab and others.

Type 'help;' or '\h' for help. Type '\c' to clear the current input statement.

MariaDB [(none)]> SHOW DATABASES;
+--------------------+
| Database           |
+--------------------+
| information_schema |
| wordpressDB        |
+--------------------+
2 rows in set (0.001 sec)

MariaDB [(none)]> QUIT
Bye
Step 3: Setup WordPress Website
Download latest wordpress for installation:
sudo dnf -y install wget tar vim bash-completion
sudo wget wordpress.org/latest.tar.gz
Extract downloaded wordpress archive:
tar xvf latest.tar.gzMove WordPress folder created to /var/www directory:
sudo mv wordpress /var/www/mywebsiteCopy configuration template:
sudo cp /var/www/mywebsite/wp-config-sample.php /var/www/mywebsite/wp-config.phpEdit the file and populate database connection values:
$ sudo vim /var/www/mywebsite/wp-config.php

/** The name of the database for WordPress */
define( 'DB_NAME', 'wordpressDB' );

/** MySQL database username */
define( 'DB_USER', 'wordpressuser' );

/** MySQL database password */
define( 'DB_PASSWORD', 'StrongDBPassw0rd' );
Save and close the file.
Step 4: Configure Nginx and PHP-FPM
Edit PHP FPM configuration file and configure like below.
$ sudo vim /etc/php-fpm.d/www.conf
listen = /run/php-fpm/www.sock
user = nginx  # For httpd keep it as apache
group = nginx # For httpd keep it as apache

# Set permissions for unix socket
listen.owner = nginx # For httpd keep it as apache
listen.group = nginx # For httpd keep it as apache
listen.mode = 0660

# Choose how the process manager will control the number of child processes
pm = ondemand
Create Nginx configuration for the website:
sudo vim /etc/nginx/conf.d/mywebsite.confModify and use below configurations:
##################################
# WORDPRESS NGINX CONFIGURATIONS
##################################
server {
    listen 80;
    root /var/www/mywebsite;
    server_name mywebsite.com www.mywebsite.com;  # Set valid & correct domain

    access_log /var/log/nginx/mywebsite_access.log;  # Configure access log file
    error_log  /var/log/nginx/mywebsite_error.log;   # Configure error log file

    location / {
        index index.php index.html;
        try_files $uri $uri/ /index.php?$args;
    }

    #############
    # Specify a charset
    #############
    charset utf-8;

    ############
    # GZIP
    ############
    gzip on;
    gzip_vary on;
    gzip_proxied any;
    gzip_comp_level 6;
    gzip_min_length 1100;
    gzip_buffers 16 8k;
    gzip_http_version 1.1;
    gzip_types image/svg+xml text/plain text/xml text/css text/javascript application/xml application/xhtml+xml application/rss+xml application/javascript application/x-javascript application/x-font-ttf application/vnd.ms-fontobject font/opentype font/ttf font/eot font/otf;

    ############
    # Prevent hidden files (dotfiles) from being served
    ############
    location ~ /\. {
        access_log off;
        log_not_found off;
        deny all;
    }

    ###########
    # Expires headers and disable 404 logging for static files
    ###########
    location ~* ^.+\.(xml|ogg|ogv|svg|svgz|eot|otf|woff|mp4|ttf|css|rss|atom|js|jpg|jpeg|gif|png|ico|zip|tgz|gz|rar|bz2|doc|xls|exe|ppt|tar|mid|midi|wav|bmp|rtf)$ {
        access_log off;
        log_not_found off;
        expires max;
    }

    ############
    # Rewrite uploaded files
    ############
    # rewrite /files/$ /index.php last;
    if ($uri !~ wp-content/plugins) {
        rewrite /files/(.+)$ /wp-includes/ms-files.php?file=$1 last;
    }

    ############
    # PHP handling
    ############
    location ~ \.php$ {
        try_files $uri =404;
        include /etc/nginx/fastcgi_params;
        fastcgi_read_timeout 3600s;
        fastcgi_buffer_size 128k;
        fastcgi_connect_timeout 3s;
        fastcgi_send_timeout 120s;
        fastcgi_temp_file_write_size 256k;
        fastcgi_buffers 256 16k;
        fastcgi_param SCRIPT_FILENAME $document_root$fastcgi_script_name;
        fastcgi_pass unix:/run/php-fpm/www.sock;
        # fastcgi_pass 127.0.0.1:9000;
        fastcgi_index index.php;
    }

    ############
    # Robots.txt
    ############
    location = /robots.txt {
        allow all;
        log_not_found off;
        access_log off;
    }

    ############
    # Restrictions
    ############
    location ~* /(?:uploads|files)/.*\.php$ {
        deny all;
    }
}
Validate nginx configurations:
$ sudo nginx -t
nginx: the configuration file /etc/nginx/nginx.conf syntax is ok
nginx: configuration file /etc/nginx/nginx.conf test is successful
Step 5: Configure SELinux and Start Services
Confirm SELinux is set in enforcing mode.
$ sestatus
SELinux status:                 enabled
SELinuxfs mount:                /sys/fs/selinux
SELinux root directory:         /etc/selinux
Loaded policy name:             targeted
Current mode:                   enforcing
Mode from config file:          enforcing
Policy MLS status:              enabled
Policy deny_unknown status:     allowed
Memory protection checking:     actual (secure)
Max kernel policy version:      33
If not in Enforcing mode enable it by running the commands below:
sudo setenforce 1
sudo sed -i 's/^SELINUX=.*/SELINUX=enforcing/g' /etc/selinux/config
Allow web server network connection:
sudo setsebool -P httpd_can_network_connect 1Set SELinux contexts on the wordpress data directory:
sudo semanage fcontext -a -t httpd_sys_rw_content_t "/var/www/mywebsite(/.*)?"
sudo restorecon -Rv /var/www/mywebsite
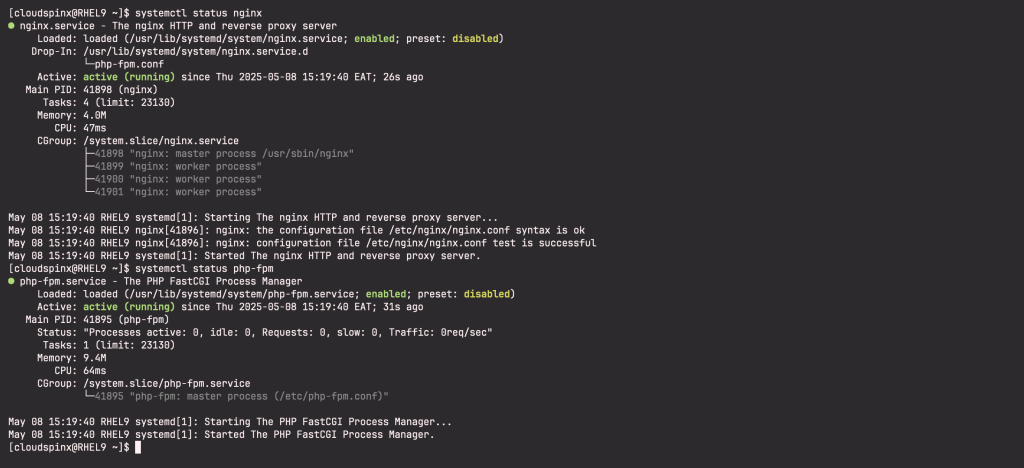
Start nginx and php-fpm services:
sudo systemctl restart nginx php-fpm
sudo systemctl enable nginx php-fpm
Confirm state of the services:
Step 6: Configure Firewall:
Configure the firewall to allow http and https requests to the server:
sudo firewall-cmd --zone=public --permanent --add-port 80/tcp
sudo firewall-cmd --zone=public --permanent --add-port 443/tcp
sudo firewall-cmd --reload
Step 7: Finalize WordPress website configuration
With DNS configured correctly for the domain used in our wordpress website we can visit the domain and complete initial wordpress site configurations.
http://mywebsite.comCreate admin user with a password for authenticating.
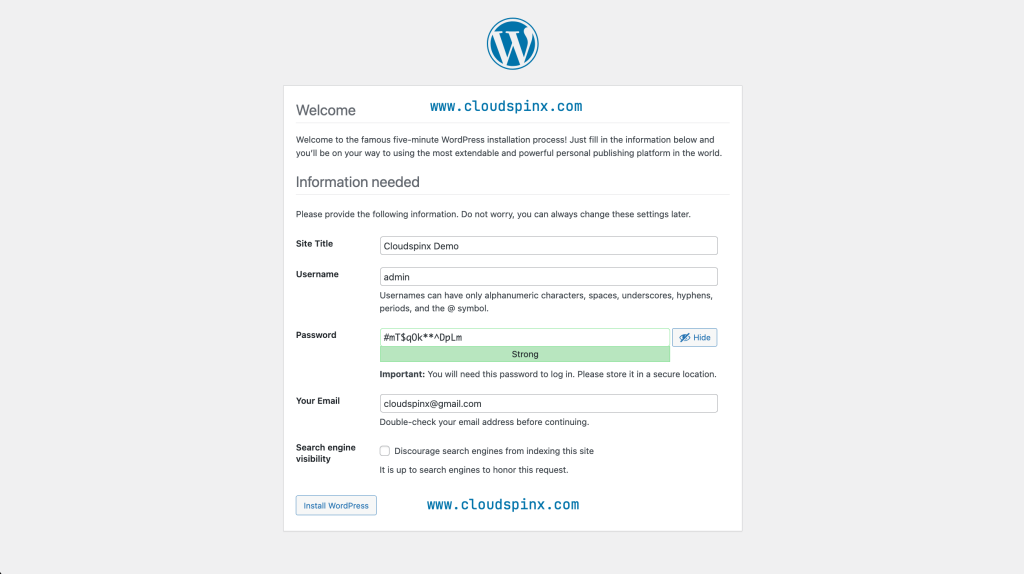
The Installation is successfull if you see the page below:
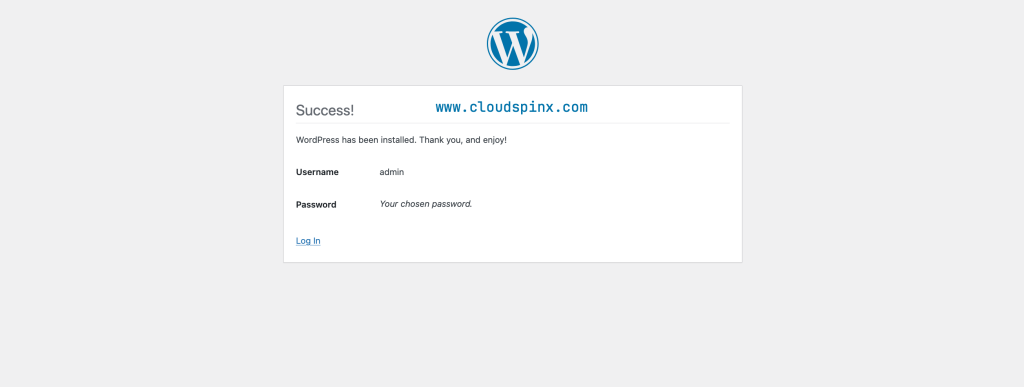
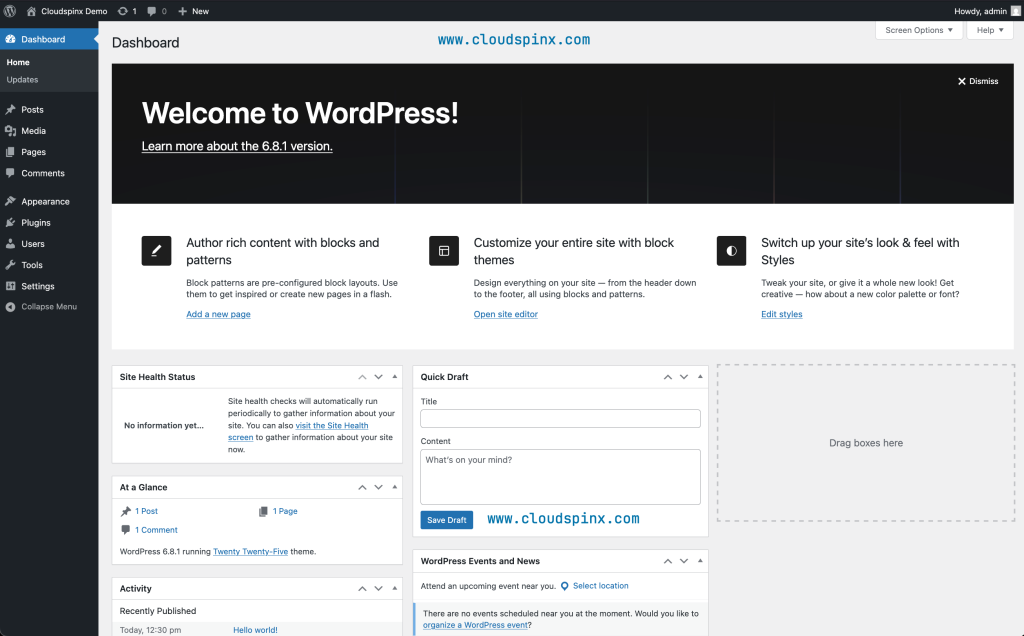
Login to your WordPress Dashboard:

Your WordPress website is setup and working.
More guides:

