If KVM hypervisor host is not your local system, you can initiate a connection to a remote KVM hypervisor using its IP address or hostname together with the authentication credentials .
By connecting to remote KVM hypervisors you are able to to manage the virtual machines hosted on a remote server. Here we provide a detailed guide on how to set up and initiate a connection to remote KVM hypervisors using tools like virt-manager, virsh, and SSH.
Mastering KVM Virtualization - The Ultimate eBook
From home labs to production clouds - master KVM Host management, automating KVM administration using Terraform, Vagrant, and cloud automation. This eBook will enable you to build scalable virtual infrastructure that works whether you're learning at home or deploying enterprise solutions. Get your full copy today
The above guide is part of the comprehensive Mastering KVM Virtualization – The Ultimate eBook. Get your full copy today. Download here.
Step 1: Install required packages
We need to prepare both remote hypervisor and local system from where we are initiating the connection.
1 – Prepare Remote KVM Hypervisor
In your remote server which will be KVM hypervisor, ensure all installations and configurations are done right.
Refer to the “Installation of KVM on LInux” for complete setup process of KVM in your Linux distribution – we coverd RHEL based systems like CentOS/AlmaLinux/Rocky, Debian based systems, Ubuntu, SUSE, RHEL, and Arch-based systems as well.
2 – Prepare your Local Machine System
Ensure virt-manager and related tools are installed on your local machine:
# RHEL based Systems
sudo yum install vim virt-manager libvirt-client

### Debian based systems ###
sudo apt update
sudo apt install vim virt-manager libvirt-clients

### Arch based systems ###
sudo pacman -Syy vim virt-manager libvirt

# SLES / openSUSE
sudo zypper install vim virt-manager libvirt-client
Step 2: Configure SSH Access
You must be able to SSH into the remote KVM machine without entering a password. For this to succeed we have to setup SSH key-based authentication.
- Allow root login on remote KVM host (we shall disable password authentication after SSH public key are copied)
$ sudo vim /etc/ssh/sshd_config
PermitRootLogin yes
PasswordAuthentication yes
You need to restart SSH server after making the changes.
sudo systemctl restart sshd || sudo systemctl restart ssh- On your local system, generate SSH keys if you don’t have already.
ssh-keygen -t rsa -b 2048 -f ~/.ssh/id_rsa- Copy your SSH Public Key to the Remote KVM Machine (from local system).
# Define remote KVM host IP address (replace accordingly)
remote_kvm_host_ip=192.168.1.3

# Define remote login username
username=root

# Copy ssh public key to remote server
ssh-copy-id ${username}@${remote_kvm_host_ip}- Test SSH connection without password (from local system)
ssh ${username}@${remote_kvm_host_ip}You should get the root shell without being prompted to to enter user password.
- Disable SSH Password Authentication on Remote KVM (optional)
Only if 4 was successful, you can disable SSH password authentication.
$ sudo vim /etc/ssh/sshd_config
PasswordAuthentication no
Also allow only SSH keys authentication mechanism (this is to better secure KVM hypervisor)
# Add to end of file
# Only accept ssh keys
AuthenticationMethods publickey
Restart SSH server service using systemctl command:
sudo systemctl restart sshd || sudo systemctl restart sshStep 3: Enable Remote Access to libvirtd
On the remote KVM hypervisor, you will need to configure libvirtd to accept remote connections.
Open the file for editing.
sudo vim /etc/libvirt/libvirtd.confIn the file, uncomment and set the following lines:
listen_tls = 0
listen_tcp = 1
tcp_port = "16509"
listen_addr = "0.0.0.0"
auth_tcp = "sasl"
Restart the libvirtd Service:
sudo systemctl restart libvirtdStep 4: Allow TCP port in Firewall (Optional)
If you have an active firewall in your remote KVM hypervisor, allows traffic on port 16509 (the default libvirt port) .
- Limit access from known IP address or known network (Recommended)
### Using Firewalld Rich rules ###
# Single IP address - Example to allow access from 192.168.1.10 IP
sudo firewall-cmd --permanent --zone=public --add-rich-rule \
'rule family="ipv4" source address="192.168.1.10/32" port protocol="tcp" port="16509" accept'

sudo firewall-cmd --reload
sudo firewall-cmd --list-all

# Network - example to allow access from 192.168.1.0/24
sudo firewall-cmd --permanent --zone=public --add-rich-rule \
'rule family="ipv4" source address="192.168.1.0/24" port protocol="tcp" port="16509" accept'

sudo firewall-cmd --reload
sudo firewall-cmd --list-all

### Using UFW ###
# Single IP address - Example to allow access from 192.168.1.10 IP

sudo ufw allow from 192.168.1.10/32 to any port 16509
sudo ufw reload && sudo ufw status

# Network - example to allow access from 192.168.1.0/24

sudo ufw allow from 192.168.1.0/24 to any port 16509
sudo ufw reload && sudo ufw status- Allow from anywhere (not recommended for public facing servers)
### Using Firewalld ###
sudo firewall-cmd --add-port=16509/tcp --permanent
sudo firewall-cmd --reload

### Using UFW ###
sudo ufw allow 16509/tcp
Learning KVM? This excerpt is part of Mastering KVM Virtualization. Read the rest and master virtualization today. Get the eBook.
Step 5: Connect to remove KVM host
We can connect either through virsh or virt-manager
1) Connect using virsh
We can use the virsh CLI tool to manage our remote KVM hypervisor:
# Define remote KVM host IP address (replace accordingly)
remote_kvm_host_ip=192.168.1.3

# Define remote login username
username=root

# Connect to remote KVM using defined IP address and username
virsh -c qemu+ssh://${username}@${remote_kvm_host_ip}/system
If successful, you should get output similar to one below.
Welcome to virsh, the virtualization interactive terminal.
Type: 'help' for help with commands
'quit' to quit
virsh #
Test by displaying node information using nodeinfo command.
virsh # nodeinfo
CPU model: x86_64
CPU(s): 4
CPU frequency: 2500 MHz
CPU socket(s): 1
Core(s) per socket: 4
Thread(s) per core: 1
NUMA cell(s): 1
Memory size: 32539536 KiB
You can use standard virsh commands but without starting with virsh. For example to list all Virtual Machines you will run list --all instead of virsh list --all.
2) Connect using Virt Manager
Launch Virt Manager then;
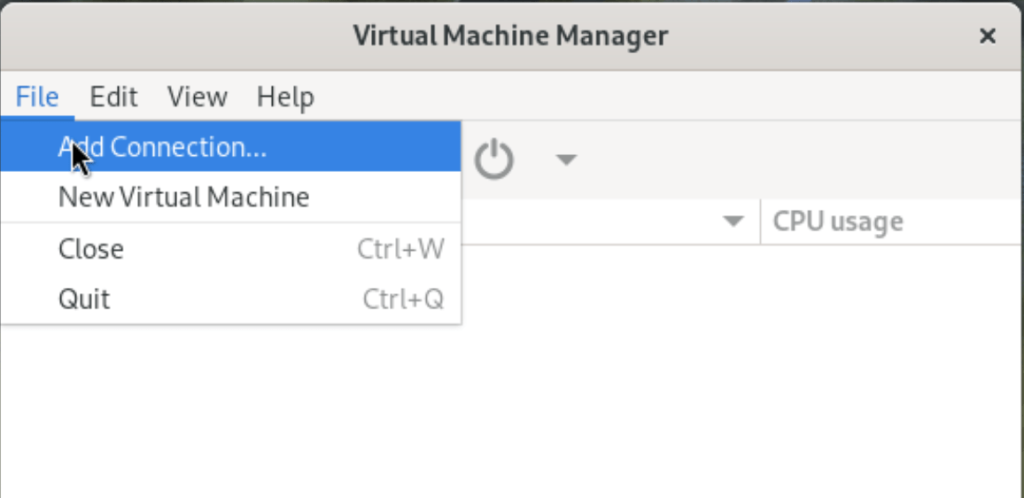
- Go to
File>Add Connection.

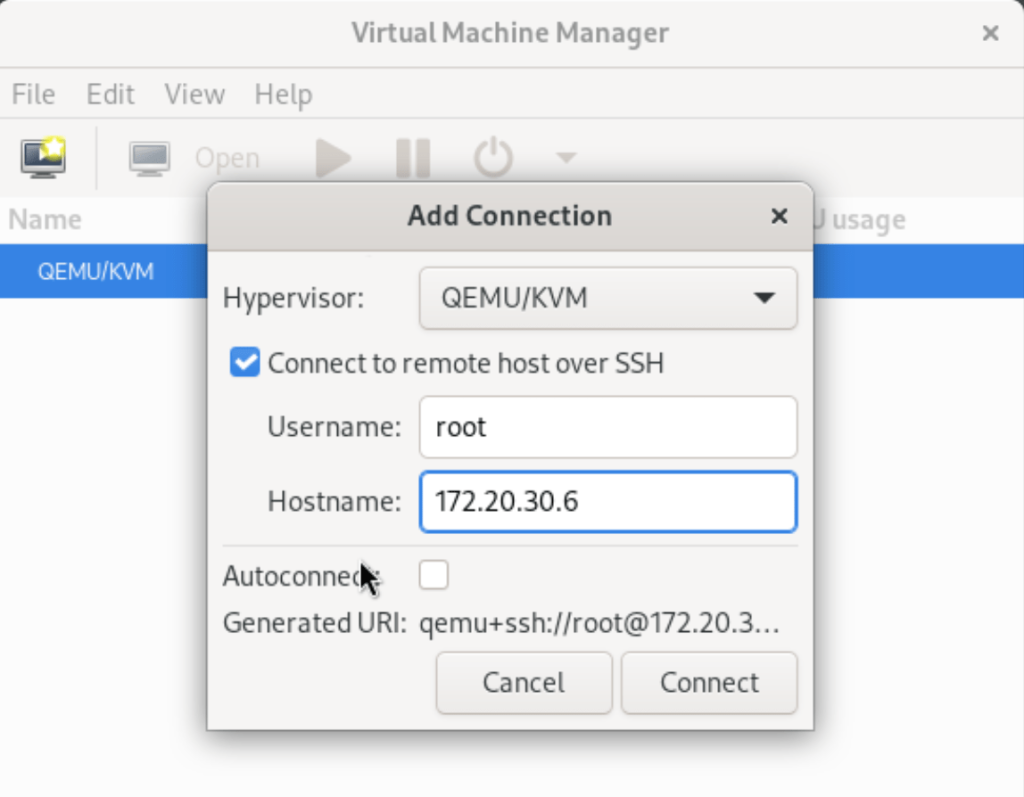
- Select
QEMU/KVMas the Hypervisor, tick “Connect to remote host over SSH“, Input login username. And optionally enable automatic connection by ticking “Autoconnect”.

- Click
Connectwhen done.

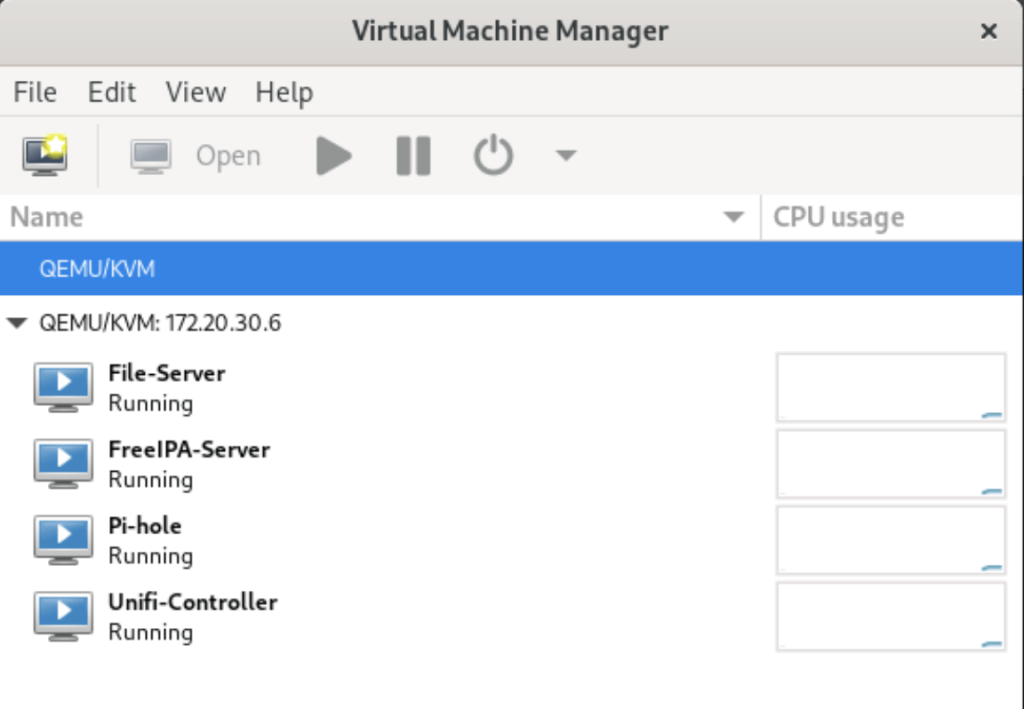
You should be connected now to a remote KVM hypervisor and can see all running instances on the first screen.


