
Proxmox VE has support for multiple authentication methods – Linux PAM, integrated Proxmox VE authentication server, LDAP, Microsoft Active Directory and OpenID Connect. By creating and mapping users from either authentication source, you can define granular access control using role-based user and permission management for all objects (VMs, Storage, nodes, etc.).
In this article we shall demonstrate how one can create users, create groups and add users to it, and defining access control roles for different objects in Proxmox Virtualization Environment. Proxmox is such a powerful self-hosted Type-2 hypervisor that can run operating systems including Linux and Windows on x64 hardware. It is an alternative to other Virtualization Management solutions such as XenServer, XCP-ng, RHEV, oVirt and VMWare ESXI.
Before you can proceed with this setup ensure below requirements are met:
- Running / Working Proxmox VE Server instance
- Access to Proxmox administration web console
- User account with Administrator role in the environment
In this article we won’t cover integration to other third party authentication sources such as LDAP, Microsoft Active Directory and OpenID Connect. We shall consider doing a separate article for this. Here we’ll focus on creation of users and groups through Linux PAM and integrated Proxmox VE authentication server for simplicity.
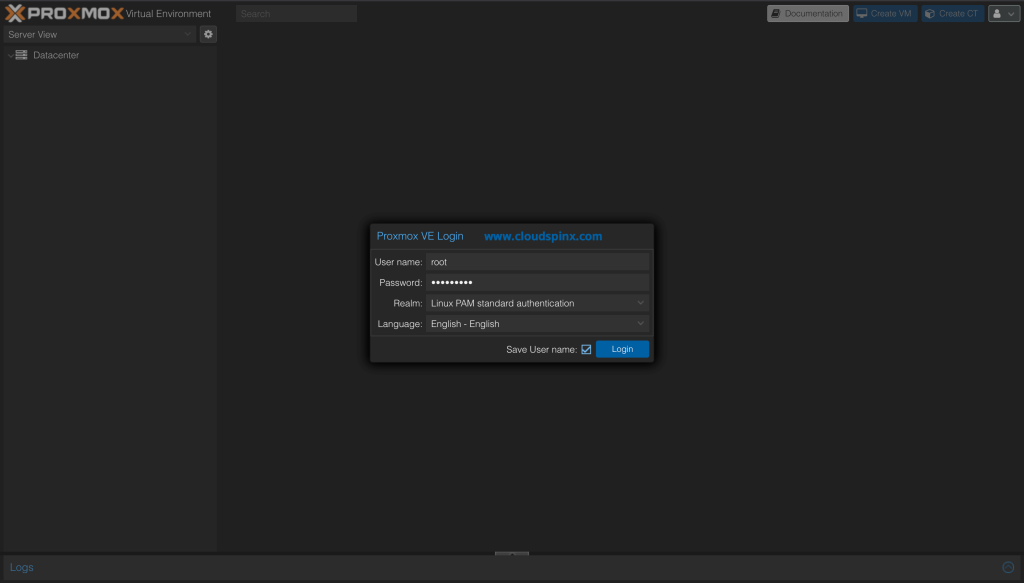
Login to your Proxmox VE dashboard using root or user with Administrator privileges.
1 – Create User Group in Proxmox VE
A user in Proxmox VE can be a member of one or several groups. Adopting Groups as way to organize access permissions is highly preferred. When permissions are granted to groups instead of individual users, you get an easy to maintain access control list.
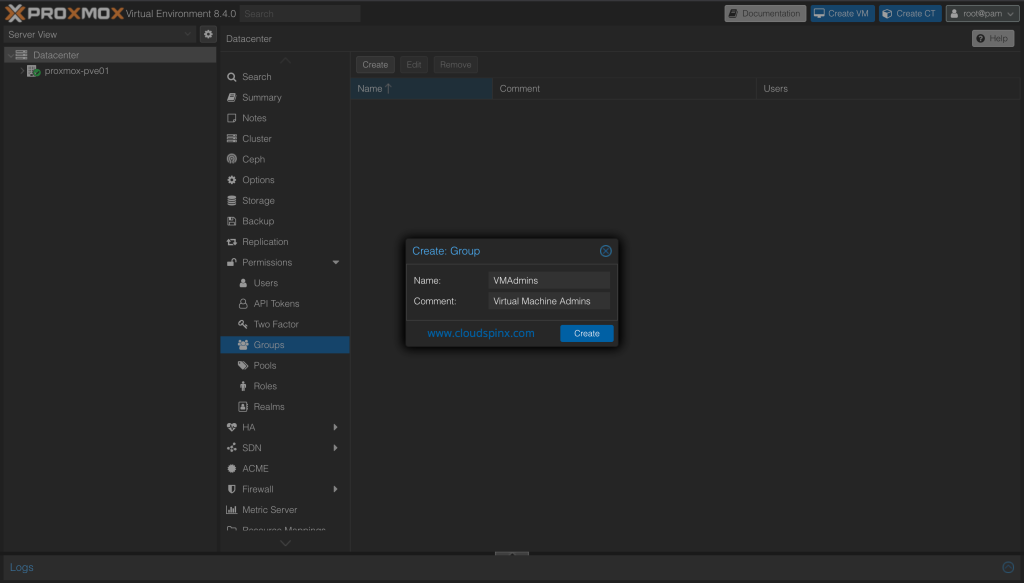
To create a group click on Datacenter > Groups > Create
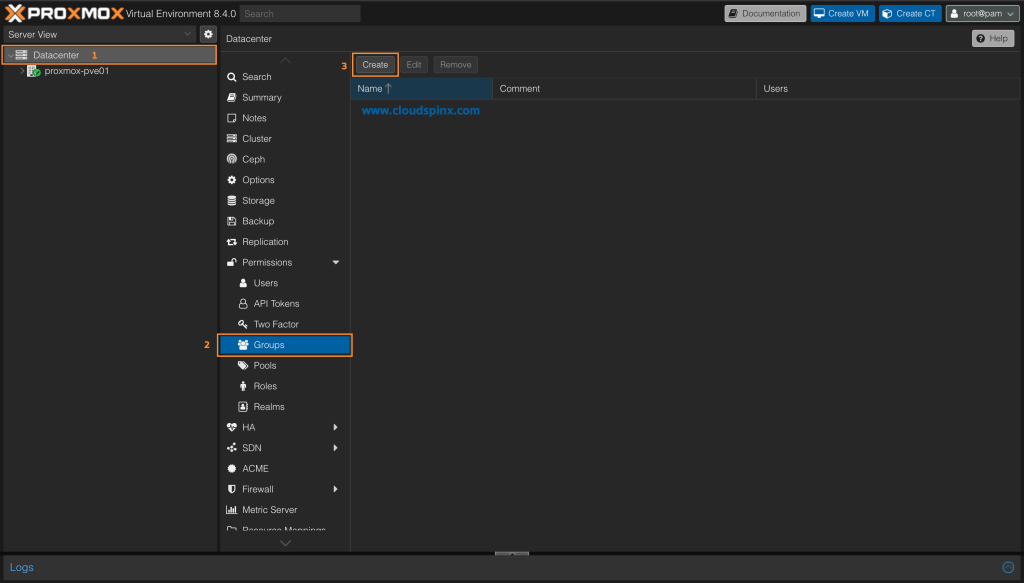
Input group name and optionally description.
CLI Method:
pveum group add VMAdminsYou can confirm group has been created in the file /etc/pve/user.cfg.
$ cat /etc/pve/user.cfg
user:root@pam:1:0::::::

group:VMAdmins::Virtual Machines Admins:
2 – Create users in Proxmox Virtual Environment
We’re going to create two users in either Linux PAM or integrated Proxmox VE authentication server. if you don’t need the users on Debian host system, then go with integrated Proxmox VE authentication server.
In Proxmox Virtual Environment user attributes are stored in /etc/pve/user.cfg but password information is associated with the authentication realms;
- Linux PAM Standard Authentication: Users are created on the host system with commands such as
adduser. Users are then added to Proxmox VE for login via their system username and password. - Proxmox VE Authentication Server: Unix-like password store which stores hashed passwords in
/etc/pve/priv/shadow.cfg. This is recommended if users do not need access to anything outside of Proxmox VE. Users created in this method are fully managed by Proxmox VE and they can change their own passwords via the GUI. - LDAP / Microsoft Active Directory (AD): Provides authentication using directory services. These authentication realms are common in Enterprise / Corporate environments.
- OpenID Connect: This is implemented as identity layer on top of the OATH 2.0 protocol. Clients are able to verify user identity based on authentication performed by an external authorization server.
Create user using Proxmox VE Authentication Server
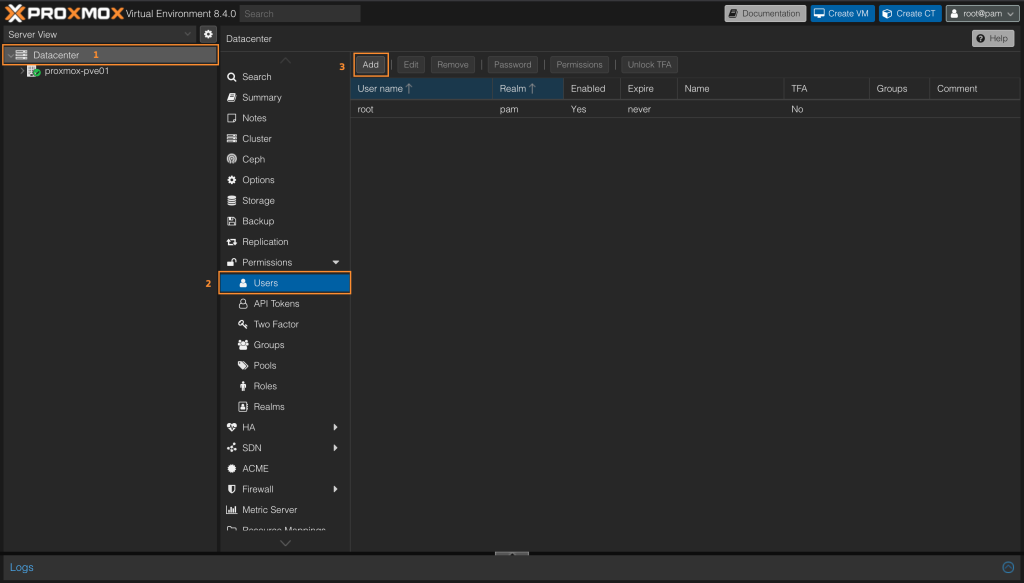
On Proxmox VE GUI go to Datacenter > Users > Add.
Select realm – in this example we’re using Proxmox VE Authentication Server. If using OS system users then choose Linux PAM. See example below for user we created:
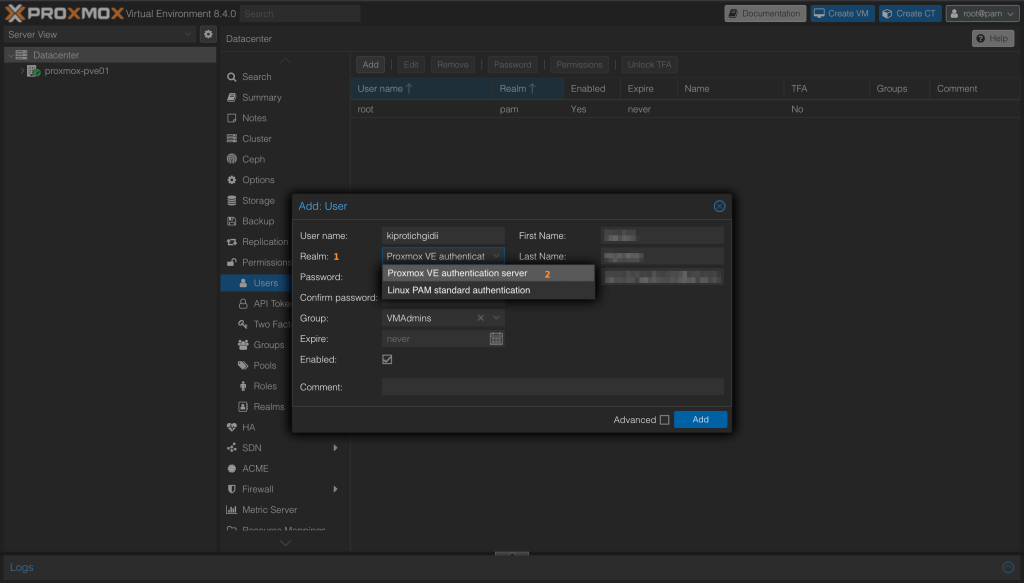
Then input all other user information details required.
- First name
- Last name
- E-mail address
- Group memberships
- An optional expiration date
- A comment or note about this user
- Whether this user is enabled or disabled
- Optional two-factor authentication keys
Make sure you select group that this user will be added. In our example we’re using group created in first step – VMAdmins
CLI method:
pveum help user addCreate user using Linux PAM Standard Authentication
Create a user on Linux system shell (Proxmox host):
$ sudo adduser <username>Example;
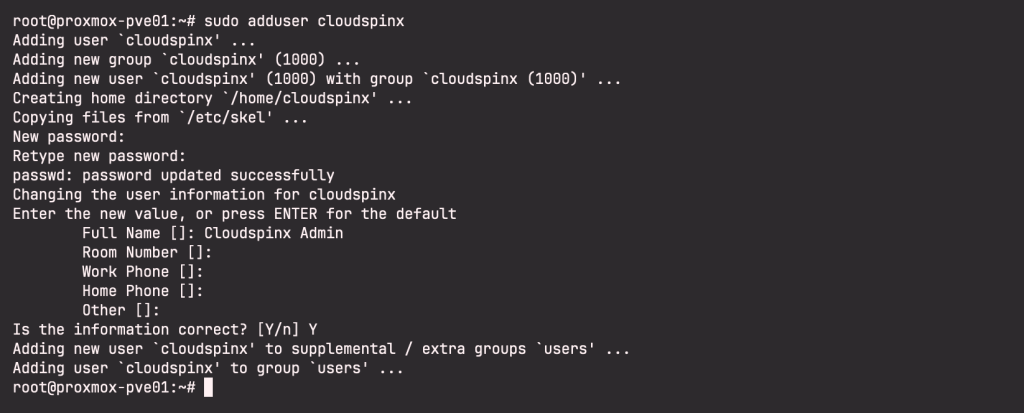
Once user is created on the host system. Import it on Proxmox VE.
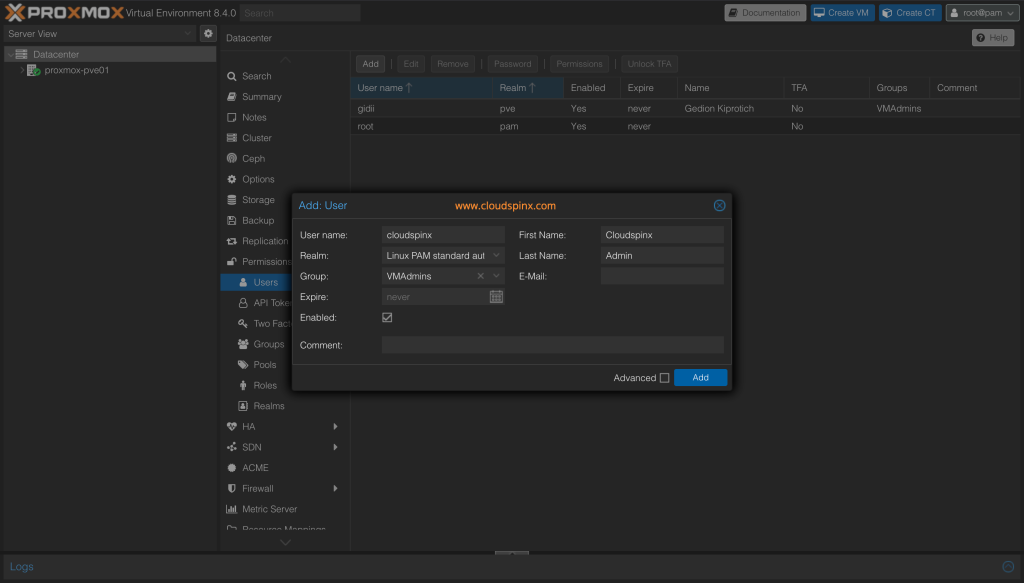
Notice no password is required unlike in Proxmox VE Authentication Server method.
3 – Add role to group in Proxmox VE
For users that we’ve created to perform any action action on Proxmox VE, we need to assign appropriate permissions. Proxmox VE uses a role and path based permission management system. Permissions can be granted to:
- Users
- Groups
- Tokens
Access rules can then be presented as a triple of;
- path, user, role
- path, group, role
- path, token, role
A role contains a set of allowed actions, and the path representing the target of these actions.
Default Roles in Proxmox VE
- Administrator: has full privileges
- PVEAdmin: can do most tasks, but has no rights to modify system settings (Sys.PowerMgmt, Sys.Modify, Realm.Allocate)
- PVEVMAdmin: fully administer VMs
- PVEVMUser: view, backup, configure CD-ROM, VM console, VM power management
- PVEUserAdmin: manage users
- PVEDatastoreAdmin: create and allocate backup space and templates
- PVEDatastoreUser: allocate backup space and view storage
- PVESysAdmin: User ACLs, audit, system console and system logs
- PVEPoolAdmin: allocate pools
- PVETemplateUser: view and clone templates
- NoAccess: has no privileges (used to forbid access)
- PVEAuditor: has read only access
Other customized roles can be added via the GUI or the command line. Navigate to Datacenter > Permissions > Add > Group Permission.
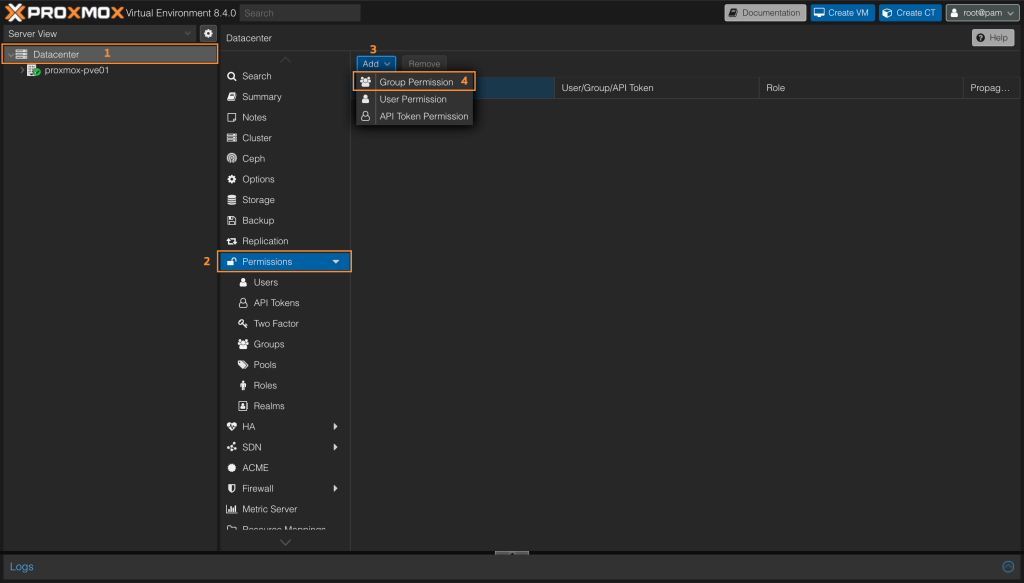
In below example we’re assigning PVEVMAdmin role to group we created and added users to it (VMAdmins group).
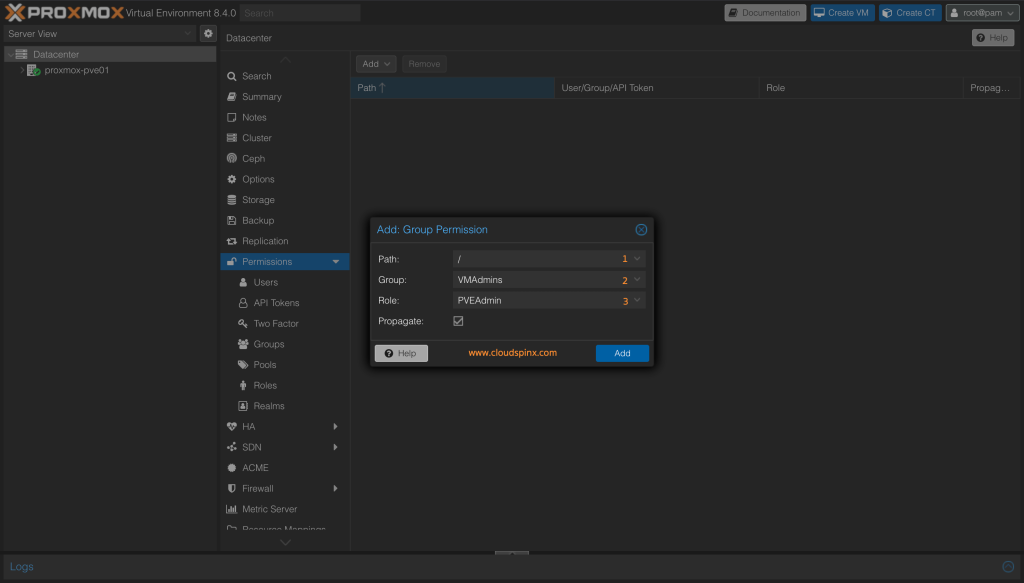
Select Path, Group and Role to assign permission. When done click on Add button to complete permissions assignment.
CLI method:
pveum acl modify / -group <groupname> -role <rolename>Confirm current user, group and permissions configurations:
$ cat /etc/pve/user.cfg
user:cloudspinx@pam:1:0:Cloudspinx:Admin::::
user:gidii@pve:1:0:Gedion:Kiprotich:[email protected]:::
user:root@pam:1:0:::[email protected]:::

group:VMAdmins:cloudspinx@pam,gidii@pve:Virtual Machine Admins:

acl:1:/:@VMAdmins:PVEAdmin:
4 – Login with user created
Logout as current Admin user and test your authentication with created user.

Validate permissions granted to the group applies to your user.

Conclusion
It is important to understand that access permissions are assigned to objects, such as virtual machines, storages or resource pools. File system like paths are used to address these objects. The paths form a natural tree, and permissions of higher levels (shorter paths) can optionally be propagated down within this hierarchy.
More guides on Virtualization:


