
Debian has been a favourite of end-users due to its bullet-proof stability, vast software repository, and open-source philosophy. With the releases of Debian 13, codenamed Trixie, the project once again reaches a lean, hardy, and general OS suitable for server, desks, and the in-between. As a seasoned Debian user who wishes to have a look around or someone who is out on another Linux OS, Trixie offers the best-of-both-worlds work of years and effort of the community.
We’ll take you step by step through the installation process of Debian 13 from scratch, omitting nothing so that newcomers to Linux can participate, as well as old-timers. We’ll show you the whole process, from downloading the ISO image right through to creating partitions, installing the system, and preparing everything for first boot. You’ll have a fully functional copy of Debian 13 installed exactly as you want—and a heightened respect for why Debian is still one of the most stable names under Linux.
New Features
Before you can proceed with the installation, here’s what’s new in the latest Debian release; Debian 13 (Trixie):
- Upgraded Installer: The Debian installer is highly enhanced in Trixie, beginning with the addition of HTTP Boot support for supported U-Boot and UEFI firmware. Installation media now can be directly booted off web servers without the need for physical optical media or USBs. Also, the installer acquires Btrfs rescue functionality on top of previously Calamares-installed system configurations. This fills in the void in which the installer was unable to restore Btrfs configurations appropriately.
- RISC-V 64 Support: Debian officially supports the riscv64 architecture, an important milestone for Debian and the RISC-V community alike with complete support for 64-bit RISC-V hardware. RISC-V has found widespread application in embedded systems, data centers, and IoT. The open-source nature of RISC-V provides alternatives for commercial and research purposes. Support of Debian provides RISC-V hardware access to the Debian repository and toolchain and allows production and gives developers a familiar Linux development environment.
- Linux Kernel 6.12: Debian 13 utilizes Linux kernel 6.12, which is an upgrade from the 6.1 used in Debian 12. This is an LTS kernel, introducing Intel updates, PREEMPT_RT support, and improved support for laptops.
- Security against ROP and COP/JOP attacks: Debian 13 adds security features to the amd64 and arm64 targets to assist in preventing Return-Oriented Programming (ROP) attacks and Call/Jump-Oriented Programming (COP/JOP) attacks. On amd64 it includes Intel Control-flow Enforcement Technology (CET) support to fall back upon for ROP attacks and COP/JOP protection as well, on arm64 by Pointer Authentication (PAC) for ROP attacks and Branch Target Identification (BTI) for COP/JOP attacks. These are enabled automatically if your hardware provides support for them.
- Better Manual Pages: The manpages-l10n project has contributed many improved and new translations for manual pages. Especially Romanian and Polish translations are greatly enhanced since bookworm.
- 64-bit time_t transition: All architectures other than i386 now use a 64-bit time_t ABI, which offers support for upto 12 years. On 32-bit platforms, i.e., armel and armhf, the ABI of many libraries went through a change without changing the library’s “soname.” Therefore, on these platforms, third-party packages and software will need recompilation or rebuilding, along with a check for any possible silent data loss.
- KDE Plasma 6.3: Debian 13 will be the first-ever version of the Debian operating system incorporating Plasma 6 as a complete part of its product lineup. The new version promises to be a significant improvement upon the previous version, Plasma 5, seen in the last release, namely Debian 12. Plasma 6 has been built atop an entirely new technological base itself, built with the most updated versions of the Qt 6 and KDE Framework 6 library, which are key building components of this new and exciting iteration.
Prerequisites for Installing Debian 13 (Trixie)
Before installing Debian 13, ensure you have the following:
- System requirements:
- 2 GB RAM (minimum), 4 GB or more recommended
- 20 GB disk space (minimum), 50+ GB recommended for a desktop
- x86_64 (64-bit) processor
- Internet connection for updates and optional network installation
- What you’ll need:
- Debian 13 ISO image (download from the Debian website)
- USB drive with at least 4 GB capacity
- Tool to create a bootable USB (e.g., Rufus, Etcher, Ventoy)
- A backup of important files (if installing on an existing machine)
Installing Debian 13 (Trixie): Step-by-Step
Let’s get started with the installation steps:
Step 1: Download the Debian 13 ISO Image
To get Trixie’s ISO image, head over to the Debian Official download page and download the image you wish to use. Alternatively, if you prefer to pull the image directly using your terminal, run one of the commands below:
## FULL DVD/CD/USB MEDIA
wget https://cdimage.debian.org/debian-cd/current/amd64/iso-dvd/debian-13.0.0-amd64-DVD-1.iso

## Minimal NETINSTALLER
wget https://cdimage.debian.org/debian-cd/current/amd64/iso-cd/debian-13.0.0-amd64-netinst.iso
Step 2: Create a Bootable USB Drive | Create a VM
In this step, we cover how we can create either a bootable installation media or create a virtual machine which will be used to install Debian 13 (Trixie).
Creating a Bootable USB Drive
This step is only necessary if you are installing Debian 13 (Trixie) on a physical device rather than a virtualized environment. Today, tools such as Rufus and Balena Etcher make the process very easy and simple.
To create a bootable USB, you can use the following tools:
- Windows users: Rufus
- Linux & macOS users: Balena Etcher
dd– Linux CLI tool
All of the mentioned tools are excellent choices and are pretty much straightforward when it comes to using them. That being said, let’s briefly have a look at how we can create a bootable USB using the dd CLI tool.
First, connect the USB device and ensure that it is unmounted. Use lsblk to identify your USB drive.
lsblk
#OR
sudo fdisk -l
Then, unmount the drive, and format it:
# unmount
umount /dev/sdb*
# format the drive
sudo mkfs.ext4 /dev/sdb1
Now you are ready to copy the ISO file to the usb drive using the dd command. Navigate to the directory where you have downloaded the ISO. Then use the command below to create your bootable drive:
sudo dd if=debian-13.0.0-amd64-DVD-1.iso of=/dev/sdb status="progress"Replace ‘debian-13.0.0-amd64-DVD-1.iso‘ with the actual name of the ISO image. The process will take a significant amount of time to complete. Typically, it takes 15–20 minutes per gigabyte using a USB 2.0.
Create a Virtual Machine
If you are installing Debian 13 (Trixie) in a virtualized environment such as Proxmox VE, VirtualBox, VMware, or KVM, you need to set up a VM. Setting up a VM in any of these environments is pretty much straightforward.
KVM
For instance, to setup a VM on KVM, you’d execute such a command on the KVM host:
sudo virt-install \
  --name Debian-13 \
  --ram 4096 \
  --vcpus 3 \
  --disk path=/var/lib/libvirt/virtual-machines/Debian-13.qcow2,size=40 \
  --os-variant debian13 \
  --cdrom /var/lib/libvirt/virtual-machines/debian-13.0.0-amd64-DVD-1.iso \
  --network network=bridged-network \
  --graphics vnc \
  --console pty,target_type=serial \
  --noautoconsole
Proxmox VE
For Proxmox VE users, which I’m sure is a lot of people, you can set up your Debian 13 VM as follows:
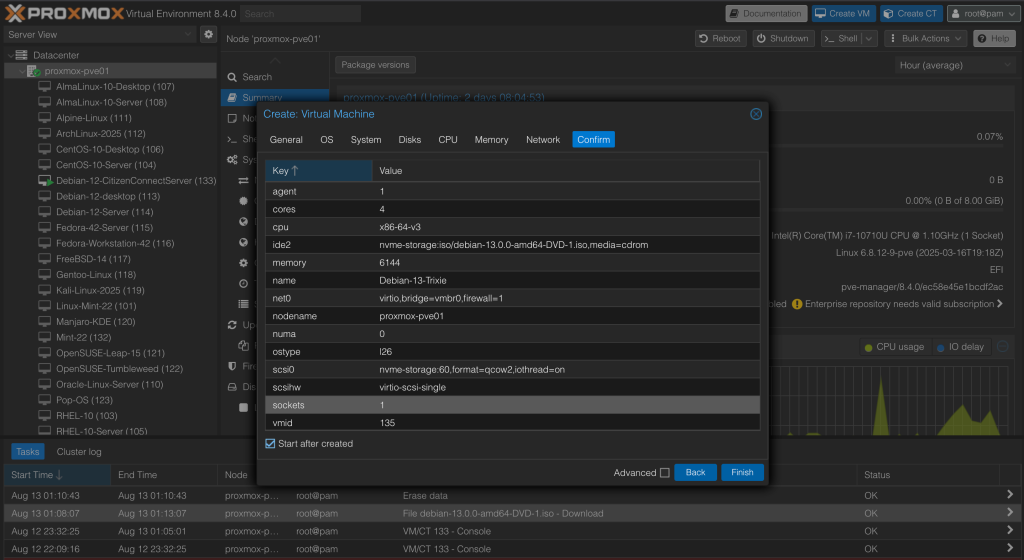
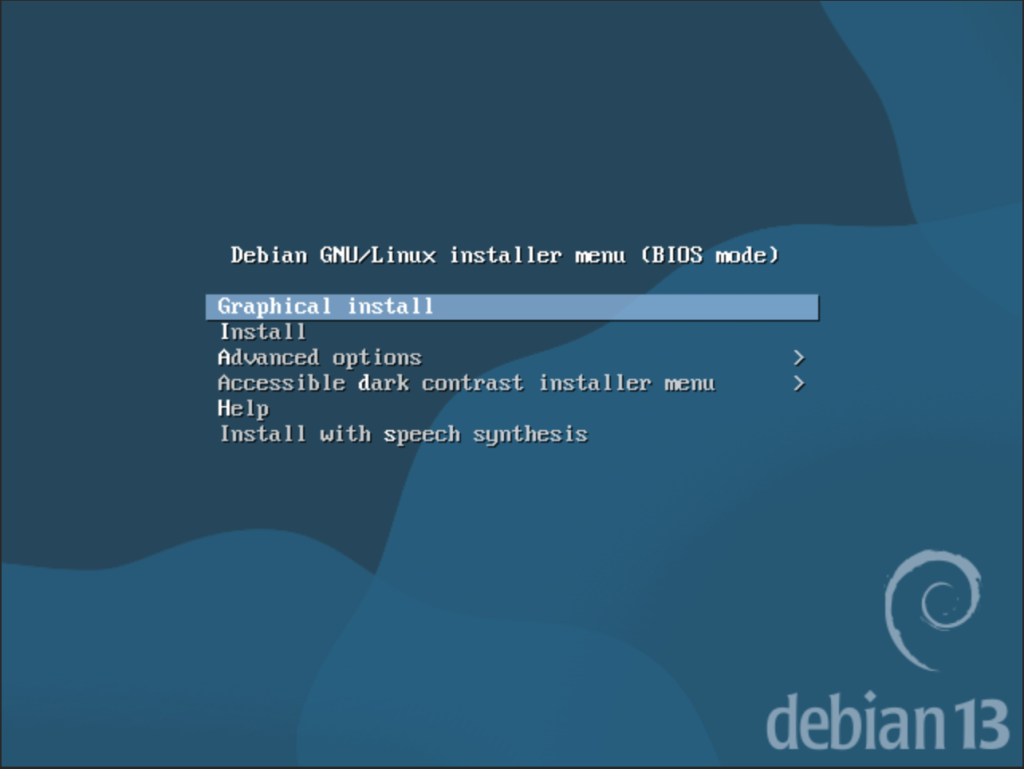
Step 3: Start the Installation
When your VM or physical device boots up, you should be able to see the screen shown below:
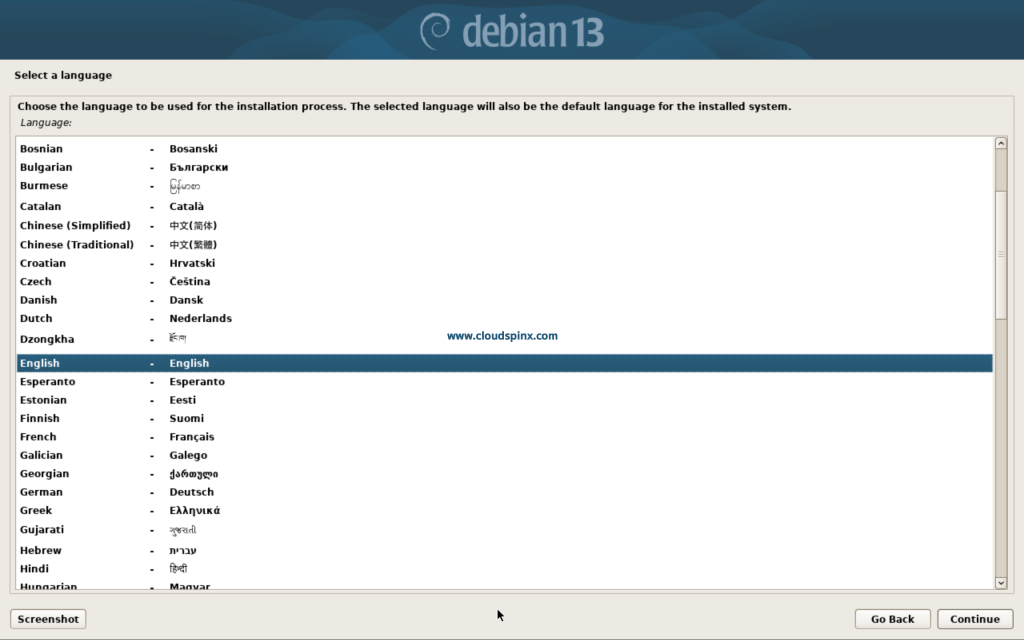
When the installer starts, select the language you would like to use during the installation, then click Continue.
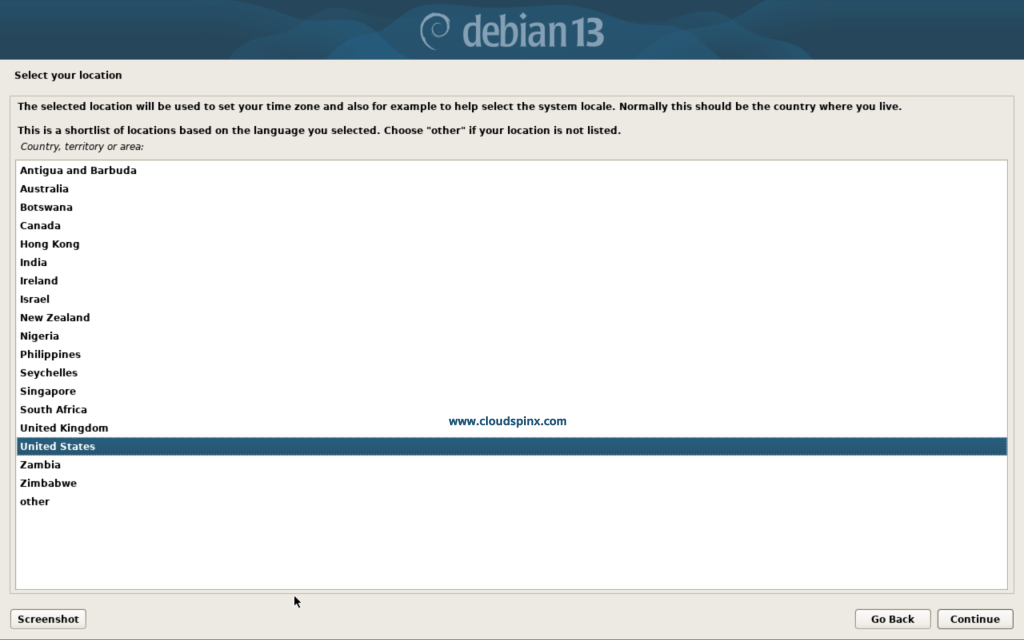
In the screen that follows, select your location then click Continue.
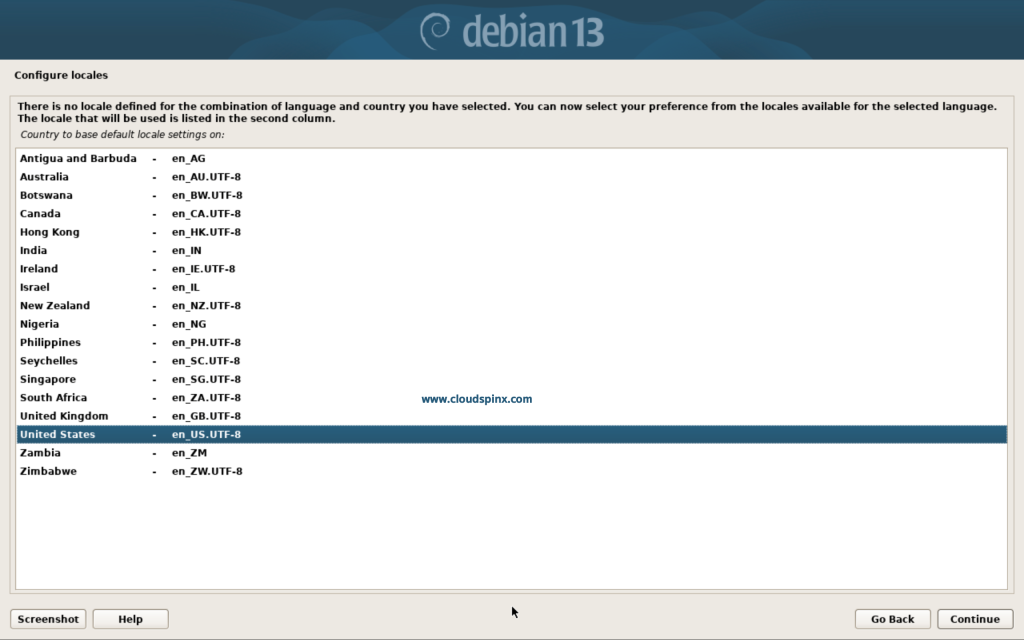
If the location you choose is in the ‘other’ section, you might be prompted to configure your locale. Do so and click Continue:
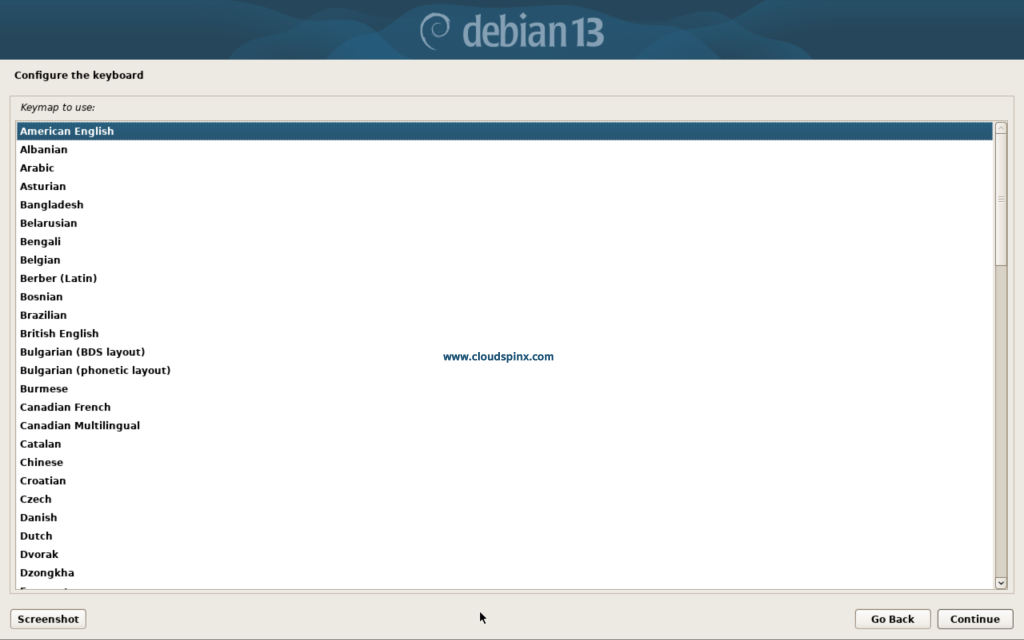
Then configure your keyboard:
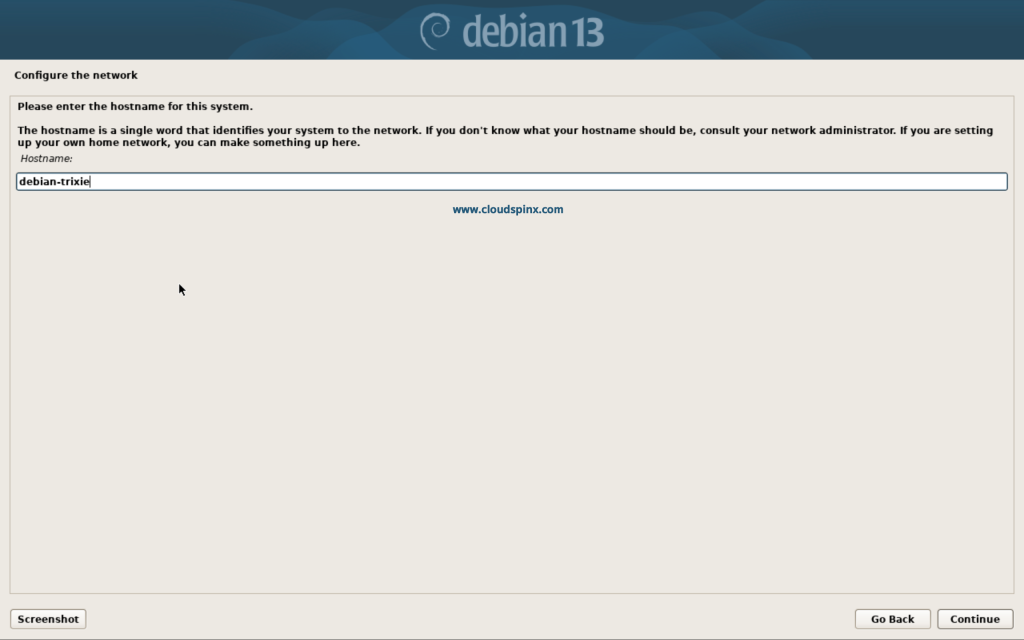
Next, you need to configure the hostname:
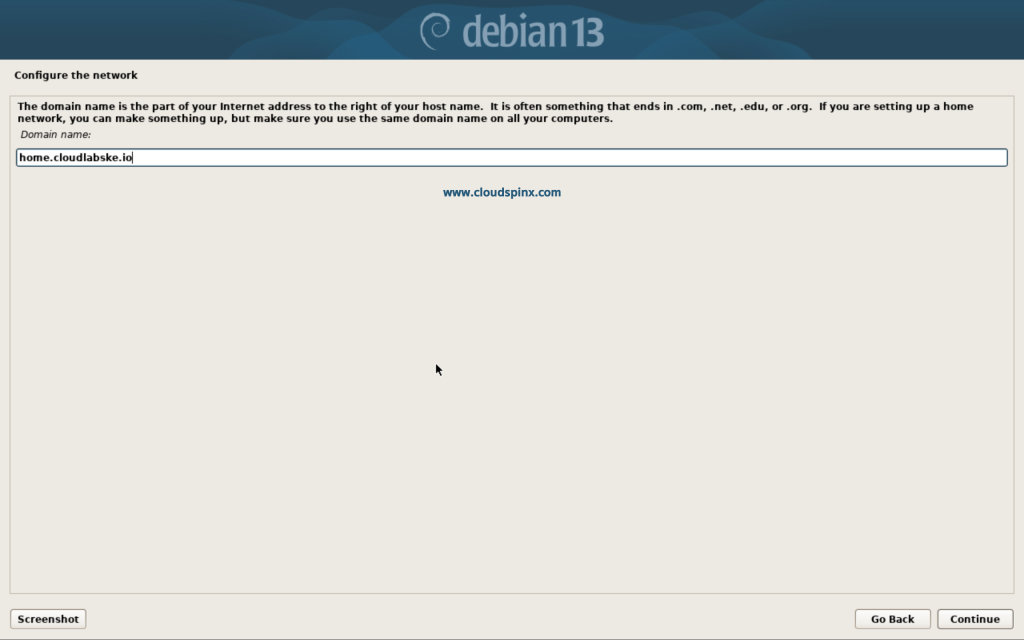
Next, configure your network domain name for your server, then click Continue:
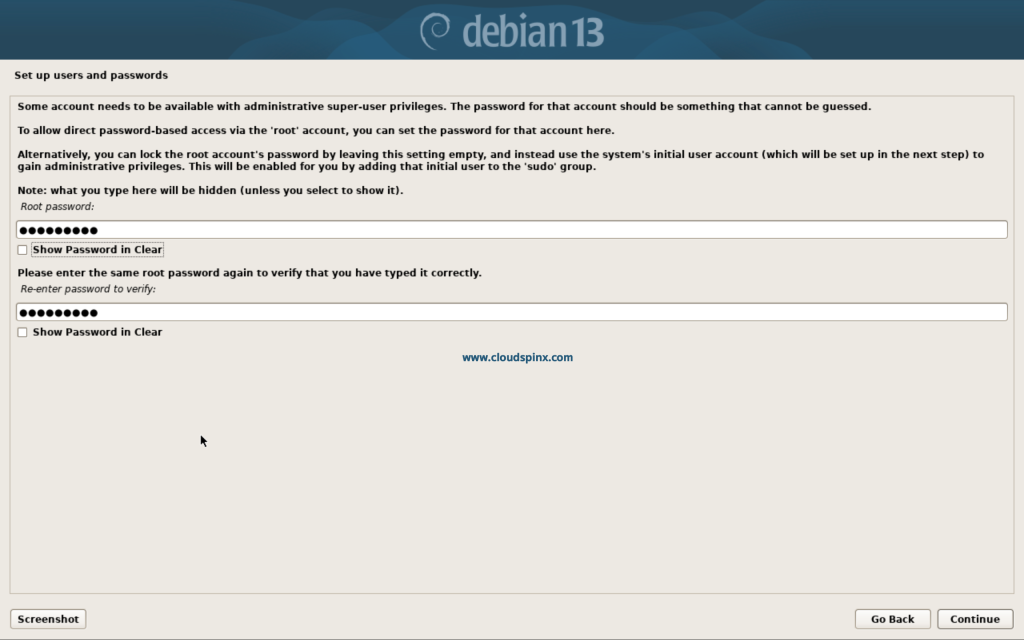
Now, you need to set up the root password:
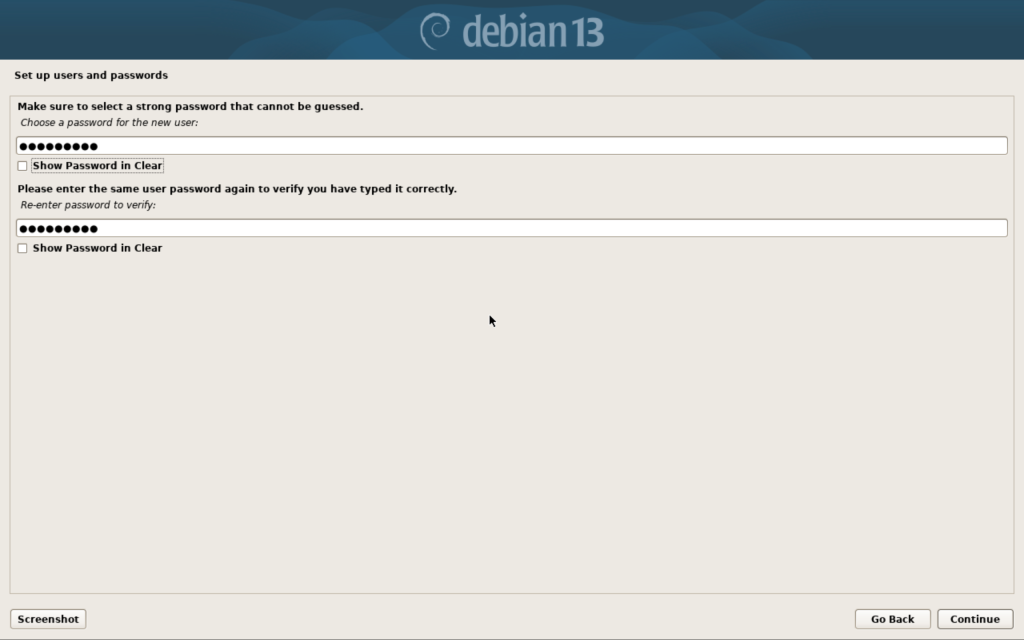
Set up a user for the new Debian 13 installation:

Then proceed to set up a username and password for your new user:
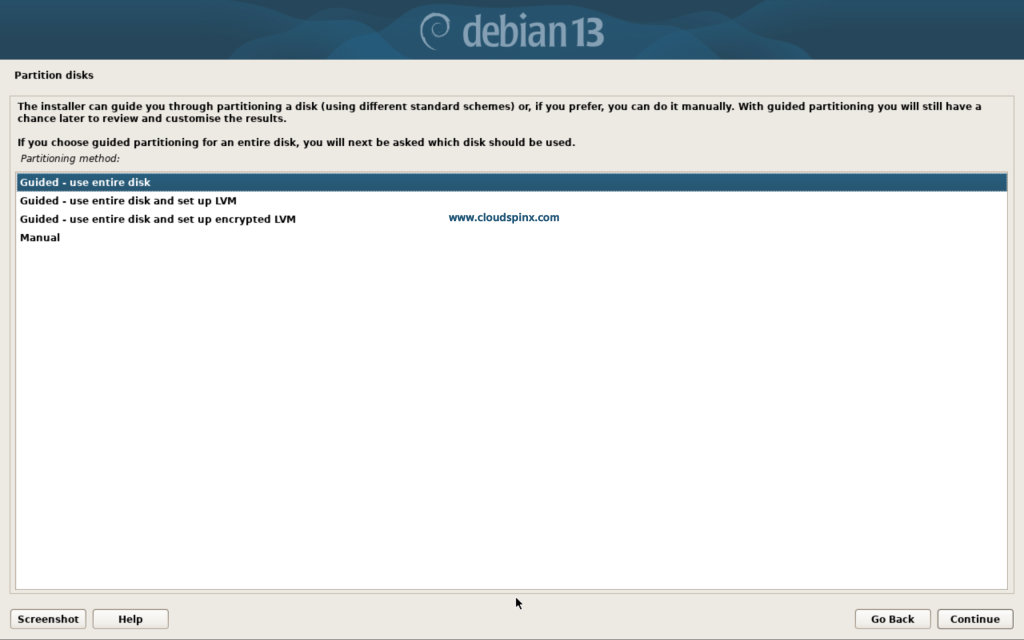
After setting up the users, it’s time to partition the disk. Choose the best method for you. If you are a beginner and new to Linux, select any of the guided partitioning methods, which should be straightforward. You can also choose manual partitioning, but only if you know what you are doing.
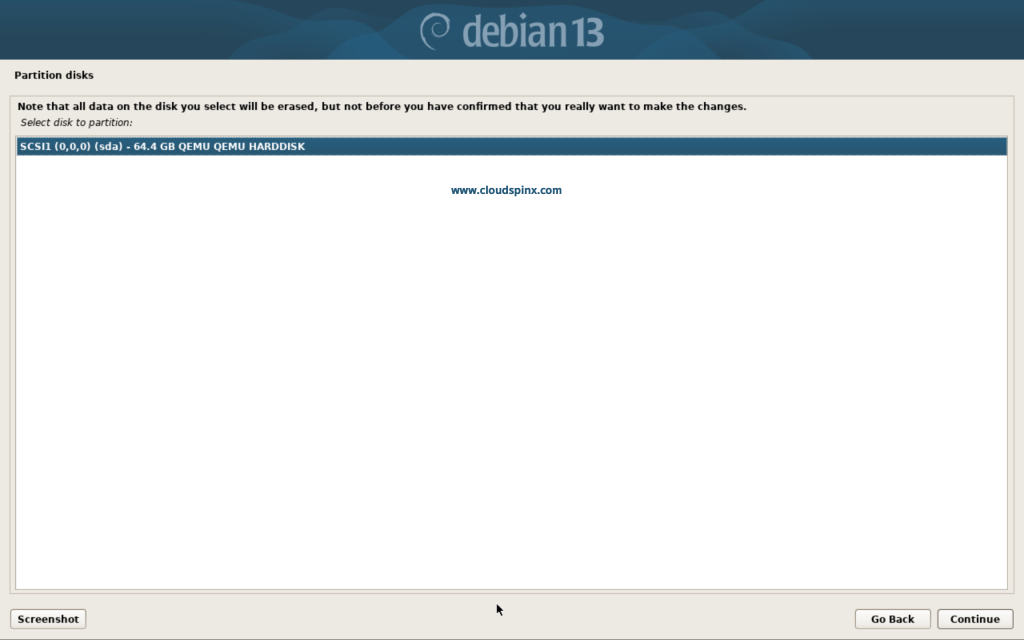
Next, you need to select the disk to use, if you only have one, just click Continue as it will be automatically selected:
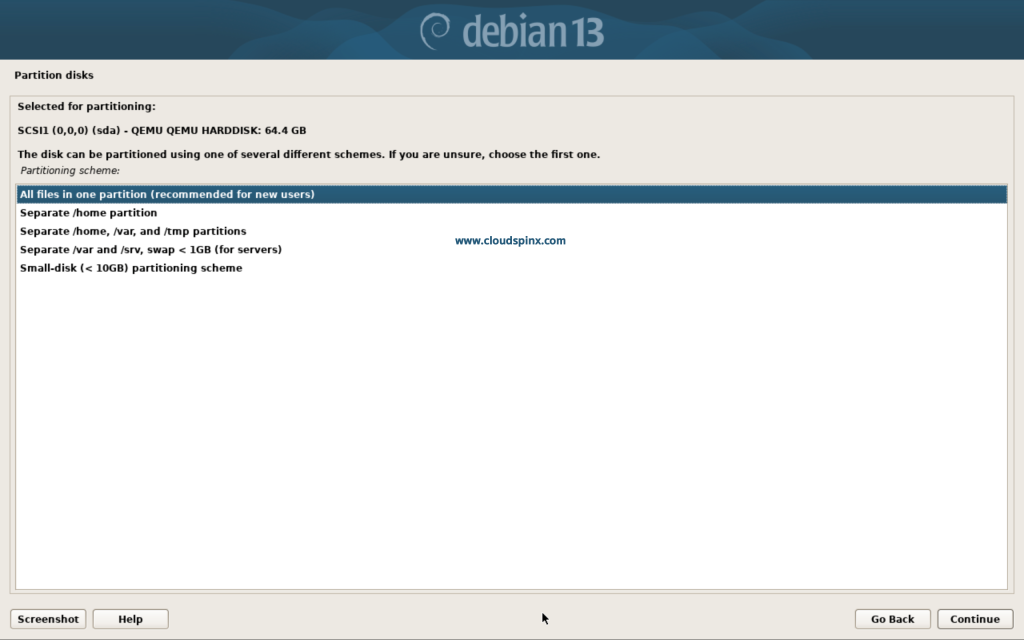
Then select a partitioning scheme, and click Continue:
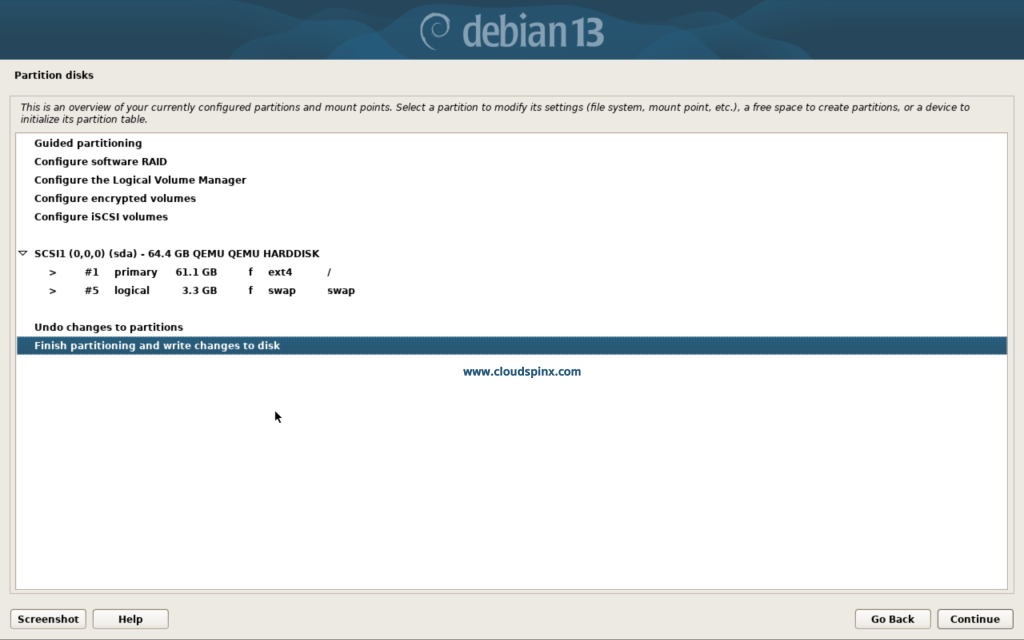
Finish partitioning and write changes to disk:
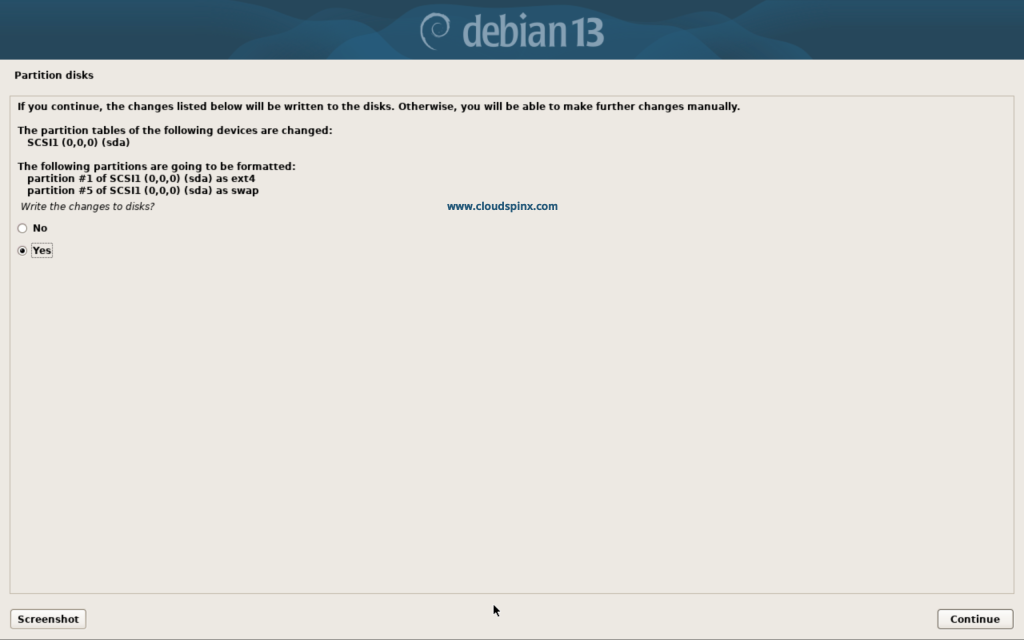
Check the checkbox that says ‘Yes’ to allow changes to be written to disk, then click Continue:
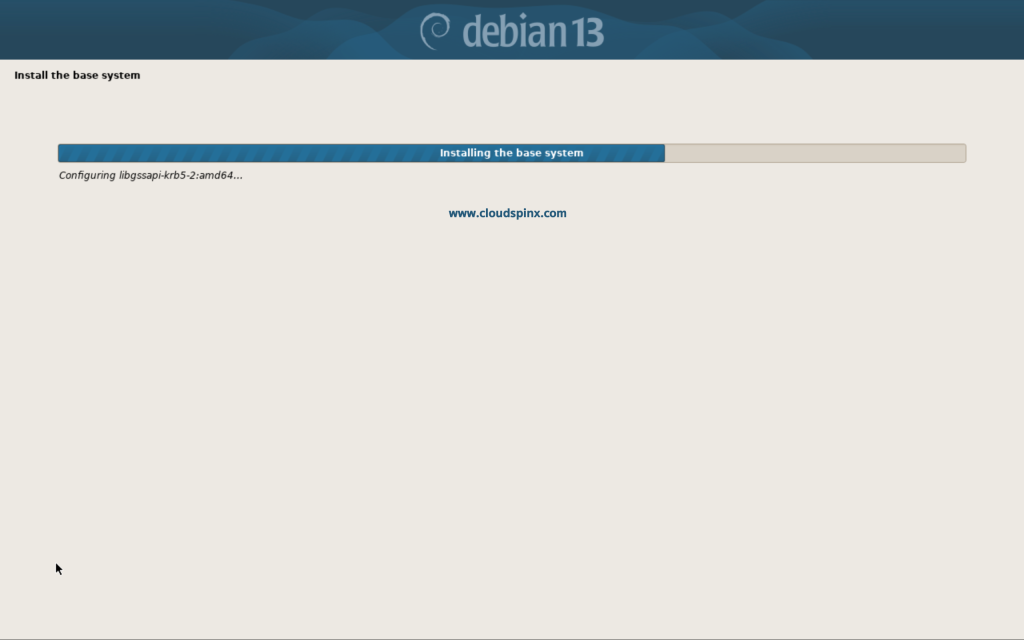
The installation process should start as shown below:
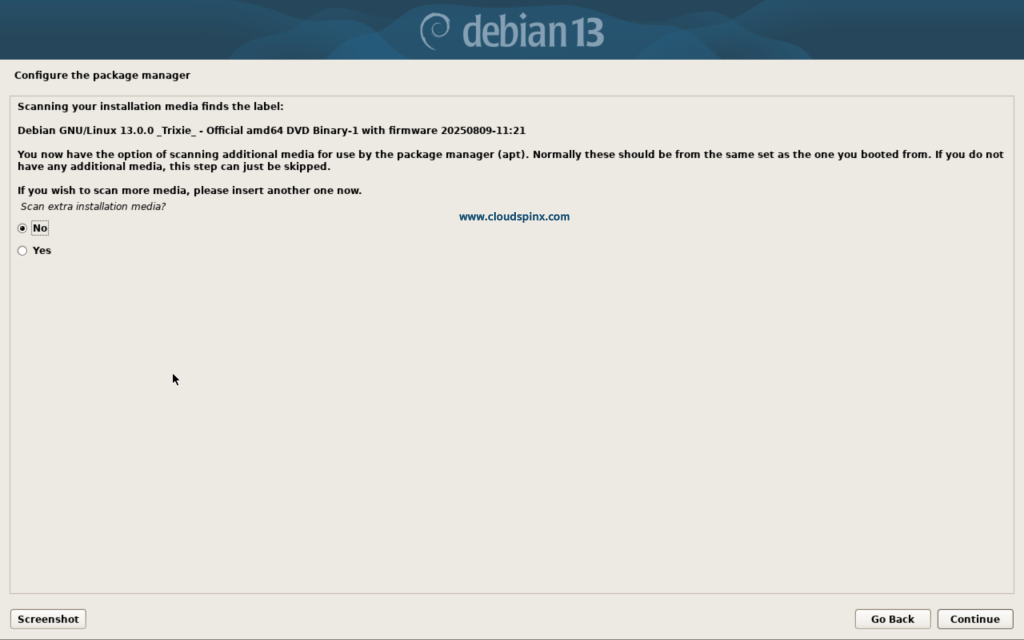
Check ‘No‘ when prompted for scanning additional media, then proceed.
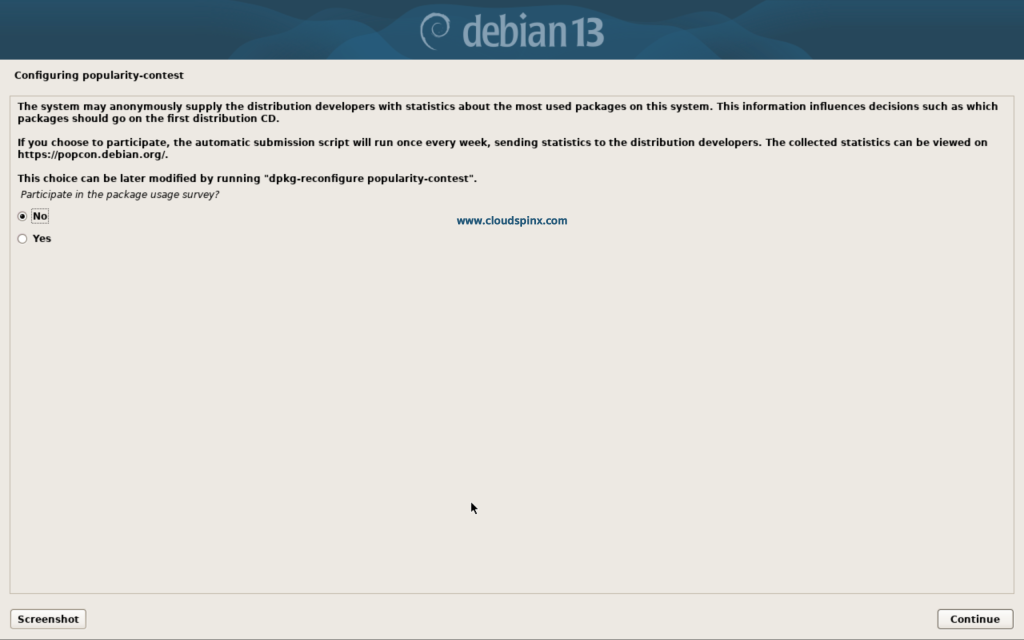
You can agree to participate in the package usage survey if you want. Click Continue to proceed:
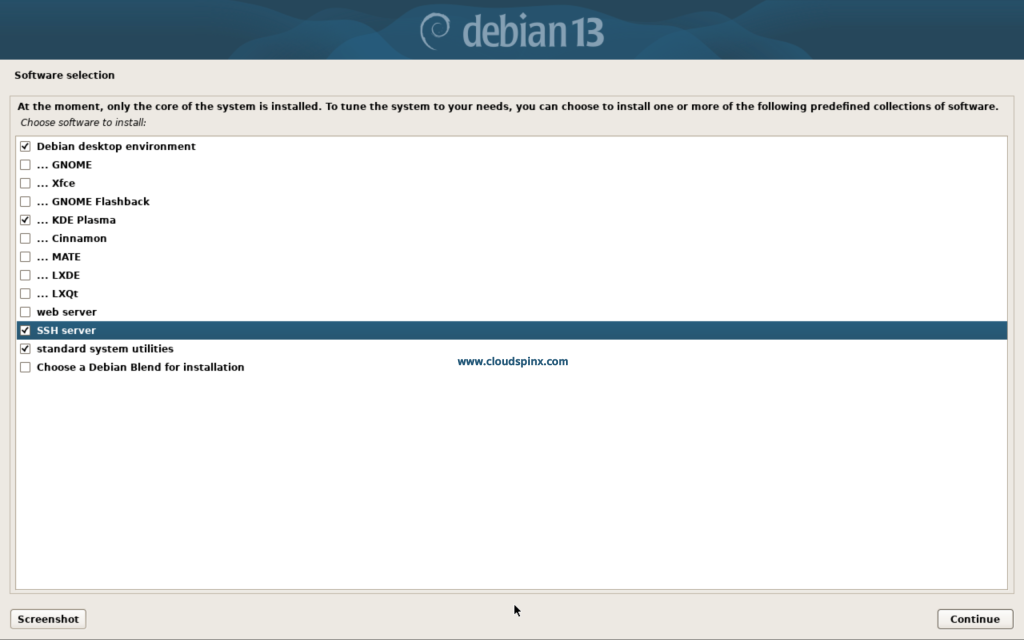
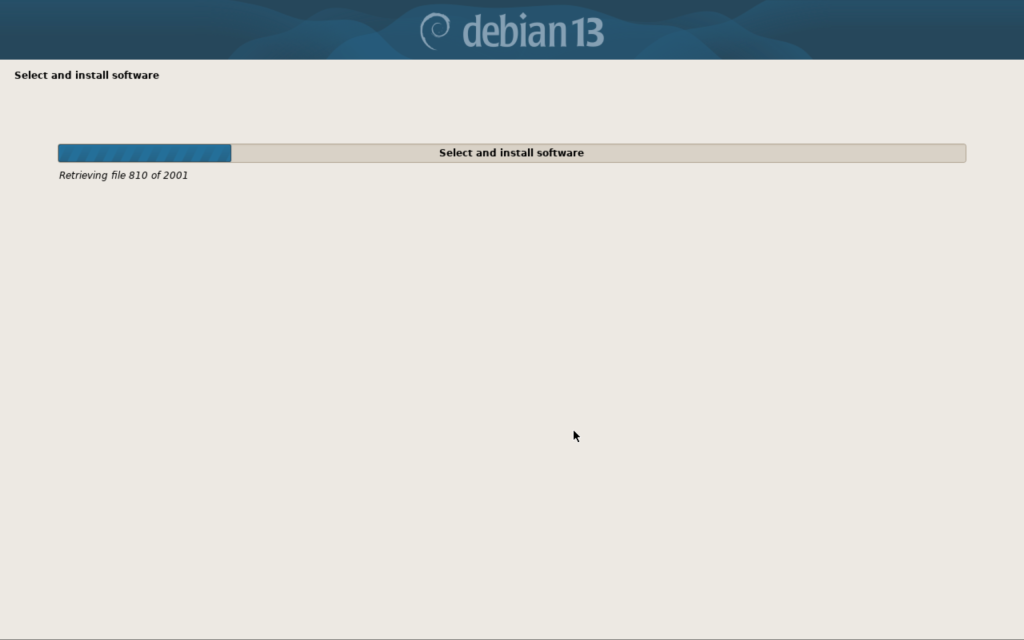
At the moment, only the core system is installed, you can tune it to your needs by choosing the software that you want to install, such as the Desktop Environment:
The installation will proceed as follows:
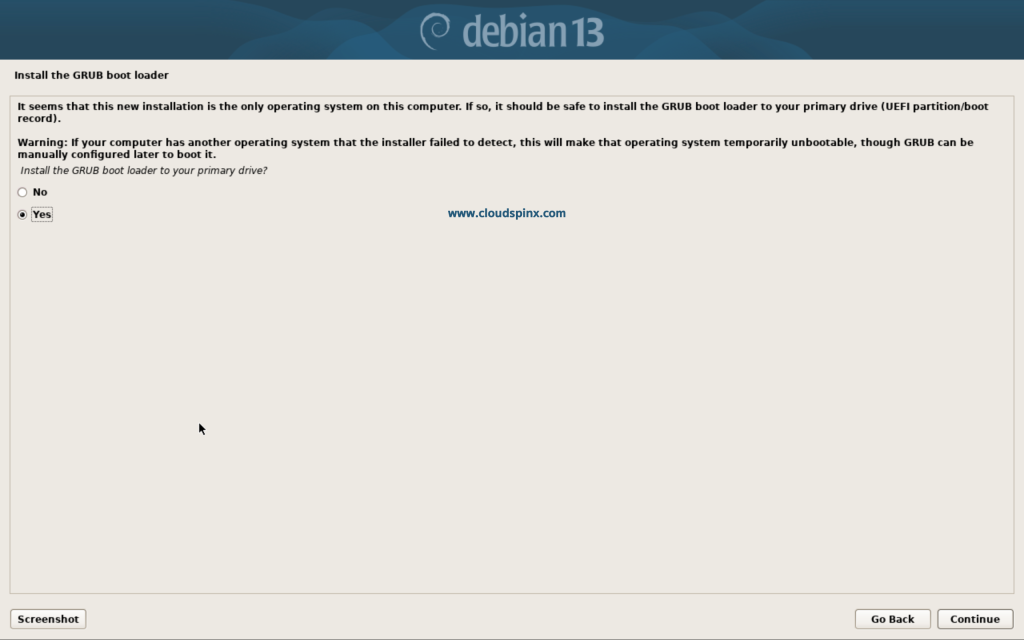
Then install the GRUB Boot loader to your primary drive:
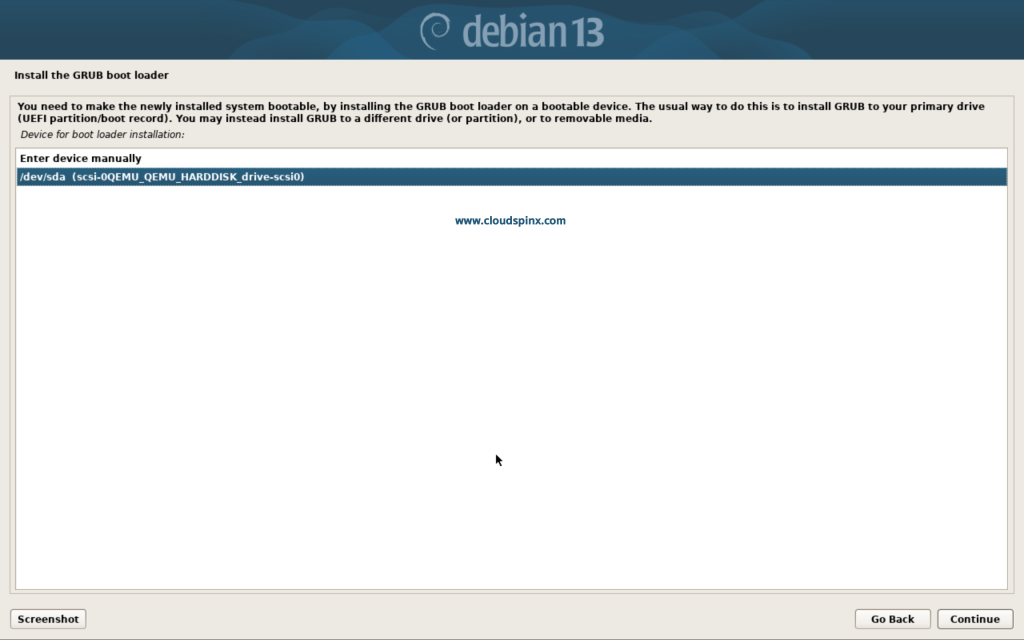
Select the drive to install the GRUB Boot loader on, and procedd with the installation:
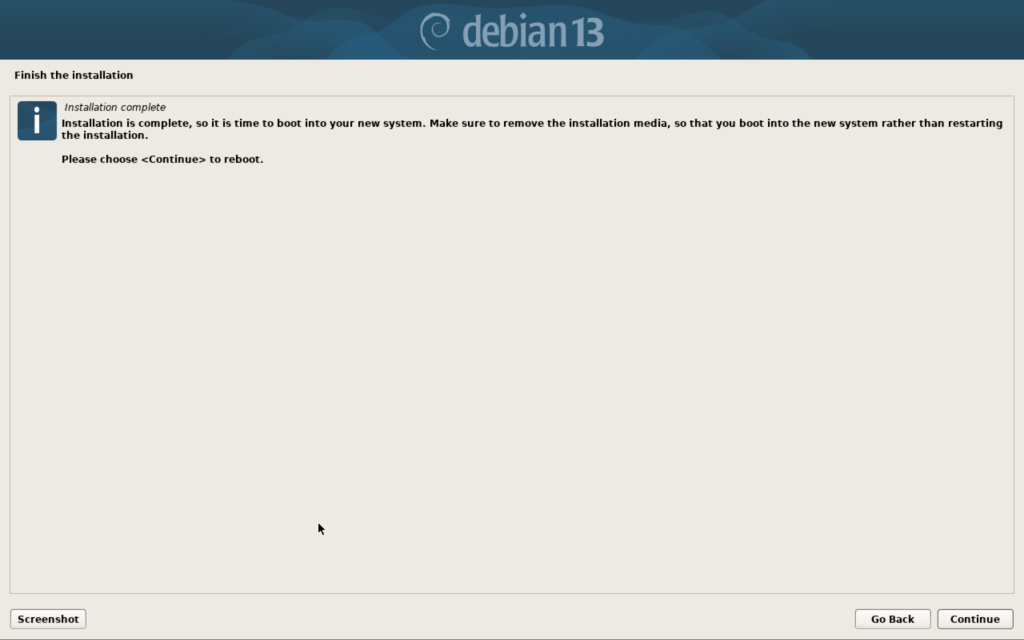
When the process is complete, click Continue to reboot the system:
Post Installation Steps
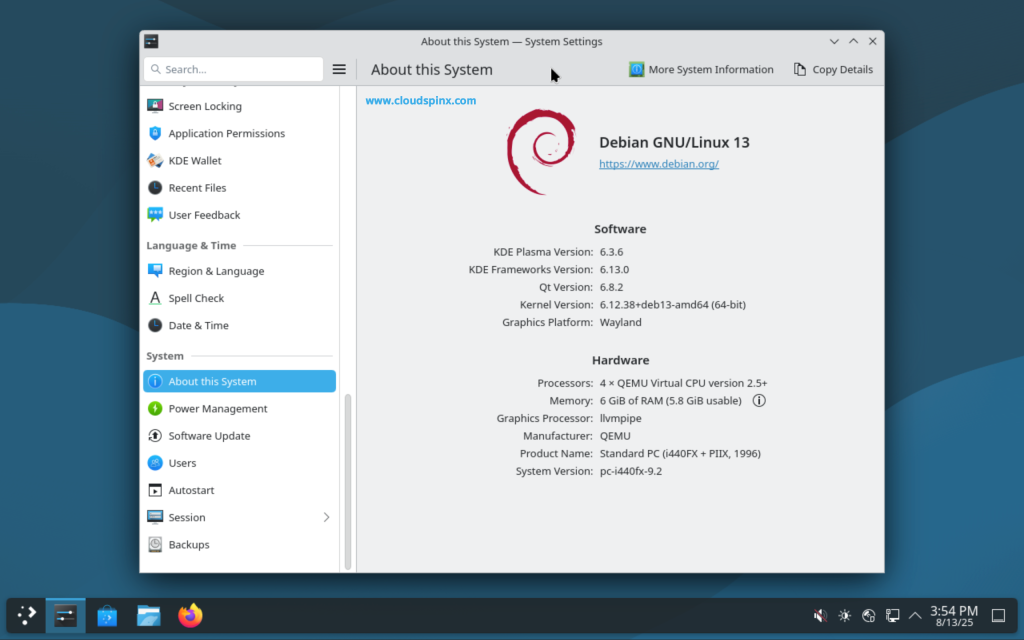
After the reboot, you will be logged in to your new Debian 13 ‘Trixie’:
Add $USER to sudoers File
By default, users created during installation on debian are not added to the sudoers file, so you’ll need to add it manually using the root user. Switch to the root user using the command below:
su -You will be prompted for the root password, enter it. Now as the root user, add your user to the sudo group with the following command:
sudo usermod -aG sudo your_usernameAdding APT Internet Sources
On new installations the default is for APT to be set up to use the Debian APT CDN service, which should ensure that packages are automatically downloaded from a server near you in network terms.
You will notice that if you try running apt update, you’ll get repo errors as such:

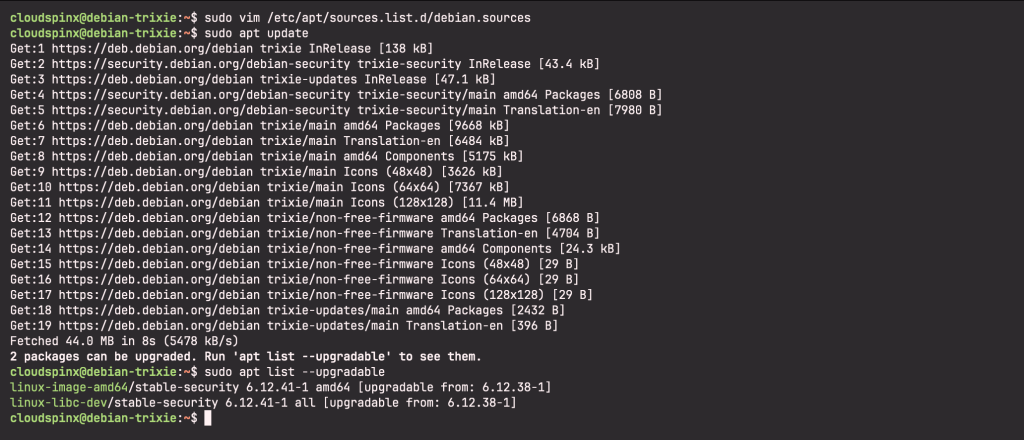
You need to update the /etc/apt/sources.list by deleting the cdrom entry. To make use of the CDN service, add the following entry into /etc/apt/sources.list.d/debian.sources:
Types: deb
URIs: https://deb.debian.org/debian
Suites: trixie trixie-updates
Components: main non-free-firmware
Signed-By: /usr/share/keyrings/debian-archive-keyring.gpg

Types: deb
URIs: https://security.debian.org/debian-security
Suites: trixie-security
Components: main non-free-firmware
Signed-By: /usr/share/keyrings/debian-archive-keyring.gpg
Then run apt update:
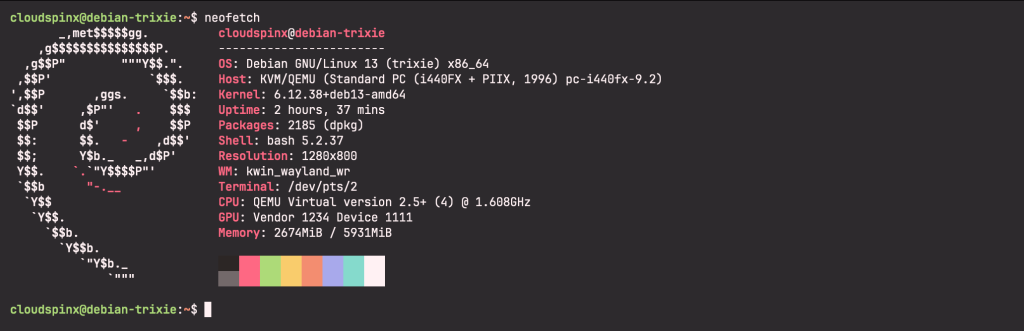
Up to this moment, you have successfully installed Debian 13 ‘Trixie’:
Similar guides:


