QNAP is a NAS (Network Attached Storage) device that is used in most small to medium size companies to backup data of various type. QNAP is know to be affordable and scalable where requirements are much higher than default packaging.
Backing up your cPanel user, websites and email data is critical to prevent against data loss. The failure can result from accidental data deletions, hard drive failures, or even an attack from malware. Ensuring that you have the data backed up gives you the confidence against infrastructure related disasters that could happend.
Prepare QNAP NAS Device
Before we can configure QNAP on cPanel and setup backup intervals, we need to create an NFS share and assign permissions.
Enable NFS Service
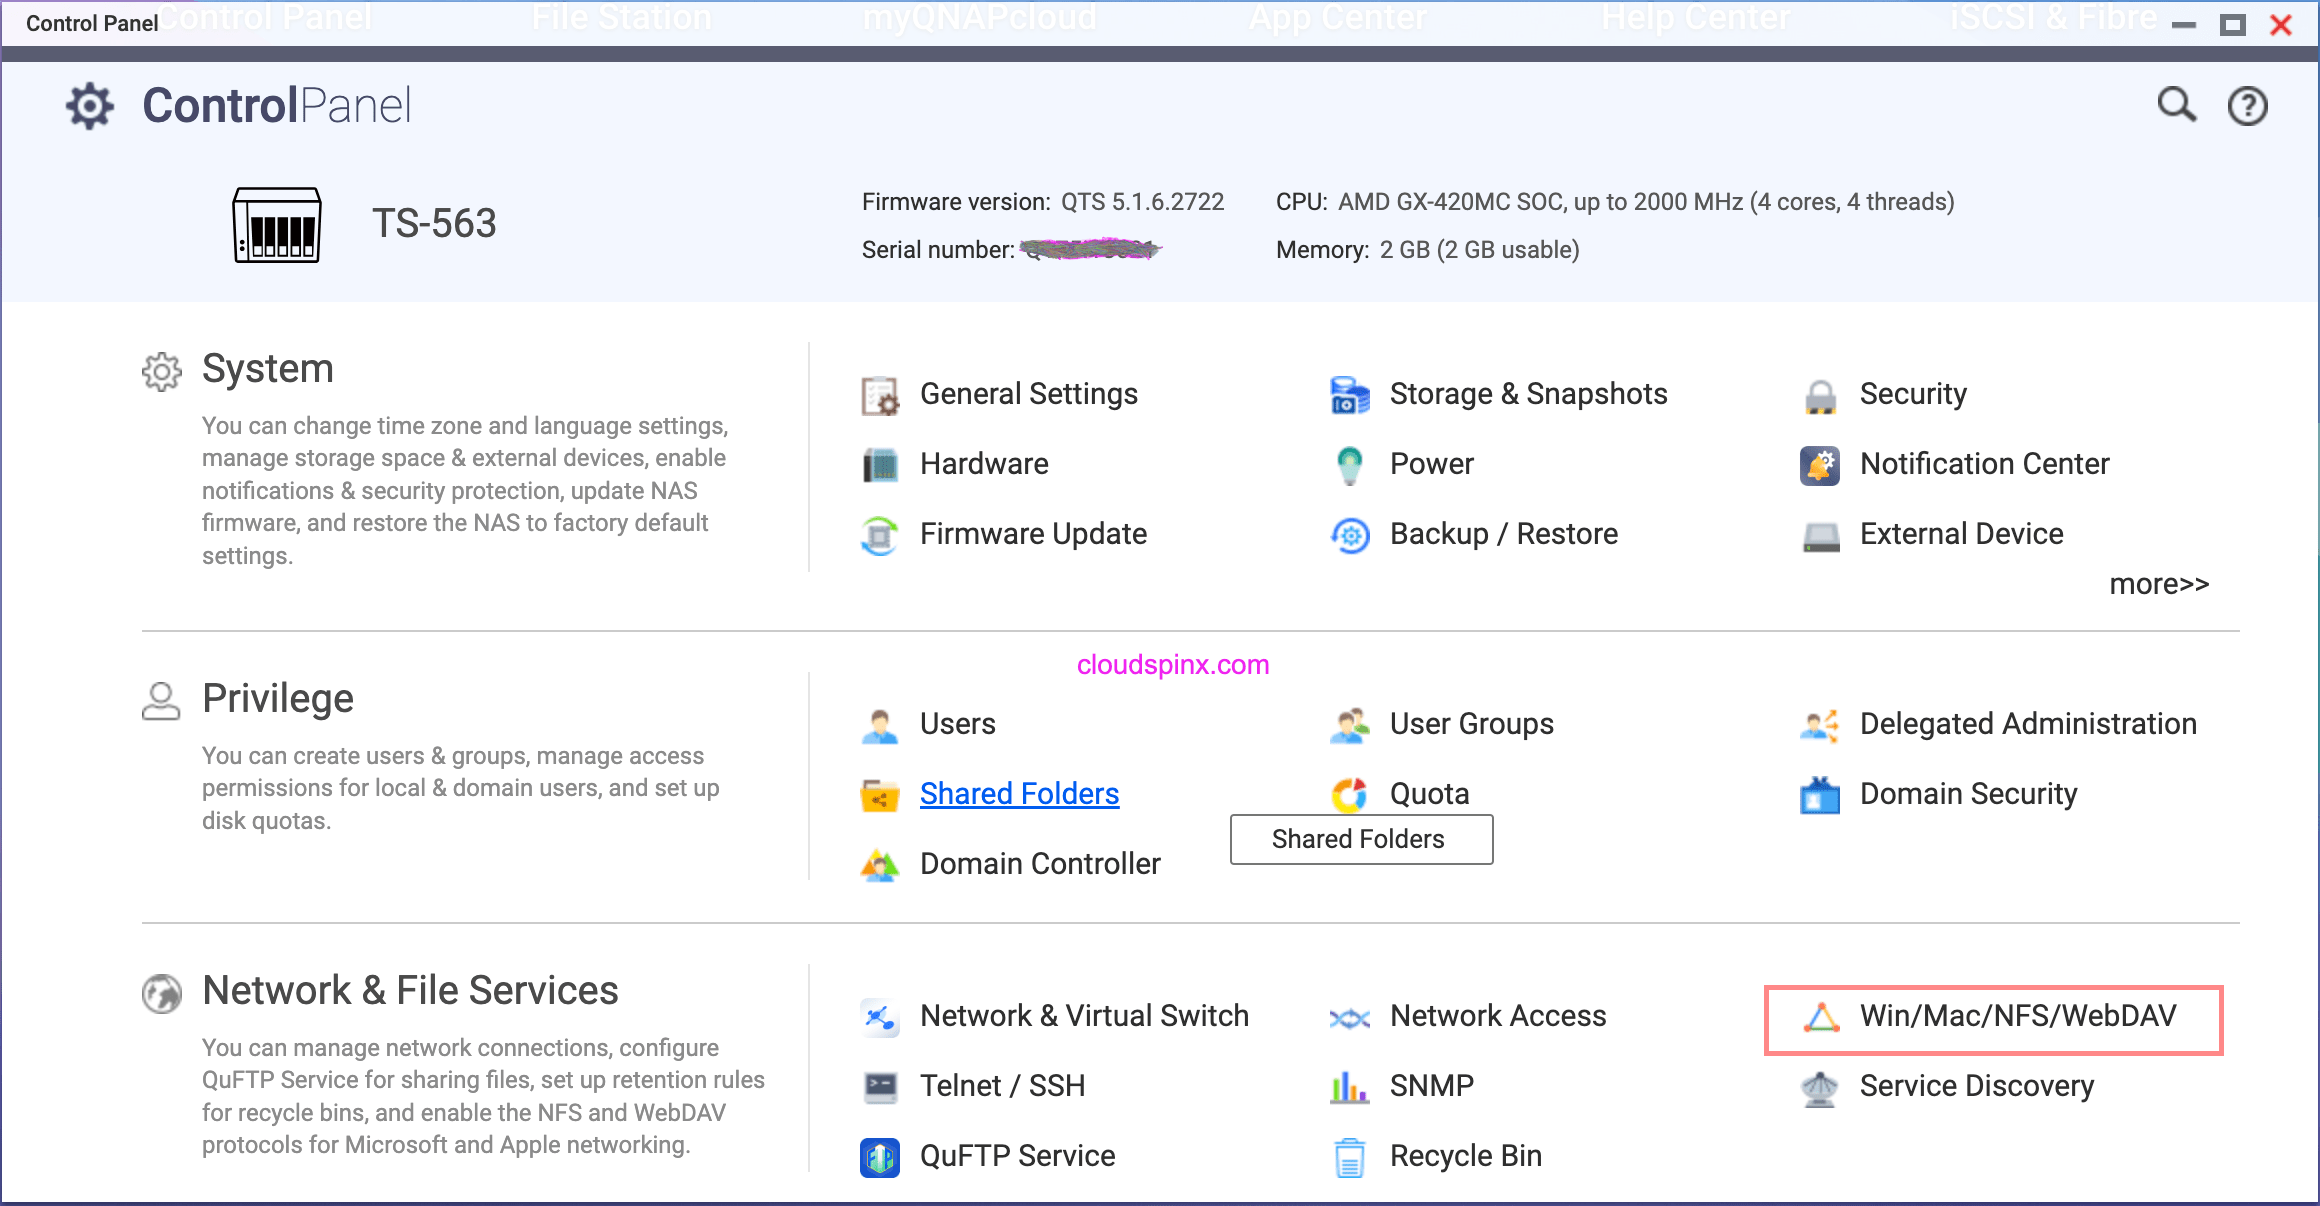
Login to QNAP and click on “Control Panel“

Then go to “Network & File Services” > “Win/Mac/NFS/WebDAV”
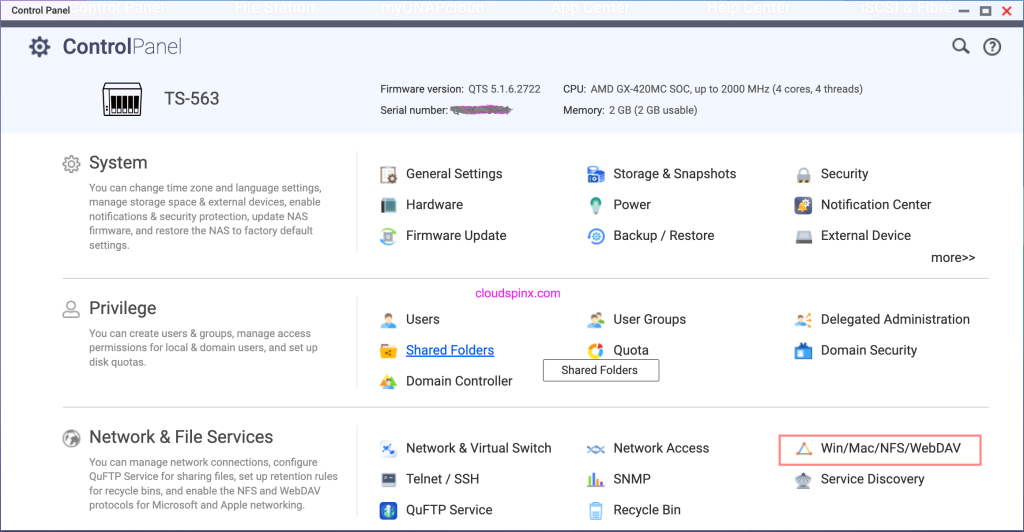
Enable NFS is not active already under “NFS Service” tab. Tick the versions of NFS to enable.
Create NFS Share
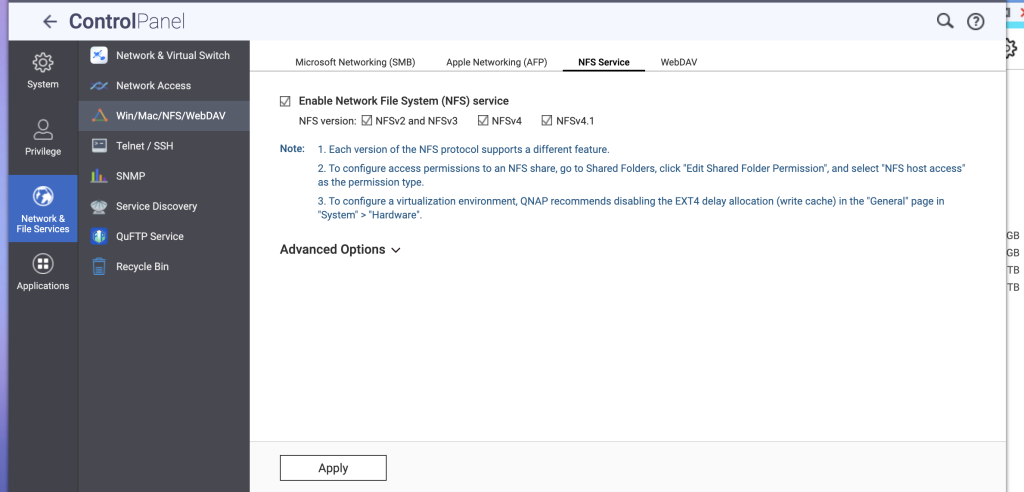
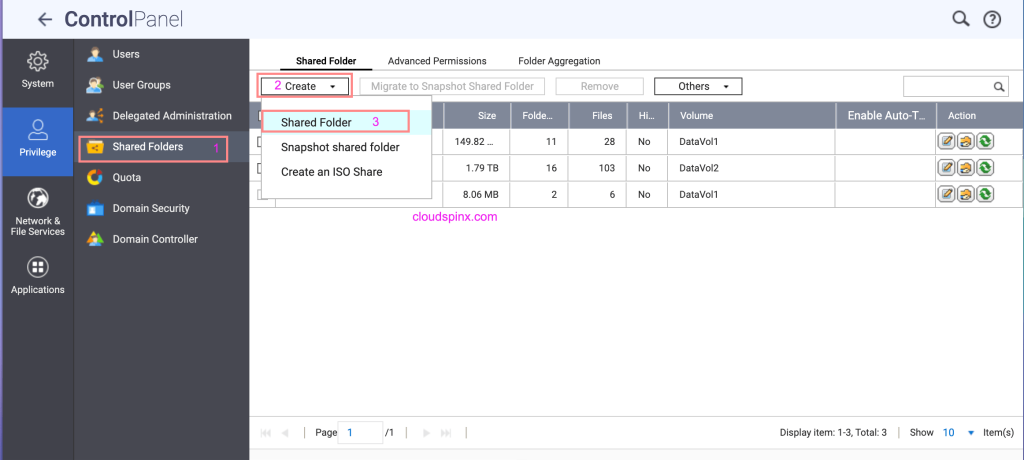
Go back to Control Panel and click “Shared Folders“
Then go to “Create” > “Shared Folder” > “Create” > “Shared Folder”
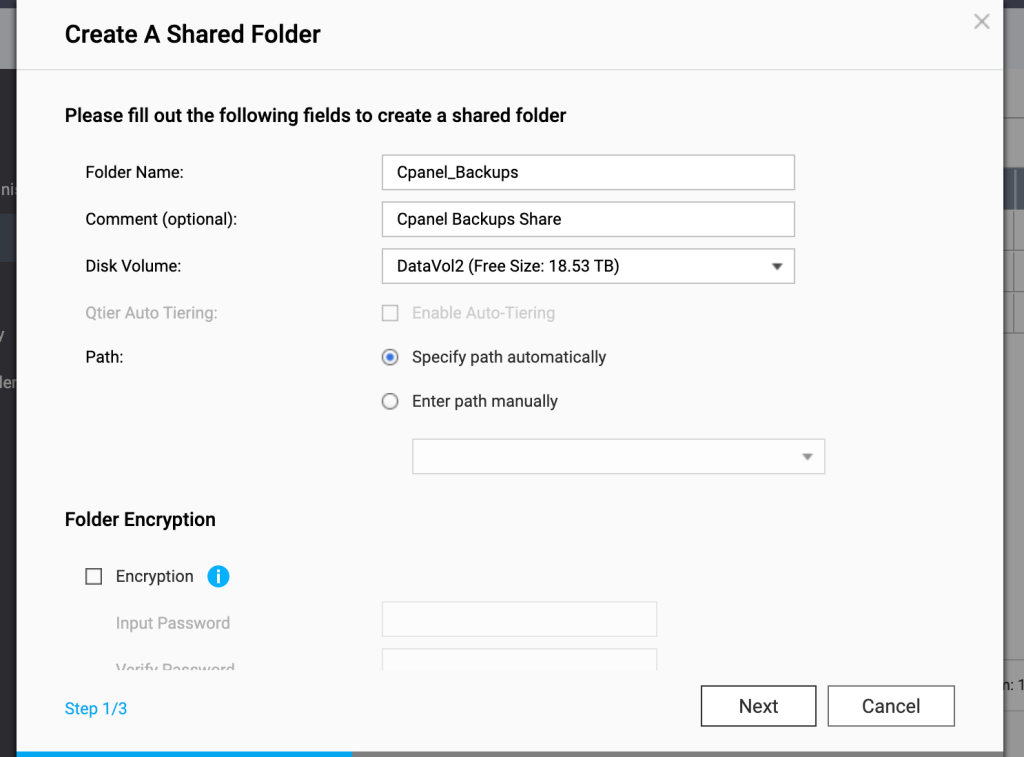
Give the share a name, select Disk volume and choose path configuration option.
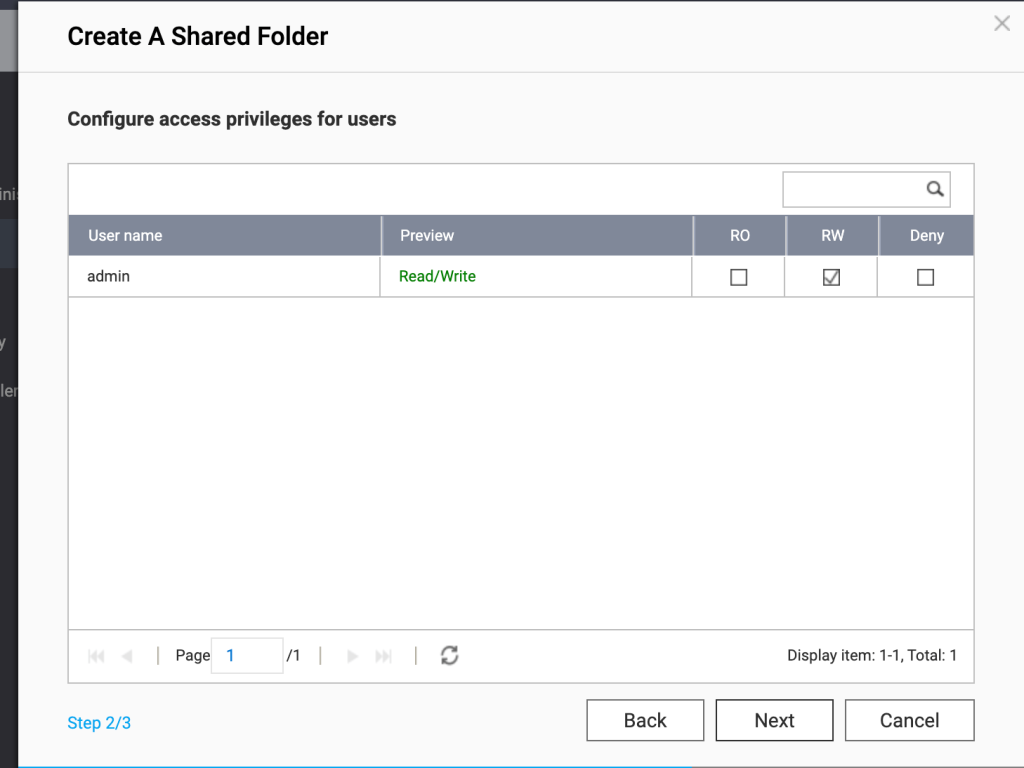
Next give it permissions for the default user and click “Next” then follow other prompts to complete the setup.
After it’s created, select the “Share name” and click on the middle “icon” in the far right to edit “Shared Folder Permission“

On “Select permission type“, choose “NFS host access”
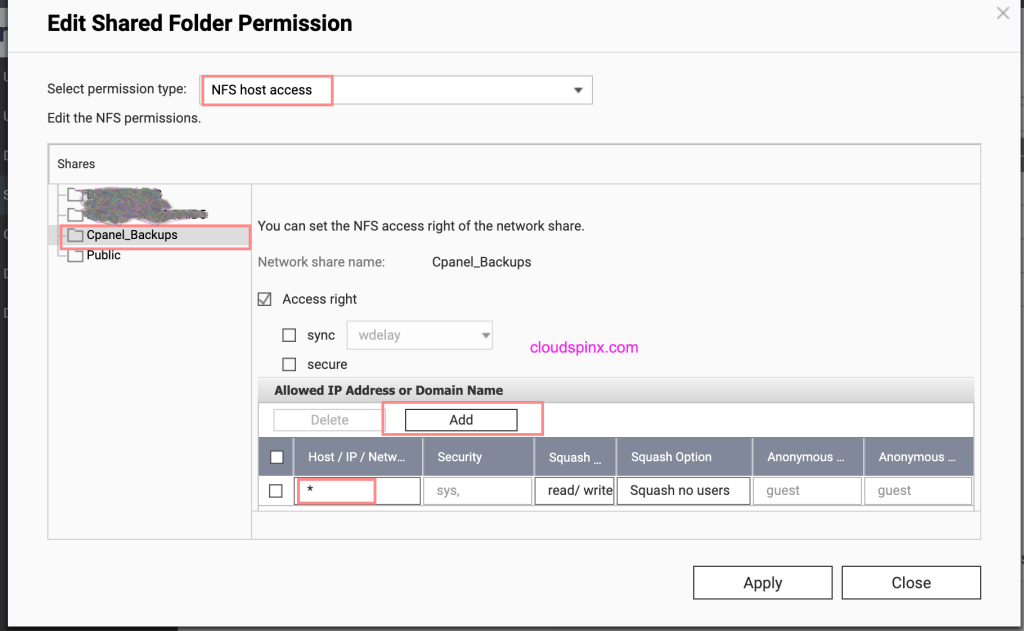
You can add more than one host IP address in the following format.
- 192.168.1.20 – single host
- 192.168.1.0/24 – Network subnet
- * – Allow access from any host IP
Hit “Apply” when done to effect the change.
Mount QNAP NFS Share on cPanel
Take note of QNAP IP address as this will be used to mount the NFS share. By default the mount will be:
- QNAP_IP:/share/ShareName e.g 192.168.1.20:/share/Cpanel_Backups
Login to cPanel server(s) using ssh or web terminal and create mount path.
mkdir /backupsInstall nfs-utils package.
yum -y install nfs-utils Mount QNAP NFS share point to the created directory.
mount 192.168.1:/share/Cpanel_Backups /backupsConfirm it’s mounted successfully.
$ df -hT /backups
Filesystem                         Type  Size  Used Avail Use% Mounted on
192.168.1:/share/Cpanel_Backups nfs    21T  2.4T   19T  12% /backups
We can now persist the mount by editing the /etc/fstab file.
$ sudo vim /etc/fstab
192.168.1:/share/Cpanel_Backups  /backups                   nfs     defaults        0 0
Configure cPanel Backups on WHM
WHM (Web Host Manager) is an in-built web dashboard for configuring cPanel with ease. Search for “Backup Configuration“

Enable backups to activate the backup service.

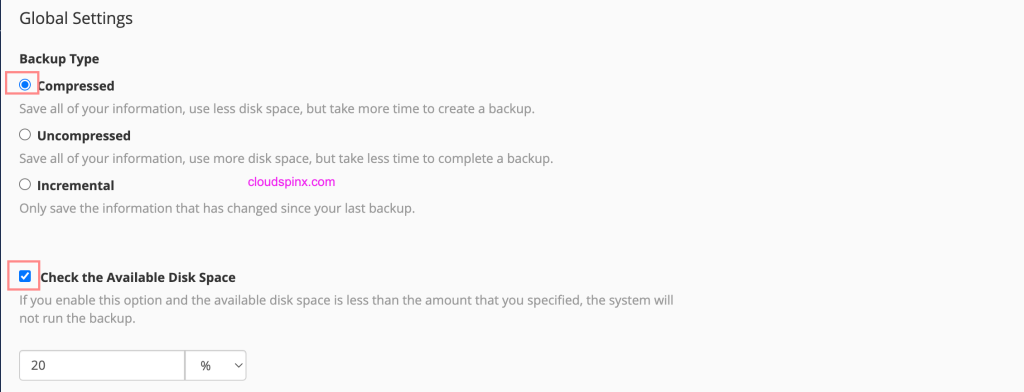
For backup type you can choose compressed, uncompressed or incremental. Also set min available disk space required before a backup can be run.
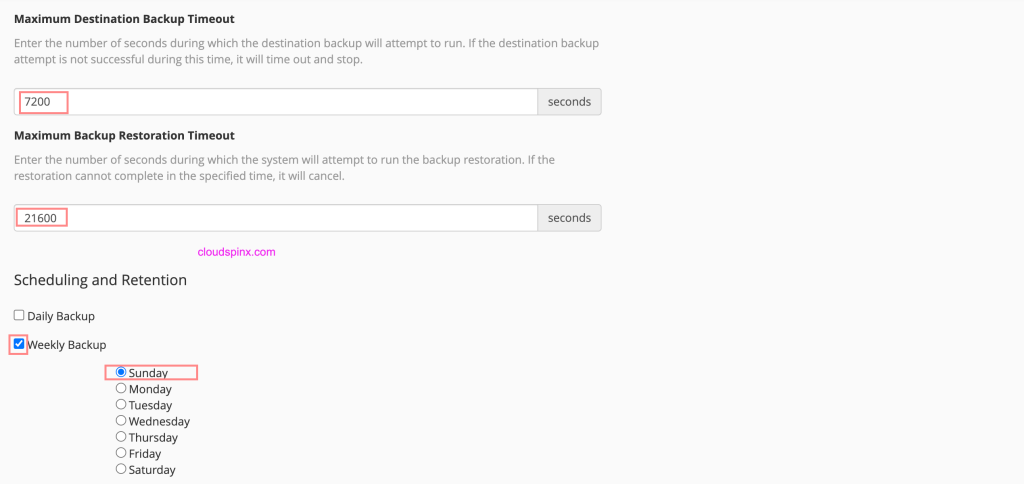
Set timeout values amd weekly backup schedule.
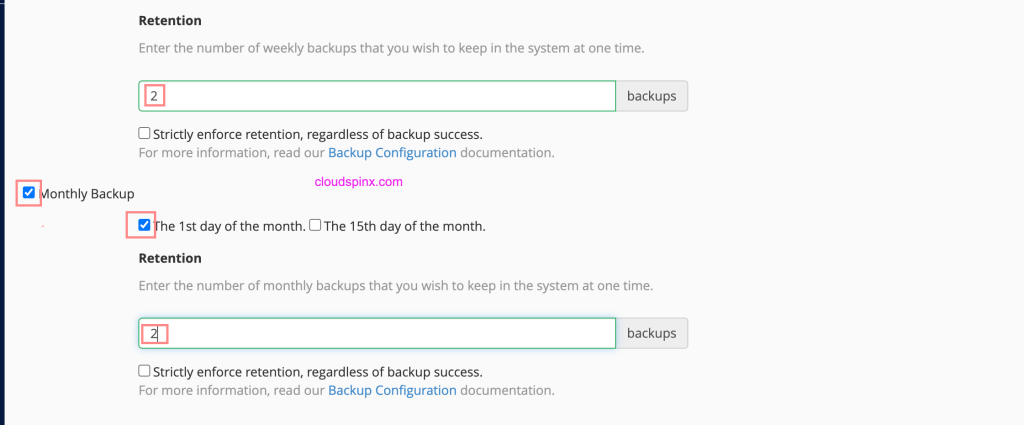
Next set retention – the number of weekly and monthly backups to be kept in the system at one time.
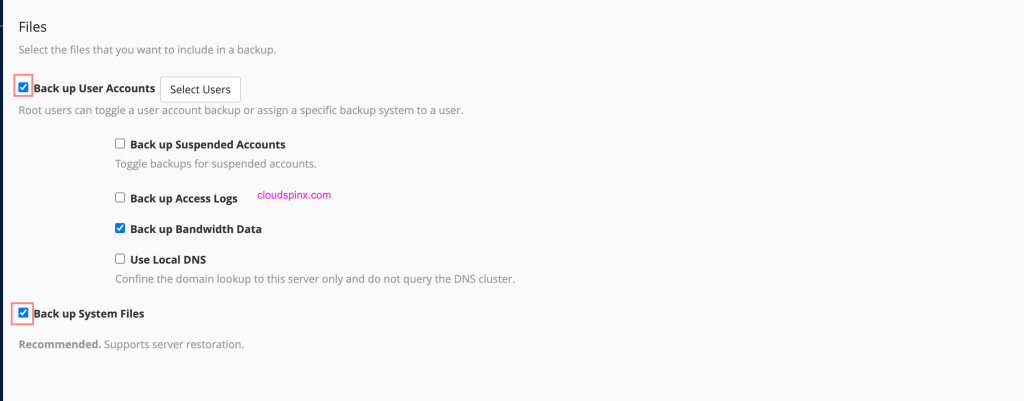
Choose the files to backup – mostly user accounts and system files.
Specify backup directory – this should be QNAP share mount point.
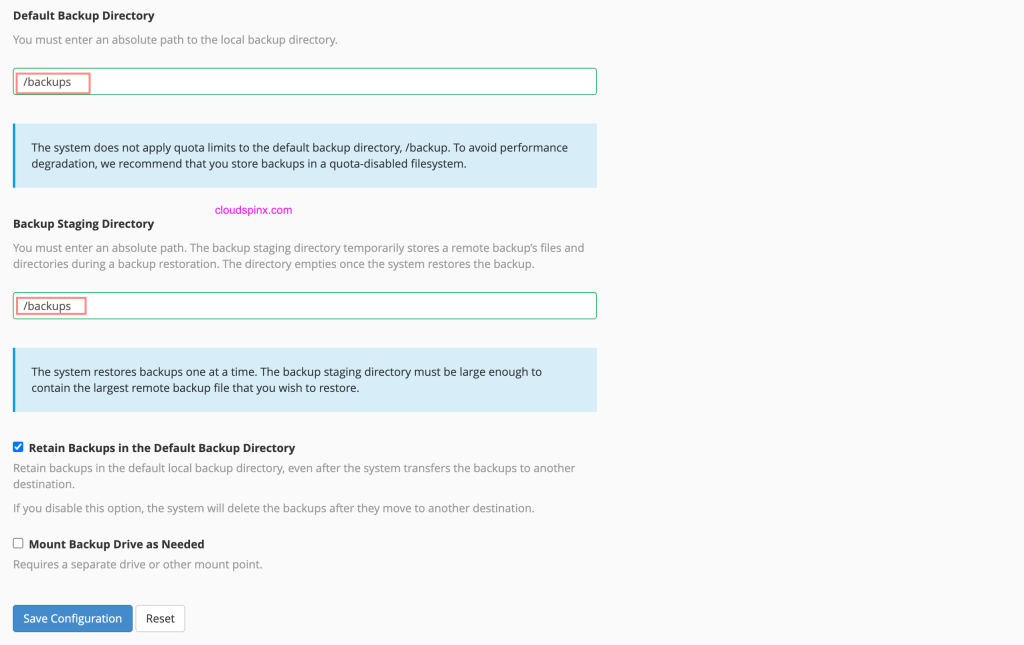
Save configurations once done. And your backup settings should now be active and will be executed at set intervals.
CloudSpinx Engineers can help with all cPanel related issues, troubleshooting and fixing, server configurations, data migrations, backup strategy, cPanel upgrades among many other services. Let’s engage now using available channels of communication.

