
A Directory Storage Pool describes the most basic and simple type of storage pool offered within KVM. Such a storage pool depends on a special directory within the host filesystem, where virtual machine images as well as other such files required for proper operation are stored. The very basic nature of this type of storage pool contributes a great deal towards the ease of setup as well as management, making the type very suitable for small deployments or test setups where the preference for something simple and uncomplicated stands very high.
The files in this directory can be fully allocated raw files, meaning complete files with no sparse areas, and sparsely allocated raw files with empty holes to reduce disk usage. The pool can also hold one of a number of special disk formats like qcow2 or vmdk, among others, that are used by the qemu-img program, which is the de facto standard program for disk image manipulation. If the specified directory does not exist at the time the pool is being defined, the build operation can be used to create the directory as required so that the structure needed to manage files is in place.
The dir pool type supports the following volume types:
qcow: QEMU v1 disk image formatqcow2: QEMU v2 disk image formatqed: QEMU Enhanced Disk image formatvmdk: VMware disk image formatvpc: VirtualPC disk image formatraw: a plain filebochs: Bochs disk image formatcloop: compressed loopback disk image formatcow: User Mode Linux disk image formatdmg: Mac disk image formatiso: CDROM disk image format
Use Cases
- Testing and Development: Directory storage pools are extremely useful in the context of development and testing applications. It’s especially the case where setup ease and the simplicity of the implementation are regarded as the success factors most important.
- Small-Scale Deployments: This option is especially beneficial for small-scale deployments, where a small number of virtual machines are run within a small environment.
- Temporary Storage: This is especially handy for scenarios that demand temporary storage solutions, most notably in instances where issues like performance and scalability are not of the highest priority or most critical concern.
Mastering KVM Virtualization - The Ultimate eBook
From home labs to production clouds - master KVM Host management, automating KVM administration using Terraform, Vagrant, and cloud automation. This eBook will enable you to build scalable virtual infrastructure that works whether you're learning at home or deploying enterprise solutions. Get your full copy today
Configuring a Directory Storage Pool
The directory(dir) storage pool can be configured using virsh, cockpit and virt-manager.
Prepare a disk for storing VM volumes, in this example, we have /dev/sdb free:
DISK=/dev/sdX
sudo parted -s -a optimal -- $DISK mklabel gpt
sudo parted -s -a optimal -- $DISK mkpart primary 0% 100%
sudo parted -s -- $DISK align-check optimal 1
sudo mkfs.xfs ${DISK}1
Configure mount point to path where you want the volumes to be stored. In this example we are using /var/lib/libvirt/vms.
sudo mkdir -p /var/lib/libvirt/vmsOpen /etc/fstab file for editing:
sudo vim /etc/fstabConfigure accordingly:
/dev/sdb1 /var/lib/libvirt/vms xfs defaults 0 0Test to confirm it can be mounted:
sudo systemctl daemon-reload
sudo mount -a
Mount status checking:
$ df -hT /var/lib/libvirt/vms
Filesystem     Type  Size  Used Avail Use% Mounted on
/dev/sdb1      xfs   466G  9.0G  457G   2% /var/lib/libvirt/vms
If you are running RHEL-based systems with SELinux in enforcing mode – this can be checked by running the command sestatus:
SELinux status:                 enabled
SELinuxfs mount:                /sys/fs/selinux
SELinux root directory:         /etc/selinux
Loaded policy name:             targeted
Current mode:                   enforcing
Mode from config file:          enforcing
Policy MLS status:              enabled
Policy deny_unknown status:     allowed
Memory protection checking:     actual (secure)
Max kernel policy version:      33
If you have Current mode: enforcing, then consider labeling the path to set permanent context:
sudo yum -y install policycoreutils-python-utils
DIR=/var/lib/libvirt/vms
sudo semanage fcontext -a -t virt_image_t "$DIR(/.*)?"
sudo restorecon -Rv $DIR
Check by running:
ls -ldZ $DIRShould show:
drwxr-xr-x. 2 root root system_u:object_r:virt_image_t:s0 6 Aug 6 18:43 /var/lib/libvirt/vmsUsing Virsh CLI
Create a Storage Pool
Open your terminal with a user that has sudo privileges. First, you need to confirm that your hypervisor supports directory storage pools:
virsh pool-capabilities | grep "'dir' supported='yes'"To create a dir storage pool, use the virsh pool-define-as command. For instance, to create a storage pool named vms, which uses the directory /var/lib/libvirt/vms, run the command as follows:
virsh pool-define-as vms dir --target "/var/lib/libvirt/vms"Define Storage Pool using XML
A storage pool can also be created using virsh pool-define. This requires the use of an XML config file where various parameters are specified for the storage pool.
The following are the parameters required in the xml file to successfully define a dir storage pool:
| Description | XML code |
|---|---|
| The type of storage pool | <pool type='dir'> |
| The name of the storage pool | <name>name</name> |
| The path specifying the target. This will be the path used for the storage pool. | <target><path>target_path</path></target> |
Example
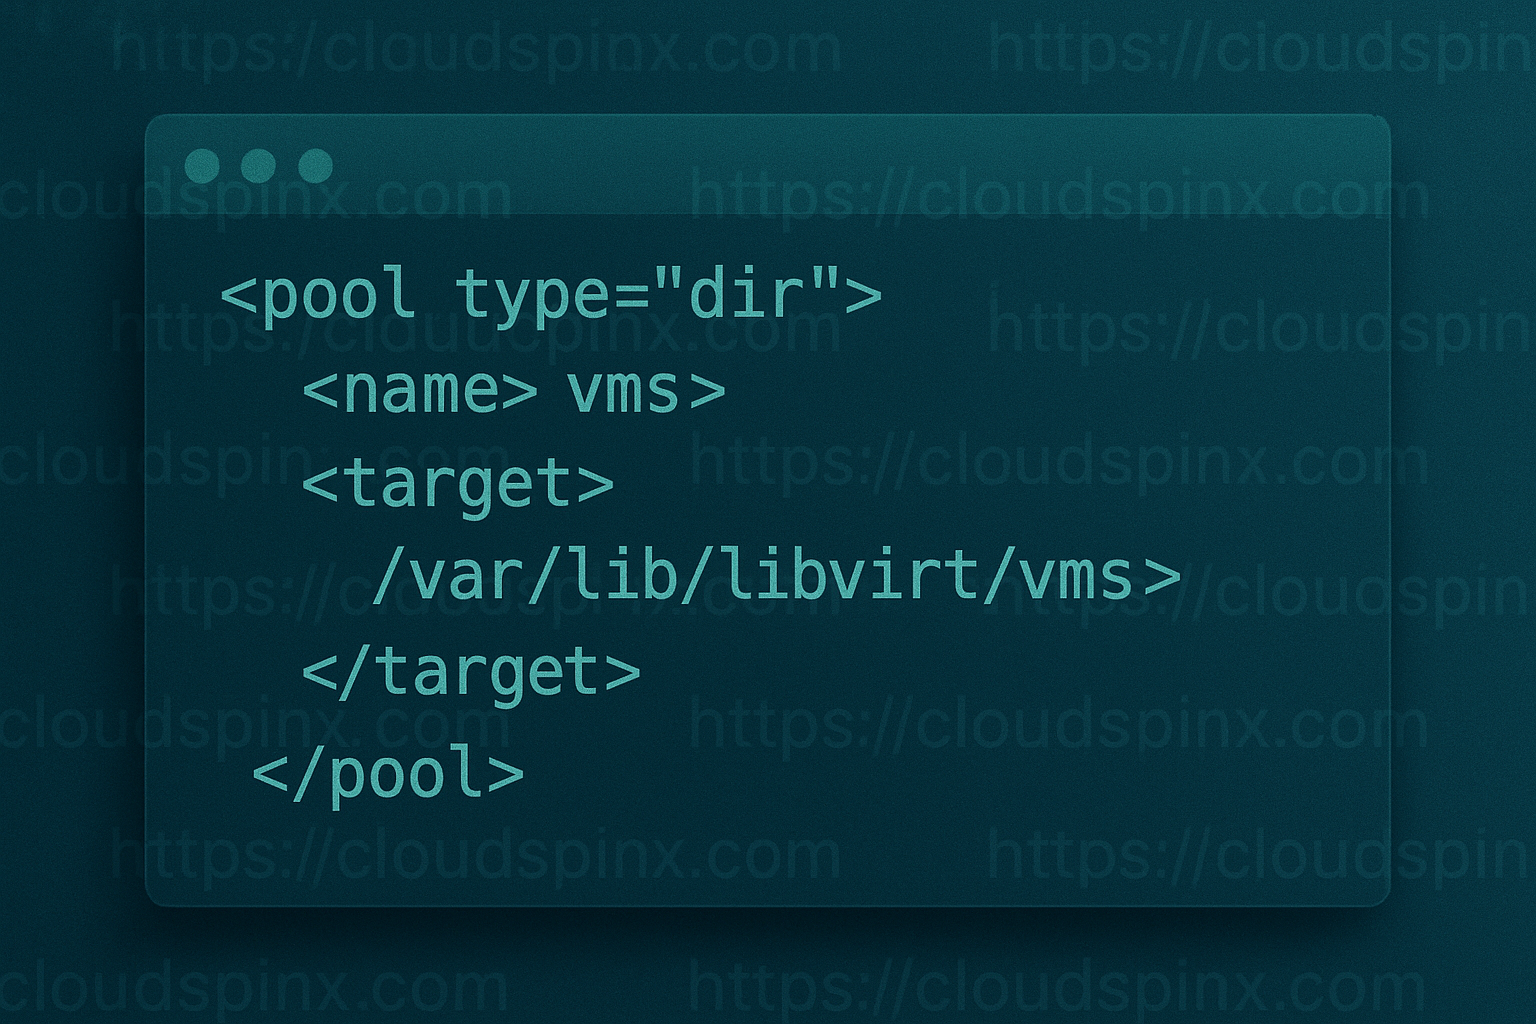
For example, you create the same pool but using an xml file, you’d define the pool as follows:
<pool type="dir">
  <name>vms</name>
  <target>
    <path>/var/lib/libvirt/vms</path>
  </target>
</pool>
The pool created is based on the /var/lib/libvirt/vms directory.
Create Storage Pool target Path
Virsh also offers a command to create a specific target path for your intended storage pool. The target path created will match the already existing, already formatted file system storage pool that you just defined in the step above. Run the following command to create your target path:
virsh pool-build vmsCheck that the pool was created, using the virsh pool-list command:
virsh pool-list --allStart the Storage Pool
Use the virsh pool-start command to mount the storage pool:
virsh pool-start vmsSince storage pools defined using virsh are not set to start automatically when the host boots, you can precisely set it to autostart using the command below:
virsh pool-autostart vmsVerify Storage Pool Creation
To confirm that the storage pool is now running, you ought to use the virsh pool-info command. The command will display the sizes of the storage pool and whether the autostart configuration is in place to enable the desired functionality:
virsh pool-info vmsOutput example:
Name:           vms
UUID:           a4d1d55d-6b39-466b-9447-360d222f6e20
State:          running
Persistent:     yes
Autostart:      yes
Capacity:       456.35 GiB
Allocation:     84.52 GiB
Available:      371.83 GiB
Using Cockpit Web Console
This chapter assumes that you have cockpit and the VM web console plugin installed on your host. Login to your Web console and click Storage Pools at the top of the virtual machines interface to access the Storage Pools window. The window shows a list of all the configured storage pools (if any) on the host and their details.

Click Create Storage Pool and a new window appears. Enter the name of the storage pool. In the Type selection, select Filesystem Directory.
Provide the target path on the host’s filesystem, then check the box to enable the pool to autostart whenever the host boots.
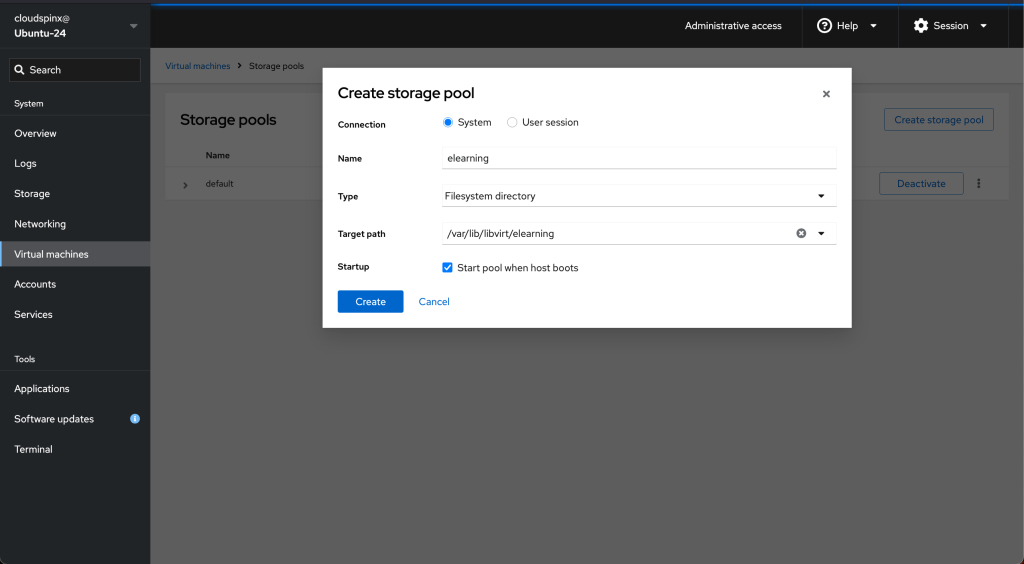
Click Create. The storage pool is created and will appear on the list of available storage pools, but in an inactive state.
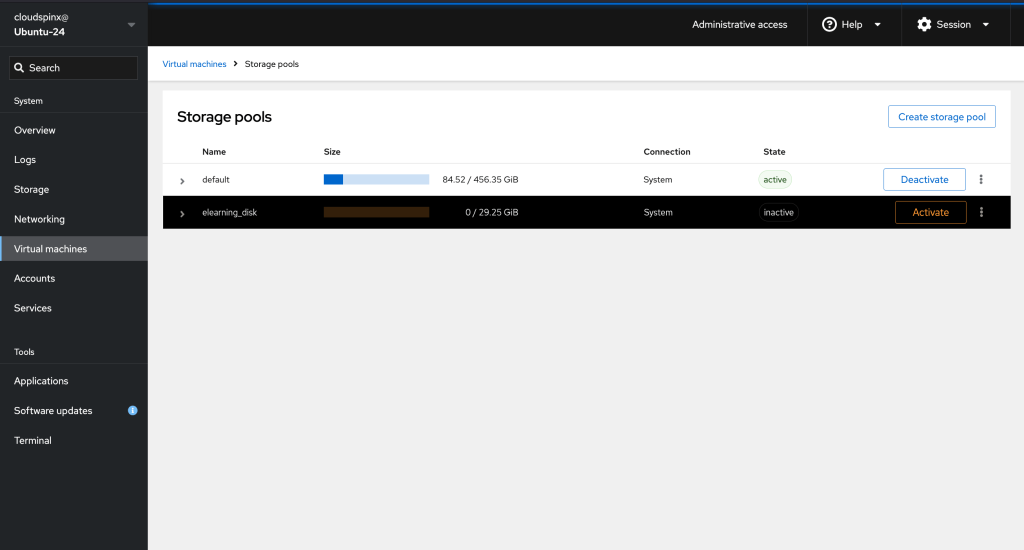
Unlike virsh which could build directories for the new storage pool, cockpit needs an existing directory as the target path, to be able to activate the storage pool successfully. So before you can activate the storage pool, ensure that the target path exists on the hosts file system.
Click on Activate and the state should read active.
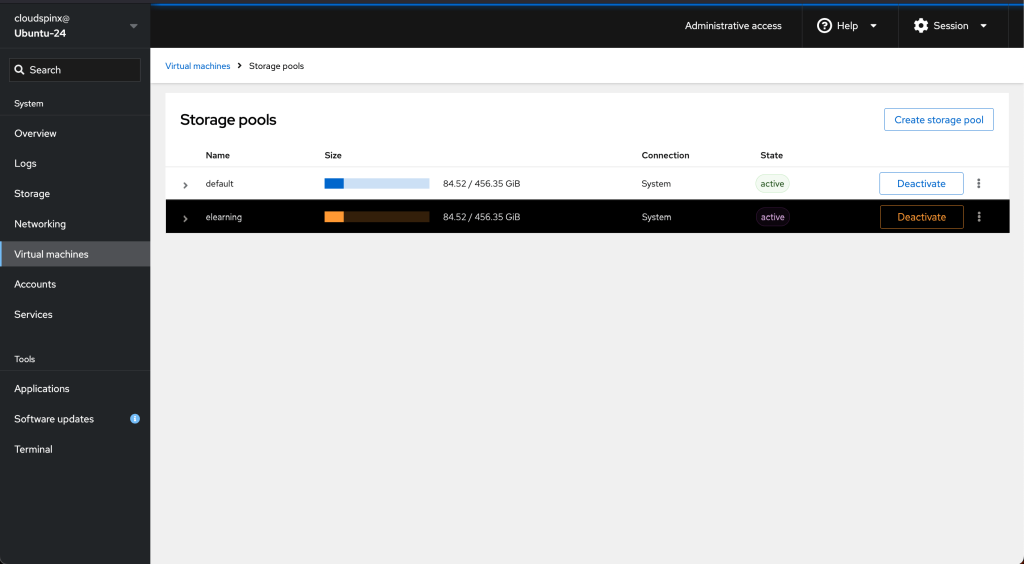
Your directory pool is set up and ready for use.
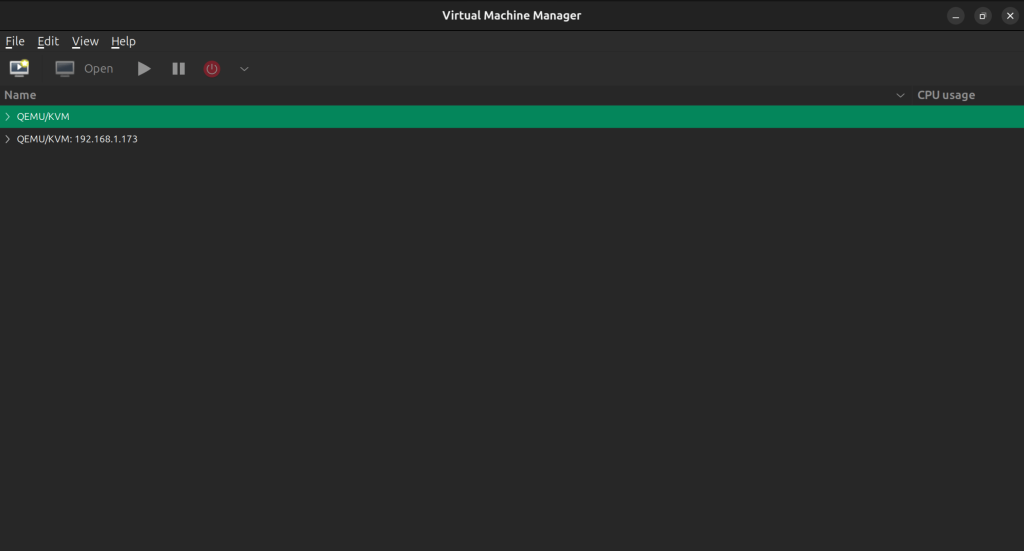
Using Virt-Manager
Launch Virt-Manager on your desktop and connect to the KVM host where you want to create the storage pool.
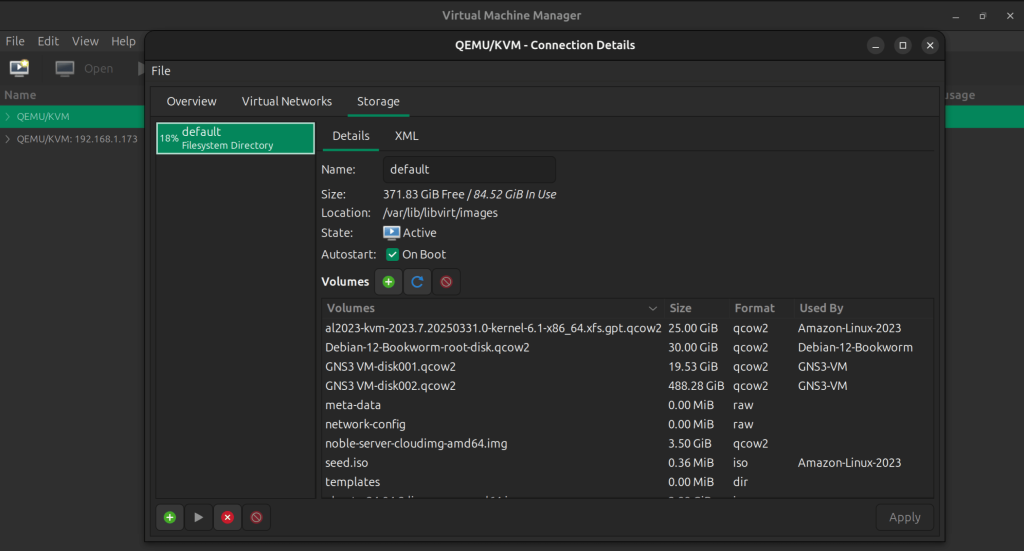
Navigate to Edit→Connection Details→Storage and click the Add Pool button.
In the new dialog window, select Directory as the pool type. Provide a name for the storage pool (e.g., vms-pool) and specify the target directory (e.g., /var/lib/libvirt/vms).
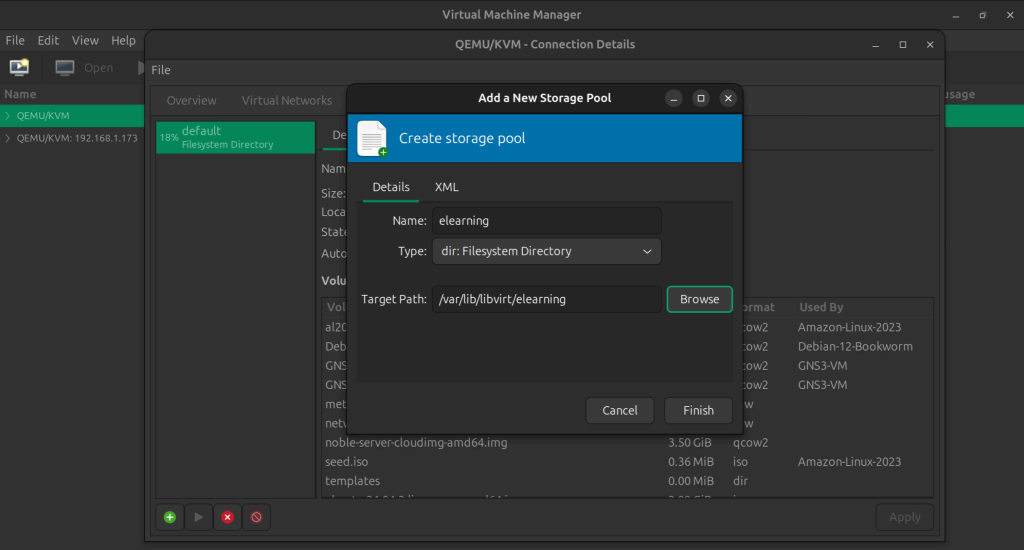
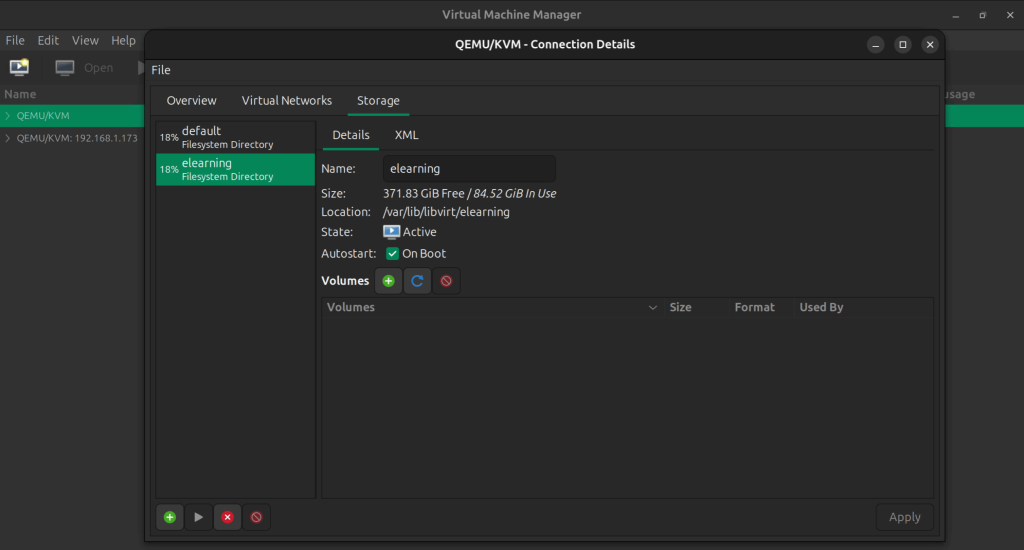
Then click “Finish” to create the storage pool. The new storage pool show now be on the storage pools list and ready for use.
🌍 Whether at work or on the go, access Mastering KVM Virtualization anytime, in the book you will learn:
- Supported Storage Pool Types
- Storage Management Using Virsh CLI
- Storage Management using Cockpit UI
- Storage Management using Virt-Manager


