
A Disk Storage Pool is set to provide a whole physical disk or a selected partition of the physical disk to be used for the actual storage of virtual machine images, along with the different other relevant files that are related to those images. This kind of storage pool has much more durability and reliability compared to a Directory Storage Pool, which is needed in most operational contexts. It is especially suited to setups where there is an apparent and urgent need for dedicated and stable storage solutions, as these are instrumental in ensuring peak performance levels as well as in improving overall efficiency in system operations. Here, different volumes are defined by adding designated partitions to this distinctive disk configuration. It needs to be noted, though, that disk pools have a set of constraints or restrictions in relation to the overall size of a volume, as well as where a volume of a set size can be placed in a given configuration. Details on ‘free extents’ present a complete picture of unallocated areas, something that is of special significance in creating new volumes. It also needs to be noted that a single volume is prohibited from crossing over or being placed across multiple free extents at a single point in time. Also, the system would set DOS as its default configuration as far as the source being used to form a given pool goes.
The volume pool accepts the following disk pool formats only:
dosdvhgptmacbsdpc98sunlvm2
For optimal portability, the dos (or msdos in parted, suitable for BIOS firmware systems) or gpt (suitable for UEFI firmware) formats are advised. gpt is required by disks larger than 2TB in size.
Keep in mind that the lvm2 format is the physical volume format, meaning that the entire disk is a physical volume rather than the partitions that are often used in LVM. This is not actually a partition table, and libvirt cannot create such a pool but can only identify it. Creating a pool of a given structure is dependent on whether it exists in parted.
Mastering KVM Virtualization - The Ultimate eBook
From home labs to production clouds - master KVM Host management, automating KVM administration using Terraform, Vagrant, and cloud automation. This eBook will enable you to build scalable virtual infrastructure that works whether you're learning at home or deploying enterprise solutions. Get your full copy today
Supported Volume Formats
The disk storage pool accepts the following volume format types:
nonelinuxfat16fat32linux-swaplinux-lvmlinux-raidextended
Use Cases
- Dedicated Storage: Such storage solution is highly appropriate for environments and settings that specifically demand dedicated storage that can be used mostly to run and manage virtual machines.
- Performance: Suitable for performance-sensitive applications where disk I/O performance is critical.
- Isolated Storage is a very useful technique for isolating the storage utilized by virtual machines from the host filesystem. This isolation greatly improves the security and management of the virtual machine environments.
Configuring a Disk Storage Pool
The disk storage pool can be configured using virsh, cockpit, and Virt-Manager. We’ll start with Virsh CLI.
Using Virsh CLI
First,, make sure that your hypervisor supports disk-based storage pools by running the command below:
virsh pool-capabilities | grep "'disk' supported='yes'"The command should generate an output, which indicates that disk-based pools are supported.
Create Storage Pool
The first thing you’ll do is to identify the disk or partition you want to use for the storage pool. For example, /dev/sdb1.
Use the command virsh define-pool-as, to define and create your disk storage pool. For instance, the command below creates a storage pool named vms_disk that uses the /dev/sdb1 device and is mounted on the /dev directory.
virsh pool-define-as vms_disk disk --source-format=gptDefine Storage Pool using XML
The storage pool can also be define from an xml configuration file using the command virsh pool-define. Using an xml file requires that you specify certain parameters in your xml file. The required parameters are as follows:
| Description | XML |
|---|---|
| Type of storage pool | <pool type='disk'> |
| The name of the storage pool | <name>name</name> |
The path specifying the storage device. For example, /dev/sdb. | <source> <path>source_path</path></source> |
| The path specifying the target device. This will be the path used for the storage pool. | <target> <path>target_path</path></target> |
Example
You could define your disk storage in an xml file as below:
<pool type='disk'>
  <name>vms_disk</name>
  <source>
    <device path='/dev/sdb'/>
    <format type='gpt'/>
  </source>
  <target>
    <path>/dev</path>
  </target>
</pool>
Save the file and then run the following command to define the storage pool.
virsh pool-define ~/disk_pool.xmlCreate the storage pool target path
The next step is to create a target path for the storage pool, initialize the storage source device, and define the data format. This can be achieved using the virsh pool-build command.
virsh pool-build vms_diskTo verify that the pool was created by running the listing all the storage pools:
virsh pool-list --allStart the disk storage pool
Use the following command to start the storage pool:
virsh pool-start vms_diskOptionally, you can configure the pool to start automatically whenever the host system boots:
virsh pool-autostart vms_diskVerify Storage Pool
The command virsh pool-info can be used to view information about a storage pool. Run this command to view your storage pool details and confirm that the pool is in running state:
$ virsh pool-info vms_disk
Name:           vms_disk
UUID:           f404e73e-632f-4052-94ea-2ddeb625a348
State:          running
Persistent:     yes
Autostart:      yes
Capacity:       29.25 GiB
Allocation:     0.00 B
Available:      29.25 GiB
Using Cockpit Web Console
Open your preferred web browser and navigate to the Cockpit interface (usually accessible at https://<server-ip>:9090) and login with administrative credentials:
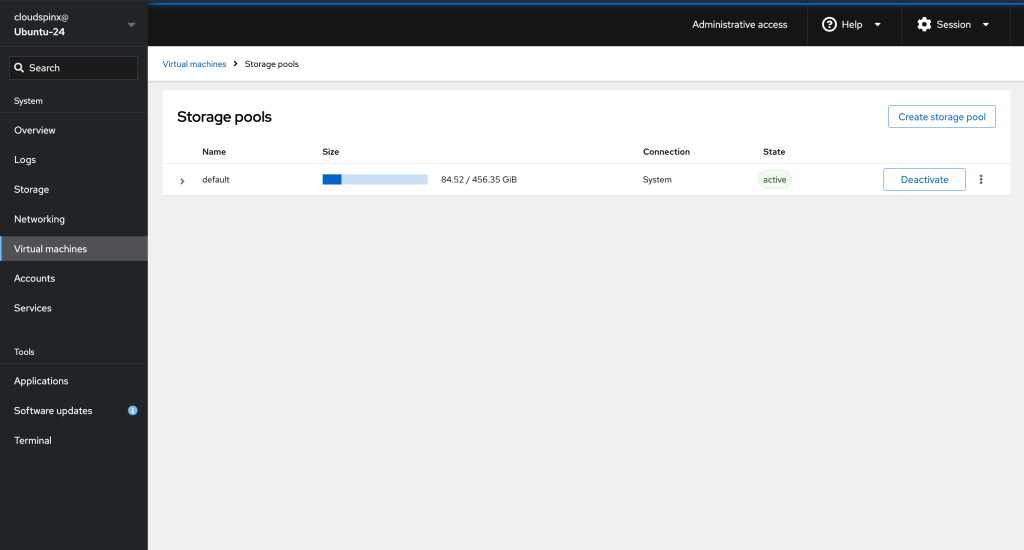
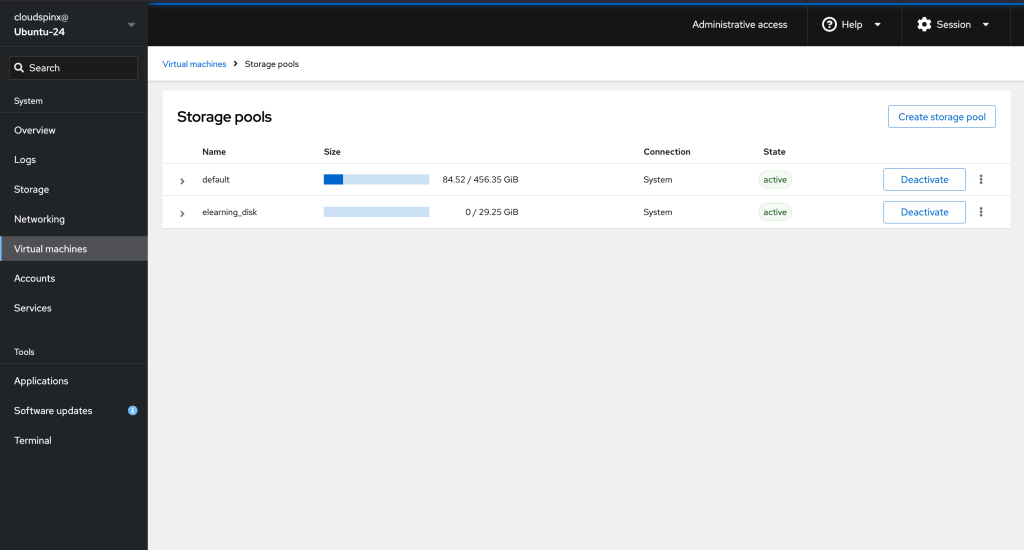
Navigate to the Virtual Machines section the click Create Storage Pool and a new window appears. Enter the name of the storage pool, select Physical Disk Device as the storage pool type.
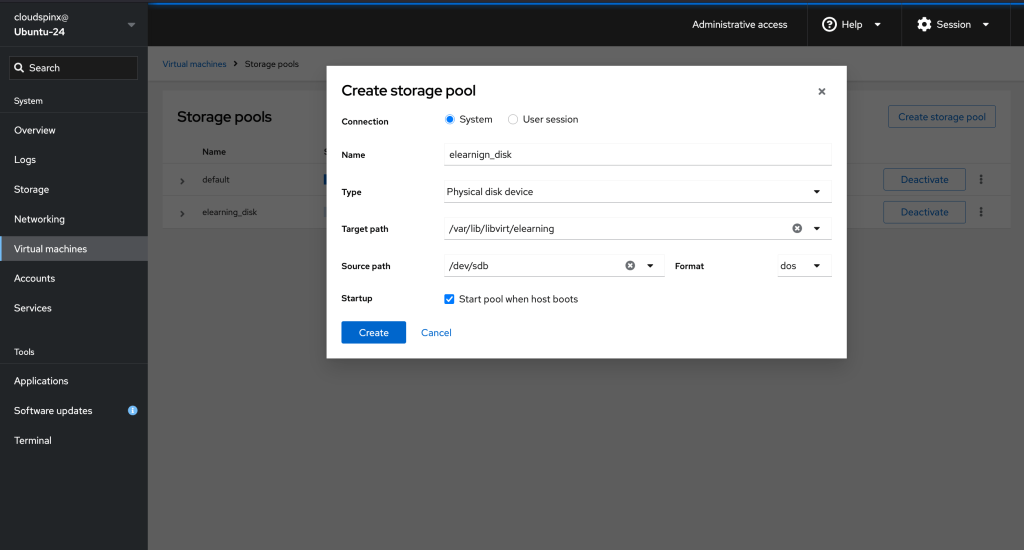
Enter the target path on the host’s filesystem where you want the storage pool to reside, and then provide the source path, where the disk device is located on the host filesystem. Also select the appropriate format of the disk device.
You can check the startup checkbox to configure the storage pool to autostart when the host system boots. When you click Create, the storage pool is created and will appear on the list of available storage pools, but it still needs to be activated.
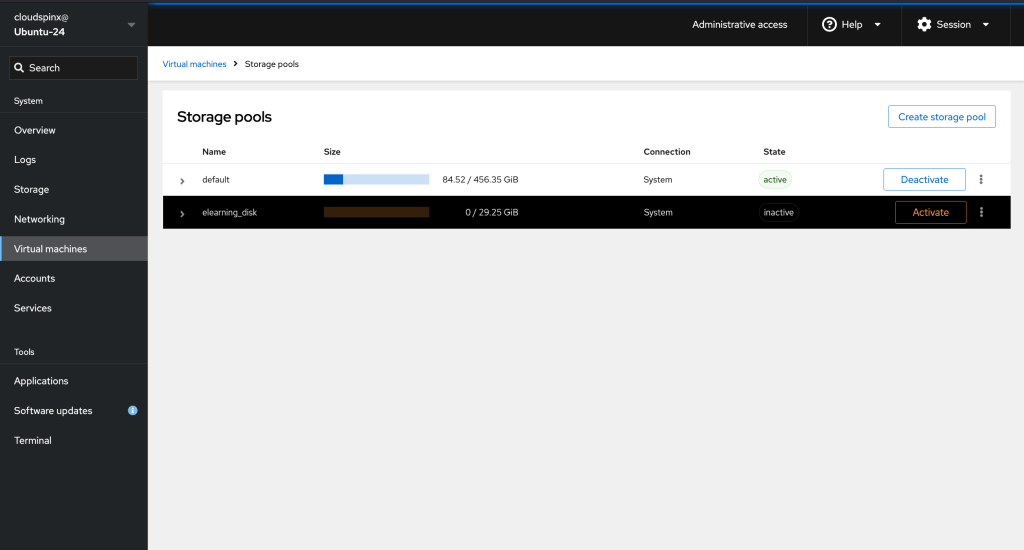
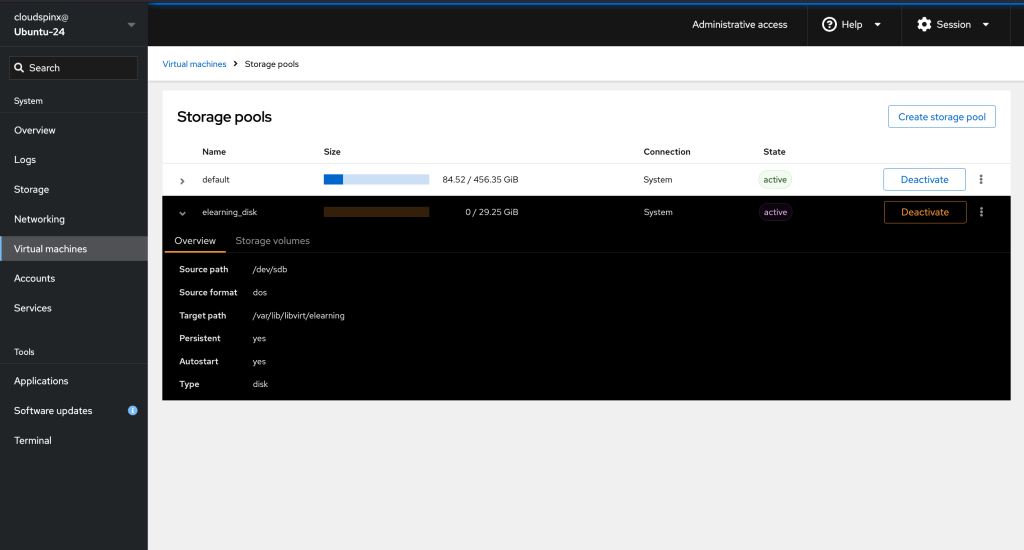
Click on Activate and the status should change to active. If you get an error such as ‘probe failed’, you might want to issue the virsh pool-build command.
Click the arrow → to see more details about the storage pool.
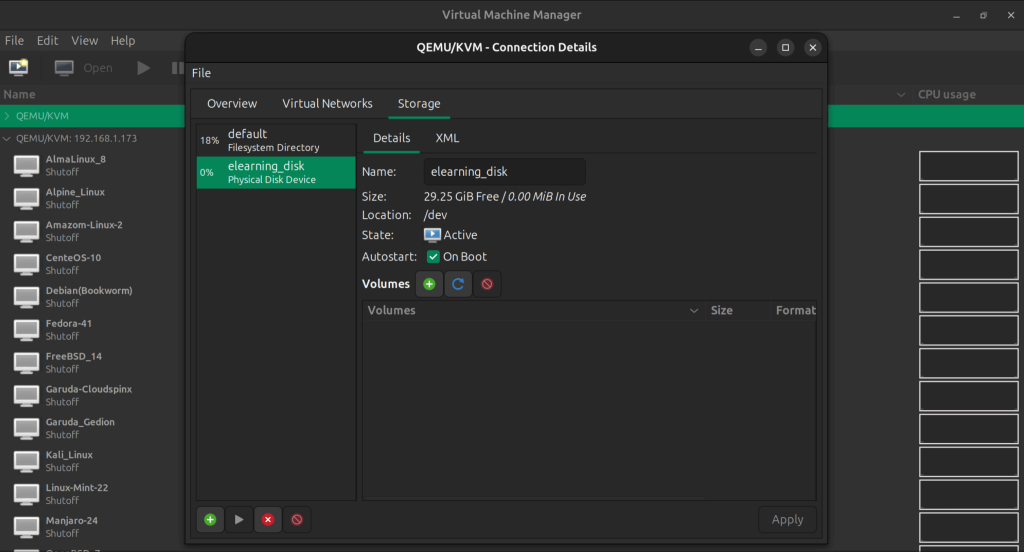
Using Virt-Manager
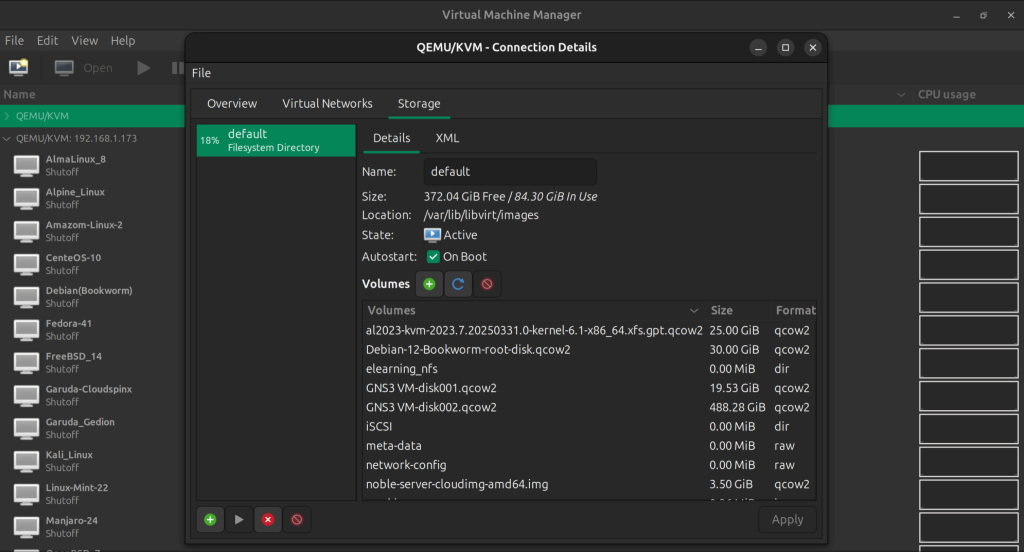
In the Virt-Manager window, connect or select the host machine you wish to configure the storage pool on. In the Connection Details tab, click on Storage to manage the existing pools or create new ones.
Then click on the Add Pool button to create a new pool and a new window will pop up. In the popup window, provide a name for the storage pool (e.g., vms-pool) and specify the path to the source of the disk.(e.g., /dev/sdc).
Set the filesystem format to auto or if the specific format is present in the dropdown menu, select it. (e.g., dos). You can leave the filesystem format as auto or input the format of your physical disk, if you know it.
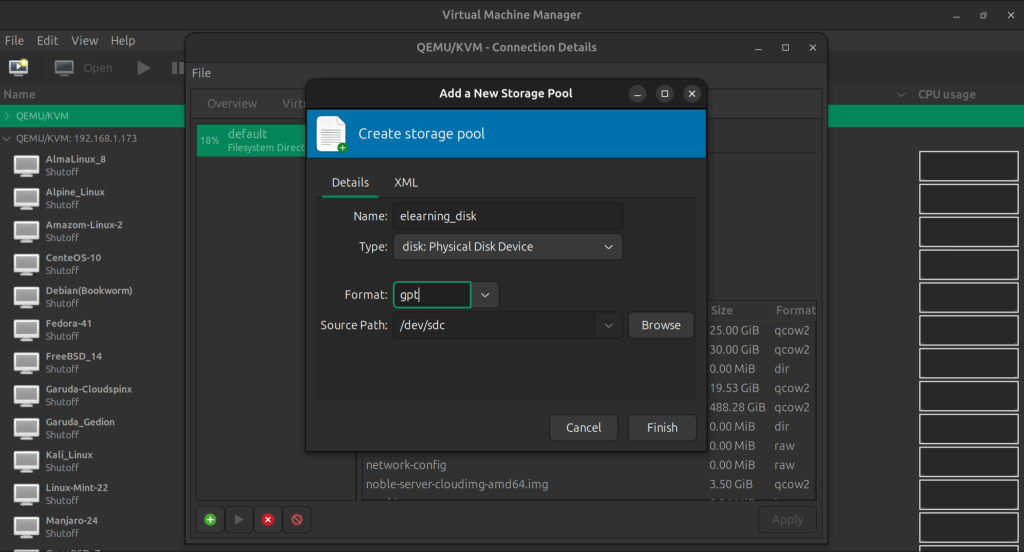
Click “Finish” to create the storage pool.
🌍 Whether at work or on the go, access KVM eBook anytime, in the book you will learn:
- Supported Storage Pool Types
- Storage Management Using Virsh CLI
- Storage Management using Cockpit UI
- Storage Management using Virt-Manager
More guides from us:


