
The filesystem storage pool is a variant of the directory-based storage pool. This type of storage pool expects a source block device to be provided instead of creating a directory on an already mounted filesystem. After naming that particular block device, it will be mounted in turn and, as a result of that, all the files will be stored and maintained in the directory of its respective mount point. By default, the setup is programmed to allow the type of filesystem to be detected and recognized automatically by the kernel and with no input explicitly provided. However, if the circumstances warrant it, the type of filesystem can also be explicitly set.
This type of storage pool offers greater flexibility compared to a Directory Storage Pool, with the additional benefit of improved performance capabilities complemented by improved management functions. In addition to that, Filesystem storage pools also benefit from being compatible with multiple different kinds of file formats so that they may be formatted to use a variety of different filesystems such as ext4, xfs, or btrfs and other similar filesystems depending on the demands and necessities that may arise from the user or application.
To put it simply, use this storage pool type when you want to create a storage pool on a system that is not mounted.
Mastering KVM Virtualization - The Ultimate eBook
From home labs to production clouds - master KVM Host management, automating KVM administration using Terraform, Vagrant, and cloud automation. This eBook will enable you to build scalable virtual infrastructure that works whether you're learning at home or deploying enterprise solutions. Get your full copy today
The filesystem storage pool type supports the following pool format types:
auto– automatically determine formatext2ext3ext4ufsiso9660udfgfsgfs2vfathfs+xfsocfs2vmfs
Use Cases
- Virtual Machine Disk Storage: You can store virtual machine disk images in filesystem storage pools on KVM or a different hypervisor. Examples include the creation and storage of
qcow2images in a filesystem directory that isext4. - Backup and archiving: A filesystem storage pool works well for both backup data and archived data as both are compatible with the filesystem and easily integrate directly into backup tools like
rsyncortar. - Sharing in Small to Medium Environments: A filesystem storage pool can be shared between multiple users and systems within an environment that has occasion to share or collaborate on files. For example, through NFS or Samba, a directory’s contents can be shared.
Configuration
The filesystem storage pool type can be configured using one of the following methods:
Using Virsh CLI
The first step is to confirm that your hypervisor supports filesystem storage pools. Use the command below:
virsh pool-capabilities | grep "'fs' supported='yes'"Any output suggests that filesystem storage pools are supported and you can proceed with the next steps.
For this type of storage pool, just as it was the case in disk storage pools, you need a device to be a base of the storage pool. Partitions or LVM volumes are highly recommended for the task.
Create Storage Pool
To create a filesystem storage pool, use the command; virsh pool-define-as, as shown below:
virsh pool-define-as vms_fs fs --source-dev /dev/sda2 --target /var/lib/libvirt/vmsThe above command creates a storage pool named vms_fs, which uses the partition /dev/sdc1, mounted on /var/lib/libvirt/vms directory.
Define Storage Pool using XML
Virsh also has a command to create the storage pool from an xml file definition. For this, certain parameters are required to be set in the xml file.
The required parameters are as follows:
| Description | XML |
|---|---|
| Storage pool type | <pool type='fs'> |
| The name of the storage pool | <name>name</name> |
Specific path to the partition. e.g /dev/sdc1 | <source><device path=device_path/> |
The filesystem type. e.g ext4 | <format type=fs_type/></source> |
| The path that specifies the target. This is the path that the storage pool will be based on. | <target><path>path-to-pool</path></target> |
For example, to define the same storage pool, the xml file would be as below:
<pool type='fs'>
  <name>vms_fs</name>
  <source>
    <device path='/dev/sda2'/>
    <format type='auto'/>
  </source>
  <target>
    <path>/guest_images</path>
  </target>
</pool>
Save the xml file and then run the command below to apply the definition:
virsh pool-define ~/vms_fs.xmlCreate the storage pool target path
Now, create the pool’s target path that was specified during the storage pool definition. This is necessary as it will initialize the storage source and define the date format.
virsh pool-build vms_fsThen confirm that the path has been created:
$ ls -la /var/lib/libvirt/vms
total 8
drwxr-xr-x  2 root root 4096 May  5 01:39 .
drwxr-xr-x 10 root root 4096 May  5 01:39 ..
List the available pools to confirm that the storage pool has been successfully created:
virsh pool-list --allStart the storage pool
Use the command below to start the storage pool:
virsh pool-start vms_fsOptionally, you can use the following command to configure the pool to start automatically when the host system boots up.
virsh pool-autostart vms_fsVerify the Storage Pool
Check that the pool has been started and is in the running state. The virsh pool-info command displays all the relevant information related to the passed storage pool, including the capacity.
$ virsh pool-info vms_fs
Name:           vms_fs
UUID:           9a89d045-2851-408a-ab1a-4ae96bf81278
State:          running
Persistent:     yes
Autostart:      no
Capacity:       456.35 GiB
Allocation:     84.53 GiB
Available:      371.81 GiB
To confirm that the device is mounted, look for a lost+found directory in the target path on the filesystem.
mount | grep /var/lib/libvirt/vms
ls -la /var/lib/libvirt/vms
The ls -la command should display a lost+found directory.
Using Cockpit Web Console
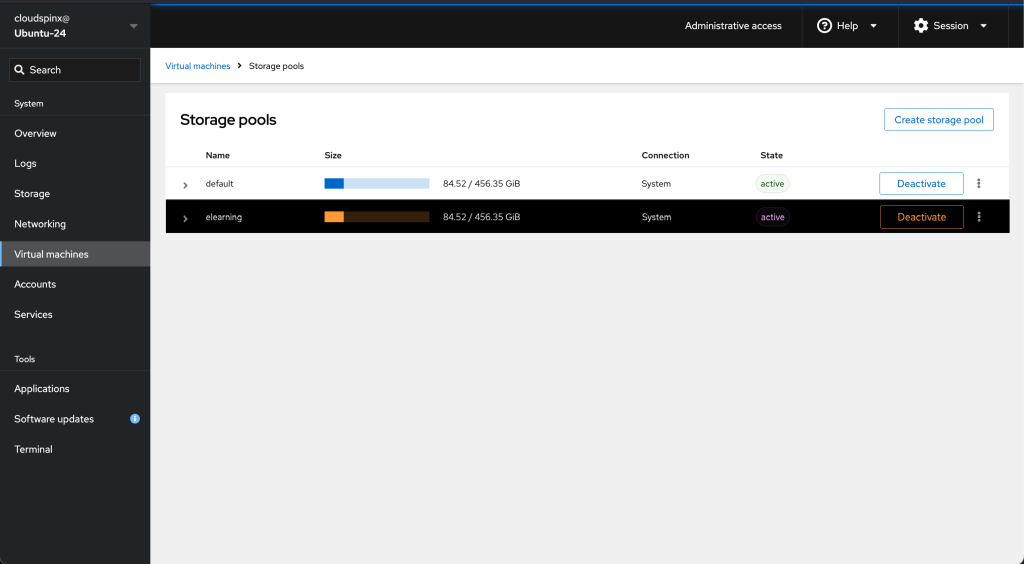
Login to your web console and navigate to the Virtual Machines section and click Storage Pools.
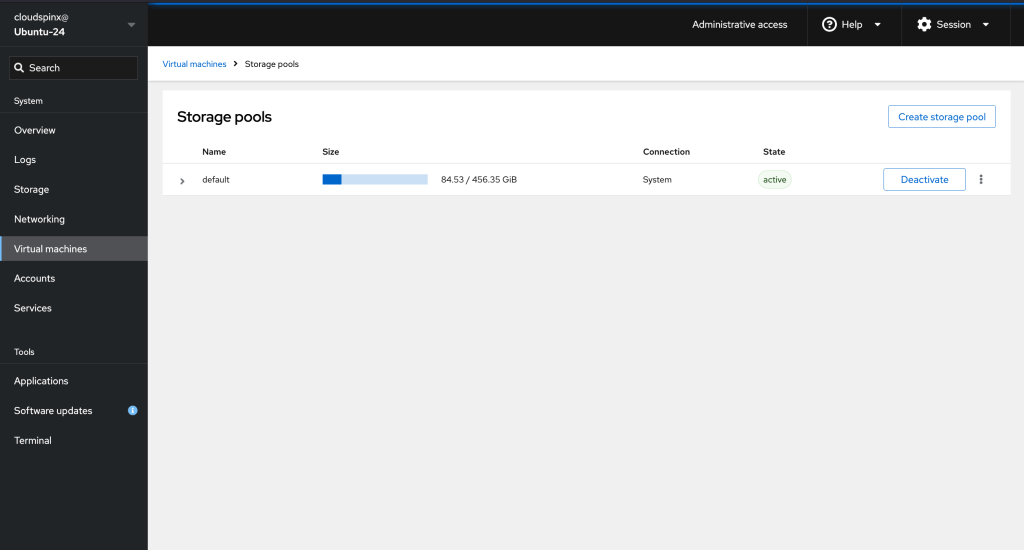
Then click the Create Storage Pool button and a new window pops up.
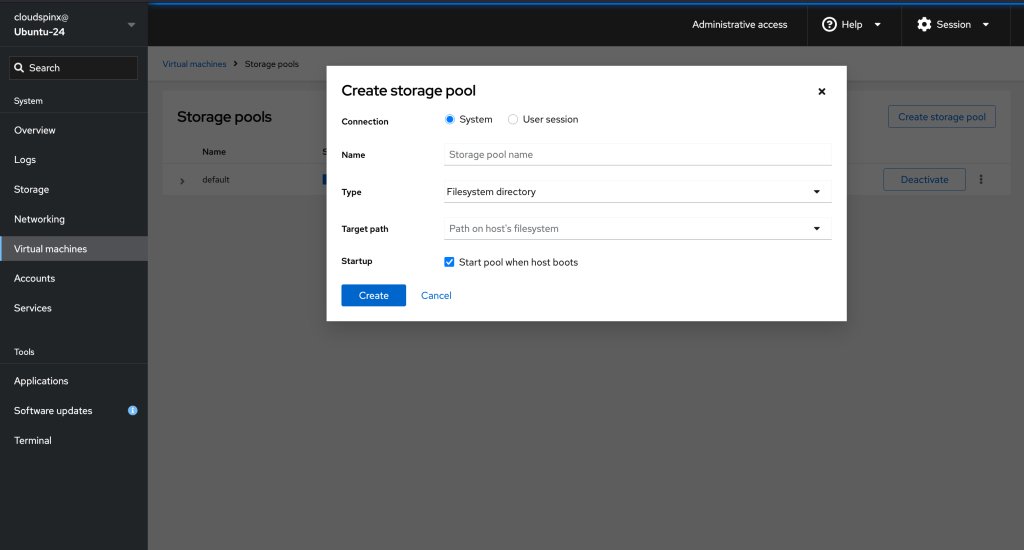
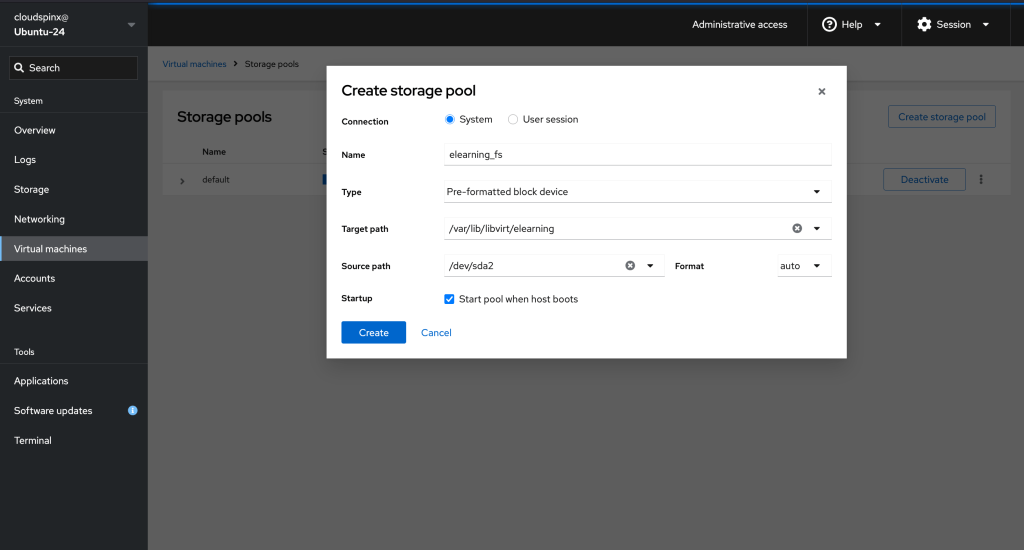
In the new popup dialog, select Pre-formatted block device as the storage pool type. Provide a name for the storage pool (e.g., vms-fs) and specify the target device (e.g., /dev/sda2).
- Specify the target path on the host’s filesystem. This is the mount point where the pool will be mounted. (e.g.,
/var/lib/libvirt/vms).
- Then select the filesystem format (e.g.,
ext4) or set it to auto if you prefer that the format be automatically detected.
- Check the startup checkbox to configure the autostart feature for the pool. Then click the Create button to create the storage pool.
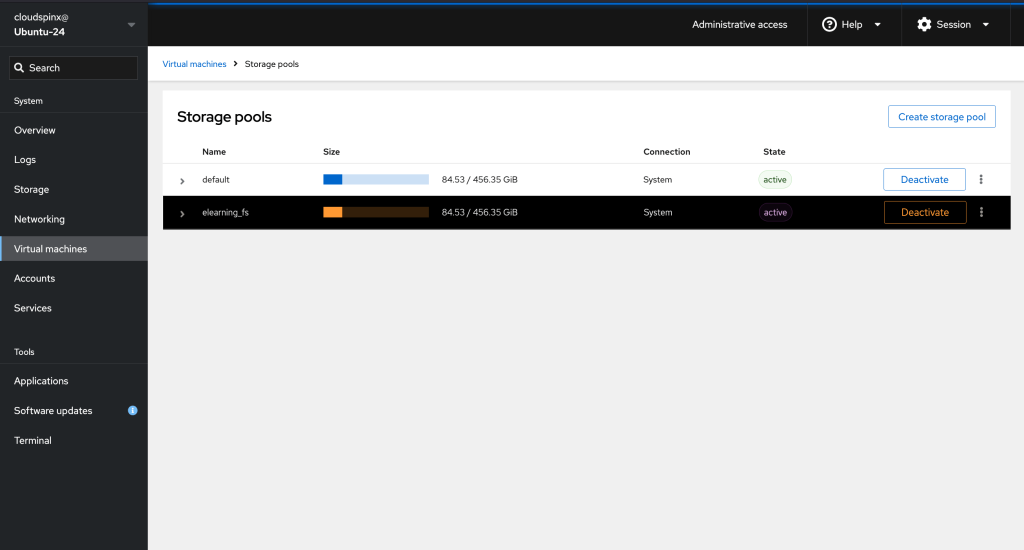
The storage pool should be listed in the pool list as inactive.
Activate the storage pool by clicking the Activate button.
Using Virt-Manager
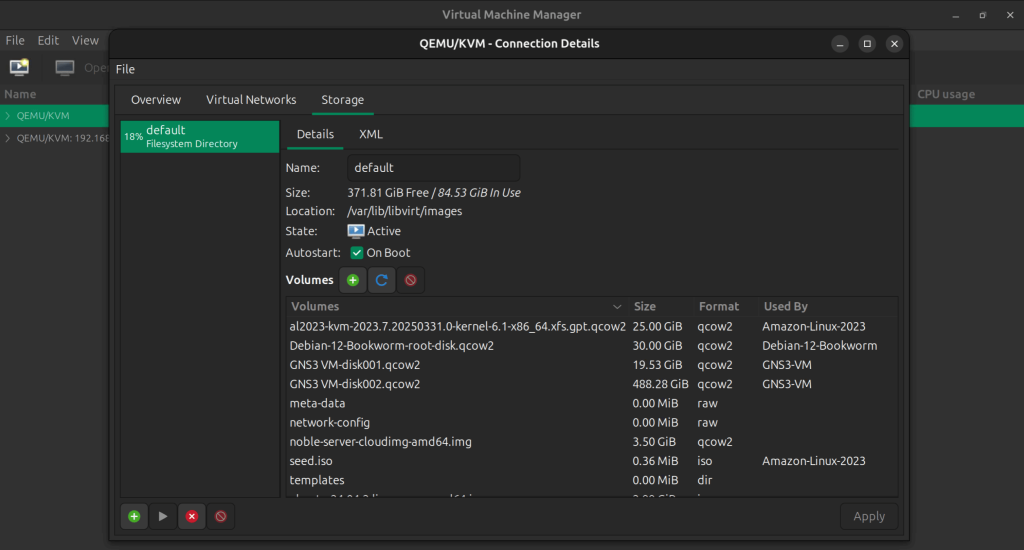
With Virt-Manager installed on your host, launch it and connect to your KVM host. In the virt-manager window, click on Edit→Connection Details→Storage.
This opens the Storage tab, which displays all the available storage pools (if any) on the host system.
Click the Add Pool button to launch a storage pool creation wizard.
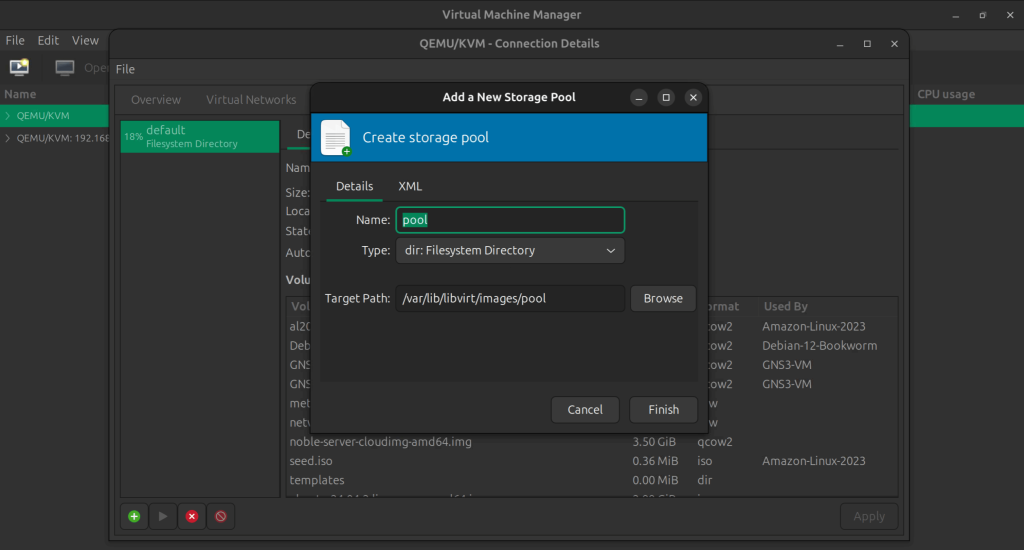
For the pool type, select Pre-formatted Block Device prefixed with fs. Then for the target path, provide the path to where you want the pool to be based and mounted(e.g, /var/lib/libvirt/vms).
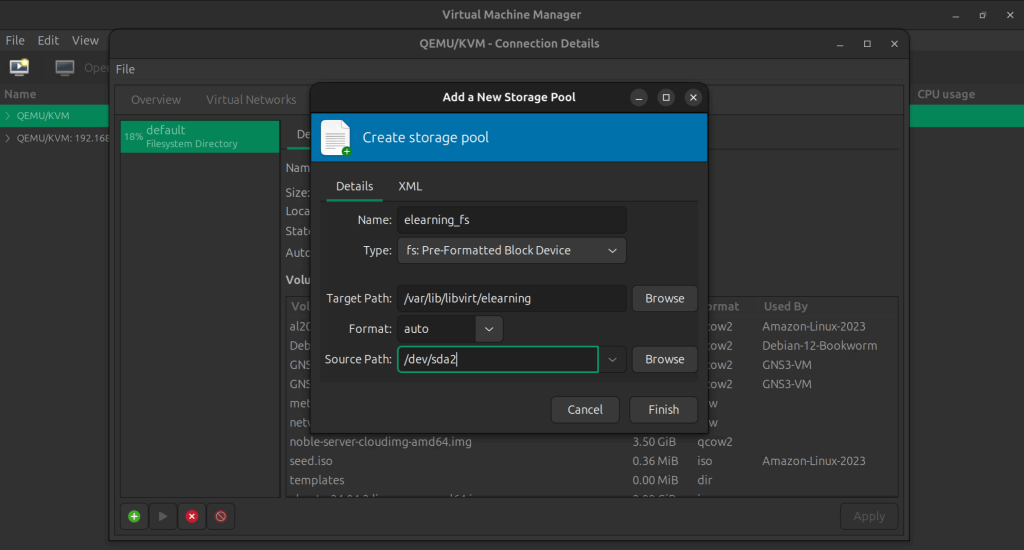
Set the format to auto for the system to automatically recognize the format of the pre-formatted device. Then provide a source path to the location of the pre-formatted device, or just browse to the location by clicking on the browse button.
Click the finish button to create the Filesystem storage pool. The pool should be created and be available on the storage pool list.
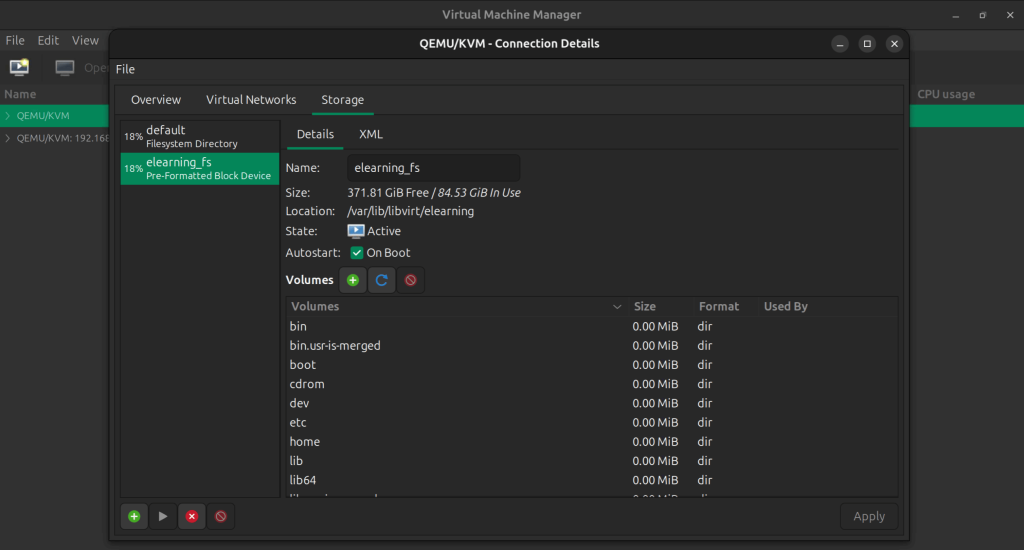
Virt-Manager starts the pool automatically when you click on finish.
🌍 Our KVM eBook covers all this in details and more. In the book you will learn:
- Supported Storage Pool Types
- Storage Management Using Virsh CLI
- Storage Management using Cockpit UI
- Storage Management using Virt-Manager
Watch out for more guides from our team:


