

An LVM stands for Logical Volume Manager and is a refined system developed for handling storage pools with the advanced facilities of the LVM technology to efficiently manage and arrange different storage units used by virtual machines. An LVM system provides a highly dynamic and flexible storage management methodology that spans a broad range of functions that allow the resizing of volumes on demand, creating snapshots to protect data from loss and providing transparent storage handling over a wide range of multiple physical disks.
Therefore, LVM storage pools prove to be highly beneficial over configurations that do not only imply scaling in size and capabilities, but also high flexibility plus a wide range of advanced storage management facilities that end up with improved performance and easier handling at the same time.
In the case that you already have a pre-existing LVM volume group set up and ready, it is enough to just specify the name of that group to be accessed. However, in the case that you want to create a completely new group from the scratch, you must provide a complete and detailed list of all of the source devices that are to be used as physical volumes in the new setup. The volumes will be assigned by systematically and carefully cutting out definite amounts of storage space from the volume group in general, making efficient use of the resources present.
Mastering KVM Virtualization - The Ultimate eBook
From home labs to production clouds - master KVM Host management, automating KVM administration using Terraform, Vagrant, and cloud automation. This eBook will enable you to build scalable virtual infrastructure that works whether you're learning at home or deploying enterprise solutions. Get your full copy today
Supported Formats
It should be noted that the volume pool supports only the lvm2 pool format. In the case that you don’t specify a format, the lvm2 format is selected automatically.
LVM storage pools require an entire disk partition, which means that if you are creating a new partition using the virsh commands, the partition will be formatted, and like every formatting scenario, all the data will be erased, and it cannot be undone.
Use Cases
- Scalability: Suitable for environments where storage needs to be easily scaled up or down.
- Flexibility: This is especially useful in scenarios where dynamic storage management is required. This encompasses operations like resizing volumes to match evolving needs and snapshots to record the state of data at a given point in time.
- High Availability: This feature itself is intended for use with clustered file systems, which are carefully engineered and optimized to deliver a high degree of availability with substantial redundancy.
- Advanced Storage Management is specifically useful in environments where there is a need for advanced storage features. These features can include, but are not limited to, thin provisioning and efficient volume group management, which are crucial in maximizing storage resources.
Configuration
You can use the following methods to configure an LVM storage pool:
Using Virsh CLI
Run the following command to check whether your hypervisor supports LVM storage pools:
virsh pool-capabilities | grep "'logical' supported='yes'"If LVM storage pools are supported, you should expect a yes in your terminal output.
Create Storage Pool
First, check for available volume groups in your file system:
$ sudo vgs
  VG     #PV #LV #SN Attr   VSize   VFree
  lvm_vg   1   0   0 wz--n- <29.25g <29.25g
LVM storage pools can be created using the virsh pool-define-as command:
virsh pool-define-as vms_lvm logical --source-name lvm_vg --target /dev/lvm_vgThe above command creates an LVM storage pool named vms_lvm, which uses the lvm_vg volume group, mounted at /dev/lvm_vg directory. Replace the name, and volume group name values with your own.
Define Storage Pool using XML
The virsh pool-define command allows for storage pool creation using an xml config file. The xml must contain the following parameters to be able to define the storage pool successfully:
| Description | XML |
|---|---|
| The storage pool type | <pool type='logical'> |
| The storage pool name | <name>name</name> |
| The path to the device for the storage pool | <source><device path='device_path'/> |
| The name of the volume group | <name>VG-name</name> |
| The virtual group format | <format type='lvm2'/></source> |
| The path to the target | <target><path=target_path/></target> |
The xml config file should be sth like this:
<pool type='logical'>
  <name>vms_lvm</name>
  <source>
    <device path='/dev/sdb1'/>
    <name>lvm_vg</name>
    <format type='lvm2'/>
  </source
  <target>
    <path>/dev/lvm_vg</path>
  </target>
</pool>
Save the xml file and then use the following command to create the storage pool from the xml file.
virsh pool-define /path/to/xml_file.xmlNow list the available storage pools to check that the pool has been defined by libvirt as expected.
$ virsh pool-list --all
 Name            State    Autostart
-------------------------------------
 default         active   yes
 vms_lvm   inactive   no
Then run the virsh pool-start to mount the storage.
virsh pool-start vms_lvmThen configure autostart:
virsh pool-autostart vms_lvmStorage Pool Verification
The virsh pool-info allows you to verify that the storage pool has been define and is in the running state, and that the size allocated is what you previous set.
$ virsh pool-info vms_lvm
Name:           vms_lvm
UUID:           20d2b44b-303d-4f3e-9a1e-1ed23a9ba25f
State:          running
Persistent:     yes
Autostart:      yes
Capacity:       29.25 GiB
Allocation:     0.00 B
Available:      29.25 GiB
The pool is setup and ready to store your VM disks and images.
Using Cockpit Web Console
Access your host’s cockpit web console and login with administrative credentials. Then navigate to the Virtual machines section and click on Storage Pools.
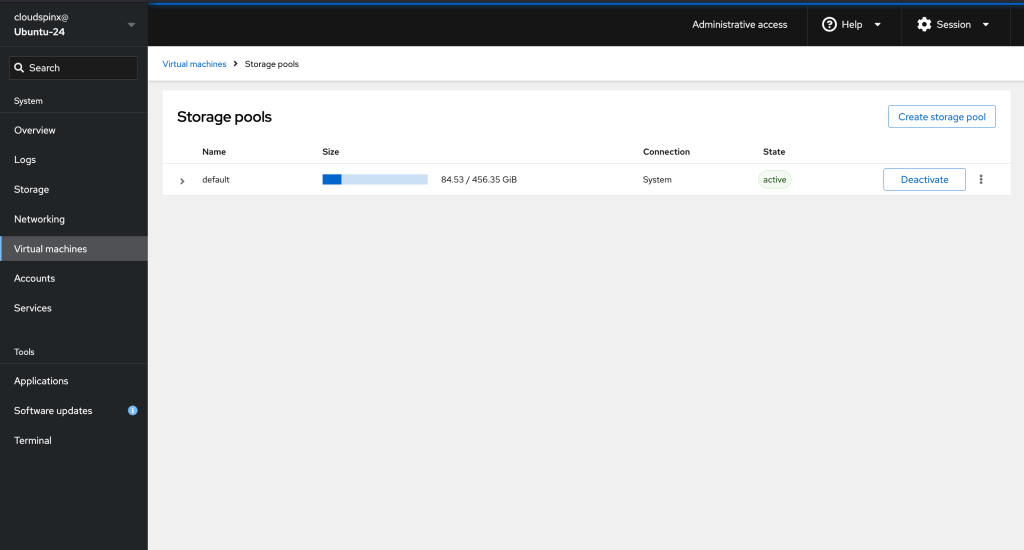
Then click on the Create storage pool button to configure a new storage pool.
Provide a name for your new storage pool and in the pool type, select LVM volume group. Then provide the name of the source volume group to be used by your new storage pool.

If you’d like the storage pool to start automatically when the host boots up, check the startup checkbox. With cockpit, the target path automatically defaults to /dev/[your-volume-group-name], i.e /dev/lvm_vg. Click Create button to finish and create the pool.
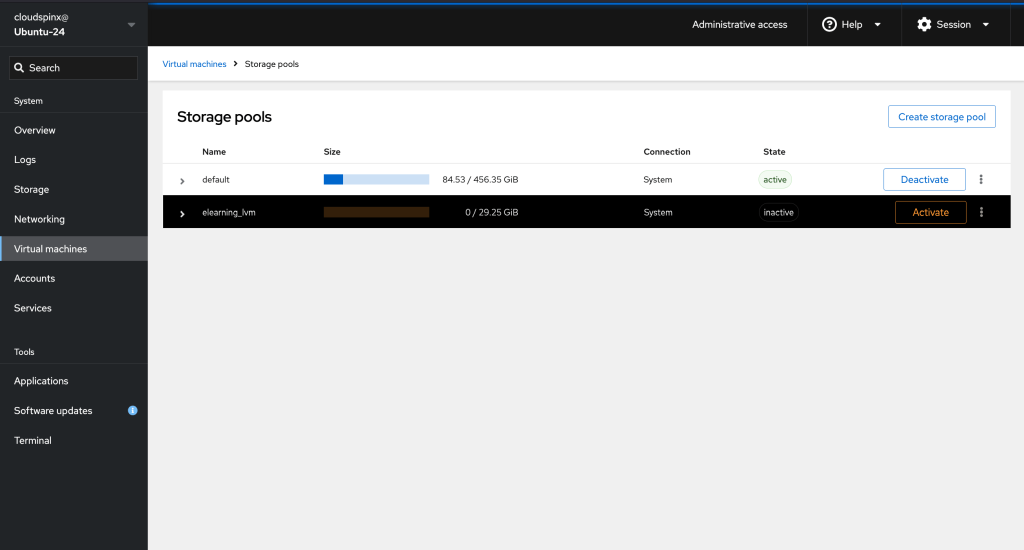
Your new pool should be available now in the list of available storage pools. You just need to activate it in order to be able to use it.
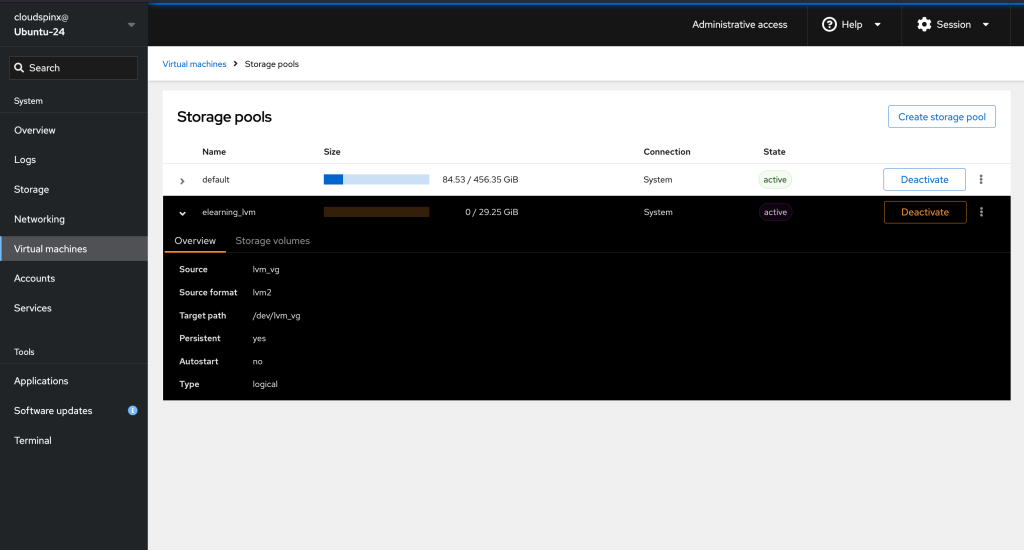
Once activated, the status should change form inactive to active. Expand the view to see more details about the storage pool.
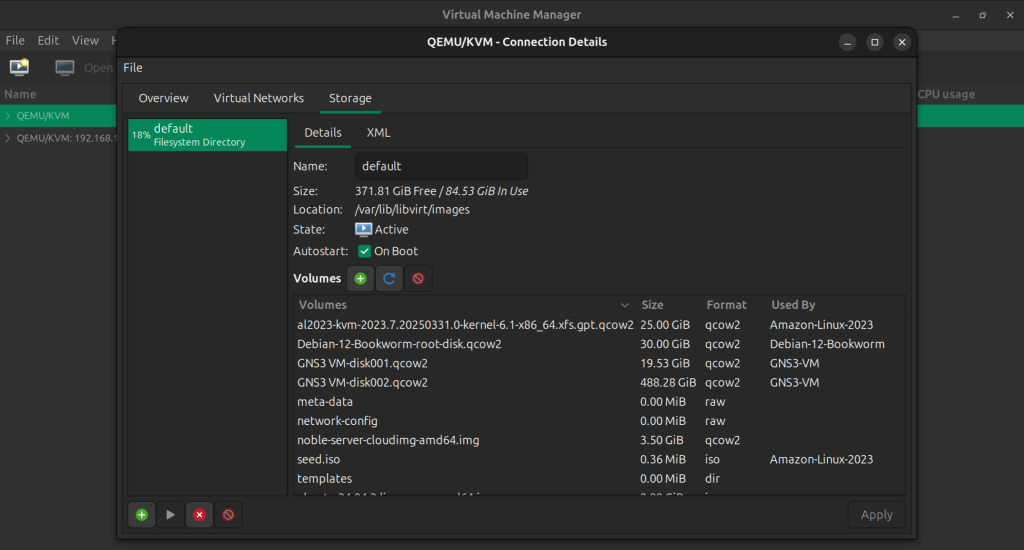
Using Virt-Manager
Open Virt-Manager on your desktop. Then click click on Edit→Connection Details→Storage to navigate to the storage section.
Click on the Add Pool button to launch the New Storage Pool popup window:
Enter the name for your new storage pool then select LVM Volume Group in the pool type section. Then provide the name of the volume group you want to use for your storage pool.
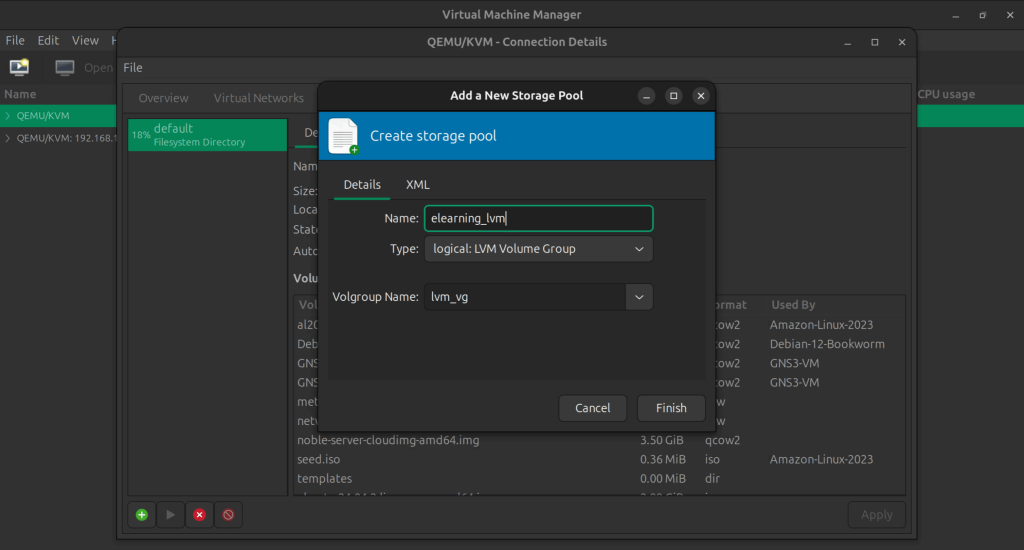
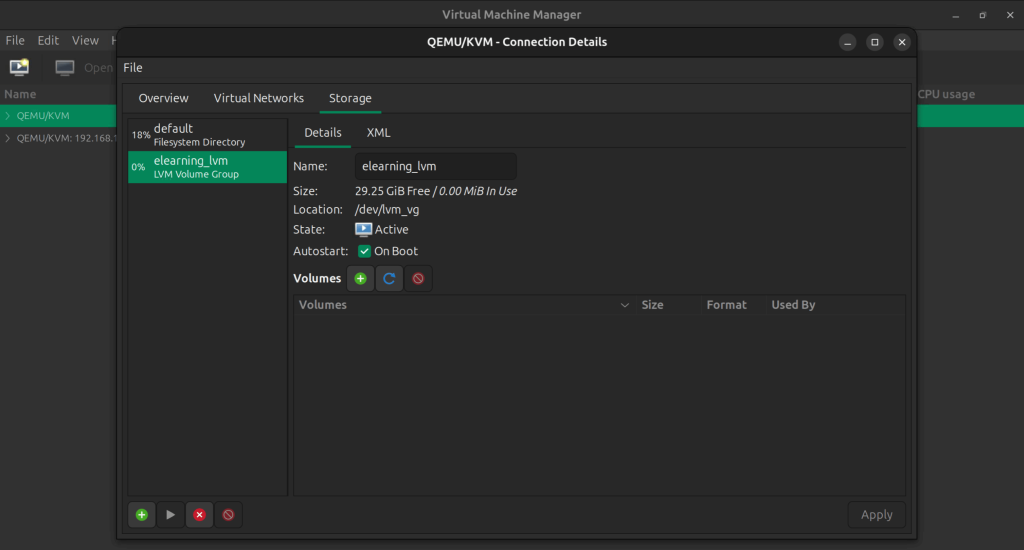
Click Finish to create the LVM storage pool. The storage pool is created and mounted on /dev/lvm_vg.
That’s it for LVM storage pools.
🌍 Our KVM eBook covers all this in details and more. In the book you will learn:
- Supported Storage Pool Types
- Storage Management Using Virsh CLI
- Storage Management using Cockpit UI
- Storage Management using Virt-Manager
Watch out for more guides from our team:


