
A Network File System, or simply NFS, works using a type of storage pool that leverages an external NFS server for storing virtual machine images and other related files that are required by the VM for top-notch performance and functionality.
NFS is especially designed to facilitate multiple hosts to access the same storage resource simultaneously over a network, making it the perfect choice for configurations requiring the capability of shared storage functionality. Moreover, NFS storage pools are immensely useful in environments where the management of storage resources is required to be centralized, with an added benefit of being accessible from a heterogeneous and diverse group of hosts.
This type of storage pool is an alternative implementation of the filesystem pool. Instead of giving it a local block device, it accepts host name and path of an exported directory. This network file system will be mounted and files will be stored in its mount directory. By default, it will utilize protocol auto, which will almost always try an NFS mount as its primary option.
Supported NFS Pool formats
The Network Filesystem pool supports the following pool formats, which can be specified during the storage pool creation:
autonfsglusterfscifs– Uses the SMB (samba) or CIFS file system.
For the volume formats, NFS storage pool supports the following volume formats:
raw: a plain filebochs: Bochs disk imagecloop: compressed loopback disk imagecow: User Mode Linux disk imagedmg: Mac disk imageiso: CDROM disk imageqcow: QEMU v1 disk imageqcow2: QEMU v2 disk imageqed: QEMU Enhanced Disk imagevmdk: VMware disk imagevpc: VirtualPC disk image
Not all of this volumes are available when creating new volumes in the NFS storage pool, only a few of them are available. Only the the raw volume type can always be guaranteed to be available.
Mastering KVM Virtualization - The Ultimate eBook
From home labs to production clouds - master KVM Host management, automating KVM administration using Terraform, Vagrant, and cloud automation. This eBook will enable you to build scalable virtual infrastructure that works whether you're learning at home or deploying enterprise solutions. Get your full copy today
Use Cases
- Shared Virtual Machine Storage: In a virtualization environment (for instance, VMware or KVM), you may use an NFS storage pool as the repository for virtual machine disk images that several hosts share. This allows VM migration among hosts without data loss.
- Centralized filing access: you can use NFS pools within an enterprise environment to offer centralized storage that is accessible to more than one server or client desktop. It comes in handy in configurations in which more than a single system needs to access the files.
- Media Servers: In media-focused settings such as media production (e.g., video editing), NFS pools will serve to let you share and store the large media files in a common workflow among multiple workstations.
Configuration
Let’s see how we can configure an NFS storage pool using virsh, cockpit and Virt-Manager:
Using Virsh CLI
The virsh utility can be used to check whether your hypervisor supports NFS-based storage pools. When you run the command below, you should expect an output to confirm support for NFS storage pools:
virsh pool-capabilities | grep "<value>nfs</value>"Create the storage pool
The virsh utility defines and creates storage pools using virsh pool-define-as. For example, the command below creates an NFS storage pool named vms_netfs, which uses the NFS server 192.168.1.182.
virsh pool-define-as --name vms_netfs --type netfs --source-host='192.168.1.182' --source-path='/home/cloudspinx/vms_nfs' --source-format='nfs' --target='/var/lib/libvirt/images/vms_nfs'The NFS share is mounted on the server’s /home/cloudspinx/vms_nfs directory. The target directory of the NFS storage pool is /var/lib/libvirt/vms .
Define Storage Pool using XML
This an alternative way to define and create your storage pool. The command used with this method is much simpler since all the arguments that would have gone with the command are define using parameters, in an xml file.
Parameters
For this method, certain parameters must be declared in the xml file:
| Description | XML code |
|---|---|
| Storage pool type | <pool type='netfs'> |
| The name of the storage pool | <name>name</name> |
| The hostname of the network server where the mount point is located. Specify either an IP address or a hostname. | <source><host name=hostname /> |
| NFS Storage pool format | <format type='cifs' /> or <format type='nfs' /> |
| The directory used on the network server | <dir path=source_path/></source> |
| The target path used for the storage pool | <target><path>target_path</path></target> |
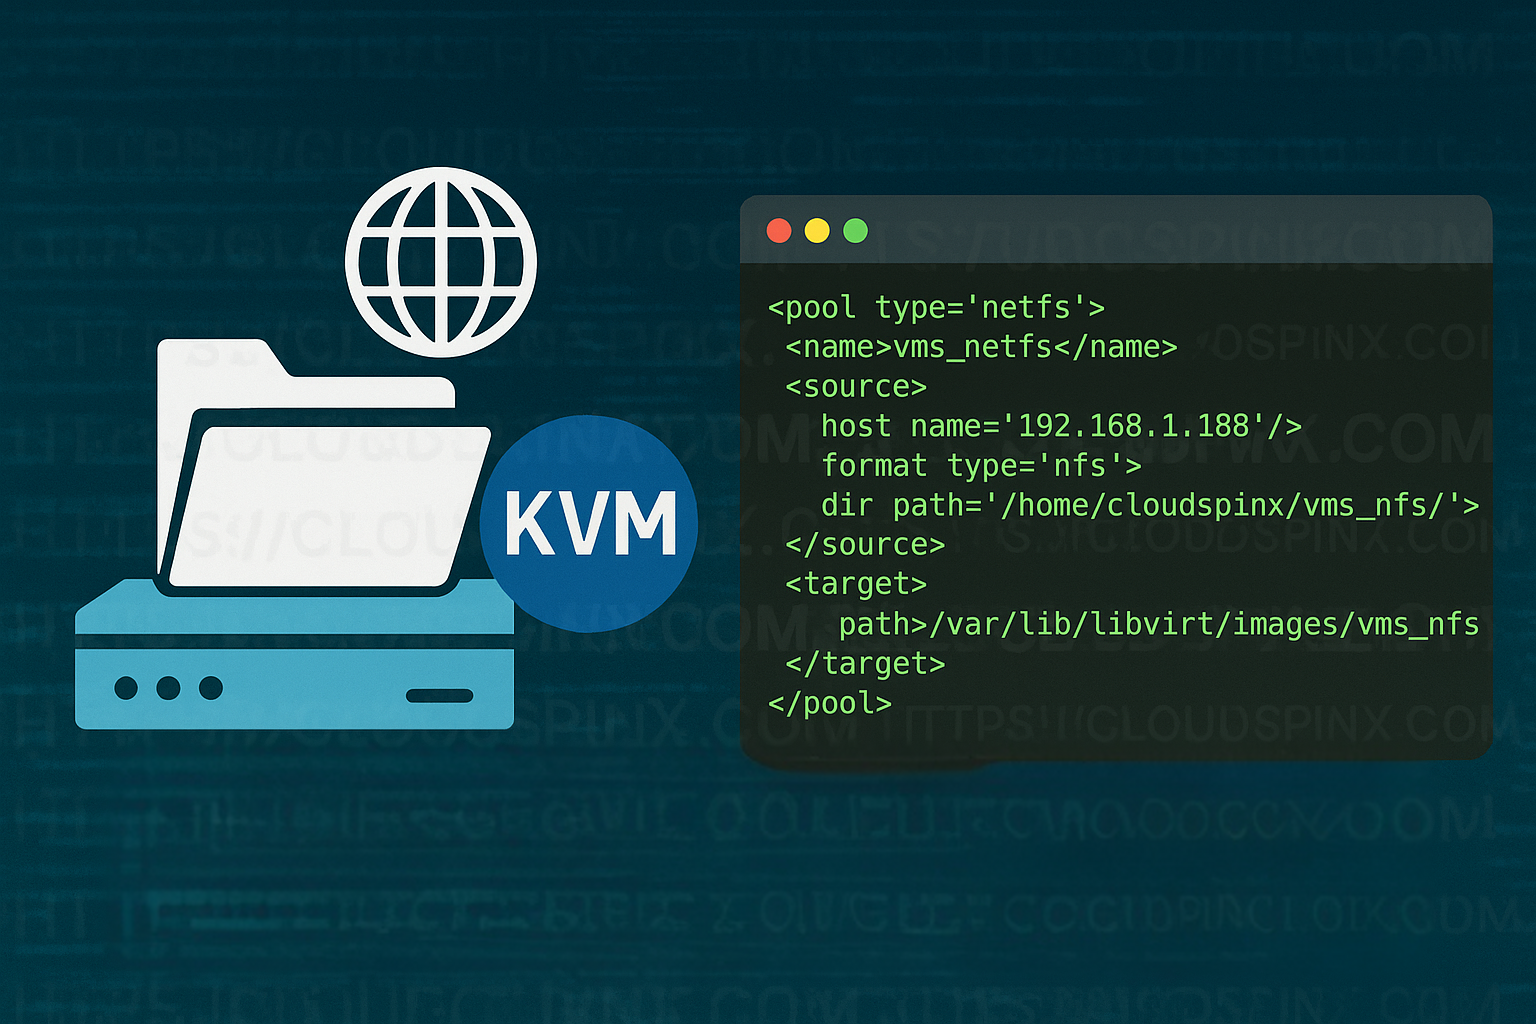
An example of an xml file to define the same storage pool we created above would resemble something like the one below:
<pool type='netfs'>
  <name>vms_netfs</name>
  <source>
    <host name='192.168.1.188'/>
    <format type='nfs'/>
    <dir path='/home/cloudspinx/vms_nfs'/>
  </source>
  <target>
    <path>/var/lib/libvirt/images/vms_nfs</path>
  </target>
</pool>
Save the xml file and run the command below to create the storage pool using the xml file.
virsh pool-define ~/vms.xmlCreate Storage Pool target Path
Virsh also offers a command to create a specific target path for your intended storage pool. The target path created will match the already existing, already formatted file system storage pool that you just defined in the step above. Run the following command to create your target path:
virsh pool-build vms_netfsList the available storage pools to confirm that the new NFS storage pool was created successfully.
virsh pool-list --allStart the storage pool
Use the virsh pool-start command to mount the storage pool.
virsh pool-start vms_netfsThe created storage pool is not set to autostart by default. If you need the pool to start automatically when the host system boots, use the following command:
virsh pool-autostart vms_netfsVerify the Storage Pool
The virsh pool-info command shows the state of the passed storage pool, together with other relevant useful information.
$ virsh pool-info vms_netfs
Name:           vms_netfs
UUID:           fd1b9851-4634-4387-ab9a-d67f86e4c215
State:          running
Persistent:     yes
Autostart:      yes
Capacity:       13.68 GiB
Allocation:     6.57 GiB
Available:      7.10 GiB
Using Cockpit Web Console
Access your hosts cockpit web console and login with administrative credentials then enable administrative access.
Navigate to the Virtual machines tab and click on Storage Pools.
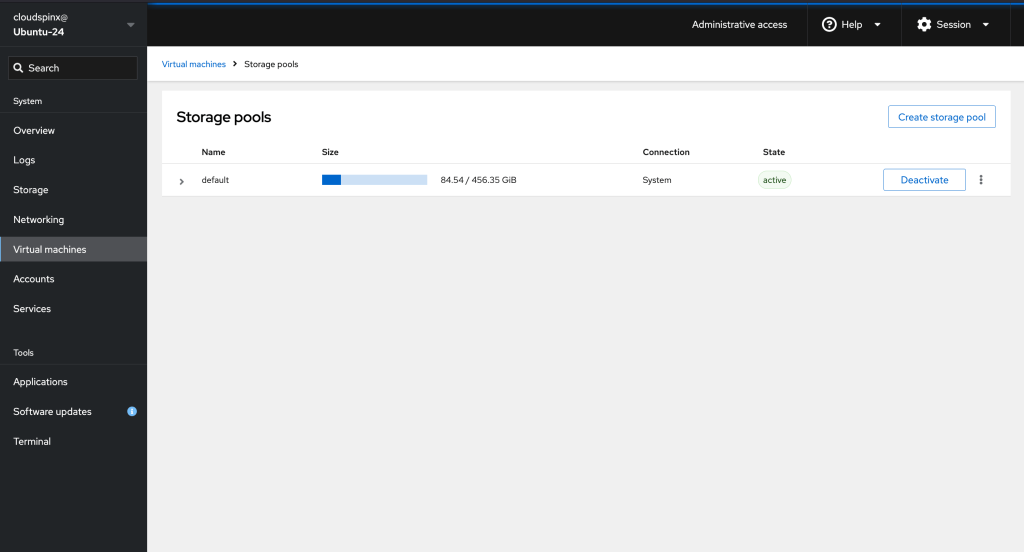
Then click Create Storage Pool, which launches a new popup window for Storage Pool creation.
Then fill in the following fields:
- Name: the name of the storage pool
- Type: the storage pool type; Network File System
- Target path: the path to be used as the storage pool mount point on the host’s filesystem.(ensure that this directory exists on the host’s file system)
- Host: The hostname/IP of the NFS server
- Source Path: the directory being exported on the network server
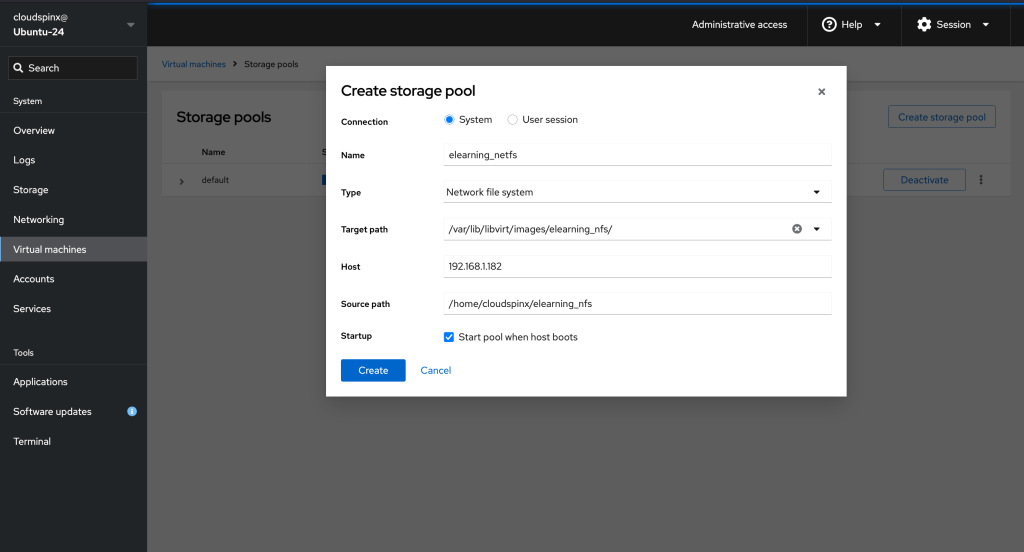
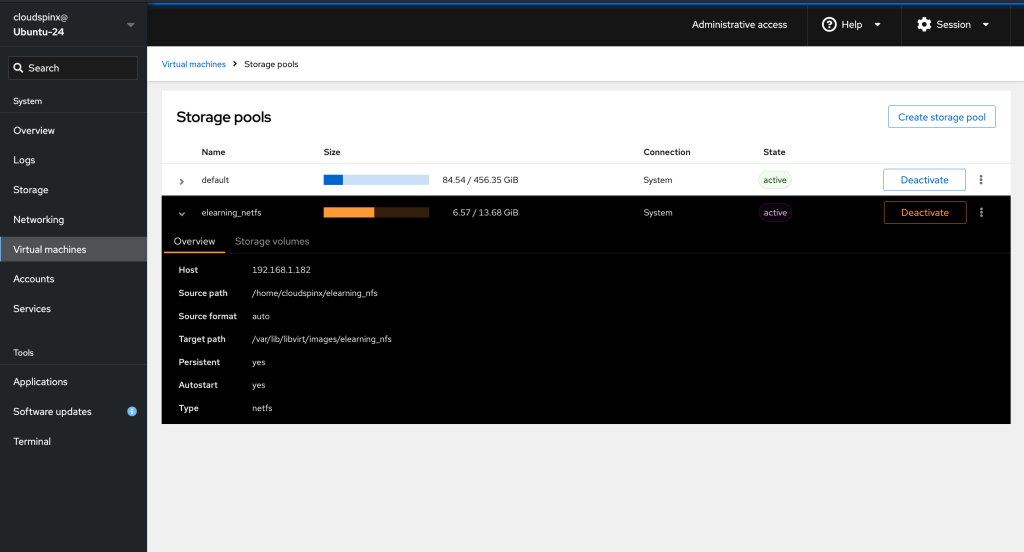
Then click Create to create the storage pool. The popup window closes, and the new storage pool appears in the list of storage pools. Activate the storage pool using the Activate button.
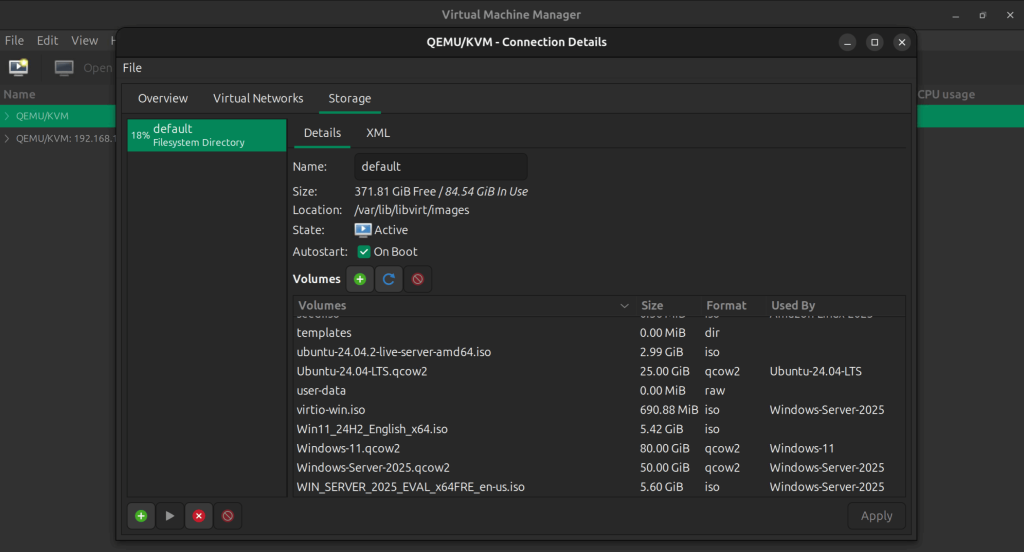
Using Virt-Manager
Launch Virt-Manager on your hosts GUI, then connect to the KVM host where you want to create the storage pool. On the main window, navigate to Edit→Connection Details→Storage to access the storage section.
Click the Add Pool button to launch the storage pool creation wizard. In the new popup window, input the details as follows:a name for your new NFS storage pool and select “Network File System” in the pool type field.
- Name: the name of your new storage pool
- Type: the storage pool type; Network Exported Directory
- Target path: the path to be used as the storage pool mount point on the host’s filesystem.
- Host: The hostname/IP of the NFS server
- Source Path: the directory being exported on the network server
Ensure the target path exists:
sudo mkdir /var/lib/libvirt/images/vms_nfs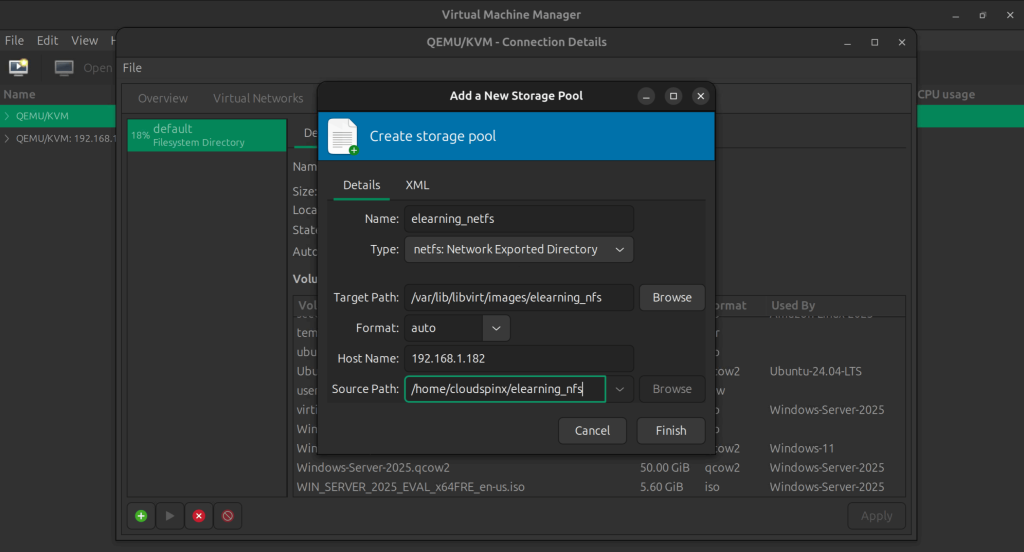
Then click Finish to create the storage pool. The new storage pool should be created and listed storage pools list.

That’s it for NFS storage pools.
🌍 Our KVM eBook covers all this in details and more. In the book you will learn:
- Supported Storage Pool Types
- Storage Management Using Virsh CLI
- Storage Management using Cockpit UI
- Storage Management using Virt-Manager
Watch out for more guides from our team:


