
KVM (Kernel-based Virtual Machine) of Linux is one of the most popular virtualization technologies of Linux. KVM is a Linux kernel module that allows one to run a hypervisor-based virtual machine manager similar to VMware in Linux. Although KVM can be managed completely via the command line, most users prefer a more user-friendly experience when it comes to configuring and clipping virtual machines.
Virt-Manager is a GUI desktop application that is designed to create, manage and configure virtual machines on a KVM host. With its simple interface, it lets you use a few simple clicks to allocate system resources, attach storage, configure networks and install operating systems. This makes it specifically useful for a novice user of KVM, along with advanced users for quicker workflow.
Mastering KVM Virtualization - The Ultimate eBook
From home labs to production clouds - master KVM Host management, automating KVM administration using Terraform, Vagrant, and cloud automation. This eBook will enable you to build scalable virtual infrastructure that works whether you're learning at home or deploying enterprise solutions. Get your full copy today
In this section, we will walk through the steps required to create a virtual machine in Virt-Manager, including selecting an installation source, configuring virtual hardware, and finalizing the setup.
1. Launch the VM creation wizard
If you haven’t opened virt-manager yet, open it and click on Create a New Virtual Machine.
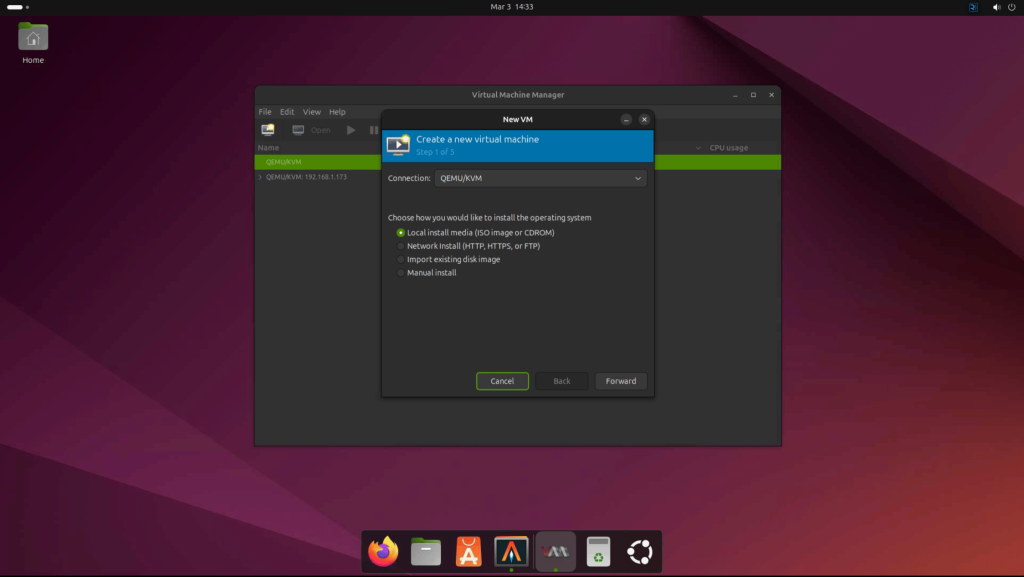
2. Select Installation Media
Here you need to select one of the following:
- Local ISO: Choose an ISO image stored on the host.
- You need to provide the absolute path to the ISO image or CD-ROM:

- Network Boot (PXE): Boot from a PXE server.
- You need to provide the URL to the Network Install server:

- Import Existing Disk Image: Use a pre-installed disk image.
- Provide the path to the existing storage disk image:
- Manual Installation: Absolutely zero assistance from the system, you’ll have to provide/select everything manually.
- Enter the OS name of the VM you want to create:

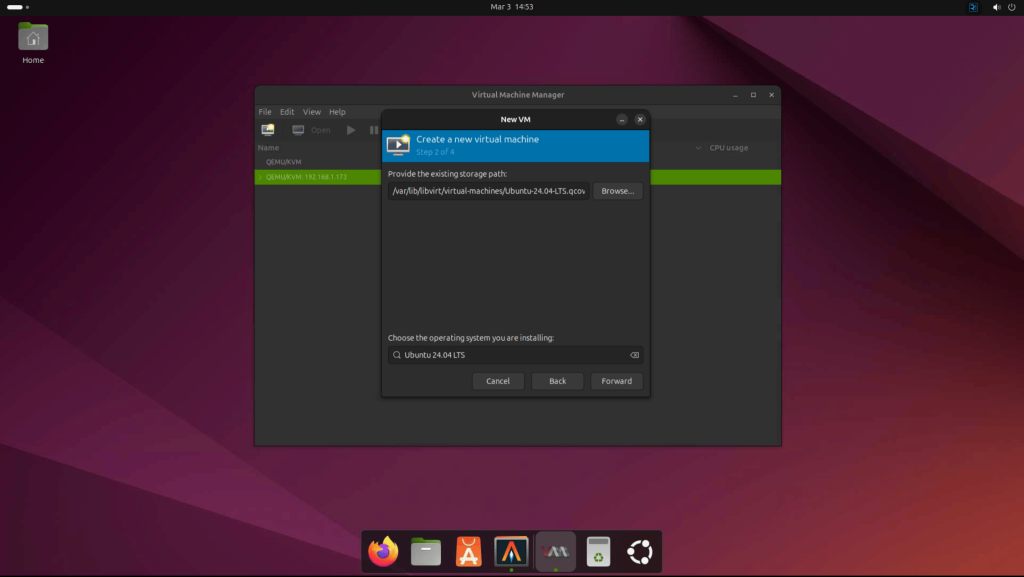
Example for the ISO/CD-ROM option:

3. Configure VM Resources
Now allocate CPU Cores and RAM based on the workload requirements. Also, take into account the amount of resources avaiable on the host machine.

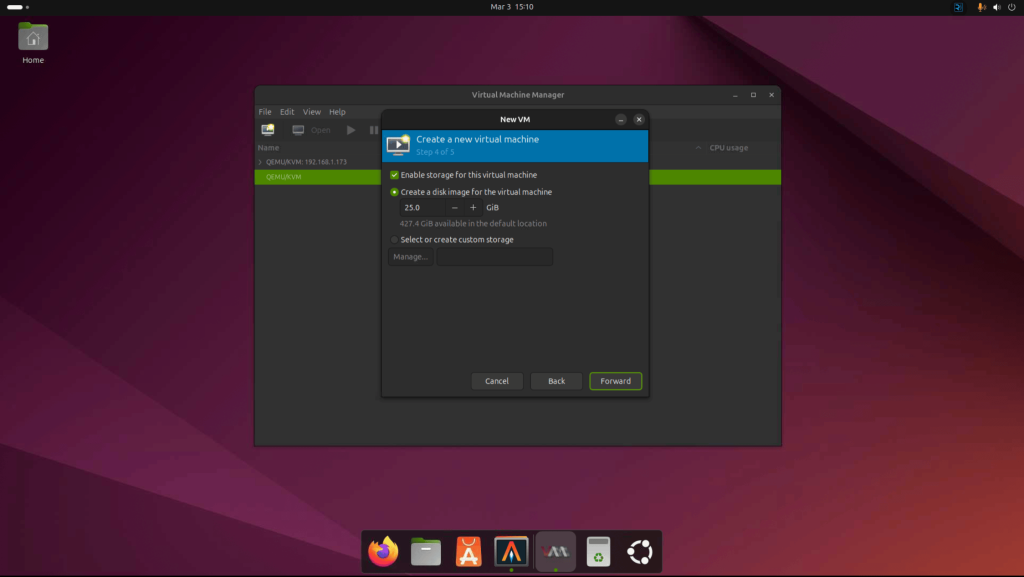
For the storage, select one of these two:
- Create a new virtual disk (QCOW2 or RAW).
- Use an existing disk image.
4. Configure Network Settings
The Network options avaliable are NAT, Bridged Network, and Macvtap. Let’s have a look at each of the network type:
- NAT (Default): Provides internet access but isolates the VM. This is the default network created by libvirt inside the host domain.
- Bridged Network: Allows the VM to have a direct IP on the host’s network. This is a direct connection to the host’s network and the VM will receive an IP address on the same subnet as the host.
- Macvtap: It replaces the combination of the tun/tap and bridge drivers with a single module based on the macvlan device driver. Typically, this is used to make both the guest and the host show up directly on the switch to which the host is connected.
You can pick the deafult NAT network, or if you have a bridged network configured, you can use that one.
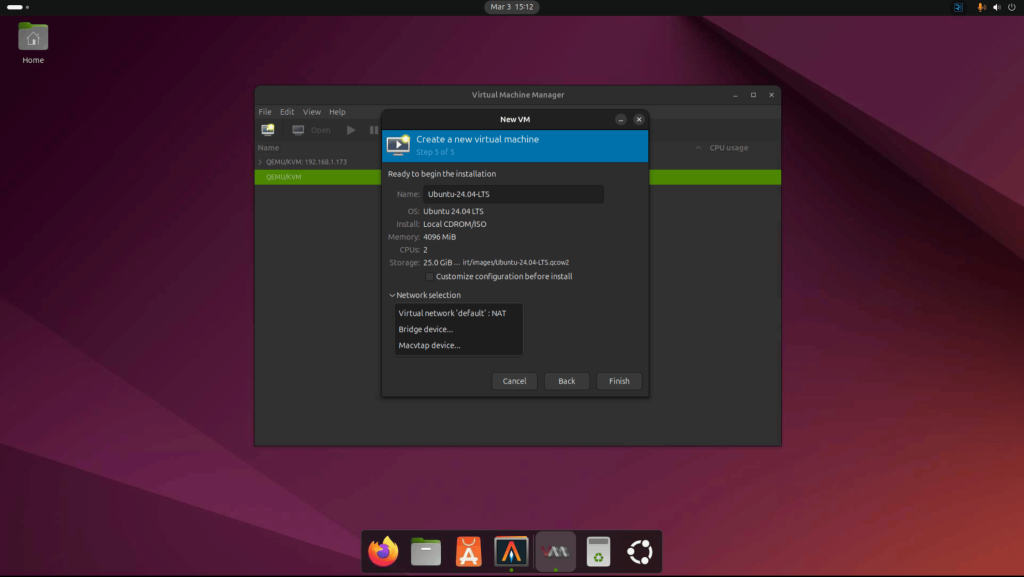
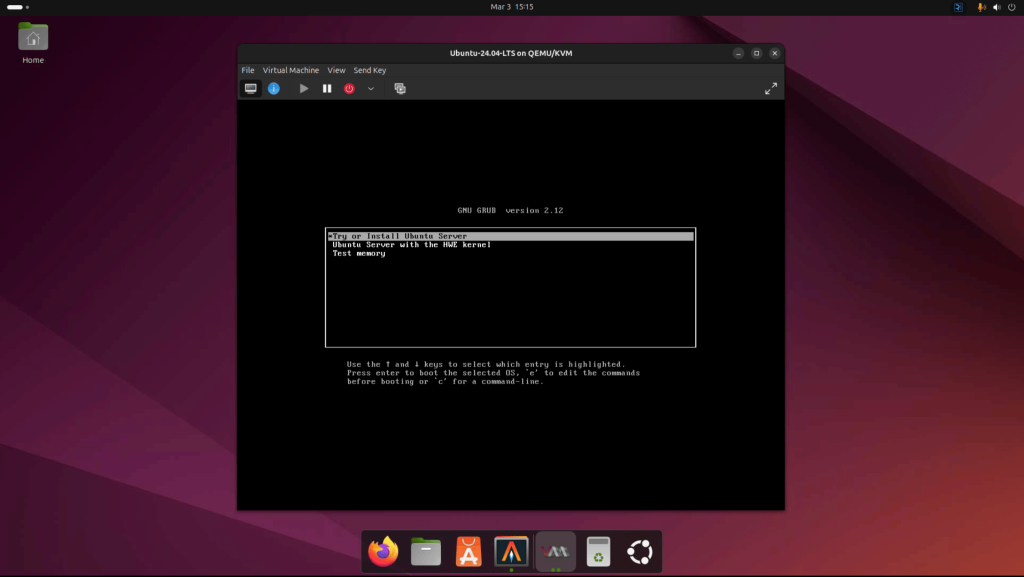
5. Finalize the Settings and Boot the VM
Review all the settings and configurtaion of the VM and then click Finish to create and launch the VM. The console will be opened and you can see the boot loader menu:
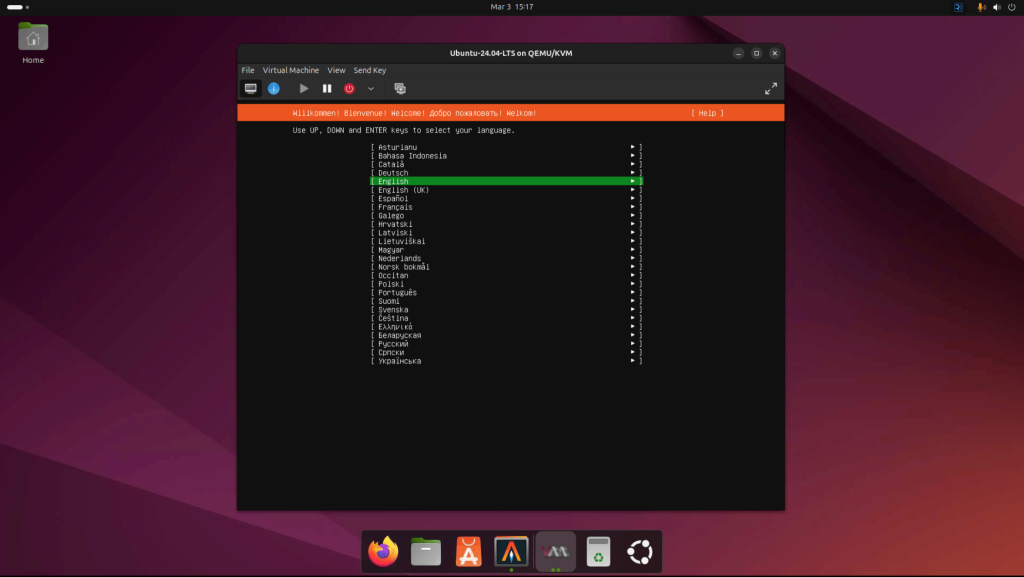
Continue with the OS installation using the installer:
More articles on Virt-Manager:


