Cockpit provides a web-based interface for managing KVM virtual machines, offering an intuitive way to create, configure, and monitor VMs without relying on complex command-line operations. Through its Virtual Machines module, users can easily deploy new VMs, assign resources, and install operating systems with just a few clicks.
In this section, we’ll walk through how to create a Linux VM and a Windows VM.
Linux Virtual Machine
To create a virtual machine in Cockpit, first enable full access mode by clicking on the blue Turn on administrative access button, and enter your password if needed.
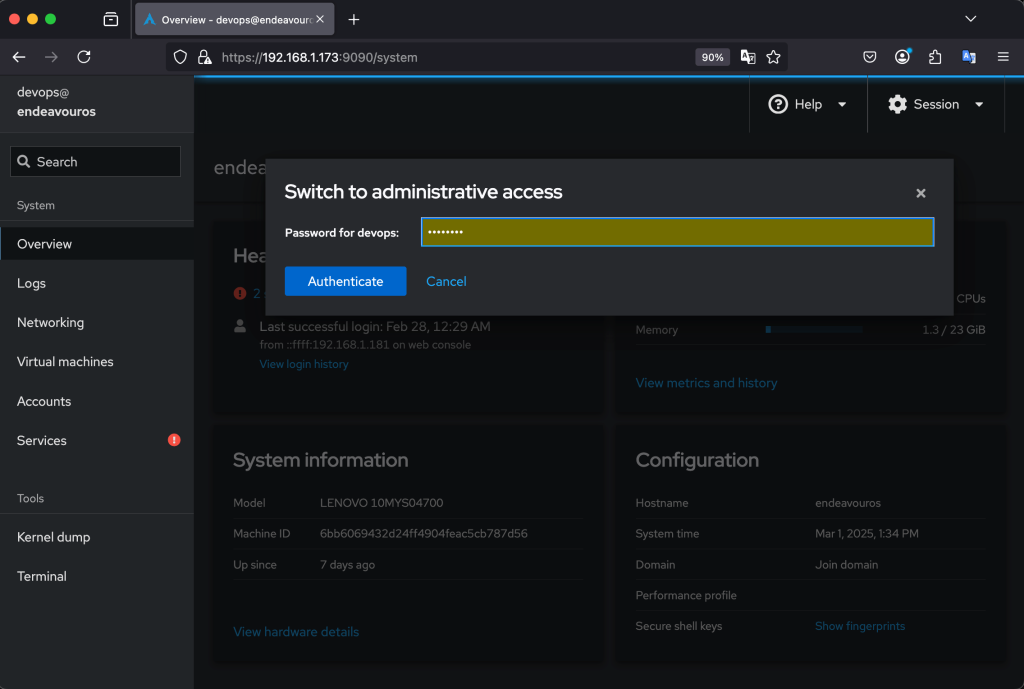
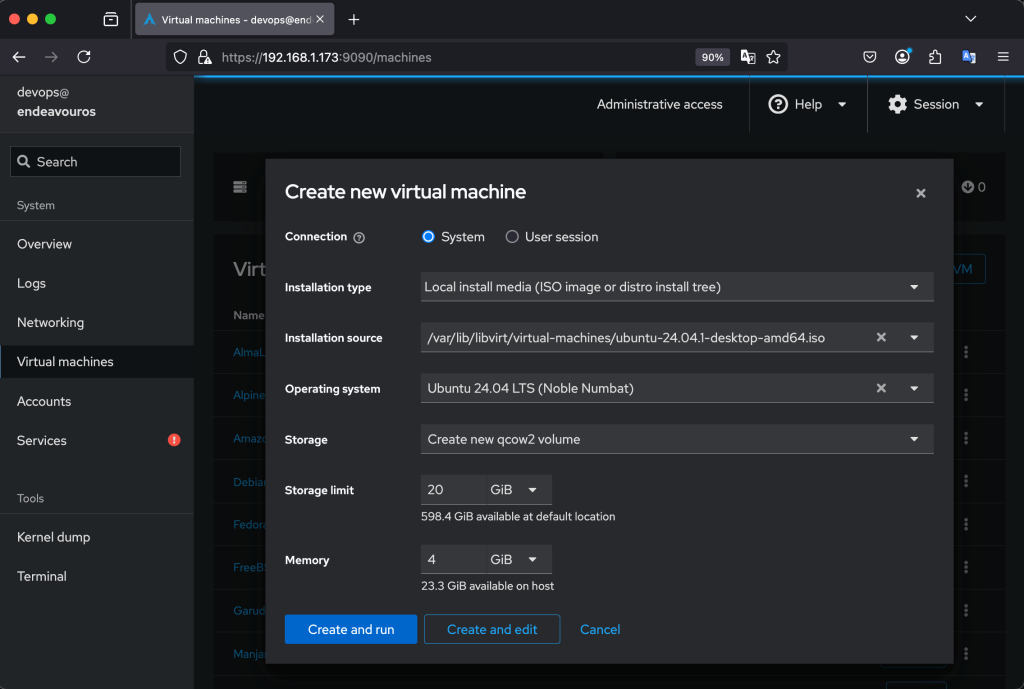
You are now logged in as root in Cockpit. In the sidebar, click on Virtual Machines > Create VM:
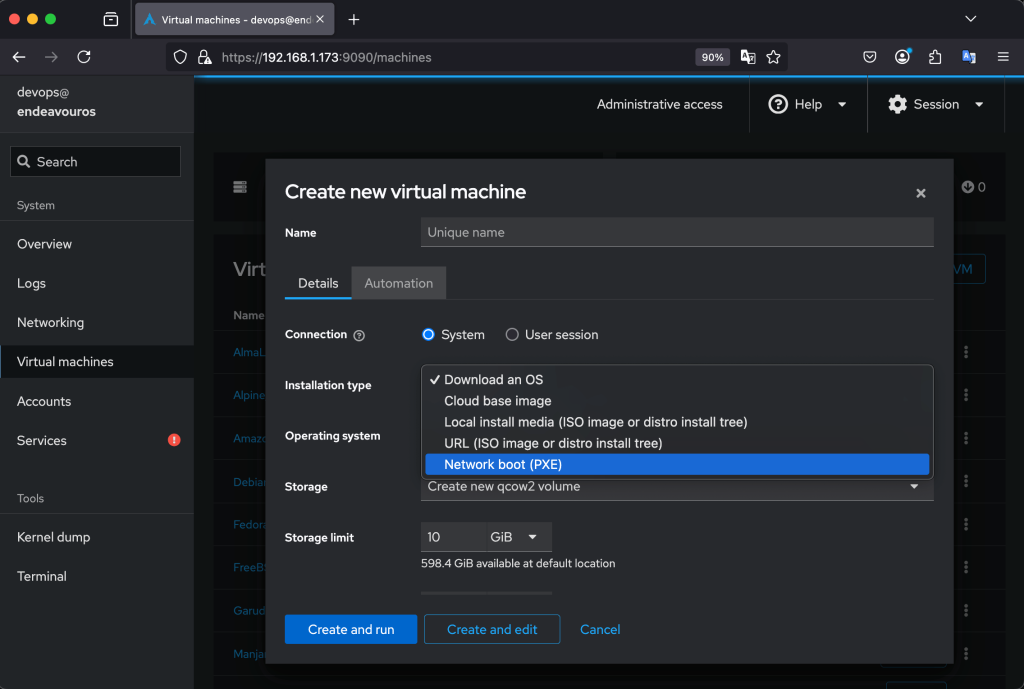
Select an installation source. You need to choose between:
- Download an OS
- Cloud base image
- Local install media(ISO image or distro install tree)
- URL(ISO image or distro install tree)
- Network boot(PXE)
Provide the path to the installation source if you didn’t choose either Download an OS or Network Boot(PXE).
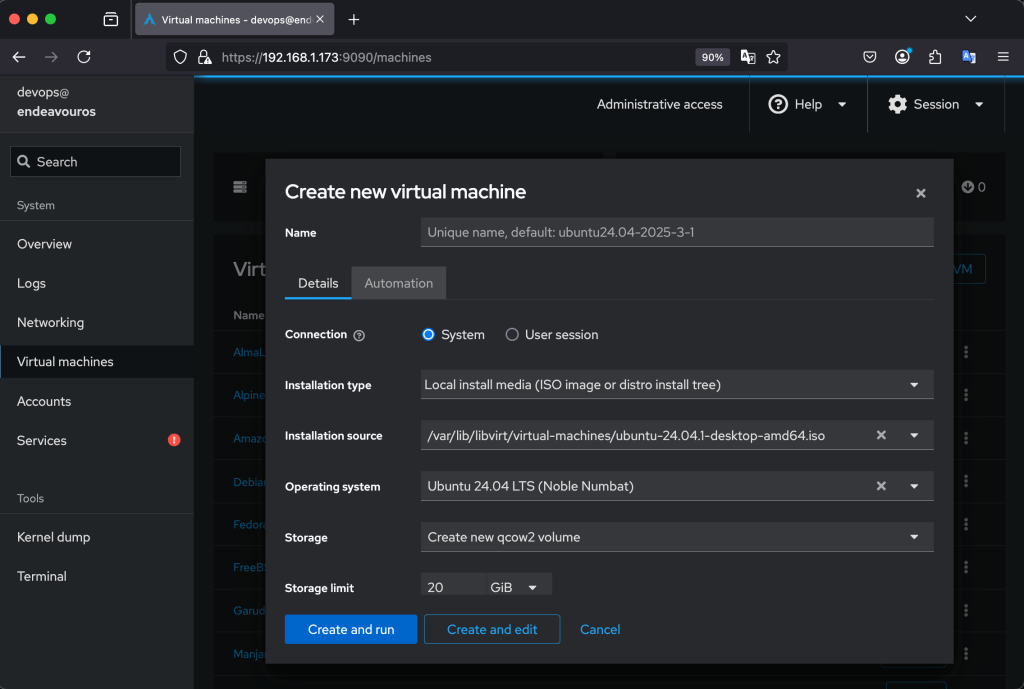
The system will automatically detect the OS from the chosen source. Proceed to configure the Storage and Memory allocation.
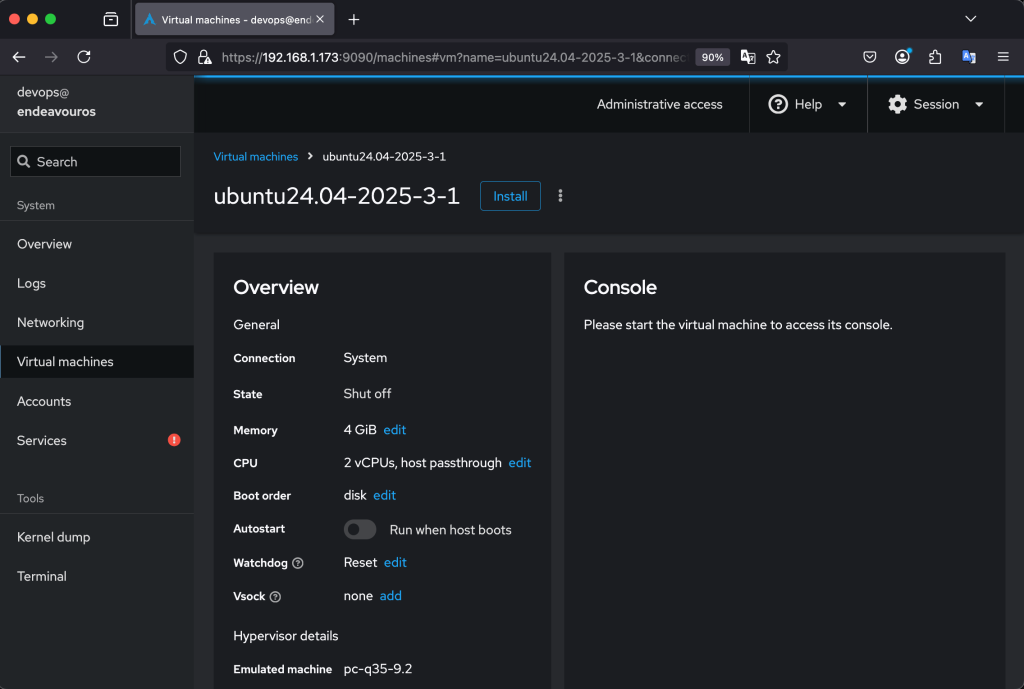
Then click on Create and Edit. From here, you can also edit the number of vCPUs allocated, the boot order, Memory, and the autostart feature:
The VM will automatically be attached to the default network interface created by libvirt. This is where you can change the network interface you want attached to your VM before booting and installing it:
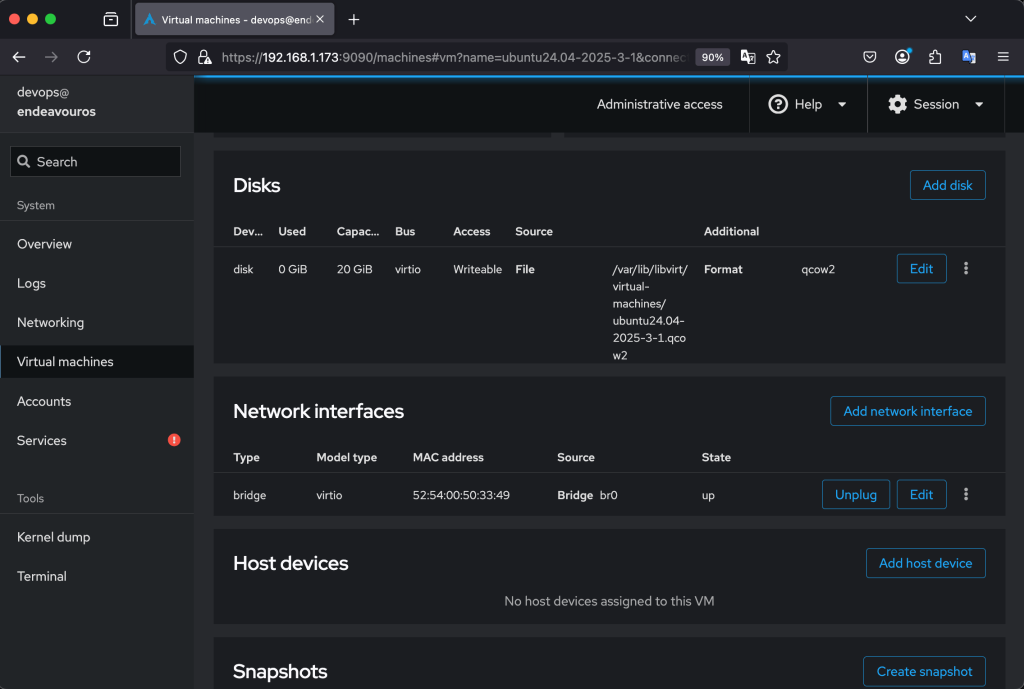
When you are satisfied with your configurations, click Install to launch the VM and continue with the OS installation.
Accessing the VM Console
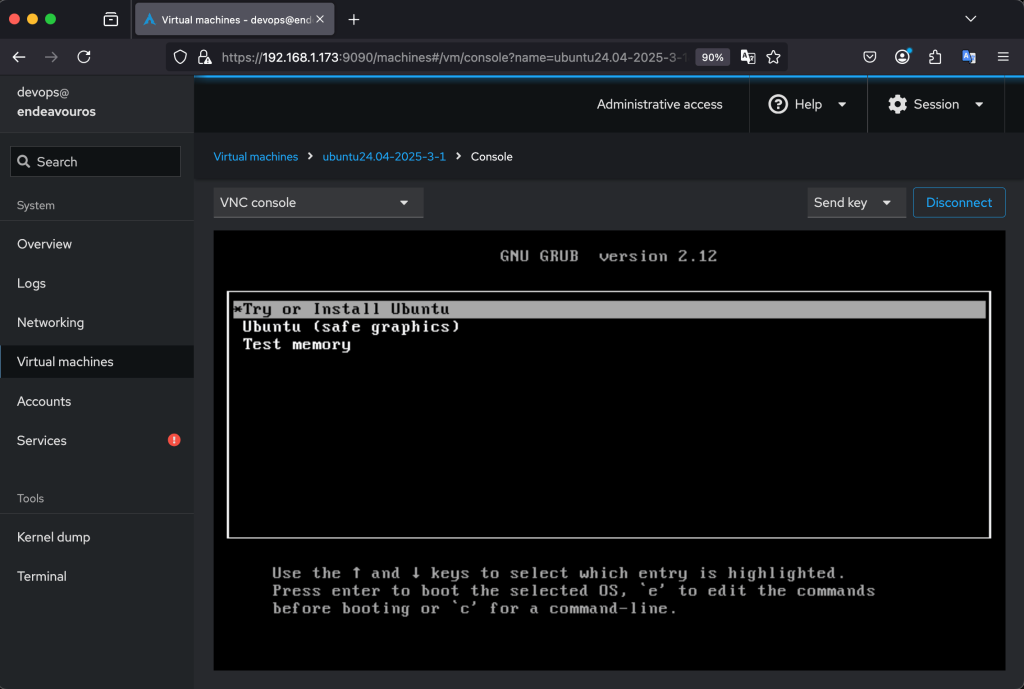
Cockpit provides direct access to the VM via a VNC console or SPICE. This console is accessible directly on the cockpit UI and you don’t need to install any extra packages:
Windows Virtual Machine
We just looked at provisioning a Linux VM on cockpit. How about a windows VM? Well, it’s pretty simple and almost identical to creating a Linux VM, except we need to add an extra CD-ROM for the VirtIO iso file.
Pre-requisites
- [Windows Server 2025 ISO](Windows Server 2025 | Microsoft Evaluation Center).
- VirtIO drivers for Windows guests.
With both ISO files downloaded, we can proceed to create a VM and install Windows server VM.
Create Windows Server VM.
Login to cockpit UI then go to the Virtual Machines section and click Create VM.
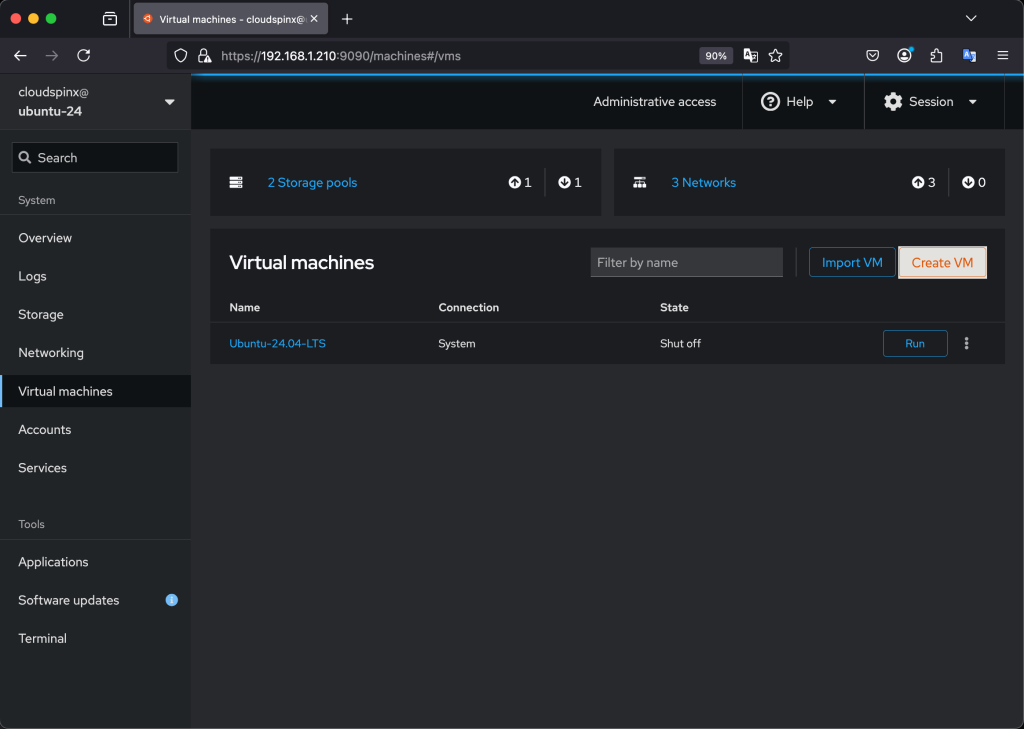
The VM Creation wizard will be launched and you can configure the VM Name, Installation Type, Storage and the Memory. For the installation type, select Local Install Media then provide the path to the ISO file on the host system.
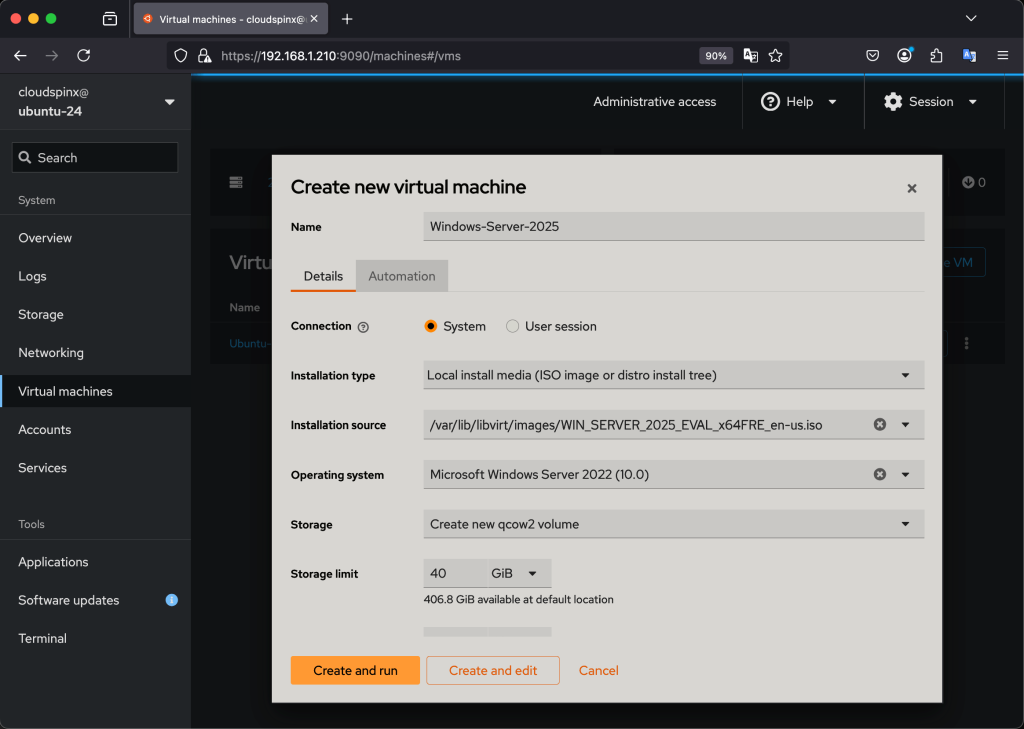
A windows VM has a minimum of 40GiB for the storage disk size. Set it to a number greater than 40GiB. This depends on your hosts resource avaialbility.
For optimal performance, set the RAM to at least 6GiB.
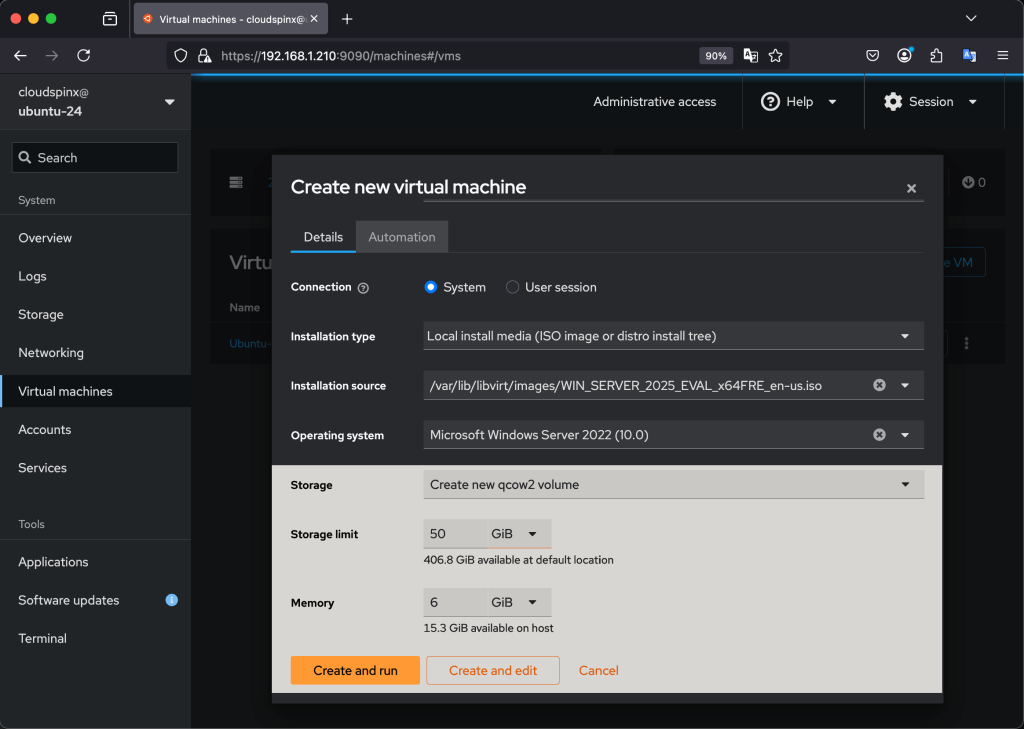
Then click Create and edit, because we are not done yet with the virtual hardware configurations.
After creating the VM, you’ll be taken to the VM overview page, scroll down to the Disks and Network Interfaces section.

Add the virtio-win iso file by clicking on Add disk. For the source select Custom Path, then provide the absolute path to the virtio-win.iso file.
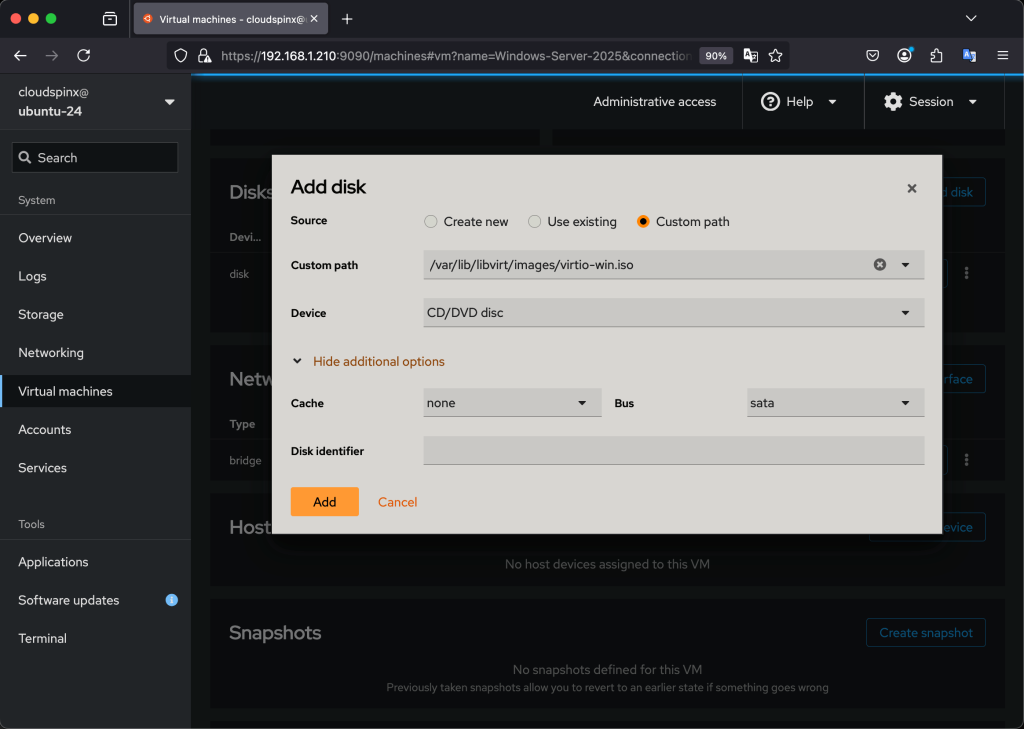
Then click Add. The new CD-ROM will be added.
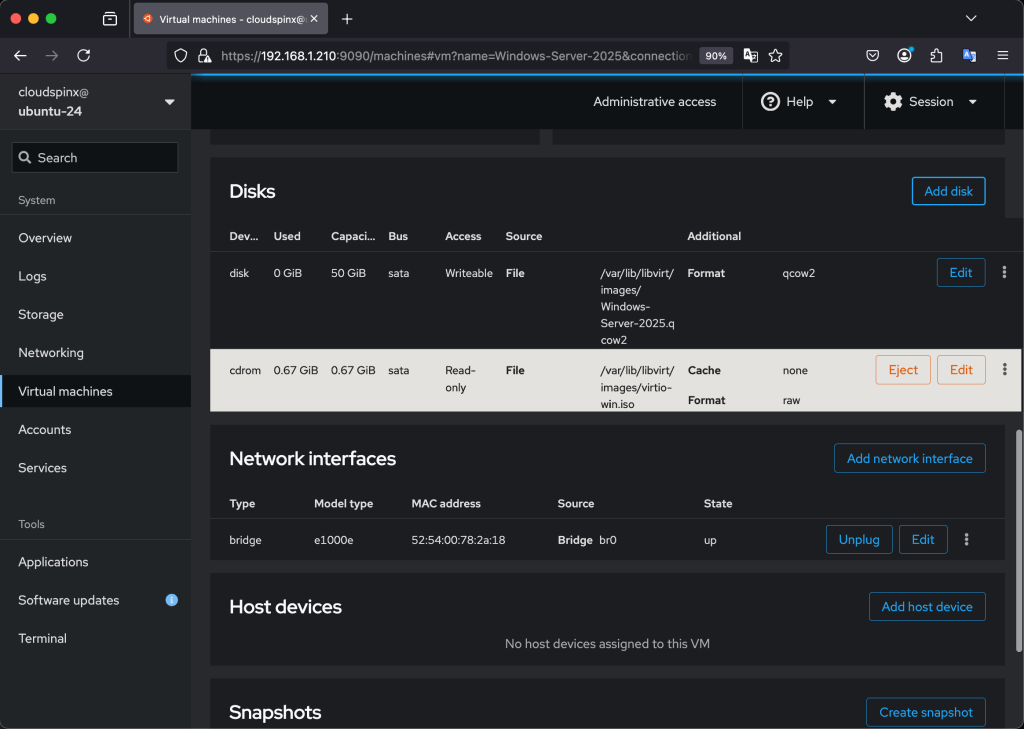
The last thing we ned to do is change the Network model type to VirtIO. Click on Edit to open the Network Interface wizard.

We are done with the Virtual Hardware configuration, click on Install to launch the VM and begin OS installation.

For the installation steps, please refer to Windows Server Installation under Virt-Manager section.
🌍 Our KVM eBook covers all this in details and more. In the book you will learn:
- Cockpit installation
- Configure and Access Cockpit dashboard
- Creating Virtual Machines using Cockpit
- Managing Virtual Machines using Cockpit
- Network Configurations and Management
- Managing Storage Pools
- Snapshot Management
- VM Backup and Migration

