How can I enable Traefik dashboard on k3s kubernetes cluster? The installation of k3s Kubernetes distribution is a matter of seconds. You just open a terminal and fire the command below.
curl -sfL https://get.k3s.io | sudo sh -After installation you should have a single node cluster – control plane + worker node. But addition of more worker nodes into the cluster can be done.
curl -sfL https://get.k3s.io | K3S_URL=https://myserver:6443 K3S_TOKEN=mynodetoken sh - K3S_URL parameter should be your first node API endpoint. This will instruct the installer to configure K3s as an agent, instead of a server. The K3s agent will register with the K3s server listening at the supplied URL. The value to use for K3S_TOKEN is stored at /var/lib/rancher/k3s/server/node-token on your server node.
After the installation of k3s, traefik UI is not enabled. To list services run the command:
$ kubectl get svc -n kube-system
NAME             TYPE           CLUSTER-IP      EXTERNAL-IP   PORT(S)                      AGE
kube-dns         ClusterIP      10.43.0.10      <none>        53/UDP,53/TCP,9153/TCP       10h
metrics-server   ClusterIP      10.43.104.117   <none>        443/TCP                      10h
traefik          LoadBalancer   10.43.170.22    10.25.25.53   80:30698/TCP,443:30213/TCP   10h
To check the deployment status of traefik, use the command:
$ kubectl get deploy -n kube-system
NAME                     READY   UP-TO-DATE   AVAILABLE   AGE
coredns                  1/1     1            1           10h
local-path-provisioner   1/1     1            1           10h
metrics-server           1/1     1            1           10h
traefik                  1/1     1            1           10h
Checking Pod status:
$ kubectl get pods -n kube-system
NAME                                      READY   STATUS      RESTARTS   AGE
coredns-576bfc4dc7-s6jqr                  1/1     Running     0          10h
helm-install-traefik-crd-z7zdg            0/1     Completed   0          10h
helm-install-traefik-f4gtx                0/1     Completed   1          10h
local-path-provisioner-6795b5f9d8-wrvpx   1/1     Running     0          10h
metrics-server-557ff575fb-cdth5           1/1     Running     0          10h
svclb-traefik-a6857890-zpwv2              2/2     Running     0          10h
traefik-5fb479b77-8q9d7                   1/1     Running     0          10h
Enable Traefik Dashboard on k3s
In a k3s cluster, Traefik is managed using Custom Resources and helm controller. The HelmChartConfig object is used to install helm charts in k3s.
To enable traefik UI, create a customization manifest file.
vim traefik-customize.yamlAdd the following contents into the file you just created. The HelmChartConfig config will enable the dashboard.
apiVersion: helm.cattle.io/v1
kind: HelmChartConfig
metadata:
  name: traefik
  namespace: kube-system
spec:
  valuesContent: |-
    additionalArguments:
      - "--api"
      - "--api.dashboard=true"
      - "--api.insecure=true"
    ports:
      traefik:
        expose: true
    providers:
      kubernetesCRD:
        allowCrossNamespace: true
Apply the file to update kubernetes resource. This will result in Traefik dashboard being accessible.
$ kubectl apply -f traefik-customize.yaml
helmchartconfig.helm.cattle.io/traefik created
Check traefik service – a new port 9000 should be visible.
$ kubectl -n kube-system get svc
NAME             TYPE           CLUSTER-IP      EXTERNAL-IP   PORT(S)                                     AGE
kube-dns         ClusterIP      10.43.0.10      <none>        53/UDP,53/TCP,9153/TCP                      10h
metrics-server   ClusterIP      10.43.104.117   <none>        443/TCP                                     10h
traefik          LoadBalancer   10.43.170.22    10.25.25.53   9000:30973/TCP,80:30698/TCP,443:30213/TCP   10h
You can use port forwarding to access Traefik web dashboard.
export KUBECONFIG=~/kubeconfig
kubectl -n kube-system port-forward deployment/traefik 9000
Using Ingress to access Traefik UI
You can then use traefik to configure Ingress for the UI.
vim traefik-dashboard-ingress.yamlAdd the contents and modify the host domain to yours.
apiVersion: networking.k8s.io/v1
kind: Ingress
metadata:
  name: traefik-dashboard
  namespace: kube-system
  annotations:
    traefik.ingress.kubernetes.io/router.entrypoints: web
spec:
  rules:
  - host: traefik.apps.cloudspinx.com
    http:
      paths:
      - path: /
        pathType: Prefix
        backend:
          service:
            name: traefik
            port:
              number: 9000
When done create the ingress.
$ kubectl apply -f traefik-dashboard-ingress.yaml
ingress.networking.k8s.io/traefik-dashboard created
It should show as active. Make sure the domain used has its IP address pointing to k3s node.
$ kubectl -n kube-system get ingress
NAME                CLASS     HOSTS                         ADDRESS       PORTS   AGE
traefik-dashboard   traefik   traefik.apps.cloudspinx.com   10.25.25.53   80      45s
Configure DNS or /etc/hosts
Make sure the domain provided resolves to your cluster’s external IP. This can be done by:
- Updating DNS A record to point to your k3s control plane P address / or LB IP where applicable.
- For local testing, you can edit your
/etc/hostsfile and add the records.
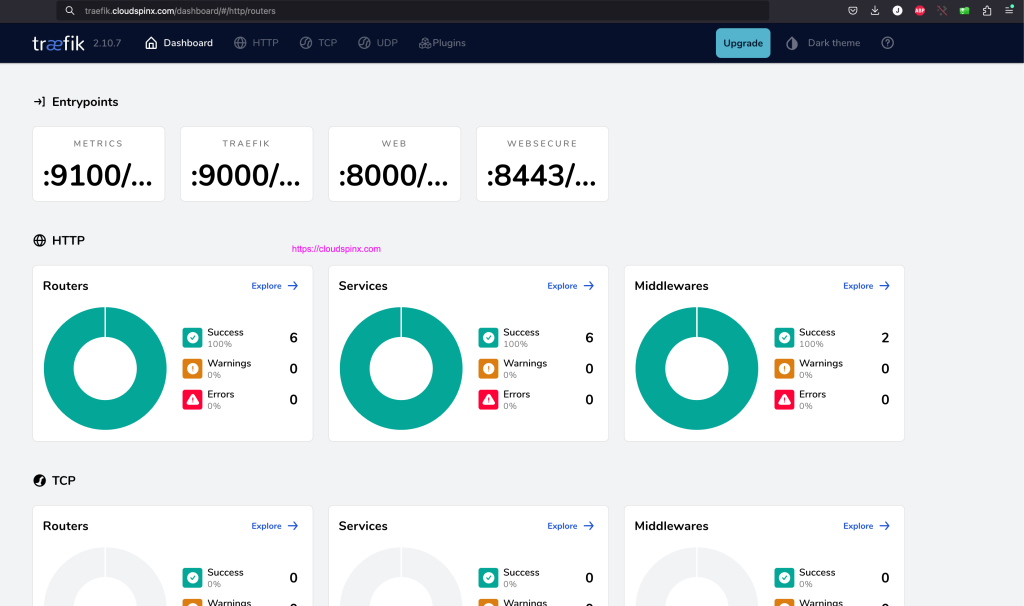
Once done, open your web browser and navigate to http://traefik.mydomain.com. You should see the Traefik dashboard.

At CloudSpinx we offer Kubernetes, OpenShift and Linux consultancy services. Reach out today and take your business to greater heights with CloudSpinx consultancy services.


