Docker is a platform that uses containers to create, manage and use applications.
🚀 Ready to master Ubuntu? This content is an extract from The Ultimate Ubuntu Desktop Handbook. Discover the complete guide today.
And what is a container? It can be considered as a package of an application, containing all the necessary dependencies and libraries needed to run the application and can be shipped as one package since they are isolated. This process is called containerization. Docker makes it possible to deploy containers in one or a cluster of Linux machines, where the containers shares resources with the host computer, unlike a virtual machine that get dedicated resources from the host. Containers are therefore preferred to virtual machines since they are light-weight and easy to deploy.
Where is docker useful?
Developers and system administrator mostly use containers to enable them isolate code and applications. It makes it easier for them to make changes to a program. Many containers can run on a single Linux computer reducing the number of systems needed and lowering overhead.
Install Docker CE in Linux Mint?
Docker is presented as a Community Edition (CE) and Enterprise Edition (EE). This guide gives a step-by-step guide on how to install ad use docker CE in Linux Mint.
Update your system
First ensure that your system packages are updated
sudo apt updateInstall Docker dependencies and add Docker official key
APT does not use HTTPS and it is crucial to install the packages and dependencies that will enable it to use a repository through https
sudo apt install apt-transport-https ca-certificates curl gnupg-agent software-properties-commonNext add Docker official key which is important in enabling Docker repo.
curl -fsSL https://download.docker.com/linux/ubuntu/gpg | sudo gpg --dearmor -o /etc/apt/trusted.gpg.d/docker-archive-keyring.gpgAdding Docker repository
Next thing is to add Docker repository to Linux Mint. The variable ‘$ (. /etc/os-release; echo “$ubuntu-codename”)’ ensures that you are using the right distribution of your Linux Mint
sudo add-apt-repository "deb [arch=amd64] https://download.docker.com/linux/ubuntu $(. /etc/os-release; echo "$UBUNTU_CODENAME") stable"Update your system again
sudo apt updateIf you run into problems such as NO_PUBKEY while trying to update from the docker repository, follow the steps below for a quick fix:
Add Docker’s official GPG key:
sudo mkdir -p /etc/apt/keyrings
curl -fsSL https://download.docker.com/linux/ubuntu/gpg | sudo gpg --dearmor -o /etc/apt/trusted.gpg.d/docker.gpg
Use the following command to set up the repository:
echo "deb [arch=$(dpkg --print-architecture) signed-by=/etc/apt/trusted.gpg.d/docker.gpg] https://download.docker.com/linux/ubuntu $(lsb_release -cs) stable" | sudo tee /etc/apt/sources.list.d/docker.list > /dev/nullNow update from the repositoires again:
sudo apt updateInstall Docker CE on Linux Mint
Run the below command to install the latest version of Docker CE
sudo apt -y install docker-ceOnce installed a docker group will be created. Add your user to the group who will be running docker commands.
sudo usermod -aG docker $USER
newgrp docker
Verify Docker Installation
Show docker version using the command below, the output is attached as well;
admin@cloudspinx:~$ docker --version
Docker version 27.3.1, build ce12230
Some Docker commands
Docker is used with syntax as shown below:
docker [options] [command] [arguments]To check options to be used with docker, run:
docker or docker help
admin@cloudspinx:~$ docker help

Usage:  docker [OPTIONS] COMMAND

A self-sufficient runtime for containers

Common Commands:
  run         Create and run a new container from an image
  exec        Execute a command in a running container
  ps          List containers
  build       Build an image from a Dockerfile
  pull        Download an image from a registry
  push        Upload an image to a registry
  images      List images
  login       Authenticate to a registry
  logout      Log out from a registry
  search      Search Docker Hub for images
  version     Show the Docker version information
  info        Display system-wide information

Management Commands:
  builder     Manage builds
  buildx*     Docker Buildx
  compose*    Docker Compose
  container   Manage containers
  context     Manage contexts
  image       Manage images
  manifest    Manage Docker image manifests and manifest lists
  network     Manage networks
  plugin      Manage plugins
  system      Manage Docker
  trust       Manage trust on Docker images
  volume      Manage volumes

Swarm Commands:
  swarm       Manage Swarm

Commands:
  attach      Attach local standard input, output, and error streams to a running container
  commit      Create a new image from a container's changes
  cp          Copy files/folders between a container and the local filesystem
  create      Create a new container
  diff        Inspect changes to files or directories on a container's filesystem
  events      Get real time events from the server
  export      Export a container's filesystem as a tar archive
  history     Show the history of an image
  import      Import the contents from a tarball to create a filesystem image
  inspect     Return low-level information on Docker objects
  kill        Kill one or more running containers
  load        Load an image from a tar archive or STDIN
  logs        Fetch the logs of a container
  pause       Pause all processes within one or more containers
  port        List port mappings or a specific mapping for the container
  rename      Rename a container
  restart     Restart one or more containers
  rm          Remove one or more containers
  rmi         Remove one or more images
  save        Save one or more images to a tar archive (streamed to STDOUT by default)
  start       Start one or more stopped containers
  stats       Display a live stream of container(s) resource usage statistics
  stop        Stop one or more running containers
  tag         Create a tag TARGET_IMAGE that refers to SOURCE_IMAGE
  top         Display the running processes of a container
  unpause     Unpause all processes within one or more containers
  update      Update configuration of one or more containers
  wait        Block until one or more containers stop, then print their exit codes

Global Options:
      --config string      Location of client config files (default "/root/.docker")
  -c, --context string     Name of the context to use to connect to the daemon (overrides DOCKER_HOST env var and default context set with "docker context use")
  -D, --debug              Enable debug mode
  -H, --host list          Daemon socket to connect to
  -l, --log-level string   Set the logging level ("debug", "info", "warn", "error", "fatal") (default "info")
      --tls                Use TLS; implied by --tlsverify
      --tlscacert string   Trust certs signed only by this CA (default "/root/.docker/ca.pem")
      --tlscert string     Path to TLS certificate file (default "/root/.docker/cert.pem")
      --tlskey string      Path to TLS key file (default "/root/.docker/key.pem")
      --tlsverify          Use TLS and verify the remote
  -v, --version            Print version information and quit

Run 'docker COMMAND --help' for more information on a command.

For more help on how to use Docker, head to https://docs.docker.com/go/guides/
admin@cloudspinx:~$
What is Docker hub
Docker hub is a registry of docker images that can easily be pulled to run containers. An image is like a container snapshot, which when started creates a container. An image is downloaded from the hub with ‘pull’ command and run with ‘run’ command.
Example: How to run nginx with docker
Use the ‘pull’ command to get nginx image from docker hub
docker pull nginxThe output should be as shown below:
admin@cloudspinx:~$ docker pull nginx
Using default tag: latest
latest: Pulling from library/nginx
a480a496ba95: Pull complete
f3ace1b8ce45: Pull complete
11d6fdd0e8a7: Pull complete
f1091da6fd5c: Pull complete
40eea07b53d8: Pull complete
6476794e50f4: Pull complete
70850b3ec6b2: Pull complete
Digest: sha256:28402db69fec7c17e179ea87882667f1e054391138f77ffaf0c3eb388efc3ffb
Status: Downloaded newer image for nginx:latest
docker.io/library/nginx:latest
admin@cloudspinx:~$
You can check the existing images by running the command below:
docker imagesThe images will be listed as shown.
admin@cloudspinx:~$ docker images
REPOSITORY   TAG       IMAGE ID       CREATED       SIZE
nginx        latest    3b25b682ea82   1 min ago.    192MB
To run nginx we need to expose the container port to network port, in this case port 80
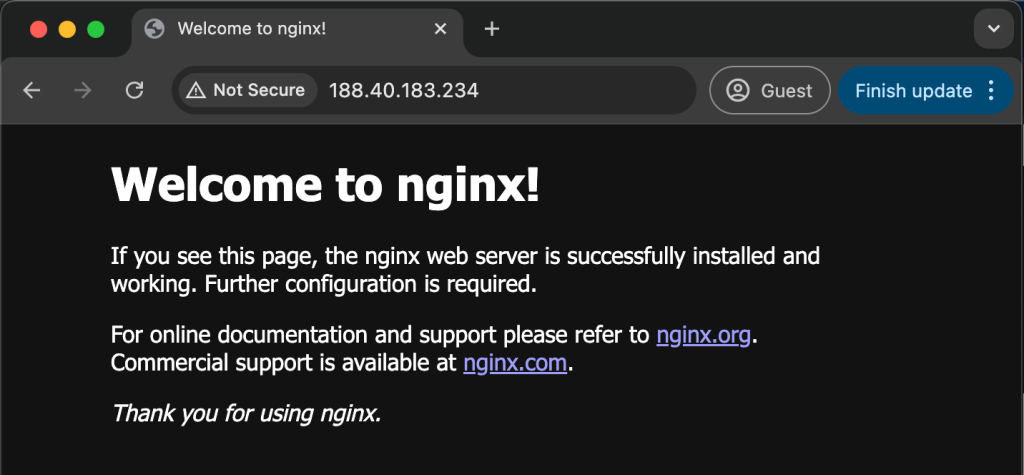
docker run -d --name docker-nginx -p 80:80 nginxTo verify that nginx is running, open your browser and enter http://your_server_ip:80 or http://localhost:80 . The output should be nginx welcome page:

You can check all the running containers by issuing the command below. Adding -a at the end of the command displays all running containers
$ docker ps
$ docker ps -a
admin@cloudspinx:~$ docker ps
CONTAINER ID   IMAGE     COMMAND                  CREATED          STATUS          PORTS                               NAMES
1ef30e6c4907   nginx     "/docker-entrypoint.…"   12 minutes ago   Up 12 minutes   0.0.0.0:80->80/tcp, :::80->80/tcp   docker-nginx
admin@cloudspinx:~$
To stop a container, take the container ID from the command above and use it to stop as below:
docker stop <container-ID>This has been an informative step-by-step guide on how to install and use docker CE in Linux Mint. I hope it has been useful to you. You can reach out to us if you need any help with container related support services.


