
MongoDB is an open-source document-oriented cross-platform database system. It stores data in JSON-like documents which offers high flexibility and dynamism and is therefore used in creating powerful applications and websites. MongoDB is a NoSQL database system, it does not use the traditional relational databases but rather use JSON-like documents to store data. This guide has been written to help users install MongoDB 4 on Linux Mint..
What are the Advantages of using MongoDB?
- It is easy to install and set up
- Auto-sharding feature where data can be distributed to different machines accessible to application and if one server cannot handle the data, the rest will, thus preventing failure and improving read/write operations.
- It is schemaless database system hence provides the ability to use different data types. Your code defines your schema
- It offers fast query response
- With features such as replication and gridFS, it is easy to set up high availability to increase performance
- It is highly scalable. Data can be distributed to several machines to handle big data
MongoDB Use Cases
MongoDB has been used in big organizations that handle huge volumes of data and need rapid access to the data as well as high scalability. Examples of organizations using MongoDB are:
- Aadhar – handles one of the biggest biometric databases in the world
- Shutterfly – stores billions of images with high transaction rates.
Install MongoDB on Linux Mint
MongoDB is available in two versions; the community edition and the enterprise edition. For testing and developing purposes, community edition is enough but enterprise edition is highly recommended for large-scale production.
In this guide we are going to see a step-by-step installation of MongoDB Community Edition in Linux Mint
First update your Linux system and install GnuPG by running the below commands.
sudo apt-get update
sudo apt-get install gnupg curl
Now download the MongoDB GPG key and add with the below command
curl -fsSL https://www.mongodb.org/static/pgp/server-8.0.asc | \
   sudo gpg -o /usr/share/keyrings/mongodb-server-8.0.gpg \
   --dearmor
Next is to add MongoDB repository. Run the following command:
echo "deb [ arch=amd64,arm64 signed-by=/usr/share/keyrings/mongodb-server-8.0.gpg ] https://repo.mongodb.org/apt/ubuntu noble/mongodb-org/8.0 multiverse" | sudo tee /etc/apt/sources.list.d/mongodb-org-8.0.listAfter adding, update repository and install MongoDB:
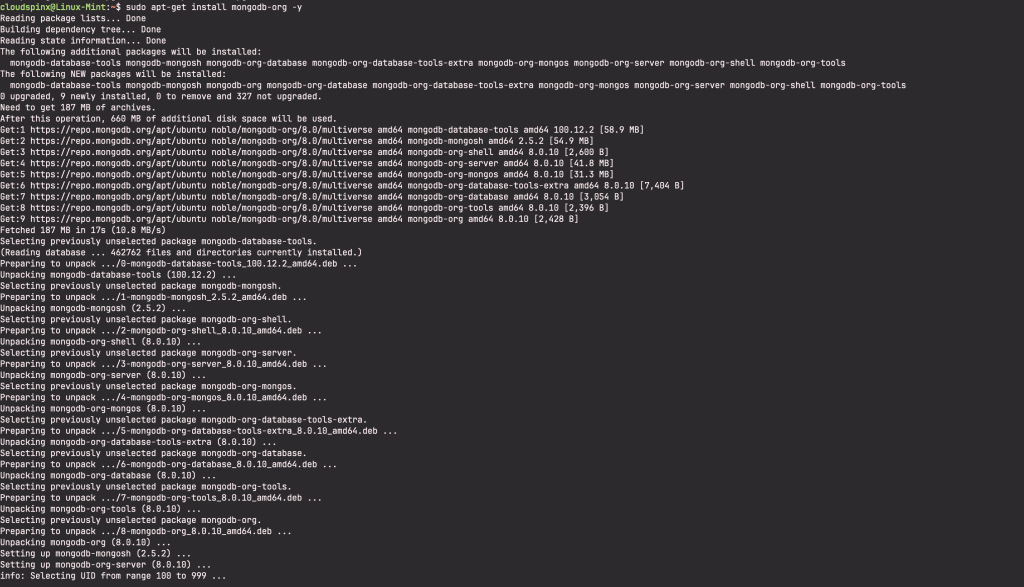
sudo apt-get update -y
sudo apt-get install mongodb-org -y
MongoDB installation will begin and you an output as below:
Once installation is complete, start MongoDB and enable at reboot:
sudo systemctl enable --now mongodCheck MongoDB status using the command below:
sudo systemctl status mongodIf MongoDB is installed successfully and is running, the output should be as below:

How to Configure MongoDB on Linux Mint
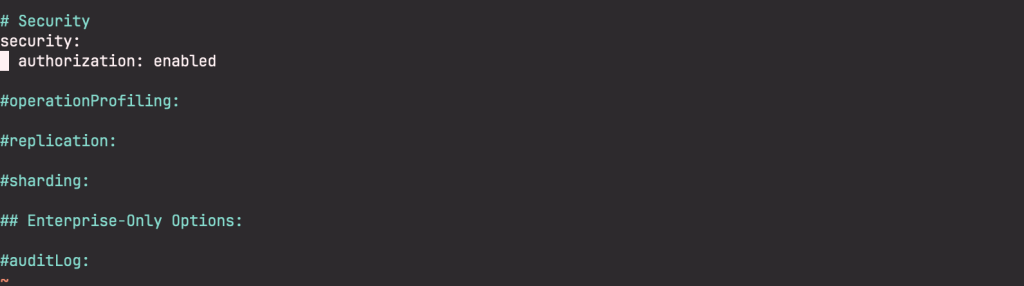
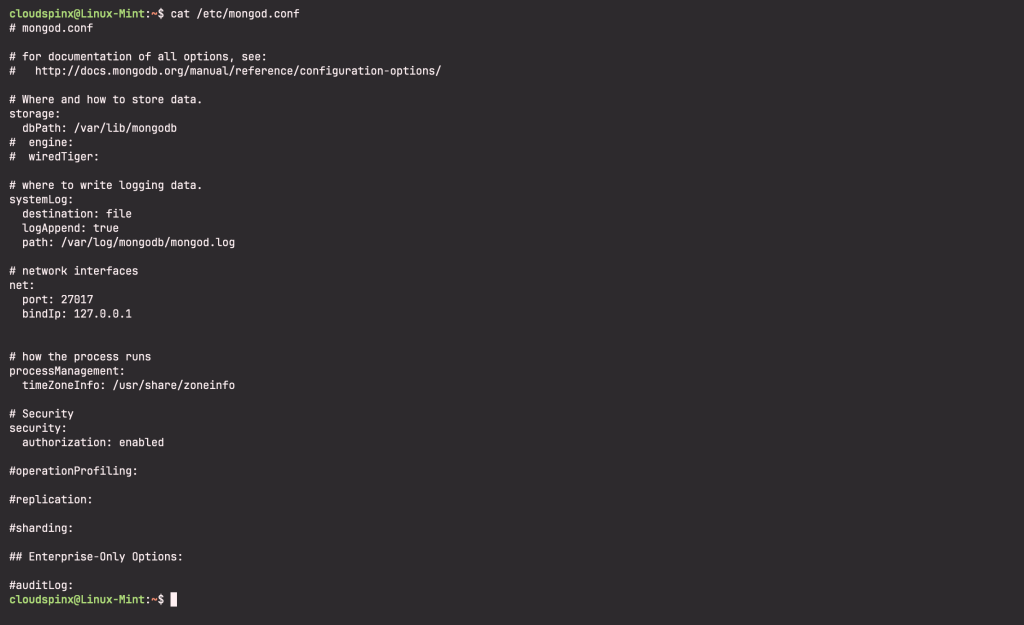
The default configuration file for MongoDB is located at /etc/mongod.conf. Open the file with your favorite file editor. I am using nano
sudo nano /etc/mongod.confBy default, every user has access to all databases in MongoDB. It is recommended to enable authorization in production environments. Once you open the configuration file add the following lines then save the file.
After adding the lines, save and restart mongoDB:
sudo systemctl restart mongodAfter enabling authorization, you can then create an admin user to manage databases. First, create admin database then add admin user to the database
How to Create MongoDB Database
The command use enables you to enter an existing database or create it if not there.
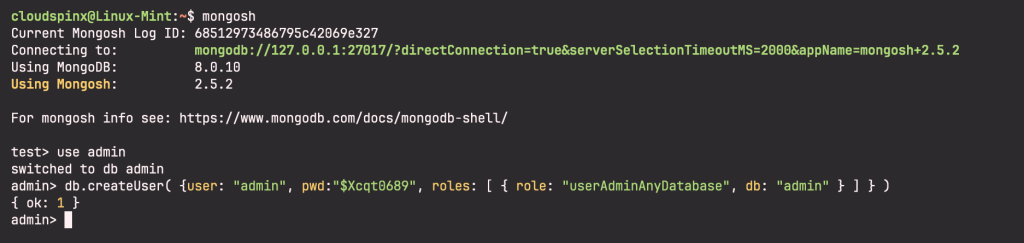
To create a database called admin, run use admin command in the MongoDB shell. The command mongo is used to enter MongoDB shell
mongoshOutput:

Once in the shell, create admin database by entering use admin command. In the admin database, create admin user as shown below, replacing ‘mypassword’ with a password of your choice:
Test the created admin user. Quit the MongoDB shell then login back using the created admin user. To quit MongoDB shell, just type quit().
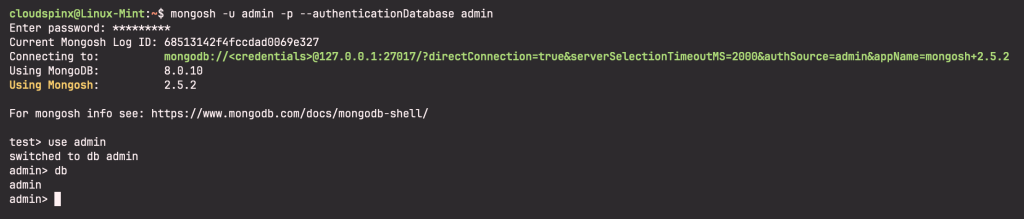
On your terminal, enter the below command to enter MongoDB with admin user.
mongo -u admin -p --authenticationDatabase adminOnce you press Enter you will be prompted to enter password. Type the password that you had set for the admin user:

You can now connect to the created admin database to add more data by typing use admin. To check the database you are currently working in type db.
How to Change Data Directory in MongoDB
The default MongoDB data directory is defined in the mongod.conf file
To display the content of mongod.conf file, use the command below:
cat /etc/mongod.confFrom the file, check out for the below content:
To change the default MongoDB data directory, open mongod.conf file using your favorite file editor and define your new path in the dbpath value. Save the file and restart mongodb to pick the new changes.
I hope you have enjoyed our step-by-step guide on installing MongoDB 8.0 in Linux Mint.
Check more interesting Linux guides below:


