Apache Tomcat is a free and open-source implementation of the Java Servlet and Server page container. It enables developers to build and deploy innumerable Java-based applications. It provides a pure Java HTTP web server environment from which Java code can run. Apache Tomcat being open-source, is developed and maintained by an open community of developers around the world under the Apache Software Foundation. In this short guide we will perform an installation of Apache Tomcat 11 on RHEL 9|CentOS Stream 9.
Getting Started
Before we commence on the nub task of this guide, we need to ensure that our systems are updated and upgraded as below:
sudo dnf update -ySet the server hostname and hosts file for RHEL 9|CentOS 9 server as below.
$ sudo hostnamectl set-hostname tomcat.example.com
$ sudo vi /etc/hosts
192.168.1.10  tomcat.example.com
Then reboot for the changes to apply.
sudo rebootStep 1: Install OpenJDK on RHEL 9|CentOS Stream 9
Java is one of the dependencies required to run Apache Tomcat. In this guide, I will use Version 17 of Java but you can also choose to install version 11 as shown.
# OpenJDK 17
sudo dnf install java-17-openjdk java-17-openjdk-devel

# OpenJDK 11
sudo dnf install java-11-openjdk java-11-openjdk-devel
Step 2: Create Tomcat user and Directory on RHEL 9|CentOS Stream 9
We create a non-root user responsible for only accessing the Tomcat application. We need to add the Tomcat group, create an Apache Tomcat directory, and the user.
# Add Tomcat group
sudo groupadd tomcat

# Create tomcat user, disable login and give rights
sudo useradd -s /bin/nologin -g tomcat -d /opt/tomcat tomcat
Step 3: Download Apache Tomcat 11 on RHEL |CentOS Stream 9
Download Apache Tomcat 11 from the official download page. Alternatively, you can download Apache Tomcat .tar.gz file using the below Wget command.
Copy the download link for the Apache Tomcat binary core .tar.gz file and download it as below.
sudo dnf -y install wget
export VER=11.0.6
wget https://dlcdn.apache.org/tomcat/tomcat-11/v${VER}/bin/apache-tomcat-${VER}.tar.gz
Now extract the downloaded archive to the Tomcat directory we created earlier.
sudo tar -xvf apache-tomcat-$VER.tar.gz -C /opt/tomcat --strip-components=1Now allow the Tomcat user to access the files in the tomcat directory.
sudo chown -R tomcat: /opt/tomcatMake scripts in the directory executable.
sudo sh -c 'chmod +x /opt/tomcat/bin/*.sh' Step 4: Create Apache Tomcat Systemd file on RHEL |CentOS Stream 9
A systemd file is responsible for starting and stopping the Apache Tomcat service. It is also useful for autostarting the service after boot.This service will be added at /etc/systemd/system/tomcat.service.
Find the Java path.
$ alternatives --list  | grep ^java
java                	auto  	/usr/lib/jvm/java-17-openjdk-17.0.15.0.6-2.el9.x86_64/bin/java
javac               	auto  	/usr/lib/jvm/java-17-openjdk-17.0.15.0.6-2.el9.x86_64/bin/javac
java_sdk_openjdk    	auto  	/usr/lib/jvm/java-17-openjdk-17.0.15.0.6-2.el9.x86_64
java_sdk_17         	auto  	/usr/lib/jvm/java-17-openjdk-17.0.15.0.6-2.el9.x86_64
java_sdk_17_openjdk 	auto  	/usr/lib/jvm/java-17-openjdk-17.0.15.0.6-2.el9.x86_64
Create the systemd configuration file.
sudo vim /etc/systemd/system/tomcat.serviceIn the created file, paste the below content.
[Unit]
Description=Apache Tomcat Web Application Container
Wants=network.target
After=network.target

[Service]
Type=forking

Environment=JAVA_HOME=/usr/lib/jvm/java-17-openjdk
Environment=CATALINA_PID=/opt/tomcat/temp/tomcat.pid
Environment=CATALINA_HOME=/opt/tomcat
Environment='CATALINA_OPTS=-Xms512M -Xmx1G -Djava.net.preferIPv4Stack=true'
Environment='JAVA_OPTS=-Djava.awt.headless=true'

ExecStart=/opt/tomcat/bin/startup.sh
ExecStop=/opt/tomcat/bin/shutdown.sh
SuccessExitStatus=143

User=tomcat
Group=tomcat
UMask=0007
RestartSec=10
Restart=always

[Install]
WantedBy=multi-user.target
With the configuration created, start and enable the Apache Tomcat service to run automatically on boot.
sudo systemctl daemon-reload
sudo systemctl enable --now tomcat
Check the status of the service.

Apache Tomcat listens on port 8080, so we need to allow this port on the firewall.
sudo firewall-cmd --add-port=8080/tcp --permanent
sudo firewall-cmd --reload
Step 5: Configure Tomcat Web Management UI on RHEL |CentOS Stream 9
With the above settings, Apache Tomcat can be accessed and managed using the Web interface. So, we need to create a user and password for login on to the management dashboard. These credentials are stored in a .xml file at /opt/tomcat/conf/.
Backup current file:
sudo mv /opt/tomcat/conf/tomcat-users.xml{,.bak}Create new:
sudo vim /opt/tomcat/conf/tomcat-users.xmlEdit your file to match the below content by adding the italicised part and replacing admin and StrongPassw0rd with your own desired credentials.
<?xml version="1.0" encoding="UTF-8"?>
<!--
  Licensed to the Apache Software Foundation (ASF) under one or more
  contributor license agreements.  See the NOTICE file distributed with
  this work for additional information regarding copyright ownership.
  The ASF licenses this file to You under the Apache License, Version 2.0
  (the "License"); you may not use this file except in compliance with
  the License.  You may obtain a copy of the License at
      http://www.apache.org/licenses/LICENSE-2.0
  Unless required by applicable law or agreed to in writing, software
  distributed under the License is distributed on an "AS IS" BASIS,
  WITHOUT WARRANTIES OR CONDITIONS OF ANY KIND, either express or implied.
  See the License for the specific language governing permissions and
  limitations under the License.
-->
<tomcat-users xmlns="http://tomcat.apache.org/xml"
              xmlns:xsi="http://www.w3.org/2001/XMLSchema-instance"
              xsi:schemaLocation="http://tomcat.apache.org/xml tomcat-users.xsd"
              version="1.0">
<!--
  NOTE:  By default, no user is included in the "manager-gui" role required
  to operate the "/manager/html" web application.  If you wish to use this app,
  you must define such a user - the username and password are arbitrary. It is
  strongly recommended that you do NOT use one of the users in the commented out
  section below since they are intended for use with the examples web
  application.
-->
<!--
  NOTE:  The sample user and role entries below are intended for use with the
  examples web application. They are wrapped in a comment and thus are ignored
  when reading this file. If you wish to configure these users for use with the
  examples web application, do not forget to remove the <!.. ..> that surrounds
  them. You will also need to set the passwords to something appropriate.
-->
<!-- user manager can access only manager section -->
<role rolename="manager-gui" />
<user username="admin" password="StrongPassw0rd" roles="manager-gui" />

<!-- user admin can access manager and admin section both -->
<role rolename="admin-gui" />
<user username="admin" password="StrongPassw0rd" roles="manager-gui,admin-gui" />
</tomcat-users>
Then we also need to allow tomcat to be accessed remotely. By default, it is set to allow access from the local machine only. This is achieved by editing the content.xml file as below.
sudo vim /opt/tomcat/webapps/manager/META-INF/context.xmlIn the file, add your subnet to allow access to Tomcat as shown.
...
<Context antiResourceLocking="false" privileged="true" >
  <Valve className="org.apache.catalina.valves.RemoteAddrValve"
          allow="127\.\d+\.\d+\.\d+|192\.\d+\.\d+\.\d+|::1|0:0:0:0:0:0:0:1" />
...
</Context>
From the above configuration, I have allowed full access to the 192.0.0.0 subnet.
No limit on who access Tomcat web admin interface (Not recommended in prod)
Alternative configuration that doesn’t limit access from address:
<?xml version="1.0" encoding="UTF-8"?>
<!--
  Licensed to the Apache Software Foundation (ASF) under one or more
  contributor license agreements.  See the NOTICE file distributed with
  this work for additional information regarding copyright ownership.
  The ASF licenses this file to You under the Apache License, Version 2.0
  (the "License"); you may not use this file except in compliance with
  the License.  You may obtain a copy of the License at
      http://www.apache.org/licenses/LICENSE-2.0
  Unless required by applicable law or agreed to in writing, software
  distributed under the License is distributed on an "AS IS" BASIS,
  WITHOUT WARRANTIES OR CONDITIONS OF ANY KIND, either express or implied.
  See the License for the specific language governing permissions and
  limitations under the License.
-->
<Context antiResourceLocking="false" privileged="true" >
</Context>
Step 6: Access Apache Tomcat Web Interface
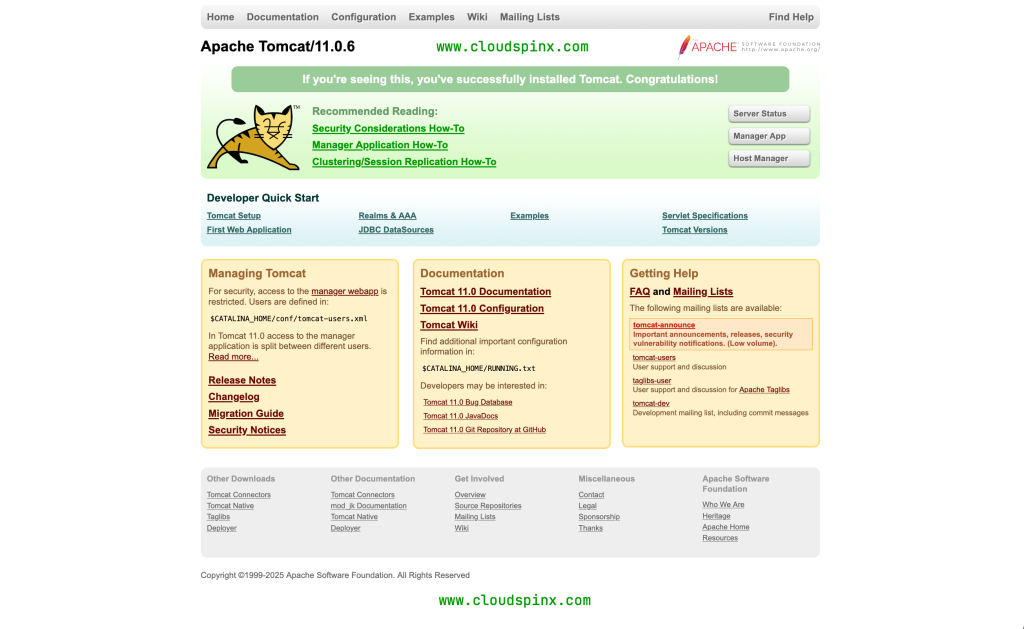
Now the Apache Tomcat Web Interface can be accessed on a browser using the URL http://server-ip:8080. At this point, you should be able to access this page.
Step 7: Configure Nginx as the Apache Tomcat Reverse Proxy (Optional)
In this guide, we will use Nginx Server to access Apache Tomcat Application. Install Nginx Web server on RHEL 9|CentOS Stream 9. Add the Nginx repo on RHEL 9|CentOS Stream 9.
Now proceed and install Nginx on RHEL 9|CentOS Stream 9 using the command:
sudo dnf install -y nginxStart and enable Nginx to run on boot.
sudo systemctl start nginx
sudo systemctl enable nginx
Create a Virtual Host for Apache Tomcat.
Now we also need to allow Apache Tomcat to be reached from remote servers. We need to edit:
sudo vim /opt/tomcat/webapps/host-manager/META-INF/context.xmlEdit your configuration as below, to allow the Apache Tomcat to be accessed remotely.
...
<Context antiResourceLocking="false" privileged="true" >
  <Valve className="org.apache.catalina.valves.RemoteAddrValve"
         allow="127\.\d+\.\d+\.\d+|192\.\d+\.\d+\.\d+|::1|0:0:0:0:0:0:0:1" />
...
</Context>
Rename the default nginx conf file to default.conf.bak as below.
sudo mv /etc/nginx/conf.d/default.conf /etc/nginx/conf.d/default.conf.bakCreate the new Apache Tomcat .conf file:
sudo vim /etc/nginx/conf.d/tomcat.confIn the conf file, add the below content.
server {
  listen          80;
  server_name     myservername.com;
  root            /opt/tomcat/webapps/;


  location / {
        proxy_set_header X-Forwarded-Host $host;
        proxy_set_header X-Forwarded-Server $host;
        proxy_set_header X-Forwarded-For $proxy_add_x_forwarded_for;
        proxy_pass http://127.0.0.1:8080/;
  }
}
Check the syntax of the created conf file.
sudo nginx -tThen restart Nginx for the changes to apply.
sudo systemctl restart nginxConfigure SELinux and Firewall for NGINX
Allow access to port 80 through the firewall:
sudo firewall-cmd --permanent --add-service=http
sudo firewall-cmd --reload
If SELinux is set to Enforcing, allow NGINX to make connections:
sudo setsebool -P httpd_can_network_connect 1Now acess Apache Tomcat using the URL http://SERVER_IP or http://SERVER_HOSTNAME
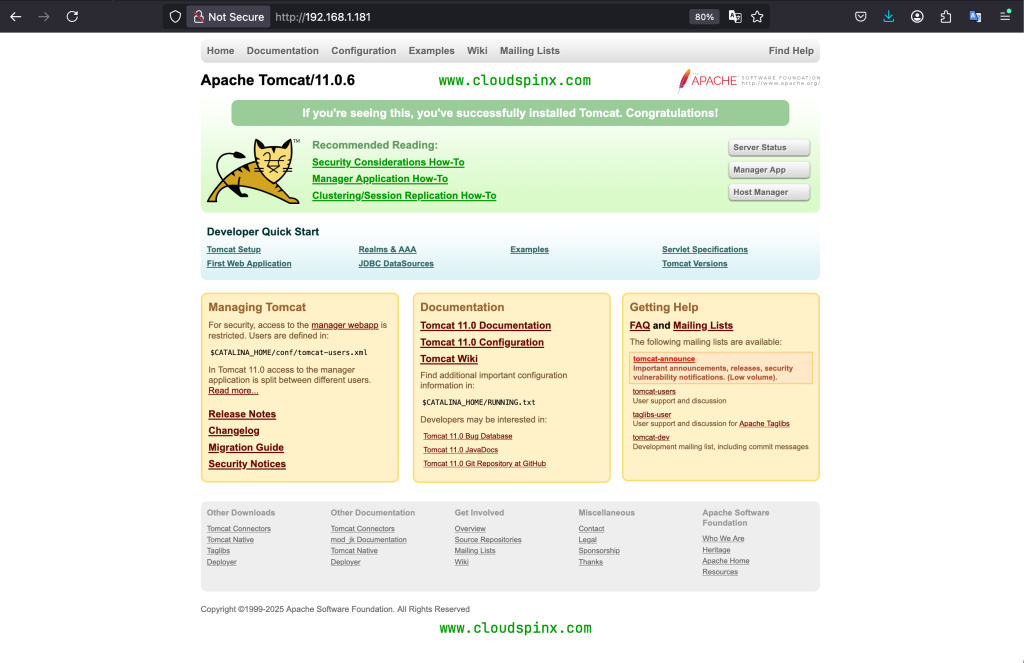
Click on Server Status or Manager App, you will be prompted to enter your credentials i.e username and password to access the dashboards.
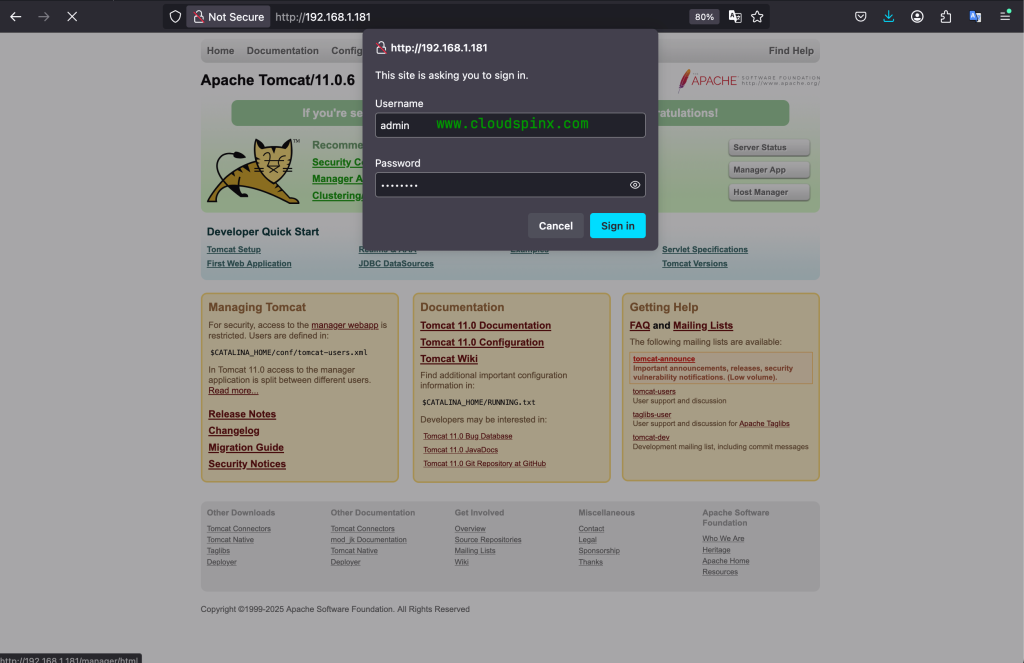
Enter the credentials you created in the tomcat-users.xml and you will be granted access to the Apache Tomcat Web interface.
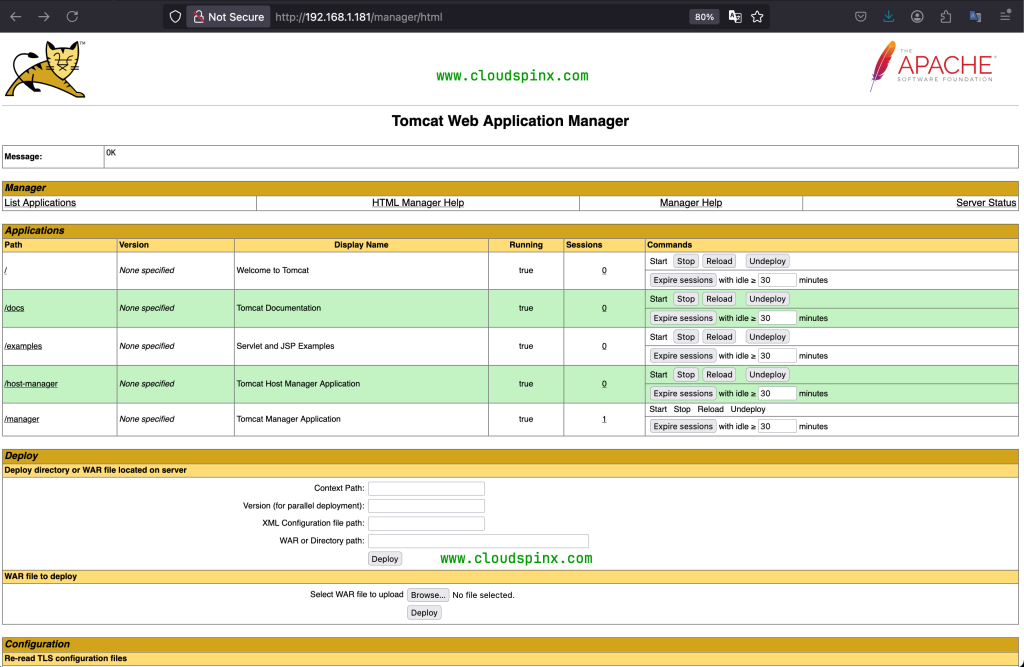
That is it! you are now set to use Apache Tomcat Web Interface, which marks the end of our guide. We have successfully installed Apache Tomcat 10 on RHEL 9|CentOS Stream 9. I hope this guide was valuable.
See more content available on our website:

