
Imagine you are a customer service agent dealing with customers from different clients and they get in touch with you from different social media platforms, via email, websites, or even via calls. You would lose track of who is and who that is trying to contact you, and the urgency of the message, which may lead to losing customers due to poor customer support services. I mean, I know you are trying but let us get to the fact of the matter, you need to handle your clients for the business to grow and get those good reviews.
🔑 Unlock the complete Ubuntu learning journey. This extract comes from The Ultimate Ubuntu Desktop Handbook.
To help you keep track of your clients, Helpdesk software come in place, they assist you in managing your customers by tracking and solving customer tickets by consolidating all of your customer support interactions into one channel tool. They automate routine tasks, optimize processes and workflows, and provide better service levels and customer experience which overall leads to business growth. There are different types of help desk software available that offer the same service but may differ in terms of payment and additional features included in the tool. They are, Zendesk, Zoho Desk, FreeScout, HelpScout, Livechat, Freshdesk, and many more.
FreeScout & Features
FreeScout is an open-source helpdesk and shared mailbox with some unique capabilities for replying to and sending emails. FreeScout is a super lightweight and high-performance self-clone of Help Scout with the shared inbox written in PHP (Laravel framework). It has modules that extend FreeScout functionality like Tags to categorize emails and Saved emails that allow you to automate replies to quickly answer common questions. It is a good solution for users who need to provide professional customer support without overlooking Privacy and not using copyrighted Zendesk and HelpScout materials.
The unique features that come with FreeScout include:
- Seamless email integration.
- Web installer & updater.
- Slack, Facebook, Telegram, and Whatsapp Integration.
- Multi-lingual with support of a variety of languages including English, Dutch, French, etc.
- Unlimited support agents, tickets, mailboxes, etc.
- Starring, merging, forwarding, and snoozing conversations.
- Support push notifications, Automatic replies, and Internal notes.
- LDAP authentication integration.
- Paste screenshots from the clipboard into the reply area.
Install FreeScout Help Desk on Debian | Ubuntu
FreeScout is a pure PHP/MySQL application, so it can be easily deployed even on shared hosting. You require the following;
- Nginx / Apache / IIS
- PHP 7.1 – 8.x
- MySQL 5.0+ / MariaDB 5.0+ / PostgreSQL
We are going to install FreeScout using the package and Running it on a docker container.
Option 1: Install FreeScout without using Docker
Update your packages with the following command.
sudo apt update && sudo apt upgrade -yConfirm if a reboot is required after updating the system.
[ -f /var/run/reboot-required ] && sudo reboot -f1.2 Install Nginx
Install Nginx with the following command. If you have apache, you will have to manually remove it. Then remove files on the root directory where we will install FreeScout.
sudo apt remove apache2
sudo apt install nginx vim
sudo rm /var/www/html/*nginx*.html
1.3 Install and Configure PHP
Install PHP and its dependencies with the following command.
sudo apt install php-fpm php php-mysql php-mbstring php-xml php-imap php-zip php-gd php-curl php-intlVerify successful installation by checking for the version.
$ php -v
PHP 8.3.6 (cli) (built: Mar 19 2025 10:08:38) (NTS)
Copyright (c) The PHP Group
Zend Engine v4.3.6, Copyright (c) Zend Technologies
    with Zend OPcache v8.3.6, Copyright (c), by Zend Technologies
Ensure the extensions are enabled:
php -mConfigure fix_pathinfo for FPM with the following command.
sudo -- "$SHELL" -c "echo 'cgi.fix_pathinfo=0' >> /etc/php/*/fpm/php.ini"1.4 Install and Configure the MariaDB database
Install MariaDB with the following command.
sudo apt install mariadb-server mariadb-clientSecure MariaDB with the following command.
sudo mariadb-secure-installationThe output is as shown below.
$ sudo mariadb-secure-installation

NOTE: RUNNING ALL PARTS OF THIS SCRIPT IS RECOMMENDED FOR ALL MariaDB
      SERVERS IN PRODUCTION USE!  PLEASE READ EACH STEP CAREFULLY!

In order to log into MariaDB to secure it, we'll need the current
password for the root user. If you've just installed MariaDB, and
haven't set the root password yet, you should just press enter here.

Enter current password for root (enter for none):
OK, successfully used password, moving on...

Setting the root password or using the unix_socket ensures that nobody
can log into the MariaDB root user without the proper authorisation.

You already have your root account protected, so you can safely answer 'n'.

Switch to unix_socket authentication [Y/n] n
 ... skipping.

You already have your root account protected, so you can safely answer 'n'.

Change the root password? [Y/n] n
 ... skipping.

By default, a MariaDB installation has an anonymous user, allowing anyone
to log into MariaDB without having to have a user account created for
them.  This is intended only for testing, and to make the installation
go a bit smoother.  You should remove them before moving into a
production environment.

Remove anonymous users? [Y/n] y
 ... Success!

Normally, root should only be allowed to connect from 'localhost'.  This
ensures that someone cannot guess at the root password from the network.

Disallow root login remotely? [Y/n] y
 ... Success!

By default, MariaDB comes with a database named 'test' that anyone can
access.  This is also intended only for testing, and should be removed
before moving into a production environment.

Remove test database and access to it? [Y/n] y
 - Dropping test database...
 ... Success!
 - Removing privileges on test database...
 ... Success!

Reloading the privilege tables will ensure that all changes made so far
will take effect immediately.

Reload privilege tables now? [Y/n] y
 ... Success!

Cleaning up...

All done!  If you've completed all of the above steps, your MariaDB
installation should now be secure.

Thanks for using MariaDB!
Login to the MariaDB root administrative account:
mariadb -uroot -pCreate a FreeScout database and user with a unique password.
CREATE DATABASE freescout CHARSET utf8mb4 COLLATE utf8mb4_unicode_ci;
GRANT ALL PRIVILEGES ON freescout.* TO freescout@localhost IDENTIFIED BY 'P@ssWord';
FLUSH PRIVILEGES;
EXIT;
1.5 Download FreeScout on Ubuntu | Debian
Install Git with the following command.
sudo apt install gitCreate the new directory to install FreeScout files and set the necessary permissions.
sudo mkdir -p /var/www/html
sudo chown www-data:www-data /var/www/html
cd /var/www/html
sudo rm -f index.html
Download the application with all the composer dependencies included to the directory.
$ sudo git clone https://github.com/freescout-help-desk/freescout .
Cloning into '.'...
remote: Enumerating objects: 42837, done.
remote: Counting objects: 100% (12863/12863), done.
remote: Compressing objects: 100% (2238/2238), done.
remote: Total 42837 (delta 10930), reused 10638 (delta 10625), pack-reused 29974 (from 2)
Receiving objects: 100% (42837/42837), 23.81 MiB | 5.05 MiB/s, done.
Resolving deltas: 100% (25495/25495), done.
Run the following command to make sure that the www-data user is the owner of all the files in the application directory:
sudo chown -R www-data:www-data /var/www/html1.6 Configure Nginx
Remove the default Nginx server configuration file:
sudo rm /etc/nginx/sites-available/default
sudo rm /etc/nginx/sites-enabled/default
Create a server configuration file for your site.
sudo vim /etc/nginx/sites-available/freescout.confAdd the following content to the file, Replace the server name with your actual site name.
server {
    listen 80;
    listen [::]:80;

    server_name freescout.example.com www.freescout.example.com;

    root /var/www/html/public;

    index index.php index.html index.htm;

    error_log /var/www/html/storage/logs/web-server.log;

    # Max. attachment size.
    # It must be also set in PHP.ini via "upload_max_filesize" and "post_max_size" directives.
    client_max_body_size 20M;

    location / {
        try_files $uri $uri/ /index.php?$query_string;
    }
    location ~ \.php$ {
	fastcgi_split_path_info ^(.+\.php)(/.+)$;
	fastcgi_pass unix:/run/php/php8.3-fpm.sock;
	fastcgi_index index.php;
	fastcgi_param SCRIPT_FILENAME $document_root$fastcgi_script_name;
	include fastcgi_params;
    }
    # Uncomment this location if you want to improve attachments downloading speed.
    # Also make sure to set APP_DOWNLOAD_ATTACHMENTS_VIA=nginx in the .env file.
    #location ^~ /storage/app/attachment/ {
    #    internal;
    #    alias /var/www/html/storage/app/attachment/;
    #}
    location ~* ^/storage/attachment/ {
        expires 1M;
        access_log off;
        try_files $uri $uri/ /index.php?$query_string;
    }
    location ~* ^/(?:css|js)/.*\.(?:css|js)$ {
        expires 2d;
        access_log off;
        add_header Cache-Control "public, must-revalidate";
    }
    # The list should be in sync with /storage/app/public/uploads/.htaccess and /config/app.php
    location ~* ^/storage/.*\.((?!(jpg|jpeg|jfif|pjpeg|pjp|apng|bmp|gif|ico|cur|png|tif|tiff|webp|pdf|txt|diff|patch|json|mp3|wav|ogg|wma)).)*$ {
        add_header Content-disposition "attachment; filename=$2";
        default_type application/octet-stream;
    }
    location ~* ^/(?:css|fonts|img|installer|js|modules|[^\\\]+\..*)$ {
        expires 1M;
        access_log off;
        add_header Cache-Control "public";
    }
    location ~ /\. {
        deny  all;
    }
}
Create a symbolic link for the configuration file to the enabled sites.
sudo ln -s /etc/nginx/sites-available/freescout.conf /etc/nginx/sites-enabled/freescout.confTest for any error on the configuration file:
$ sudo nginx -t
nginx: the configuration file /etc/nginx/nginx.conf syntax is ok
nginx: configuration file /etc/nginx/nginx.conf test is successful
Restart the services to apply changes:
sudo systemctl restart nginx php*-fpm.service1.7 Access FreeScout on Ubuntu | Debian
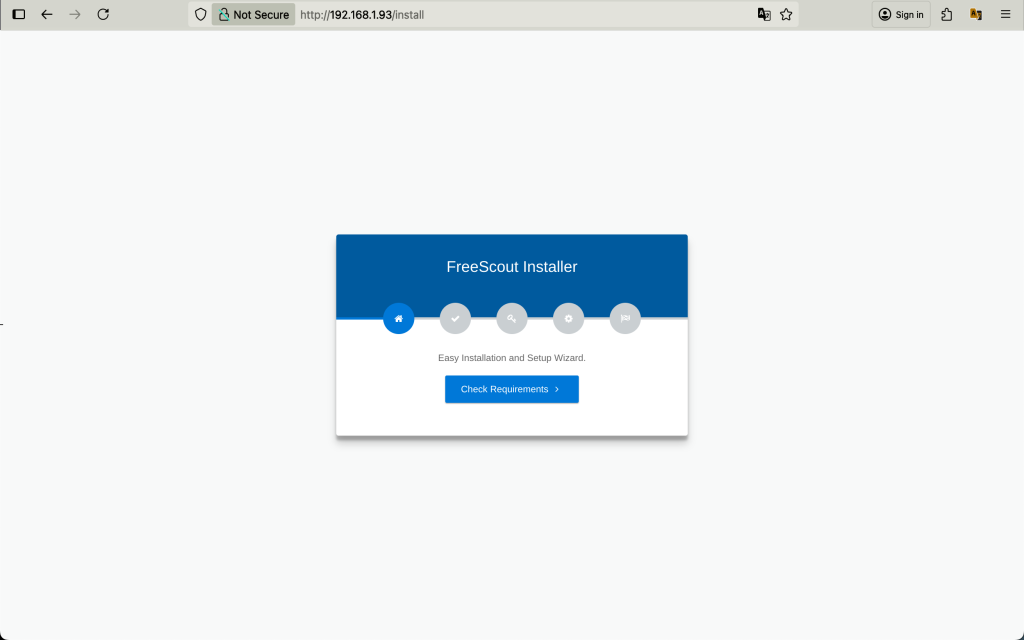
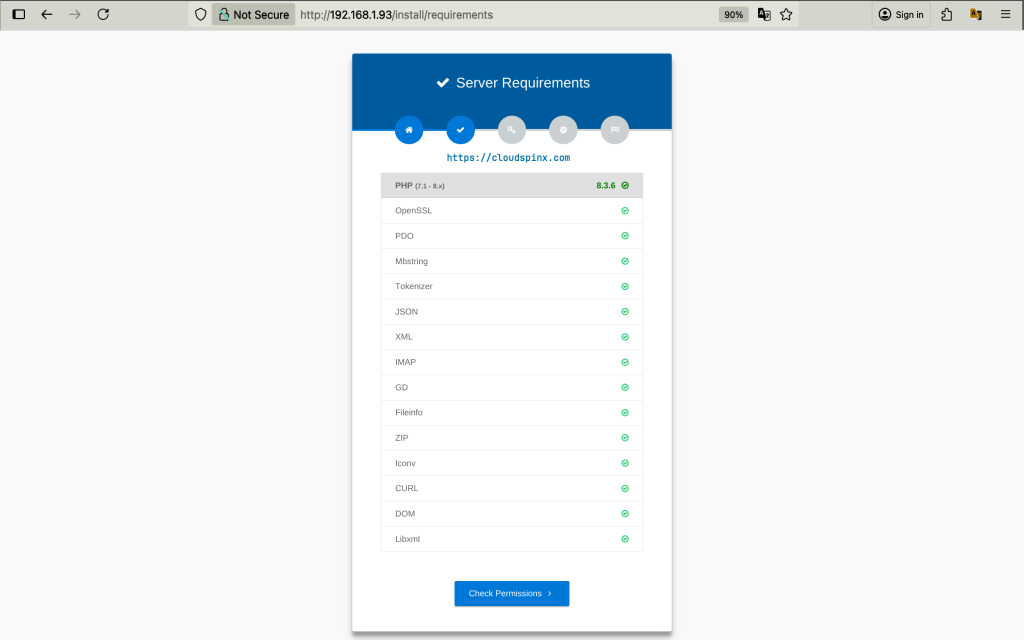
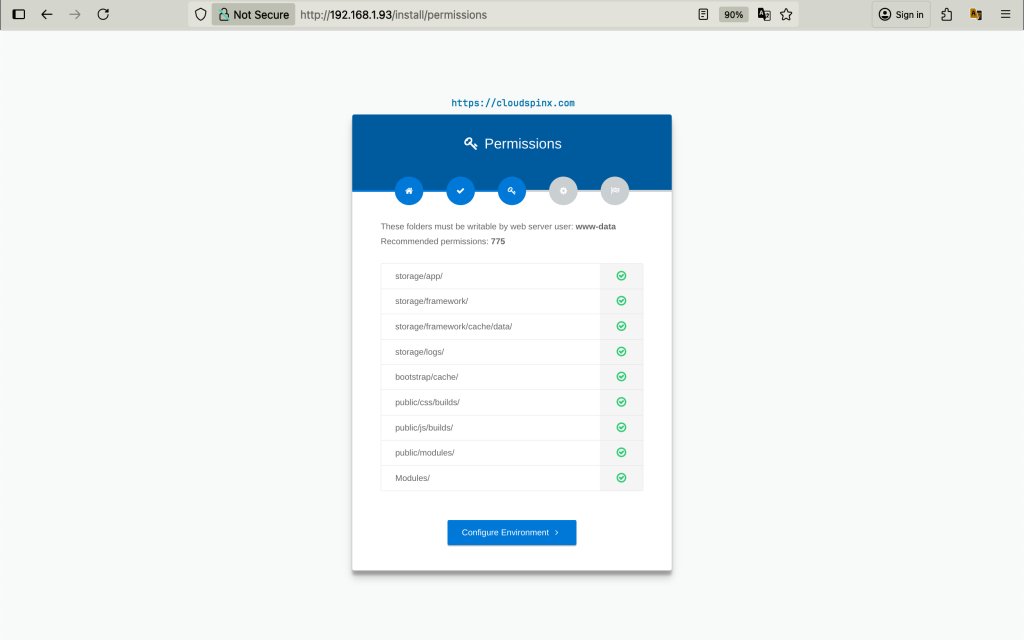
We will use the web installer to finish the installation of FreeScout. Go to http://your-domain.com/install and the installer opens as shown.
Check for server requirements.
Then check for Folder Permissions.
Configure the application environment. At the moment I Will use HTTP.

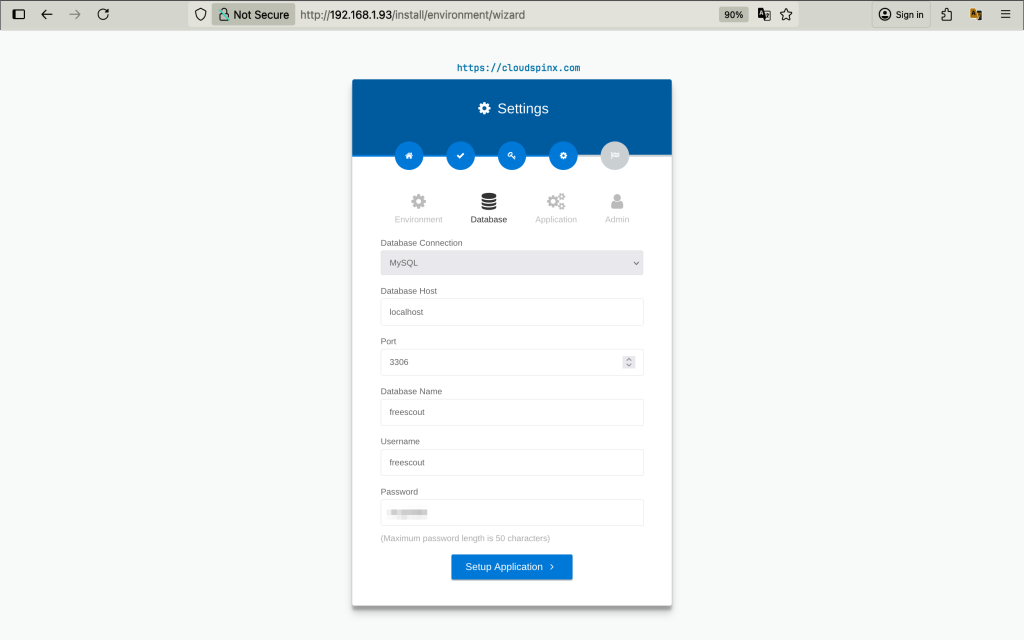
Select the Database type and edit the name, user, and password.
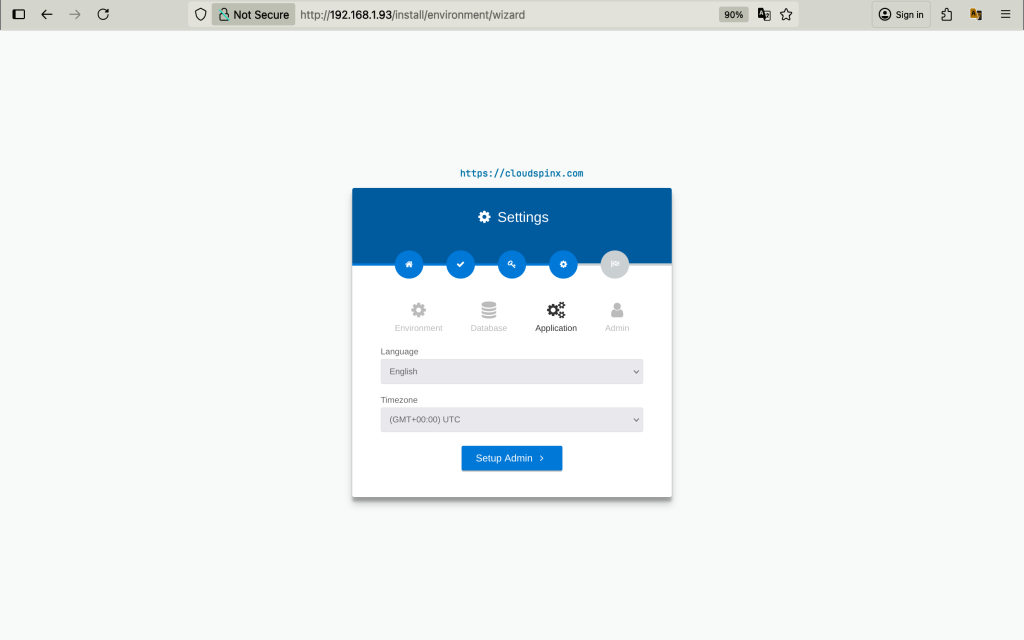
Choose Language and application timezone.
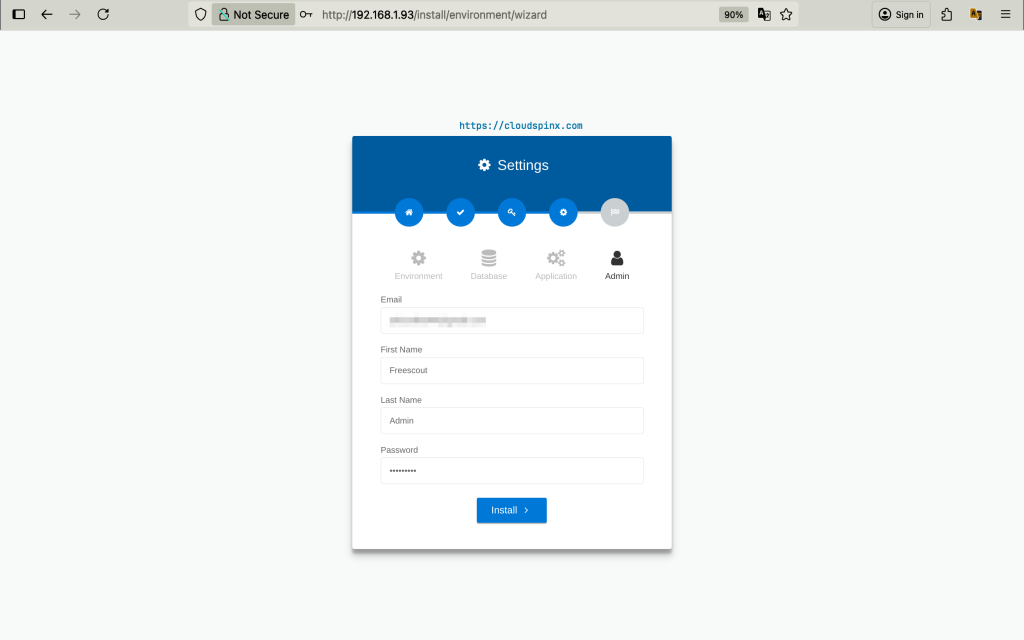
Lastly, create an admin user.
The Installation is finished.
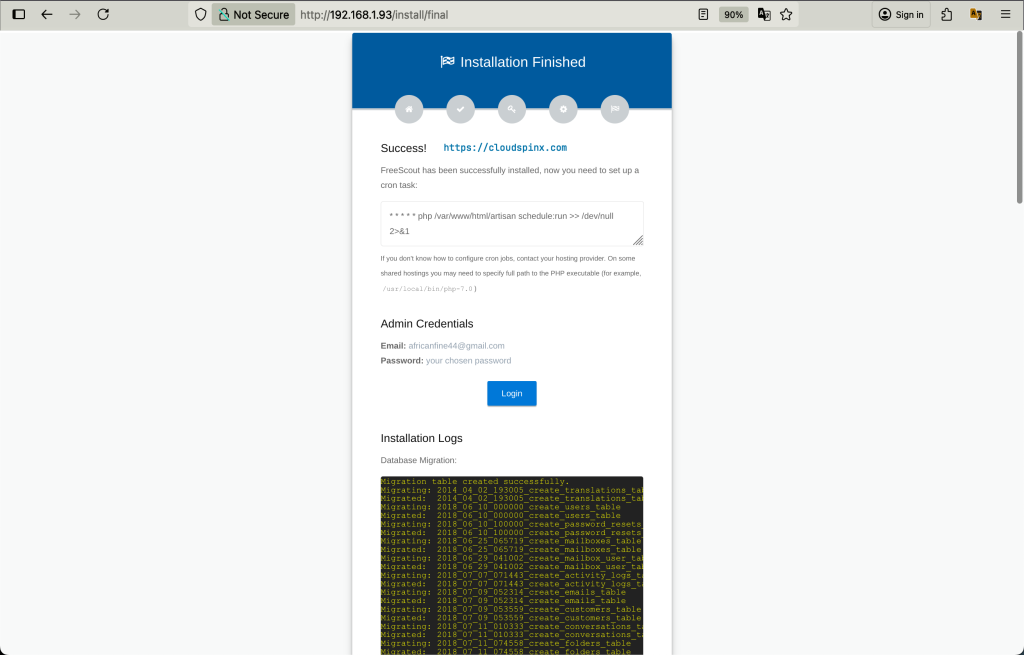
You just need to create a cron job/task with the given command:
sudo crontab -u www-data -eThen add the following line at the bottom:
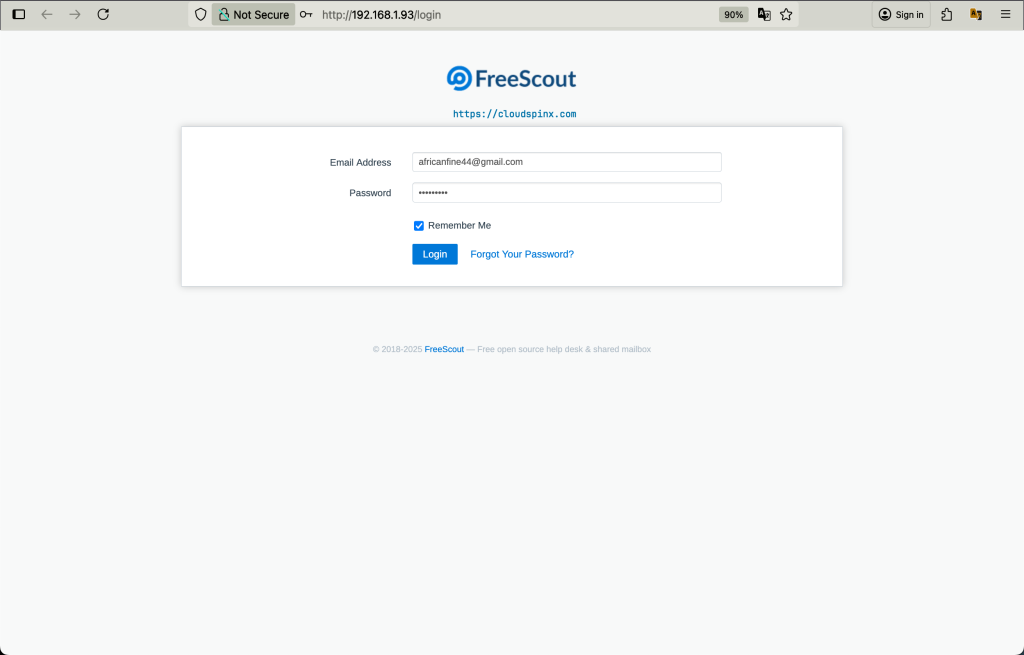
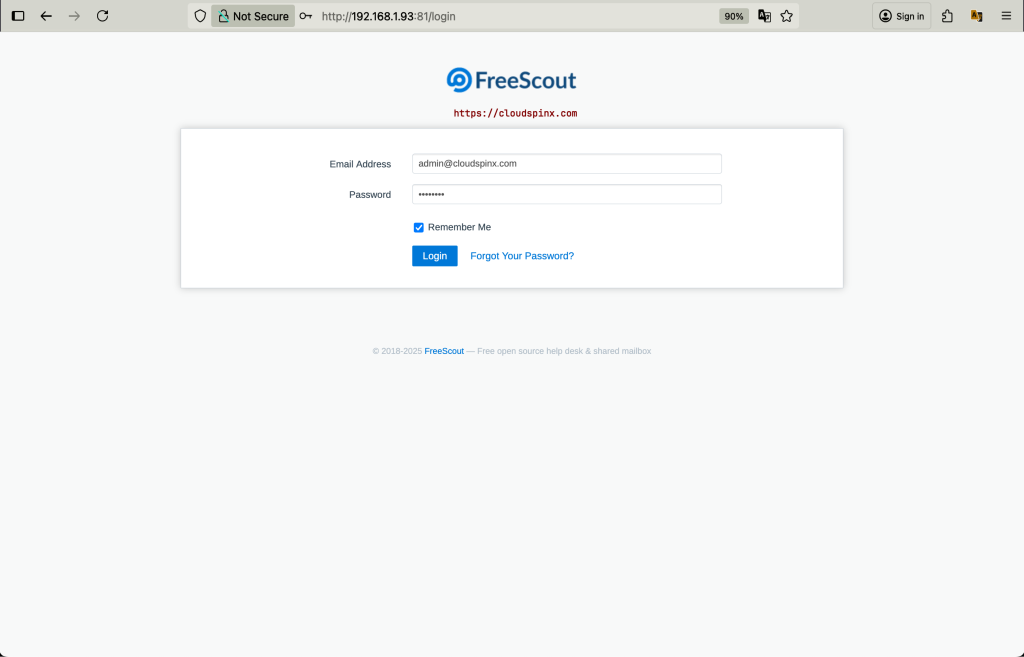
* * * * * php /var/www/html/artisan schedule:run >> /dev/null 2>&1Click on login. Use the admin details provided.
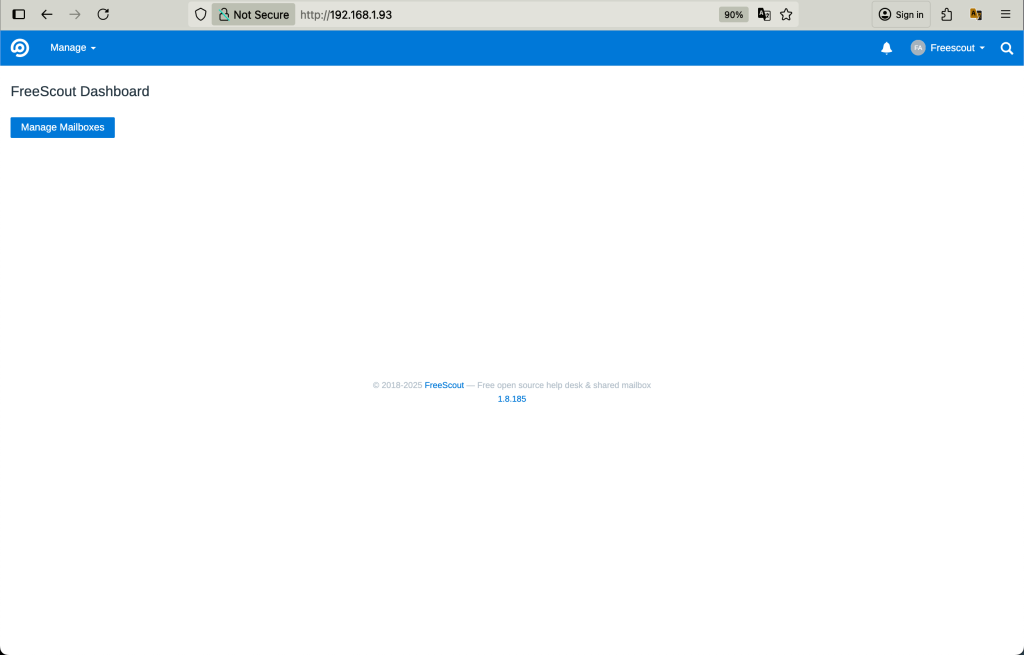
The Dashboard appears as shown.
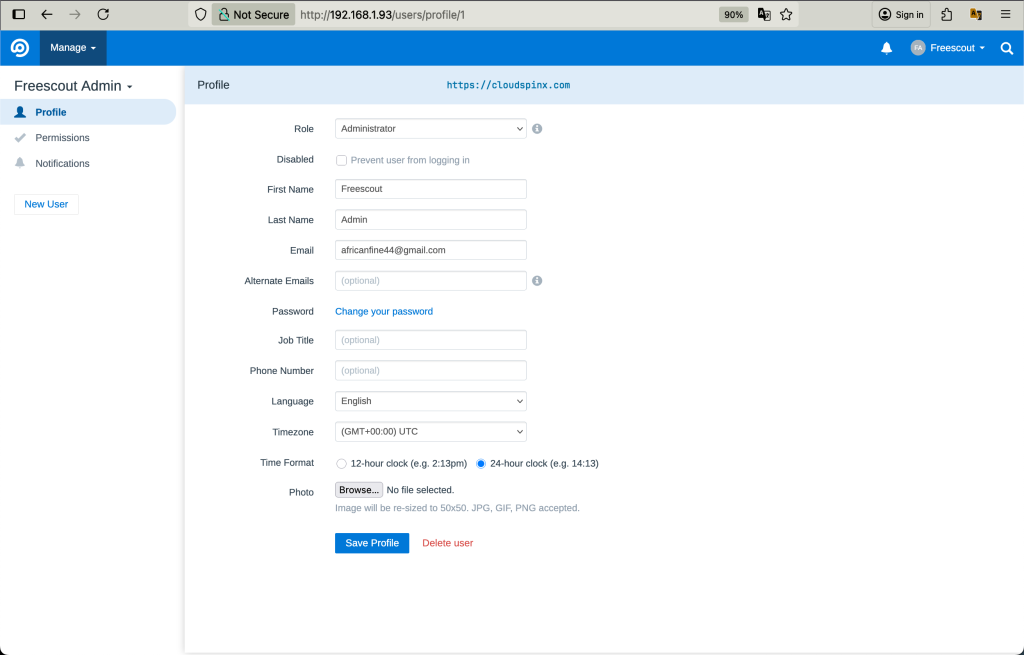
You can edit your profile from the Profile page.
2. Running FreeScout on Docker Container
This will build a Docker Image for Freescout that automatically installs and sets up installation upon the first start. But first, install Docker on your system.
2.1 Install Docker and Docker Compose
Ubuntu:
Add Docker’s official GPG key:
# Add Docker's official GPG key:
sudo apt-get update
sudo apt-get install ca-certificates curl
sudo install -m 0755 -d /etc/apt/keyrings
sudo curl -fsSL https://download.docker.com/linux/ubuntu/gpg -o /etc/apt/keyrings/docker.asc
sudo chmod a+r /etc/apt/keyrings/docker.asc

# Add the repository to Apt sources:
echo \
  "deb [arch=$(dpkg --print-architecture) signed-by=/etc/apt/keyrings/docker.asc] https://download.docker.com/linux/ubuntu \
  $(. /etc/os-release && echo "${UBUNTU_CODENAME:-$VERSION_CODENAME}") stable" | \
  sudo tee /etc/apt/sources.list.d/docker.list > /dev/null
sudo apt-get update
Install the Docker packages:
sudo apt-get install docker-ce docker-ce-cli containerd.io docker-buildx-plugin docker-compose-plugin
sudo usermod -aG docker $USER
newgrp docker
Debian:
Setup Docker’s apt repository:
# Add Docker's official GPG key:
sudo apt-get update
sudo apt-get install ca-certificates curl
sudo install -m 0755 -d /etc/apt/keyrings
sudo curl -fsSL https://download.docker.com/linux/debian/gpg -o /etc/apt/keyrings/docker.asc
sudo chmod a+r /etc/apt/keyrings/docker.asc

# Add the repository to Apt sources:
echo \
  "deb [arch=$(dpkg --print-architecture) signed-by=/etc/apt/keyrings/docker.asc] https://download.docker.com/linux/debian \
  $(. /etc/os-release && echo "$VERSION_CODENAME") stable" | \
  sudo tee /etc/apt/sources.list.d/docker.list > /dev/null
sudo apt-get update
Install the Docker packages:
sudo apt-get install docker-ce docker-ce-cli containerd.io docker-buildx-plugin docker-compose-pluginAdd your user account to the docker group:
sudo usermod -aG docker $USERVerify Docker compose is installed.
$ docker compose version
Docker Compose version v2.38.2
Verify Docker Engine is running.
docker run hello-world2.2 Configure FreeScout For Docker
Create a directory to store the FreeScout docker files:
mkdir ~/freescout && cd ~/freescoutCreate a docker-compose YAML file with the following content. You can edit the details like Database user and password to something else. The Admin User and password also can be edited. The Site URL can also be configured to another domain name or use your IP address. If you change the Port that FreeScout listens on, ensure you add it to the site URL.
$ vim docker-compose.yml
services:
  freescout-app:
    image: tiredofit/freescout
    container_name: freescout-app
    ports:
    - 81:80
    links:
    - freescout-db
    volumes:
    ### If you want to perform customizations to the source and have access to it, then uncomment this line - This includes modules
    #- ./data:/www/html
    ### Or, if you just want to use Stock Freescout and hold onto persistent files like cache and session use this, one or the other.
    - ./data:/data
    ### If you want to just keep the original source and add additional modules uncomment this line
    #- ./modules:/www/html/Modules
    - ./logs/:/www/logs
    environment:
    - CONTAINER_NAME=freescout-app
    - DB_HOST=freescout-db
    - DB_NAME=freescout
    - DB_USER=freescout
    - DB_PASS=P@ssWord
    - SITE_URL=http://cloudspinx.freescout.com:81
    - ADMIN_EMAIL=[email protected]
    - ADMIN_PASS=StrongPassword
    - ENABLE_SSL_PROXY=FALSE
    - DISPLAY_ERRORS=FALSE
    - TIMEZONE=Africa/Nairobi
    restart: always

  freescout-db:
    image: tiredofit/mariadb
    container_name: freescout-db
    volumes:
      - ./db:/var/lib/mysql
    environment:
      - ROOT_PASS=password
      - DB_NAME=freescout
      - DB_USER=freescout
      - DB_PASS=P@ssWord
      - CONTAINER_NAME=freescout-db
    restart: always

  freescout-db-backup:
    container_name: freescout-db-backup
    image: tiredofit/db-backup
    links:
     - freescout-db
    volumes:
      - ./dbbackup:/backup
    environment:
      - CONTAINER_NAME=freescout-db-backup
      - DB_HOST=freescout-db
      - DB_TYPE=mariadb
      - DB_NAME=freescout
      - DB_USER=freescout
      - DB_PASS=P@ssWord
      - DB_DUMP_FREQ=1440
      - DB_DUMP_BEGIN=0000
      - DB_CLEANUP_TIME=8640
      - COMPRESSION=BZ
      - MD5=TRUE
    restart: always
Save and exit the file. Then run the docker-compose up command to start the container.
$ docker compose up -d
[+] Running 21/21
 ⠿ freescout-db-backup Pulled                              25.5s
   ⠿ 213ec9aee27d Pull complete                             2.2s
   ⠿ 0a34d2f2b45d Pull complete                            11.9s
   ⠿ 4dd70801aef3 Pull complete                            12.1s
   ⠿ f471a1502016 Pull complete                            23.2s
   ⠿ bdd9d308f2cc Pull complete                            23.3s
 ⠿ freescout-app Pulled                                    29.0s
   ⠿ a1d1919bb7e9 Pull complete                            14.1s
   ⠿ 8ca317b6bbc8 Pull complete                            14.5s
   ⠿ 294bfb76dfbe Pull complete                            16.5s
   ⠿ 0e74ed2f8f91 Pull complete                            16.6s
   ⠿ 0f21dfad5188 Pull complete                            23.9s
   ⠿ 6a884a9e7921 Pull complete                            24.0s
   ⠿ 115f73f88cf4 Pull complete                            26.8s
   ⠿ a129a1b45002 Pull complete                            26.8s
 ⠿ freescout-db Pulled                                     22.9s
   ⠿ 59bf1c3509f3 Pull complete                             1.0s
   ⠿ e887546d6053 Pull complete                             7.5s
   ⠿ 3dace326c0ec Pull complete                             7.7s
   ⠿ ea97c706ca03 Pull complete                            21.1s
   ⠿ f908583427a3 Pull complete                            21.2s
[+] Running 4/4
 ⠿ Network freescout_default      Created                   0.1s

 ⠿ Container freescout-db         Running                   9.2s
 ⠿ Container freescout-app        Started                   5.0s
 ⠿ Container freescout-db-backup  Running                   5.4s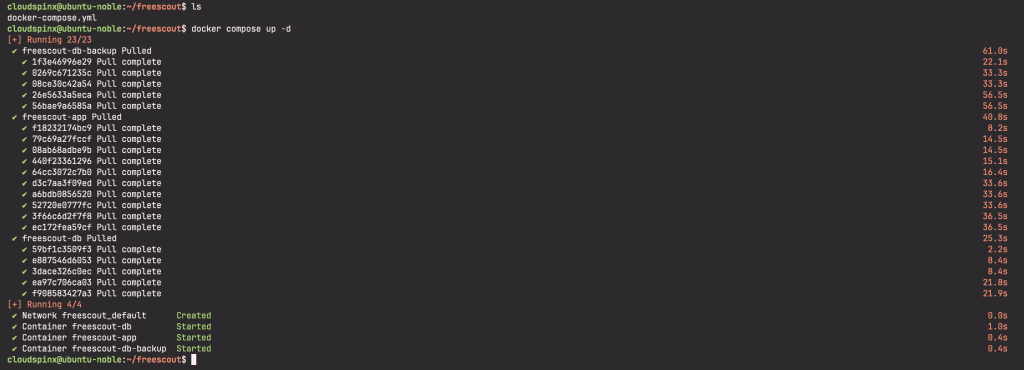
Give it time to start then go to the Site URL as directed from the file.
2.3 Access FreeScout
In my case, I would go to http://cloudspinx.freescout.com:81. The login page appears. Use the details provided in the YAML file to log in.
3. Install FreeScout Modules
FreeScout modules extend the functionality of FreeScout by providing additional features. They include Auto Login Module, Jira Integration Module, Custom Mailbox Signatures Module, User Fields Module, and many more. All Modules are Open-Source and licensed under the AGPL-3.0 license. There are Official modules that are downloaded to the server upon installation. You can also install custom modules that are developed by a third party.
However, you need to provide a one-time only for a particular module to get the License Key that is sent to your email address. Payment methods that are supported include Bank Cards, PayPal, Amazon Pay, and Robokassa. The license key allows you to download the full source code of a module and use it, modify or share it any way you want. This also includes using use the same module on more than one FreeScout instance.
To install Official modules, Go to Manage >> Modules on your Interface.
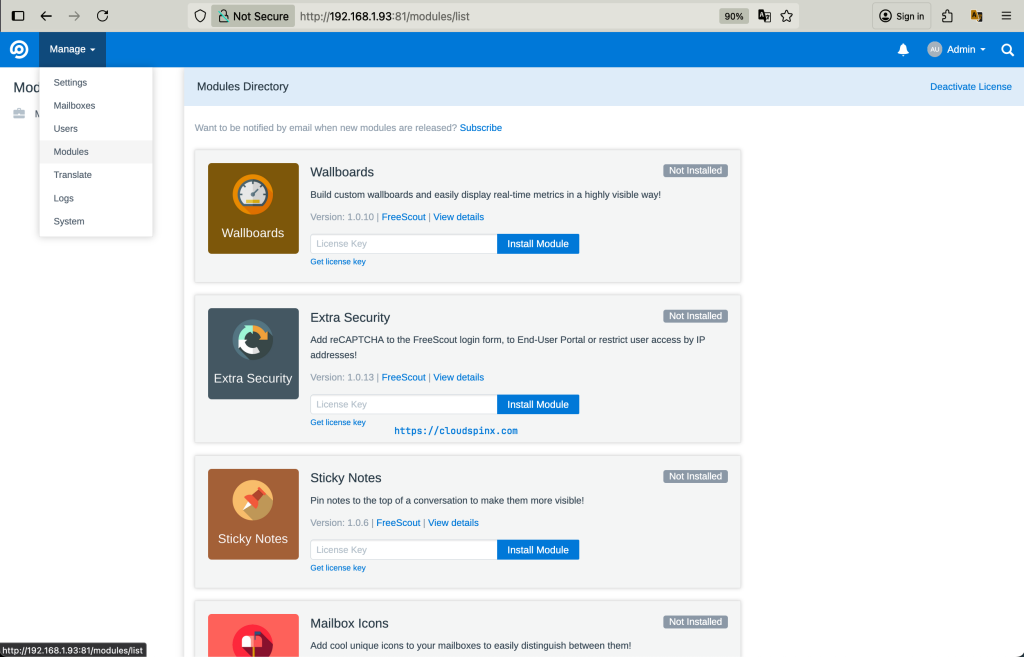
Choose a module and enter License Key. Click the Install button and then the “Activate” button.
3.1 Certify FreeScout
Enable HTTPS protocol on your site with Certbot. It is an open-source software tool for automatically using Let’s Encrypt certificates on manually-administrated websites to enable HTTPS. This protocol is required for browser push notifications to work.
Install Certbot with snaps.
sudo snap install --classic certbotExecute the following instruction on the command line on the machine to ensure that the Certbot command can be run.
sudo ln -s /snap/bin/certbot /usr/bin/certbotRun this command to get a certificate and have Certbot edit your Nginx configuration automatically to serve it, turning on HTTPS access in a single step. Follow the prompts to add an email address, accept the License agreement, and the rest.
sudo certbot --nginxTest automatic renewal for your certificates by running this command:
sudo certbot renew --dry-runWhen asked choose option 2: Redirect – Make all requests redirect to secure HTTPS access.
Add to root crontab to renew certbot:
0 12 * * * /usr/bin/certbot renew --quietAccess FreeScout securely on https://freescout.example.com.
Wrap Up
From this guide, we have installed the FreeScout help desk on Ubuntu|Debian systems. FreeScout modules make the help desk software highly extensible to provide additional functionalities. The Workflow Module automates actions and keeps track of old conversations. Others include the Custom Folders and Custom Fields Modules, ticketing modules, End-user Portal Module, and many more. FreeScout is a self-clone of HelpScout but built from scratch and does not use any copyrighted Help Scout or Zendesk materials. More articles are as shown below;


