
ln this article we walk you through the steps used to setup a fully functional Kubernetes cluster on Ubuntu 24.04 (Noble Numbat) Linux machines. Kubernetes has become the industry-standard solution for orchestrating containerized applications at scale. With its robust APIs, developers can extend on its core capabilities by creating custom resources that are tailored to specific use cases.
In Kubernetes, a cluster is a group of virtual machines or physical servers working together to provide a complete container platform where you can run your workloads. It does the automation of deployments, automatic scaling, and management of containerized applications.
1. Kubernetes Components
Below is a breakdown of key Kubernetes components.
- Control Plane: At the core of Kubernetes cluster is the control plane. This does the management of overall cluster state and all worker nodes. It contains the API server (entry point into the cluster), scheduler that assigns workloads to the nodes in cluster, and controllers that manage the overall cluster state, and etcd key-value data store.
- Worker Nodes: These are operating systems that will run containerized applications (where pods are scheduled to run). Kubelet service which runs on every node is the brain behind the pods lifecycle management.
For your application to run in kubernetes, it must be packaged in a container. A container is a lightweight application bundled with all the dependencies and libraries. When compared to Virtual Machines, they are portable since they contain everything necessary to run the application. Containers share an underlying OS of the host system, providing better efficiency.
2. Environment Preparation
The Lab environment used in this guide will have the following setup.
| OS | Server IP | Server Hostname | Server Role |
| Ubuntu 24.04 | 192.168.1.201 | k8smaster.cloudspinx.com | Control Plane |
| Ubuntu 24.04 | 192.168.1.205 | k8snode01.cloudspinx.com | Worker node |
| Ubuntu 24.04 | 192.168.1.206 | k8snode02.cloudspinx.com | Worker node |
Login to each of the server in your environment and set correct hostnames. You can also add the records to the DNS server or utilize /etc/hosts file.
# Master Node
sudo hostnamectl set-hostname k8smaster.cloudspinx.com

# Worker Node
sudo hostnamectl set-hostname k8snode01.cloudspinx.com
Substitute the values here with your correct environment settings. Logout when done for the new hostname to take effect.
logout3. Install Kubernetes components
We’ve created an Ansible Playbook under our company Github account CloudSpinx. The playbook will automate the following operations on the nodes:
- Update packages on the system and install dependencies
- Configure timezone
- Configure NTP time synchronization
- Disable swap
- Load required kernel modules
- Configure sysctl parameters
- Configure
/etc/hostsfile on each node. But you must set correct hostnames manually (FQDN) preferred. - Install and configure container run-time – CRI-O, Containerd, or Docker with Mirantis cri-dockerd
Install Ansible in your workstation
You need to choose a local machine where ansible playbook will be executed. This can be macOS, Linux or Windows OS. You can use one of the cluster nodes as your workstation for running ansible executions.
Install Ansible in your workstation.
### On a system with Python3 ###
curl https://bootstrap.pypa.io/get-pip.py -o get-pip.py
python3 get-pip.py --user
python3 -m pip install ansible --user

### On a system with Python2 ###
curl https://bootstrap.pypa.io/get-pip.py -o get-pip.py
python get-pip.py --user
python -m pip install ansible --user
macOS users can install ansible using brew
/bin/bash -c "$(curl -fsSL https://raw.githubusercontent.com/Homebrew/install/HEAD/install.sh)"
brew install ansible
Validate installation by checking the version of ansible.
$ ansible --version
ansible [core 2.18.2]
  config file = None
  configured module search path = ['/root/.ansible/plugins/modules', '/usr/share/ansible/plugins/modules']
  ansible python module location = /root/.local/lib/python3.12/site-packages/ansible
  ansible collection location = /root/.ansible/collections:/usr/share/ansible/collections
  executable location = /usr/bin/ansible
  python version = 3.12.3 (main, Jan 17 2025, 18:03:48) [GCC 13.3.0] (/usr/bin/python3)
  jinja version = 3.1.2
  libyaml = True
Update /etc/hosts file in the workstation machine and map hostnames to IP address of your cluster nodes.
$ sudo vim /etc/hosts
192.168.1.201  k8smaster
192.168.1.205  k8snode01
192.168.1.206  k8snode02
Generate SSH key if you don’t have one already.
ssh-keygen -t rsa -b 4096 -N ''Copy SSH keys to all your Kubernetes cluster nodes.
ssh-copy-id  root@k8smaster
ssh-copy-id  root@k8snode01
ssh-copy-id  root@k8snode02
Prepare cluster nodes for k8s installation
Clone the git repository to your workstation machine:
git clone https://github.com/cloudspinx/k8s-bootstrap.gitChange your current working directory to the k8s-pre-bootstrap folder.
cd k8s-bootstrapUpdate the inventory file with your Kubernetes cluster nodes. Example;
$ vim hosts
# We are using mappings we did on the /etc/hosts file
[k8snodes]
k8smaster
k8snode01
k8snode02
It can also be IP addresses:
[k8snodes]
192.168.1.201
192.168.1.205
192.168.1.206
Next we update some key variables in playbook file;
- Kubernetes version: k8s_version
- Your location timezone: timezone
- Kubernetes CNI to be used: k8s_cni
- Container runtime: container_runtime
- Pod network
$ vim k8s-prep.yml
---
- name: Prepare Kubernetes Nodes for Cluster bootstrapping
  hosts: k8snodes
  become: yes
  become_method: sudo
  #gather_facts: no
  vars:
    k8s_version: "1.32"                                  # Kubernetes version to be installed
    timezone: "UTC"                                      # Timezone to set on all nodes
    k8s_cni: calico                                      # calico, flannel
    container_runtime: cri-o                             # docker, cri-o, containerd
    pod_network_cidr: "172.18.0.0/16"                    # pod subnet if using cri-o runtime
    configure_firewalld: false                           # true / false (keep it false, k8s>1.19 have issues with firewalld)
    # Docker proxy support
    setup_proxy: false                                   # Set to true to configure proxy
    proxy_server: "proxy.example.com:8080"               # Proxy server address and port
    docker_proxy_exclude: "localhost,127.0.0.1"          # Adresses to exclude from proxy
  roles:
    - kubernetes-bootstrap
Add your private key identities to the OpenSSH authentication agent
eval `ssh-agent -s` && ssh-addUpdate the inventory list with all your cluster nodes.
vim hostsExecute the playbook when ready to prepare all your cluster nodes (control plane and worker nodes).
ansible-playbook -i hosts k8s-prep.ymlScreenshot from execution testing on one node:
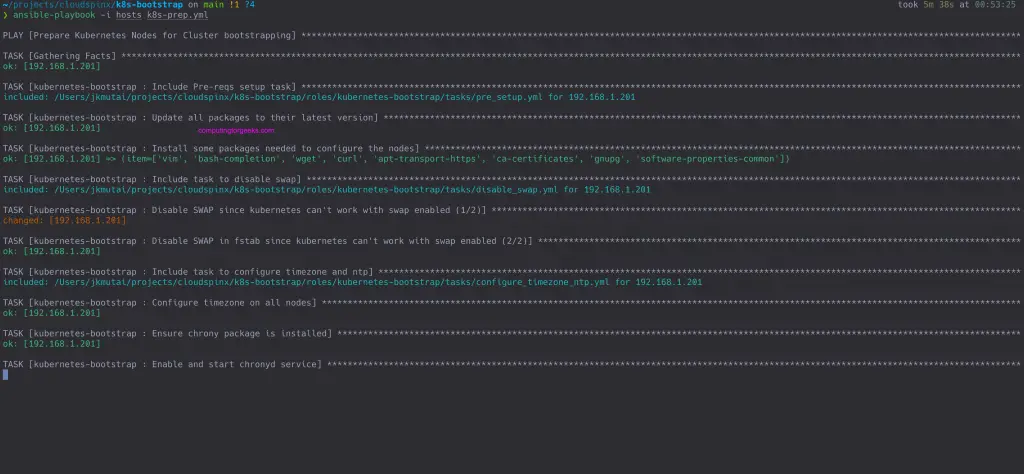
4. Create Kubernetes Cluster on Ubuntu 24.04
Now that all the packages are installed and configurations done, we should be set to create kubernetes control plane on master node(s). The tool used for this purpose is kubeadm. Kubeadm will automate cluster setup tasks required to have a functional control plane components.
The command that we will run is kubeadm init. This does the configuration of the control plane components such as the API server, controller manager, and the scheduler.
Login to your first control plane node.
ssh user@k8smasterCheck the command options that can be used with the kubeadm init command.
kubeadm init --helpSingle node control plane
For a single control plane server, initialize the cluster with the following commands.
sudo kubeadm init --pod-network-cidr=172.18.0.0/16If you have more than one CRI on the host, you will need to set the ‘criSocket‘ field in the kubeadm configuration file:
- Containerd:
unix:///var/run/containerd/containerd.sock - CRI-O:
unix:///var/run/crio/crio.sock - Docker:
unix:///var/run/cri-dockerd.sock
CRI-O example:
sudo kubeadm init --pod-network-cidr=172.18.0.0/16 --cri-socket=unix:///var/run/crio/crio.sockMultiple control plane nodes
If you intend to add multiple control plane servers, a Load Balancer IP for ControlPlaneEndpoint is required.
kubeadm init \
  --pod-network-cidr=172.18.0.0/16 \
  --cri-socket=unix://var/run/crio/crio.sock \
  --upload-certs \
  --control-plane-endpoint=k8sapi.example.com \
Where k8sapi.example.com has an A record to load balancer IP with all the control plane nodes as the backend.
Wait for the success message in the installation.
...
[mark-control-plane] Marking the node ubuntu-2404-server as control-plane by adding the taints [node-role.kubernetes.io/control-plane:NoSchedule]
[bootstrap-token] Using token: qgvgrr.u8w9e5lrf294kmvi
[bootstrap-token] Configuring bootstrap tokens, cluster-info ConfigMap, RBAC Roles
[bootstrap-token] Configured RBAC rules to allow Node Bootstrap tokens to get nodes
[bootstrap-token] Configured RBAC rules to allow Node Bootstrap tokens to post CSRs in order for nodes to get long term certificate credentials
[bootstrap-token] Configured RBAC rules to allow the csrapprover controller automatically approve CSRs from a Node Bootstrap Token
[bootstrap-token] Configured RBAC rules to allow certificate rotation for all node client certificates in the cluster
[bootstrap-token] Creating the "cluster-info" ConfigMap in the "kube-public" namespace
[kubelet-finalize] Updating "/etc/kubernetes/kubelet.conf" to point to a rotatable kubelet client certificate and key
[addons] Applied essential addon: CoreDNS
[addons] Applied essential addon: kube-proxy

Your Kubernetes control-plane has initialized successfully!

To start using your cluster, you need to run the following as a regular user:

  mkdir -p $HOME/.kube
  sudo cp -i /etc/kubernetes/admin.conf $HOME/.kube/config
  sudo chown $(id -u):$(id -g) $HOME/.kube/config

Alternatively, if you are the root user, you can run:

  export KUBECONFIG=/etc/kubernetes/admin.conf

You should now deploy a pod network to the cluster.
Run "kubectl apply -f [podnetwork].yaml" with one of the options listed at:
  https://kubernetes.io/docs/concepts/cluster-administration/addons/

Then you can join any number of worker nodes by running the following on each as root:

kubeadm join 192.168.1.201:6443 --token qgvgrr.u8w9e5lrf294kmvi \
	--discovery-token-ca-cert-hash sha256:4c3a99418e3cd40cafe8858306657205f97b1d56ed1e57d729be10a0d2d0d431
Configure your cluster access from the control plane node.
mkdir -p $HOME/.kube
sudo cp -i /etc/kubernetes/admin.conf $HOME/.kube/config
sudo chown $(id -u):$(id -g) $HOME/.kube/config
Check successful installation by listing the nodes in your cluster.
$ kubectl get nodes
NAME                              STATUS   ROLES           AGE     VERSION
k8smaster.cloudspinx.com          Ready    control-plane   3m1s    v1.32.2
5. Add Worker Nodes to the cluster
You must run the playbook against the node to prepare it if you didn’t do it in Step 3. Make sure you add worker nodes in the inventory file hosts.
ansible-playbook -i hosts k8s-prep.ymlWith the cluster tested to be working, it’s time to add worker nodes that will run our containerized applications. We can use the kubeadm token create --print-join-command command to generate cluster join commands to be run on the worker nodes.
Login to one of your control plane nodes in case you have more than one and run the commands:
kubeadm token create --print-join-commandHere is the explanation of the commands you just executed:
token create: This subcommand is used to create bootstrap token for joining new worker nodes in kubernetes cluster.--print-join-command: By using this flag, kubeadm will print the complete commands for joining worker nodes into a cluster
Please note that the generated bootstrap command is short-lived (default is to last for 24 hours). You are required to generate newer if it’s expired.
Sample join command generation output from my control plane machine.
$ kubeadm token create --print-join-command
kubeadm join 192.168.1.201:6443 --token 72n5yk.7khhkaav311irike --discovery-token-ca-cert-hash sha256:4c3a99418e3cd40cafe8858306657205f97b1d56ed1e57d729be10a0d2d0d431
Copy the entire command printed, then login to one of the worker nodes, and
kubeadm join 192.168.1.201:6443 --token 72n5yk.7khhkaav311irike --discovery-token-ca-cert-hash sha256:4c3a99418e3cd40cafe8858306657205f97b1d56ed1e57d729be10a0d2d0d431Where;
- kubeadm join: Command for joining a worker node into the cluster.
- 192.168.1.100:6443: The IP address and port number of the API server on the control plane node.
- –token 72n5yk.7khhkaav311irike: Generated bootstrap token on the control plane for the worker node to join the cluster.
- –discovery-token-ca-cert-hash Is the hash of certificate authority (CA) certificate that provides secure communication between cluster nodes.
List nodes in the cluster from control plane machine.
$ kubectl get nodes
NAME                              STATUS   ROLES           AGE     VERSION
k8snode01.cloudspinx.com          Ready    <none>          24s     v1.32.2
k8smaster.cloudspinx.com          Ready    control-plane   6h49m   v1.32.2
You can now proceed with the common cluster configurations for kubernetes. If you need our help to setup your Kubernetes clusters, don’t hesitate to contact us for support.
More Kubernetes articles:


