
How to Install Linux Mint 22 – Step by Step With Screenshots
How can I install Linux Mint 22 Linux Distribution on a Laptop or Desktop Workstation? Linux Mint 22 is now available in Beta for end users to test and share feedback for feature improvements. Linux mint is a favorite Linux distribution used by number of users in the Open Source space, schools and some private institutions. This article will guide new users through the installation steps of Linux Mint 22. We’ll include screenshots to help you follow along easily.
Linux Mint 22 features the Linux kernel 6.8 and an Ubuntu 24.04 package base. Linux Mint 22 is a long term support release which will be supported until 2029. There are many Desktop environments to choose from for the installation image to use i.e:
- Cinnamon Desktop flavor.
- Xfce Desktop flavor
- MATE Desktop flavor
Let’s get started with the installation steps:
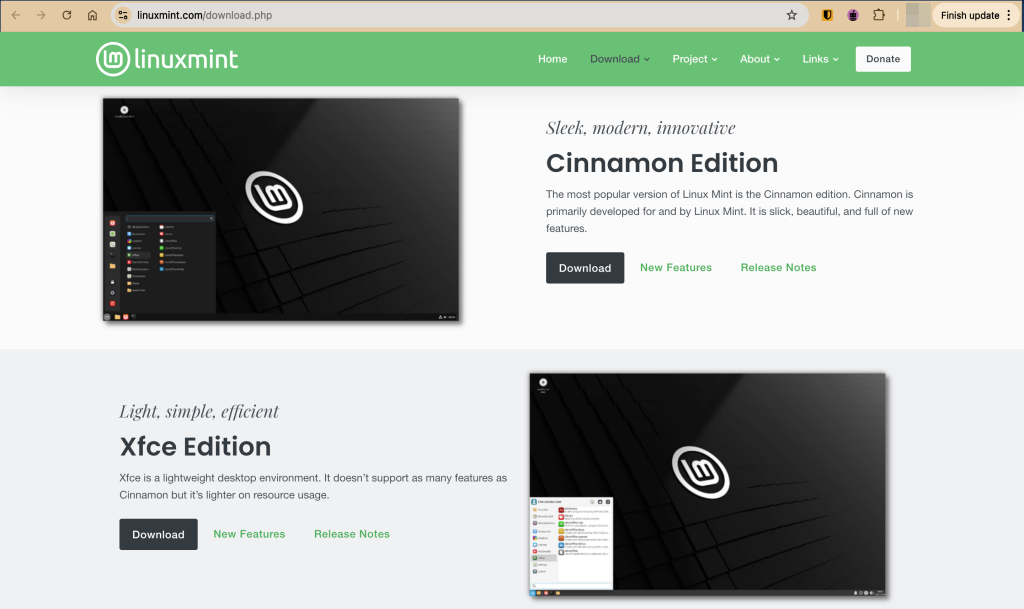
Step 1: Download Linux Mint 22 ISO
Visit the Linux Mint download page and pick the ISO file that works for you.
Alternatively, you can just download the ISO file directly from your terminal using the commands below:
# Cinnamon Edition
wget https://mirrors.layeronline.com/linuxmint/stable/22.1/linuxmint-22.1-cinnamon-64bit.iso

# XFCE Edition
wget https://mirrors.layeronline.com/linuxmint/stable/22.1/linuxmint-22.1-xfce-64bit.iso

# MATE Edition
wget https://mirrors.layeronline.com/linuxmint/stable/22.1/linuxmint-22.1-mate-64bit.iso
Step 2: Create a Bootable USB Drive | Create a VM
In this step, we cover how we can create either a bootable installation media or create a virtual machine which will be used to install Linux Mint 22 operating system.
Create a Bootable Drive
This step is only necessary if you are installing Linux Mint 22 on a physical device rather than a virtualized environment. Today, tools such as Rufus and Balena Etcher make the process very easy and simple.
To create a bootable USB, you can use the following tools:
- Windows users: Rufus
- Linux & macOS users: Balena Etcher
dd– Linux CLI tool
All of the mentioned tools are excellent choices and are pretty much straightforward when it comes to using them. That being said, let’s briefly have a look at how we can create a bootable USB using the dd CLI tool.
First, connect the USB device and ensure that it is unmounted. Use lsblk to identify your USB drive.
lsblk
#OR
sudo fdisk -l
Then, unmount the drive, and format it:
# unmount
umount /dev/sdb*
# format the drive
sudo mkfs.ext4 /dev/sdb1
Now you are ready to copy the ISO file to the usb drive using the dd command. Navigate to the directory where you have downloaded the ISO. Then use the command below to create your bootable drive:
sudo dd if=linuxmint-22.1-cinnamon-64bit.iso of=/dev/sdb status="progress"Replace ‘linuxmint-22.1-cinnamon-64bit.iso‘ with the actual name of the ISO image. The process will take a significant amount of time to complete. Typically, it takes 15–20 minutes per gigabyte using a USB 2.0.
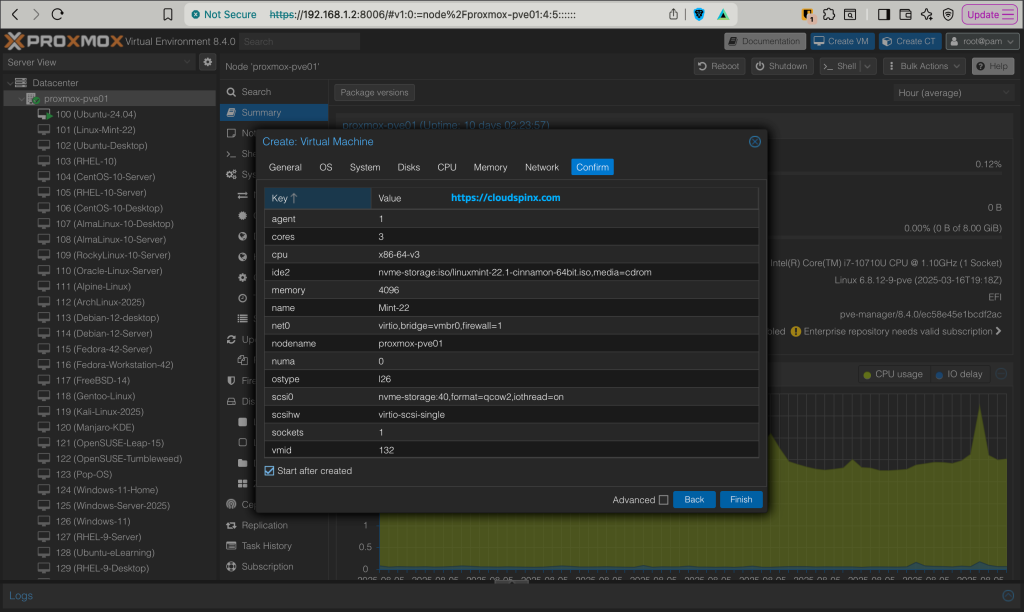
Create a Virtual Machine
If you are installing Linux Mint 22 in a virtualized environment such as Proxmox VE, VirtualBox, VMware, or KVM, you need to set up a VM. Setting up a VM in any of these environments is pretty much straightforward.
KVM
For instance, to setup a VM on KVM, you’d execute such a command on the KVM host:
sudo virt-install \
  --name Linux-Mint-22 \
  --ram 4096 \
  --vcpus 2 \
  --disk path=/var/lib/libvirt/virtual-machines/Linux-Mint-22.qcow2,size=40 \
  --os-variant ubuntu24.04 \
  --cdrom /var/lib/libvirt/virtual-machines/linuxmint-22.1-cinnamon-64bit.iso \
  --network network=bridged-network \
  --graphics vnc \
  --console pty,target_ty
Proxmox VE
If using Proxmox VE:
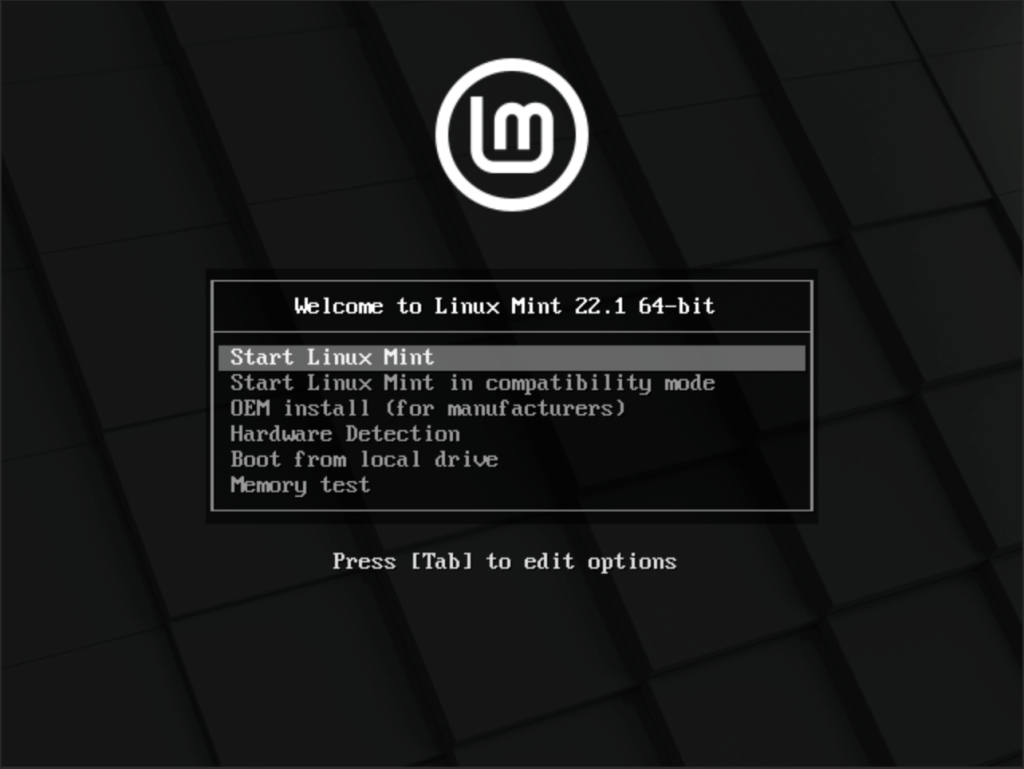
Step 3: Install Linux Mint 22
On the boot menu, select Start Linux Mint and hit enter:
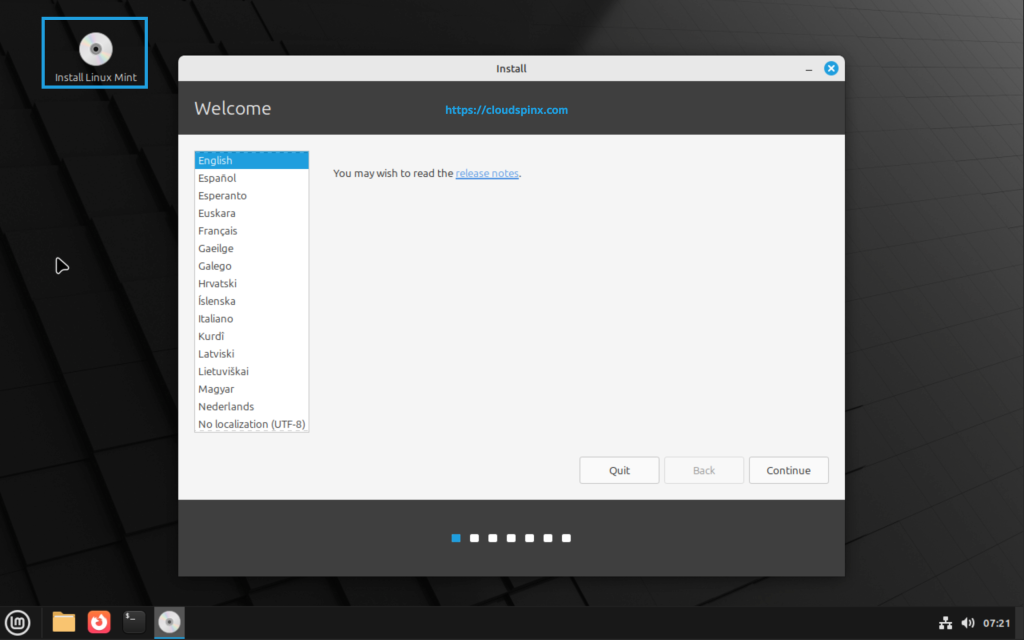
In the next page initiate installation of Linux Mint 22 by double-clicking on the disk icon labeled ‘Install Linux Mint‘ on your Desktop, then pick your language to Continue.
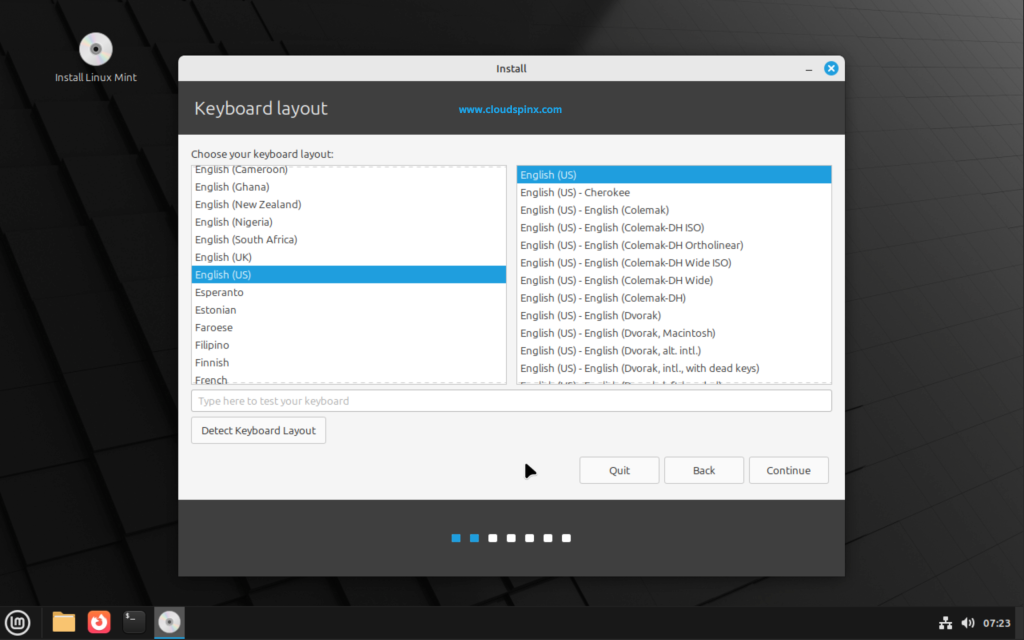
Next, choose a Keyboard layout.
It is recommended that you ensure media codecs are installed with the OS for audio to work immediately once the system is ready. Check the box and click Continue:

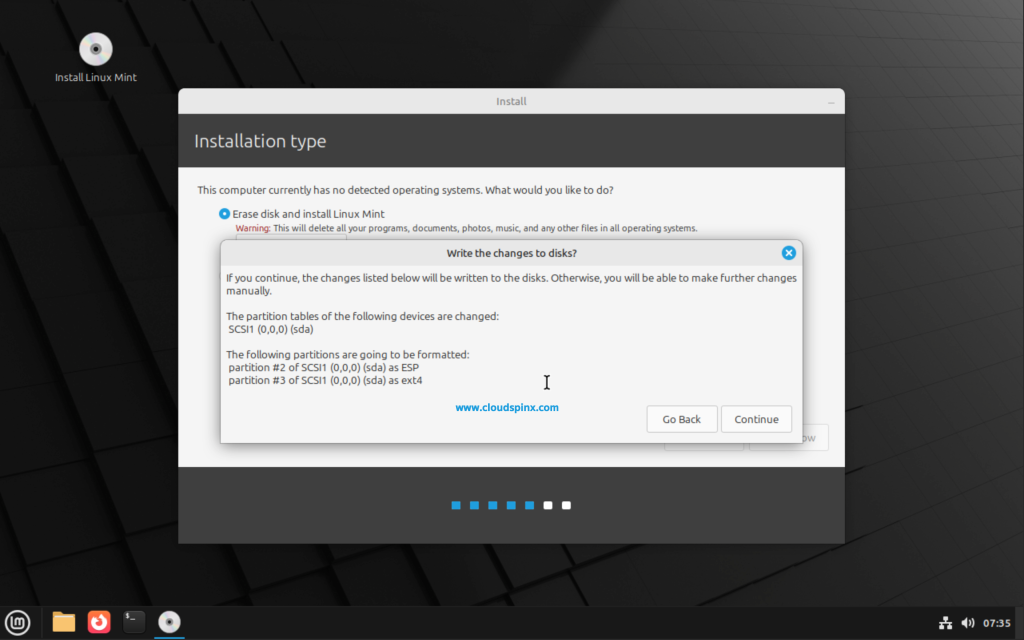
To automatically partition your disk, choose to erase disk, then click ‘Install Now‘:
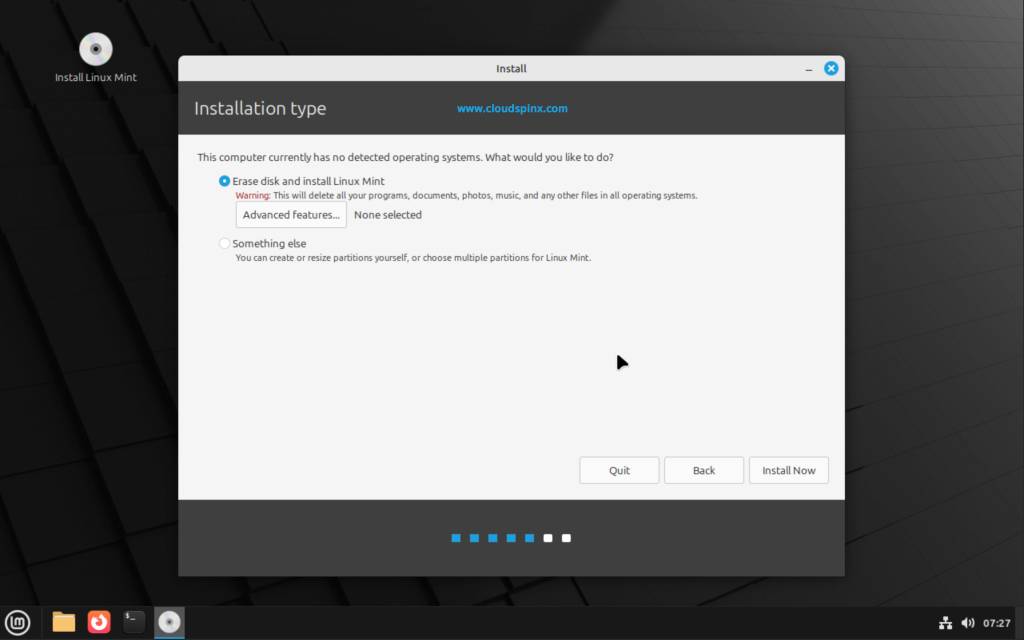
If doing full erasure you need to agree to the prompt.
If you prefer to do the disk partition manually, choose ‘Something Else‘, then create a new partition:
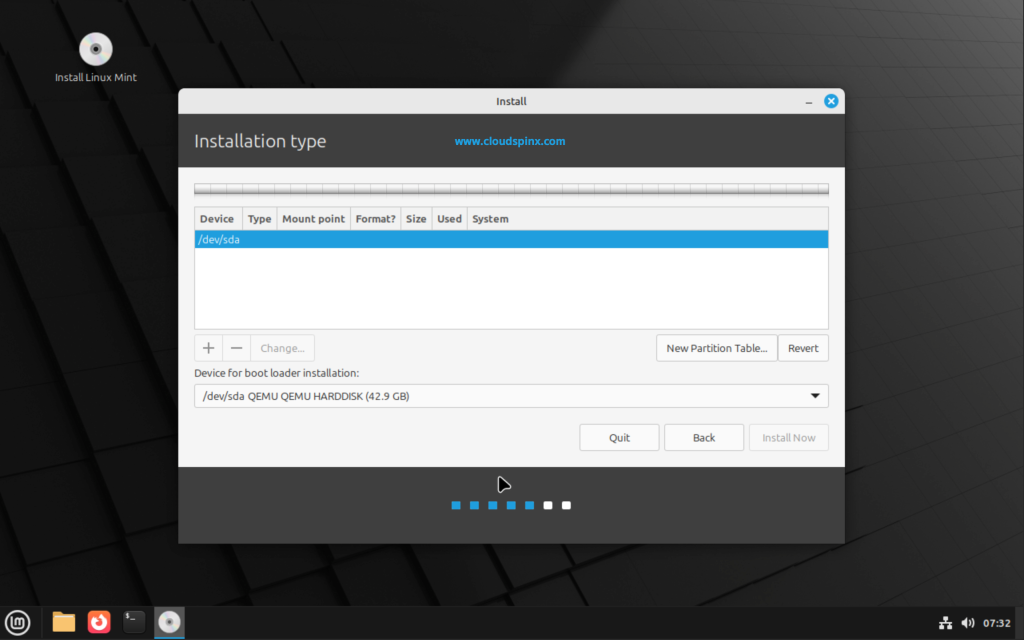
When done, click ‘Install Now‘.
Setting the correct region is key for the time zone to be set accordingly.

Proceed to add the first user which will be admin of the system.

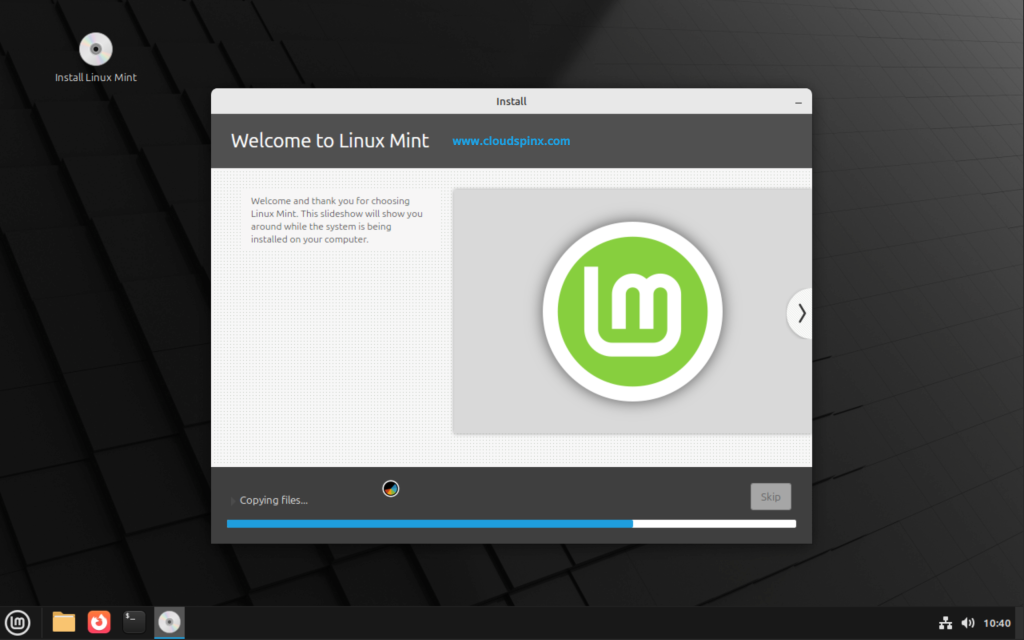
The installer should now start writing data to disk as follows:
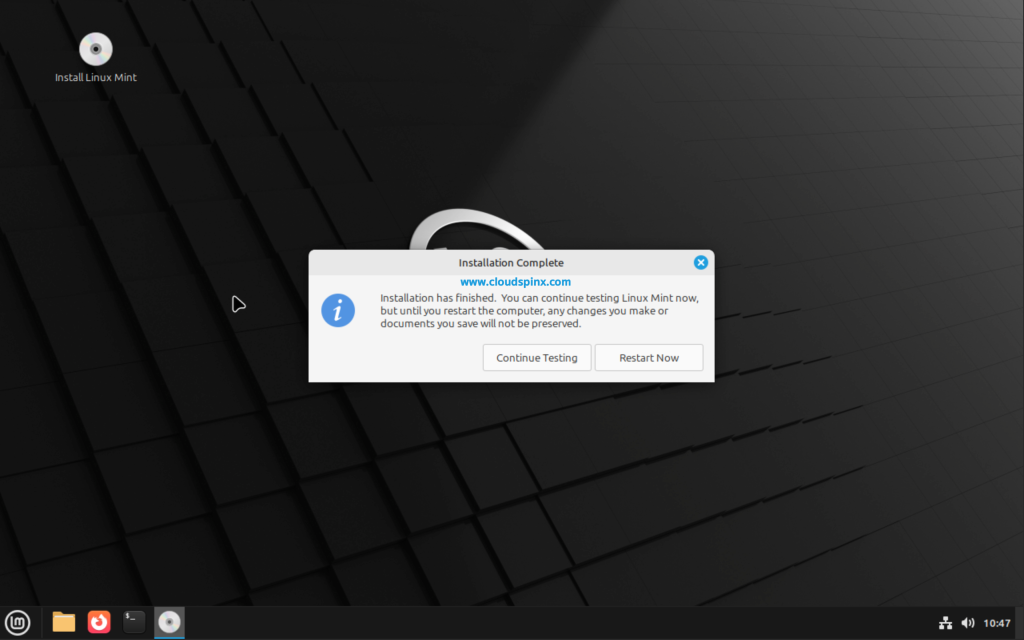
Once installation of Linux Mint 22 is completed reboot the system to start using it, ensure to remove the installation media:
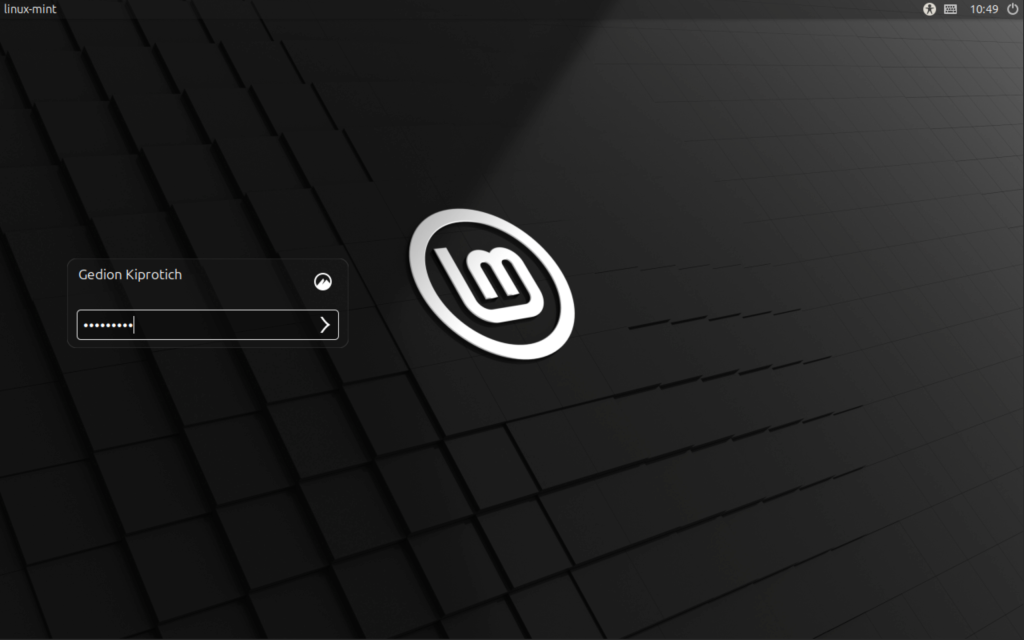
The Login screen should appear on which you can input the user password to continue.
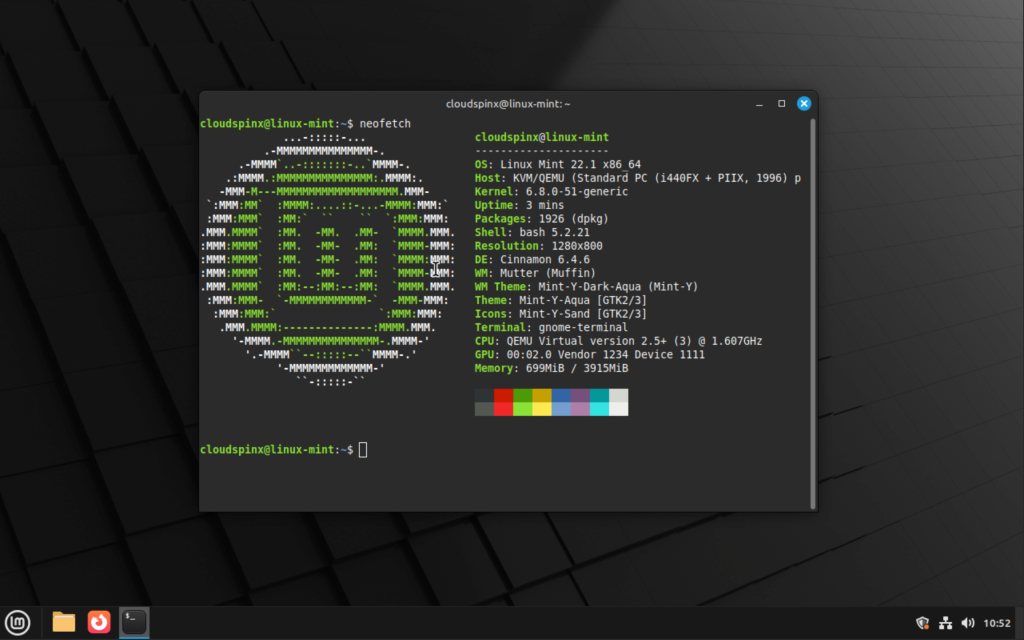
Yaayy!… Linux Mint 22 has been installed successfully on a Virtual Machine or physical hardware.
Perform upgrade after installation.
sudo apt update
sudo apt -y upgrade
sudo reboot
Check out more articles from our team:


